
Purpose
These steps outline the process for setting up a Custom SAML application to enable Single Sign-On (SSO) for any compatible applications within Practice Protect. By following these instructions, administrators can seamlessly integrate SAML authentication, ensuring secure and efficient access management.
Prerequisites
- Practice Protect Account with Admin Access
Instructions
- Login to your Practice Protect and switch to the Admin portal (ex. domain.id.cyberark. cloud)
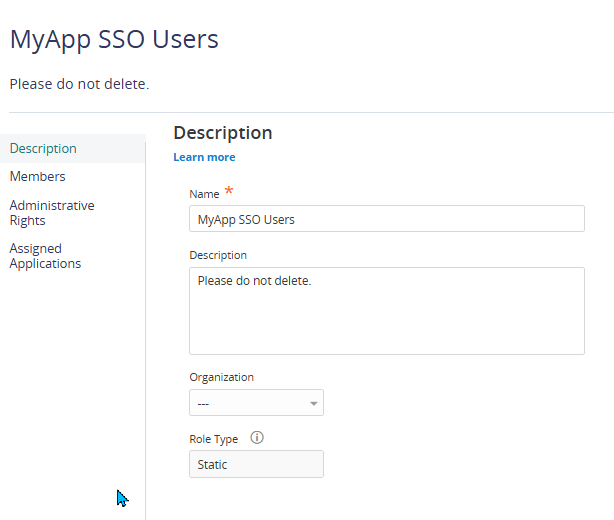
- On Core Services, Click on Roles > Add Roles. Create a role and set the name field to MyApp SSO Users. Then Save.
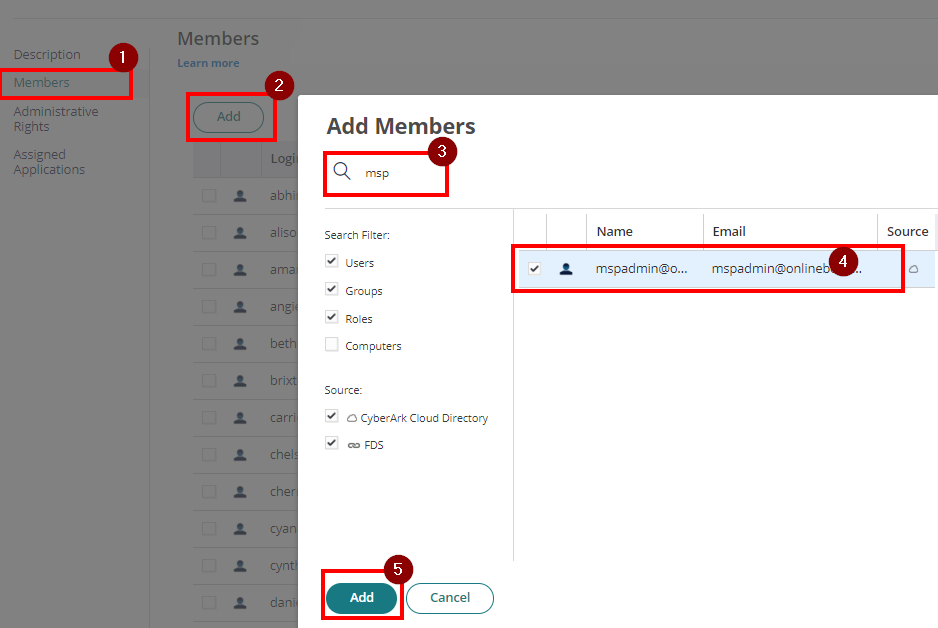
- With the created role, click on Members > Add. Add each user that will have access to the app. Then Save.
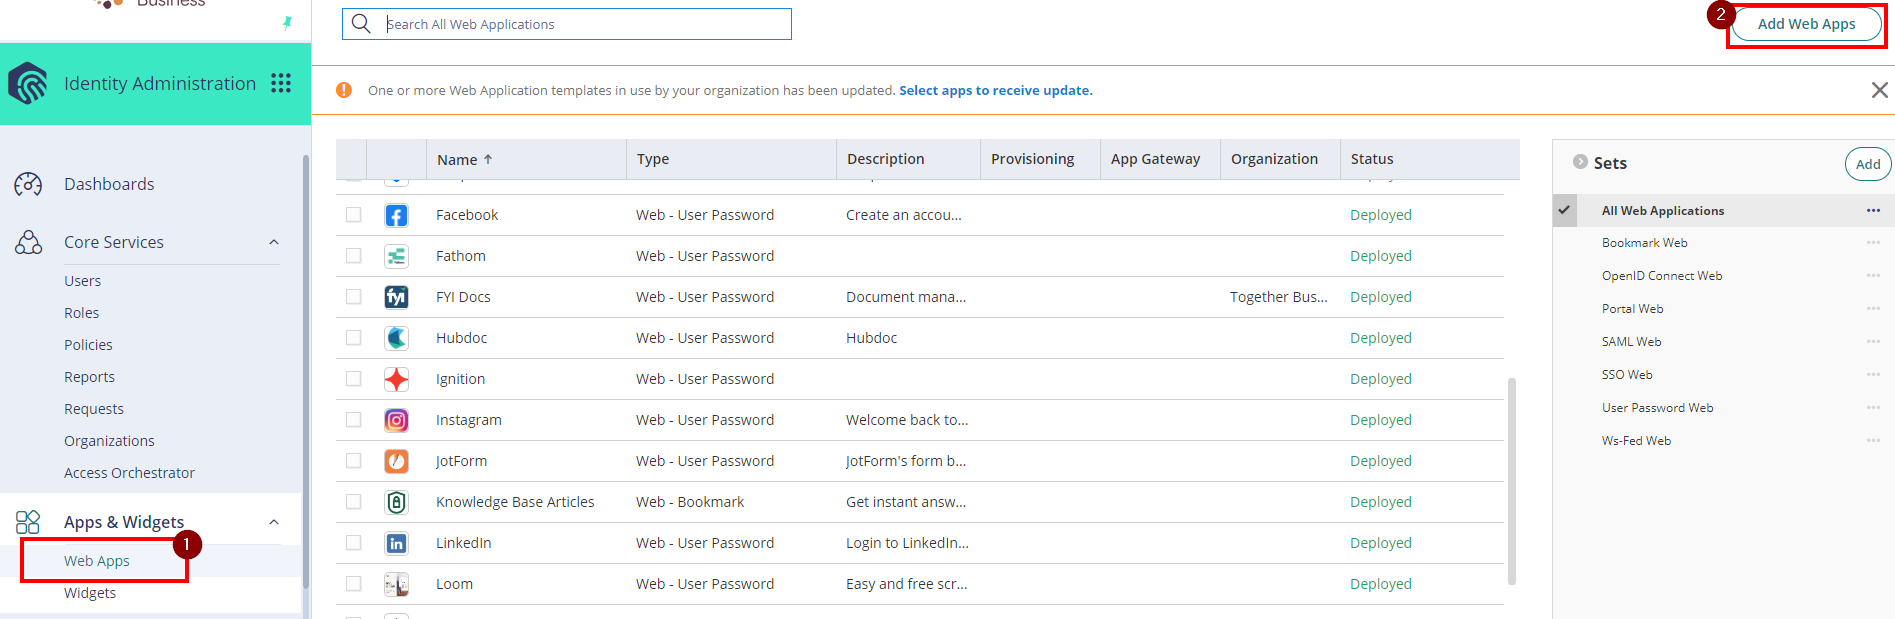
- From the Apps & Widgets, go to Web Apps section. Then, choose Add Web Apps on the top right corner.
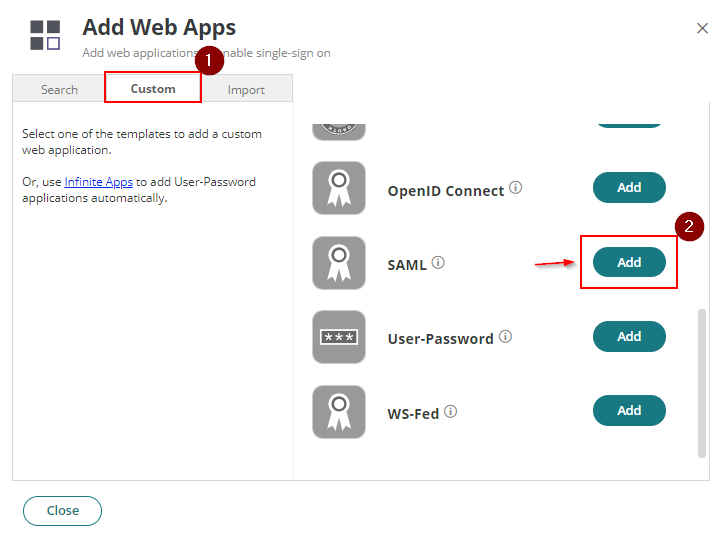
- Select Custom then next to SAML click Add. Click Close to exit the Application Catalog. The application that you just added opens to the Settings page.
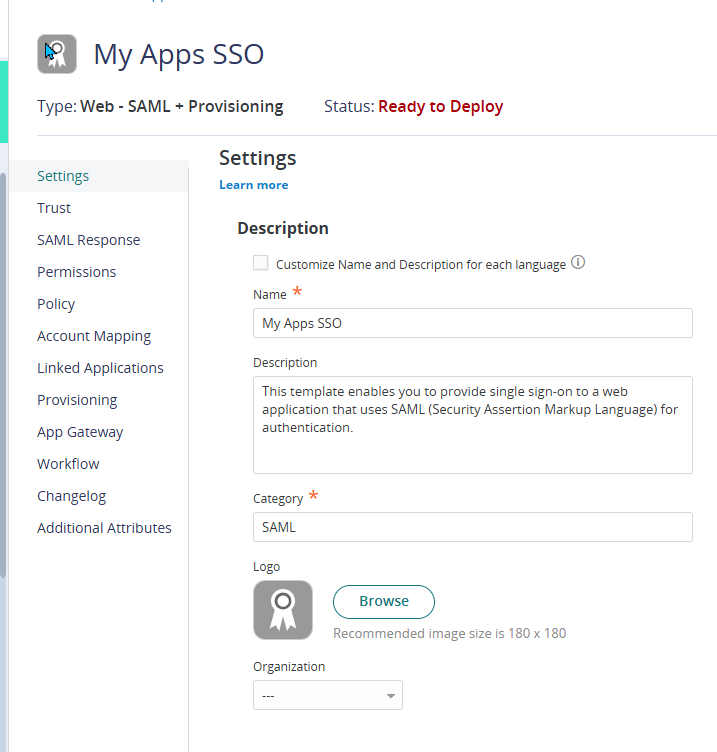
- On Settings, set the name of the SSO app (ex. MyApp SSO) and select Save. You can also set category and logo. Click Save.
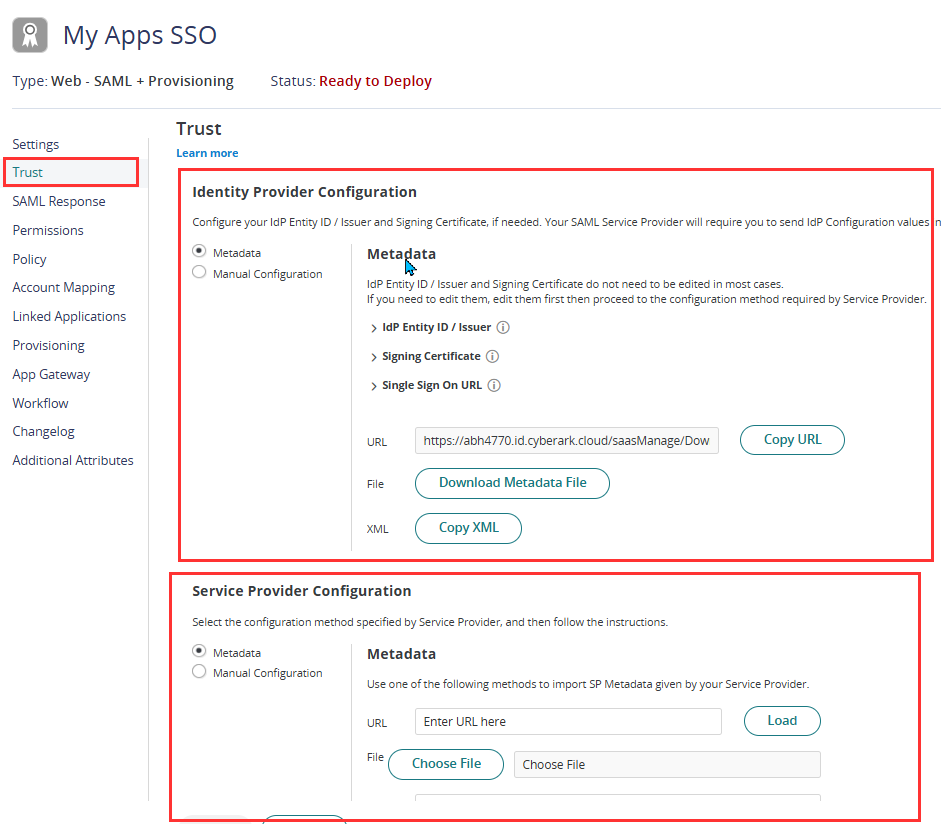
- Click on Trust.
Overview of Identity and Service Provider ConfigurationSection Details Overview The Trust page contains the necessary SAML metadata fields and configurations required by the Service Provider (SP). You must enter these details according to the SP’s specifications to establish a trust relationship between Practice Protect (acting as the Identity Provider) and the application (SP). Key SAML Information - Issuer (IdP Entity ID): A globally unique identifier for the Identity Provider (IdP). The Service Provider (SP) uses it to validate authentication requests.
- SSO URL (Single Sign-On endpoint): The endpoint where authentication requests are sent from the SP to the IdP for user authentication.
- Signing Certificate: A security certificate used to digitally sign authentication responses, ensuring data integrity and authenticity.
- Name ID format: Specifies how users are identified in the SAML response, such as by email, username, or another unique identifier.
- Assertion attributes (if required by the SP): Additional user details (e.g., name, role, email) that may be included in the SAML assertion if the SP requires them for authorization.
Importance of Matching Values Ensuring that the values match the SP’s required format is crucial for authentication to work properly. If there’s a mismatch, SAML authentication may fail. Trust Page Sections The Trust page in Practice Protect settings for a Custom SAML app is divided into two sections. Identity Provider (IdP) Configuration - Issuer (Entity ID): The unique identifier for Practice Protect as the IdP, which must match what the SP expects.
- SSO URL (Single Sign-On endpoint): The URL where authentication requests are sent for validation and login.
- Signing Certificate: Used to sign the SAML assertion, ensuring the response’s authenticity.
- Metadata URL (optional for automatic configuration): A URL that contains the IdP’s metadata, allowing SPs to import settings automatically.
Service Provider (SP) Configuration - ACS (Assertion Consumer Service) URL: The endpoint where the IdP sends SAML authentication responses.
- SP Entity ID: A unique identifier assigned to the SP, ensuring secure communication with the IdP.
- Name ID format: Defines how the user is identified in the SAML assertion (email, username, or another identifier).
- SAML attributes mapping: Defines how user attributes (e.g., email, role, department) are mapped from the IdP to the SP.
Configuration Methods The Trust page offers two ways to configure SAML settings. Metadata Configuration (Automatic Setup) - If the SP provides a metadata file or URL: CyberArk Identity can automatically import the necessary settings.
- Simplifies setup: Eliminates the need for manual data entry, reducing the risk of misconfigurations.
- Recommended whenever available: Using metadata minimizes errors and speeds up the configuration process.
Manual Configuration (Custom Setup) - Used when metadata is not available: Requires entering all necessary fields manually.
- Required fields include: ACS URL, SP Entity ID, Name ID format, and attribute mappings.
- Allows for greater customization: Useful if the SP has specific attribute requirements that need to be manually configured.
- Requires careful validation: Any incorrect values can cause authentication failures.
- After setting up the Trust Page, click Save.
- Next step is to copy and paste key details between the Identity Provider (IdP) and the Service Provider (SP) to establish a successful SAML connection.
-
From the IdP to the SP. Copy the SSO URL (Single Sign-On endpoint) from the IdP settings and paste it into the SP configuration.
-
Copy the Issuer (Entity ID) from the IdP and paste it into the SP’s settings.
-
Download the Signing Certificate from the IdP and upload it into the SP.
- From the SP to the IdP: Copy the ACS (Assertion Consumer Service) URL from the SP settings and paste it into the IdP configuration.
-
Copy the SP Entity ID and add it to the IdP settings.
-
If required, configure attribute mappings based on what the SP needs.
- Ensure that you hit Save to apply changes on both system (IdP and SP)
-
-
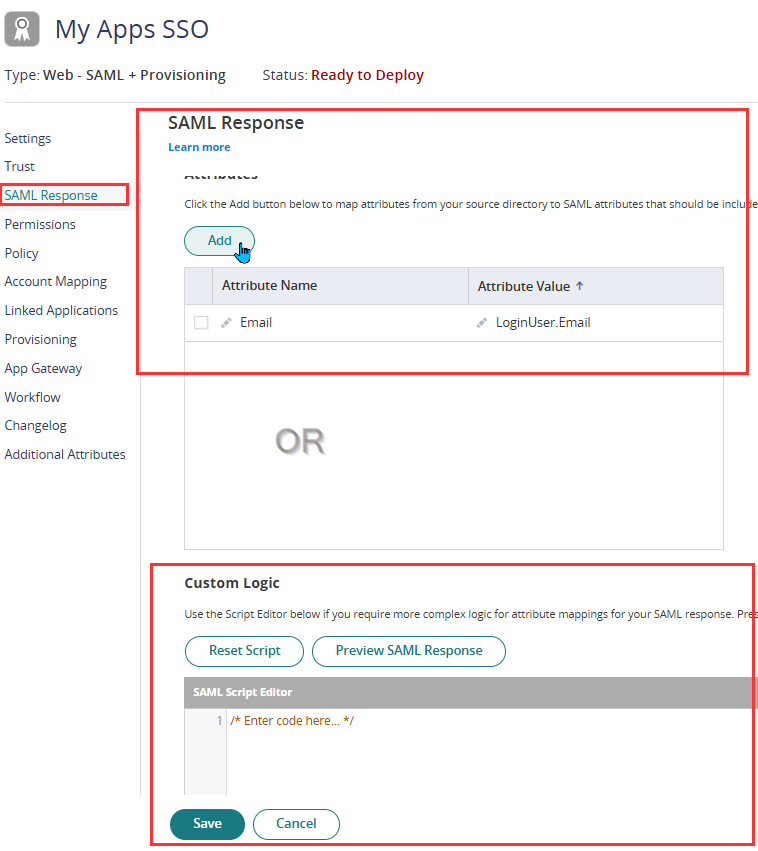
- Go to the SAML Response page.
The Attributes Section allows you to define which user details (like email, username, role, or group) will be sent in the SAML response.
Match Attributes to SP Requirements:
-
The Service Provider (SP) may require specific attributes (e.g.,
email,first_name,last_name). -
You must map these attributes correctly in the IdP settings.
Common Attribute Mappings:
IdP Attribute (Practice Protect ) SP Attribute Name Purpose LoginUser.EmailEmailIdentifies the user LoginUser.FirstNameFirstNameUser’s first name LoginUser.LastNameLastNameUser’s last name LoginUser.DisplayNameDisplayNameUser’s Display Name Note: If attributes are missing or incorrectly mapped, authentication may fail.
Using Custom Logic for Advanced Attribute Mapping
If the SP requires more complex attribute handling, you can use Custom Logic in the “Editing the Assertion Script” section.
When to Use Custom Logic:
-
If the SP needs role-based access, where users get different permissions based on their role.
-
If you need to modify or transform attributes before sending them.
-
If you need custom rules, like sending different attributes based on the user’s department.
-
- Hit Save.
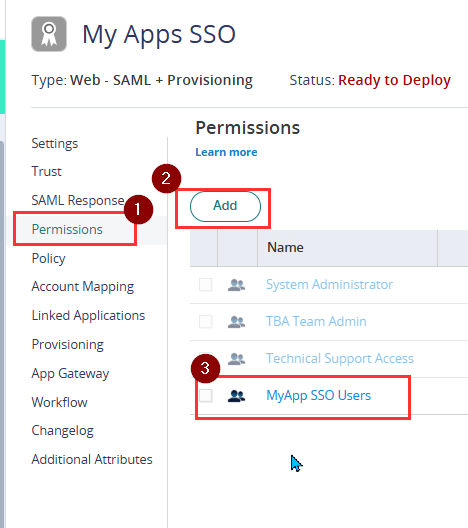
- Before enabling the Single Sign On on Service Provider settings page, ensure that the role you created on the previous step is added. Go to Permissions.
- Add the role we created in an earlier step (e.g. MyApp SSO Users) and click Save.
- For the final step, enable SAML in the Service Provider (SP) settings, then test user login—users should be redirected to Practice Protect for authentication when signing in directly to the app, and a direct tile in the Practice Protect Portal should allow seamless auto sign-in.