
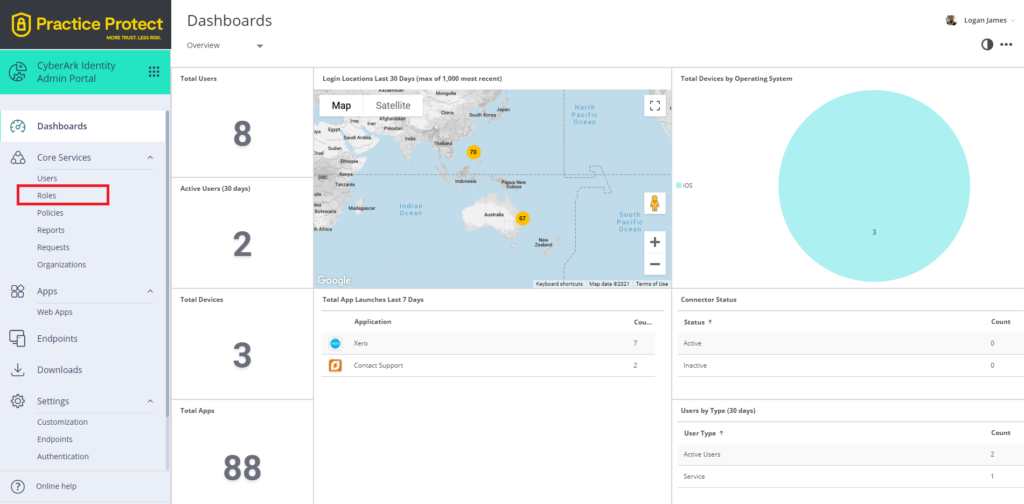
- In the Admin portal, go to Roles (under Core Services).
2. Add a role and name it accordingly
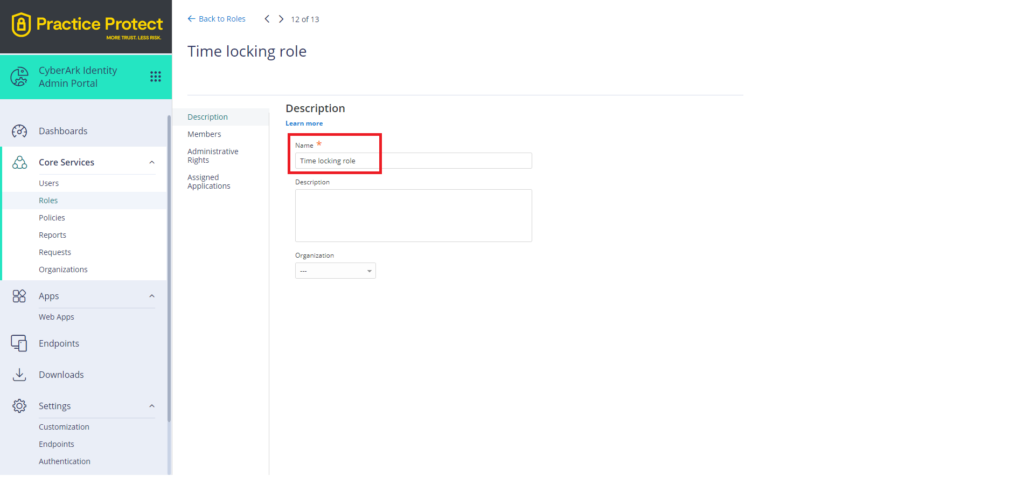
3. You can click on the ‘Members’ menu and add any members you want this time-lock role to apply to.

4. Once the role is created, we need to create a policy next. Click ‘Policies’ under Core Services.
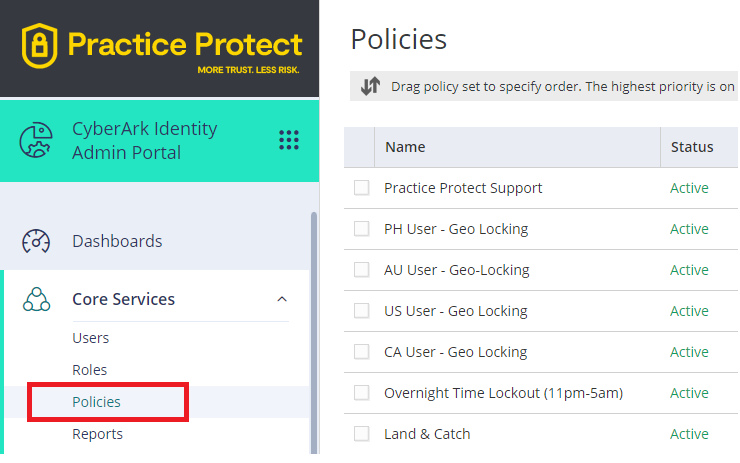
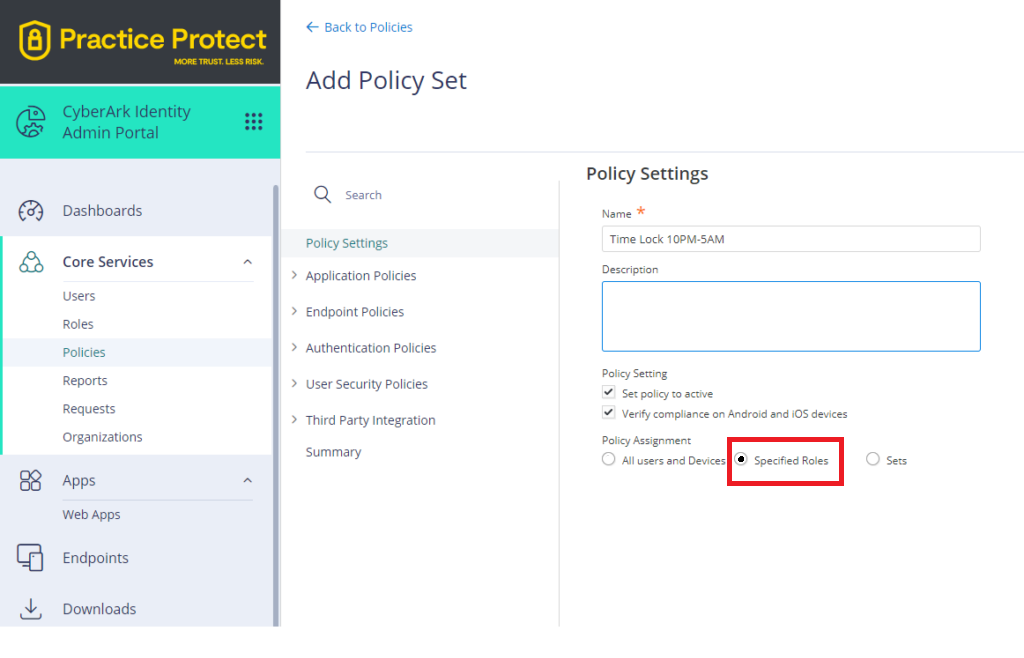
5. Add a policy and name it (like in the previous steps for Role creation).
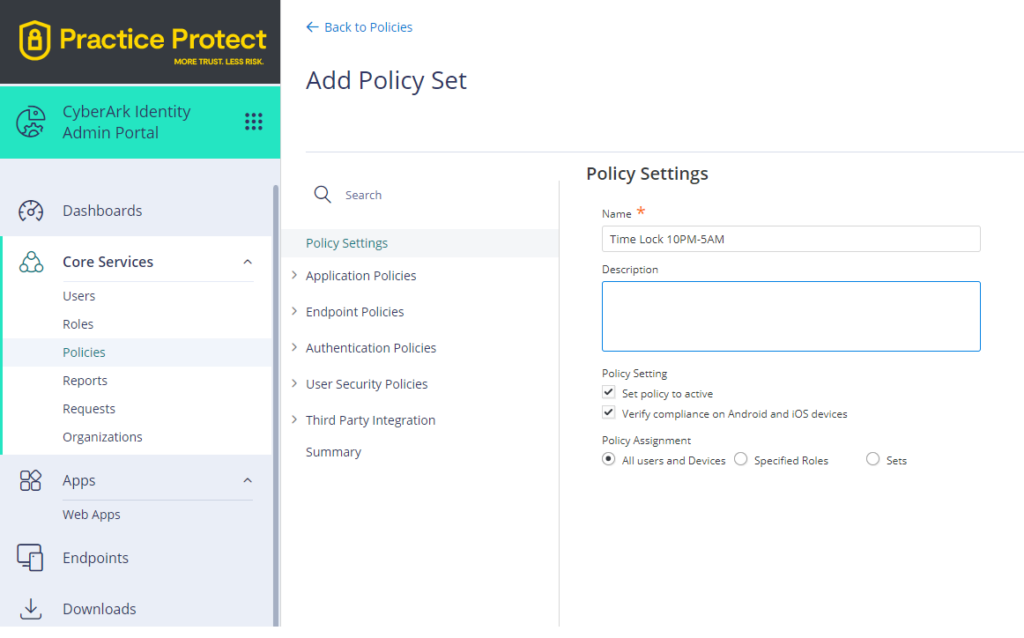
Policy Assignment: Ticking ‘All Users and Devices’ will apply the time-lock to every user on the platform. To only apply the policy to certain members, click the ‘specified roles’ button and choose which roles this policy will apply to.
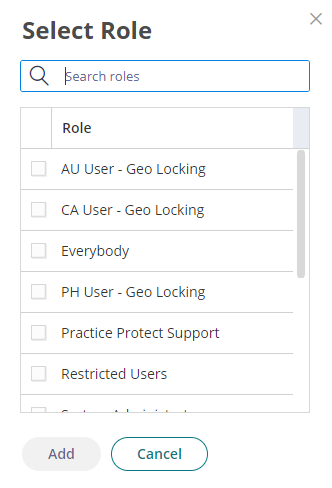
6. Select the roles you want this time lock policy to apply to:
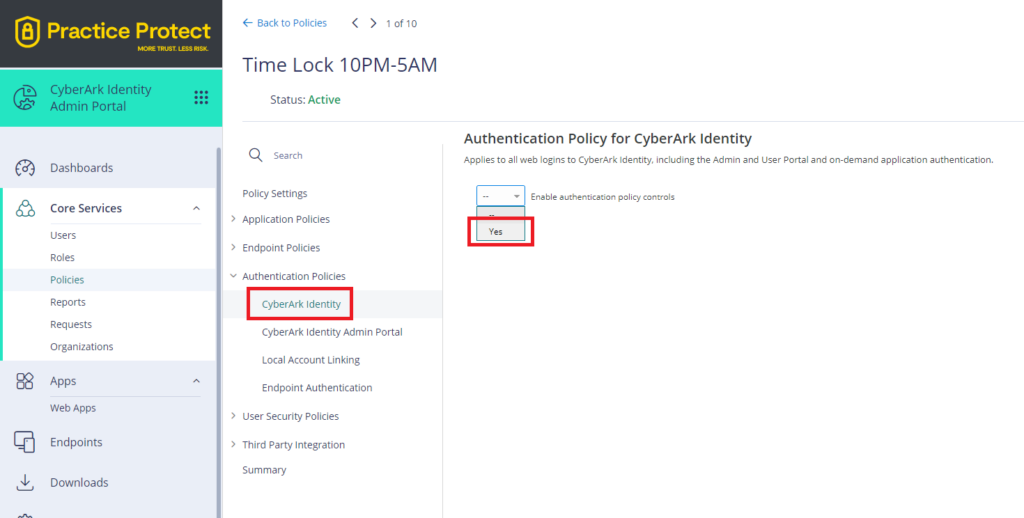
7. Next, go to Authentication Policies. This is where we create the condition restricting users from logging into their portals at unauthorised times.
From here, click on CyberArk Identity and click ‘Yes’ on the dropdown menu.
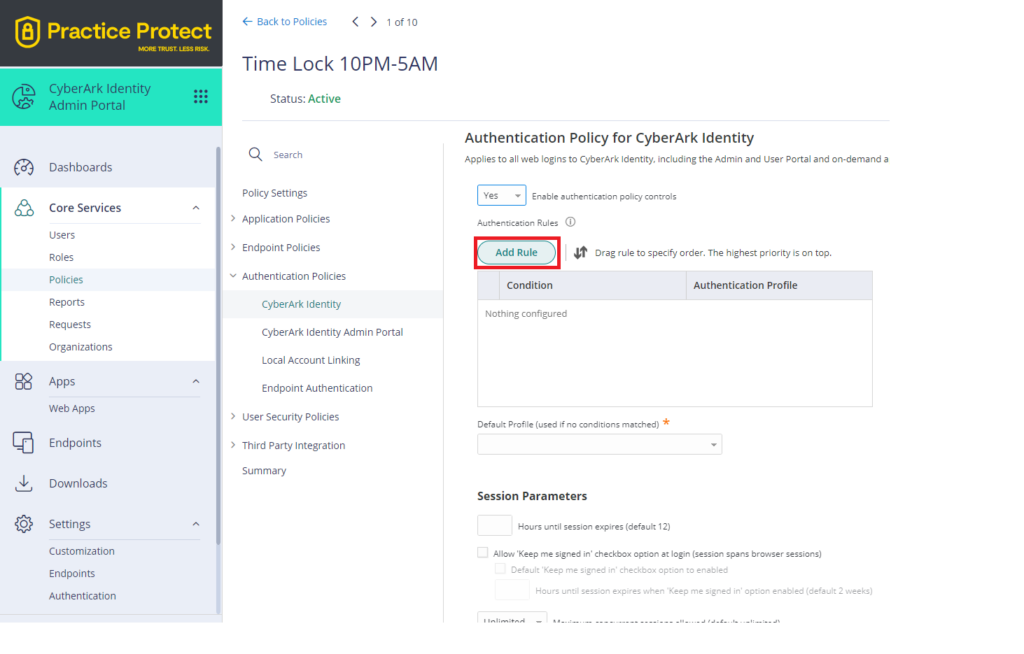
8. Upon hitting ‘Yes’, we can now configure the conditions we want (in this case, restricting certain users from logging onto the portal at certain times of the day).
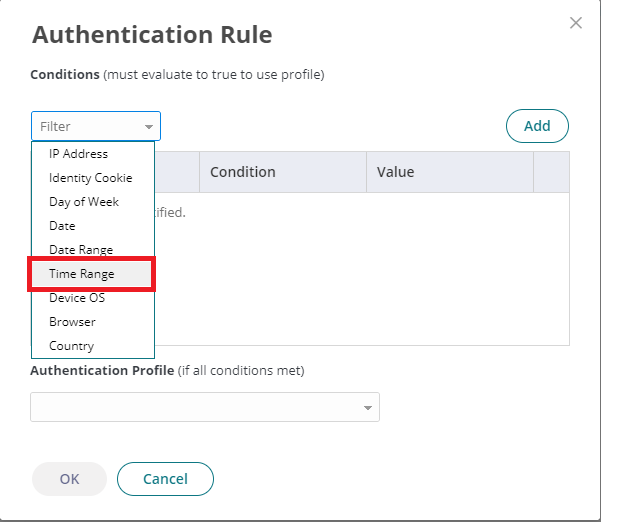
9. Click ‘Add Rule.’
10. In the window that pops up, click ‘Add Filter.’

11. In the dropdown, select ‘Time Range.’
12. There are two options for a reference point with the time range: User Local Time and UTC. User Local Time is based on a computer’s timezone, and is not recommended to be used as users can get around this policy by simply changing their device’s system time, rendering the time-lock policy useless.
Selecting UTC will ensure a standard that will be enforced no matter what timezone a user’s system is running on.
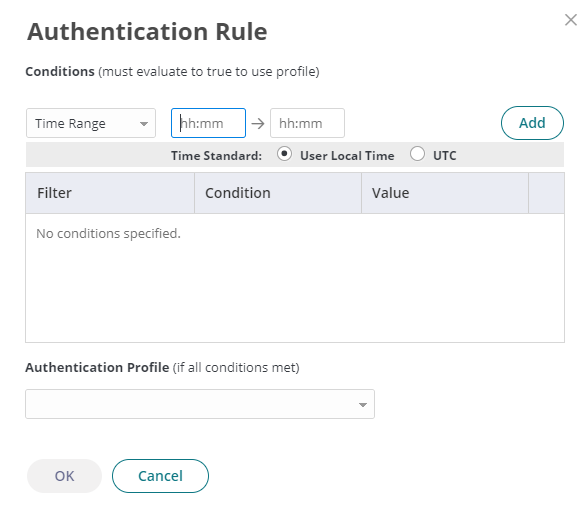
13. Simply convert the desired time range from your respective timezone into UTC. Click here for a free online timezone conversion tool.
Please note: This is in a 24-hour time format (8PM would be 20:00, 8AM would be 0800, etc)
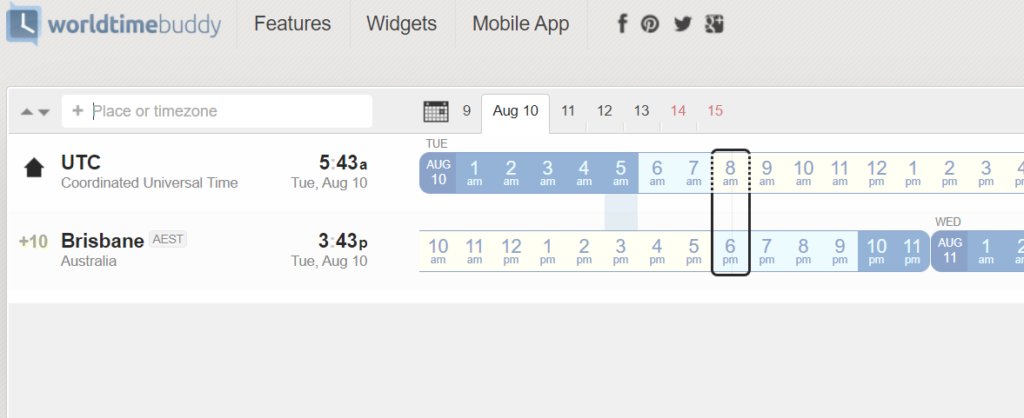
14. The time range you put in will be the times that users with the time-lock policy will be able to access their portals at. In the example below, this means users with this policy enabled for them will only be able to access their portals from 9PM – 9AM UTC, or 7AM to 7PM AEST (Brisbane).

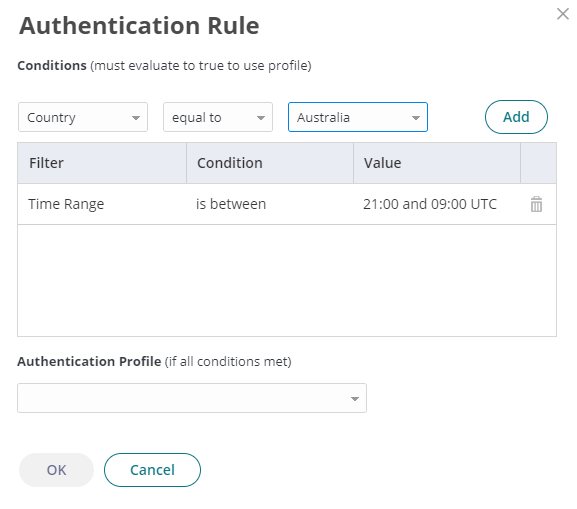
15. Hit ‘Add.’

Now a condition for the time range (in which users’ portals are accessible) has been created.
16. Next, create a geo-locking policy. This is an extra step to ensure that only users in the specified region can access their accounts.
17. Again, click ‘Add Filter’ > ‘equal to’ > [Country of choice]. Then click Add.
18. Click the dropdown for ‘Authentication Profile’ and select ‘Default New Device Login Profile.’ This ensures that authentication will be done through Multi-Factor Authentication.
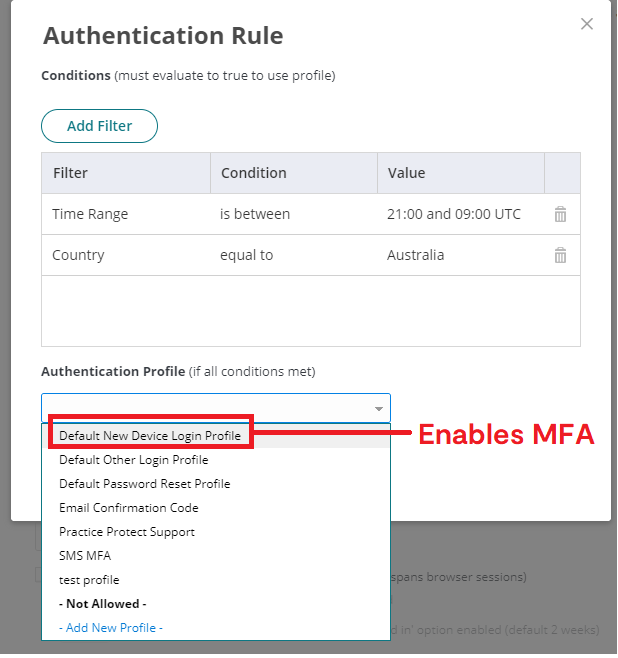
19. In the ‘Default Profile’ (used if no conditions matched) dropdown, select ‘Not Allowed.’
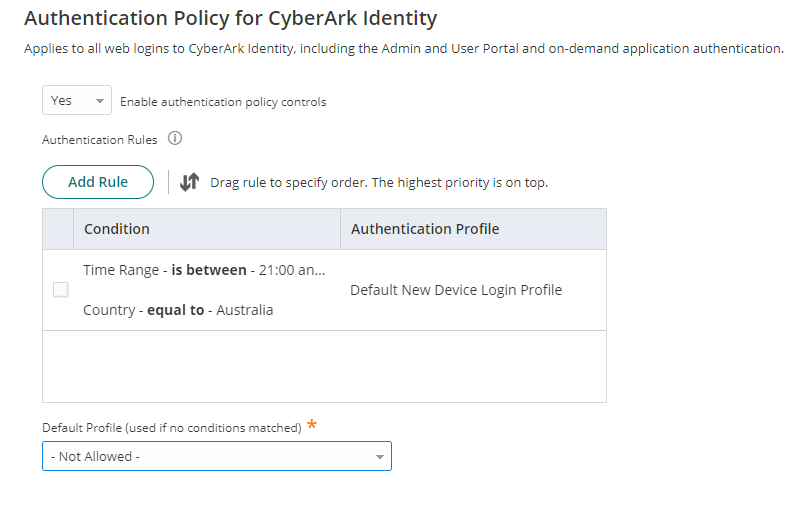
20. Click ‘Save’ and now the time-lock policy has been created and will now apply to any users or roles that you feel needs this restriction.