Purpose
This article explains how to prevent browser from remembering credentials via Microsoft Endpoint Manager (Intune).
Prerequisites
- Office 365 Global Administrator
- Endpoint Manager Licensed and Deployed
Instructions – Create Policy
- Login to Office 365 Admin Center. https://admin.microsoft.com/Adminportal
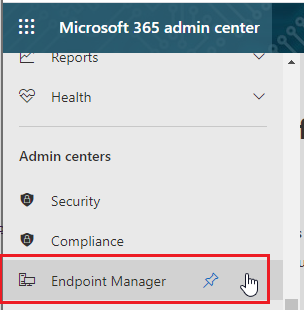
- Go to Endpoint Manager.
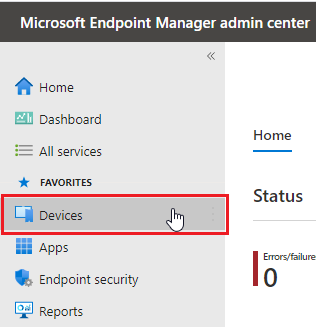
- Click on Devices.
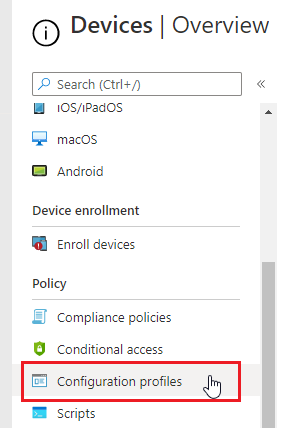
- Go to Configuration Profiles.
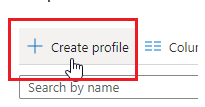
- Click on Create Profile.
- Continue below for the browsers required. You will need to create a Profile for each browser you want to block.
Microsoft Edge
- Configure the following and click Create. Platform “Windows 10 and Later”, Profile Type “Templates”, Template name “Administrative Templates”.
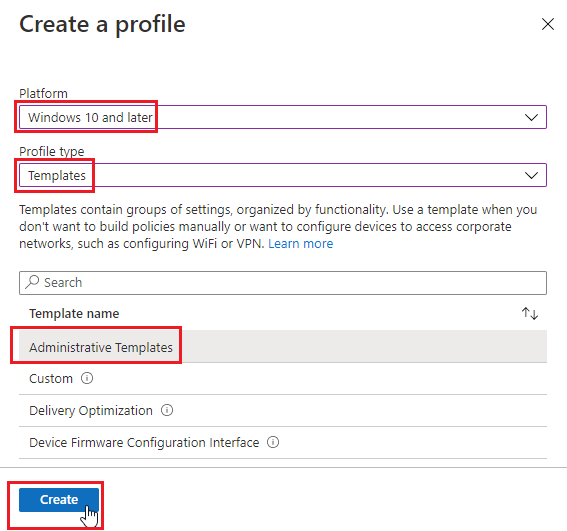
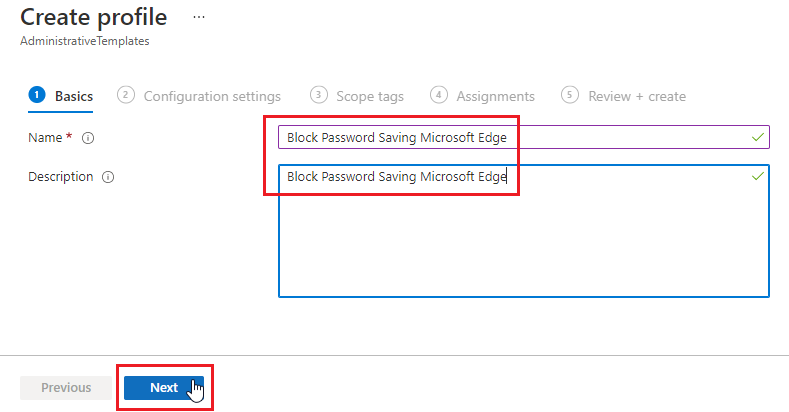
- Name the Profile “Block Password Saving Microsoft Edge” and click Next.
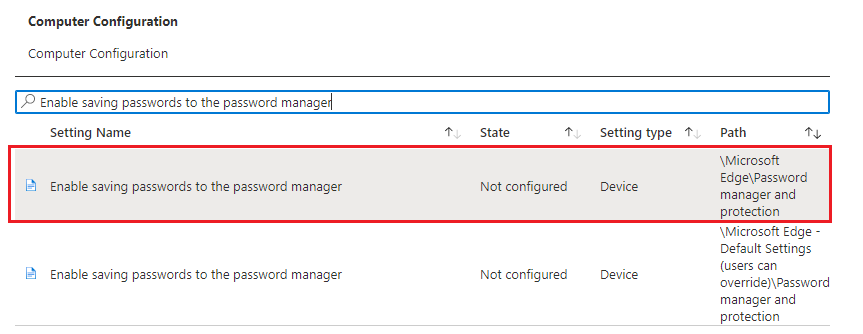
- In the search box type “Enable saving passwords to the password manager” then select the one that does not include “users can override” the click Next.
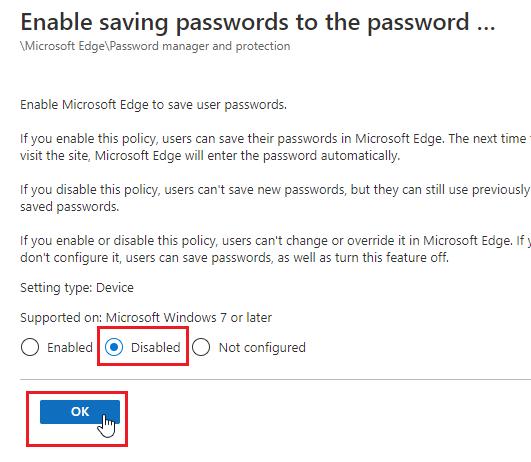
- Chose Disabled and Click Ok.
- In the search box type “Disable synchronization of data using Microsoft sync services” then select the one that does not include “users can override” the click Next.

- Chose Enabled and Click Ok.
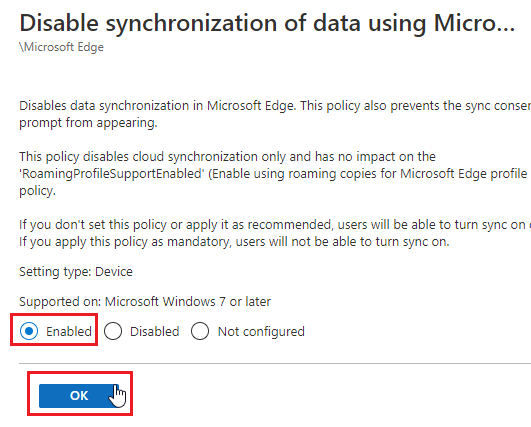
- Click Next.

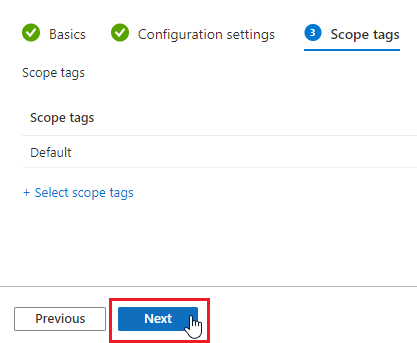
- Leave scope as Default and click Next.
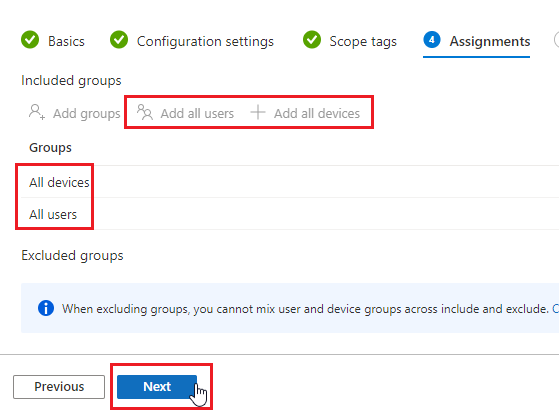
- Select All Users and All Devices (You may use custom groups as well). Click Next.
- Confirm the configuration and click Next.
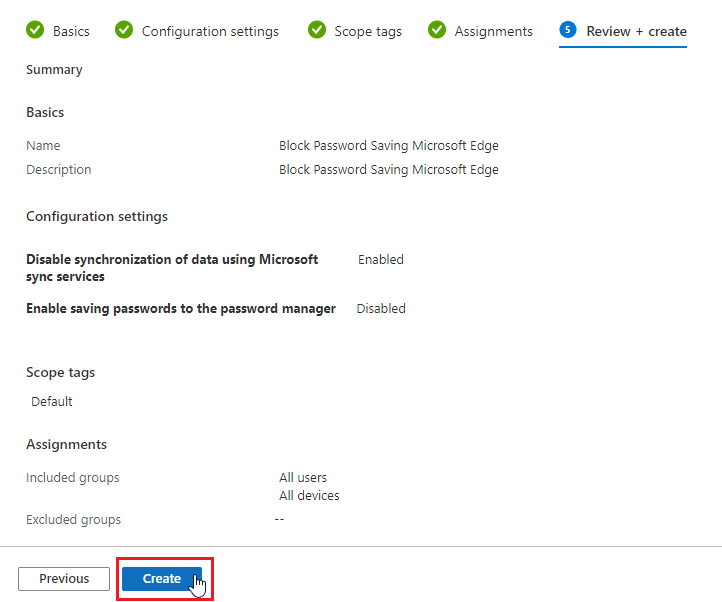
- The policy will now deploy out to devices when they next check-in.
- Continue below for Chrome and Firefox Polices.
Google Chrome
- Click Create Profile

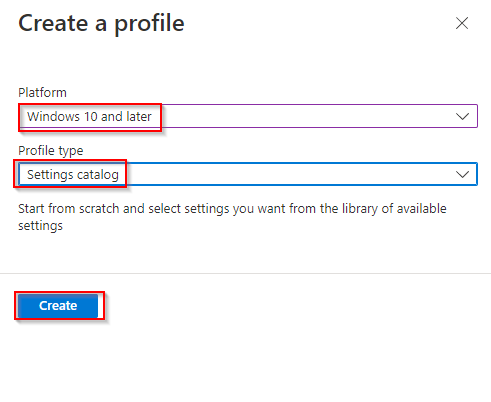
- Configure the following and click Create. Platform “Windows 10 and Later“, Profile Type “Settings catalog“
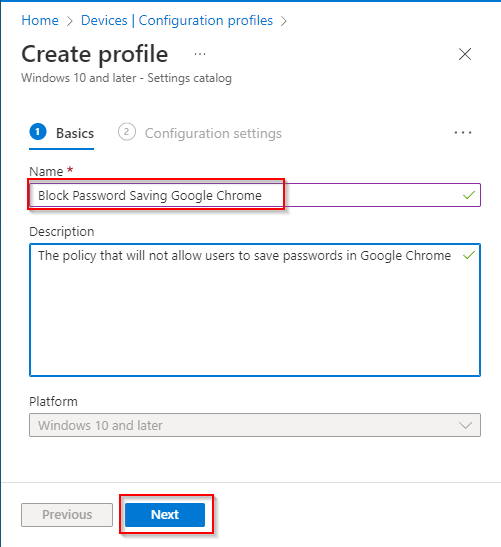
- Name and Description “Block Password Saving Google Chrome” and click Next
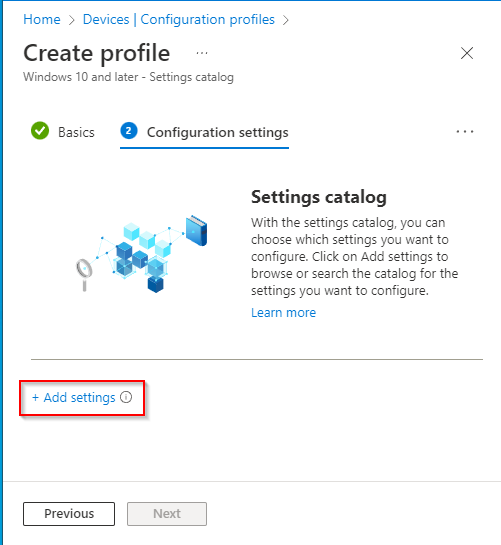
- Click “Add settings”
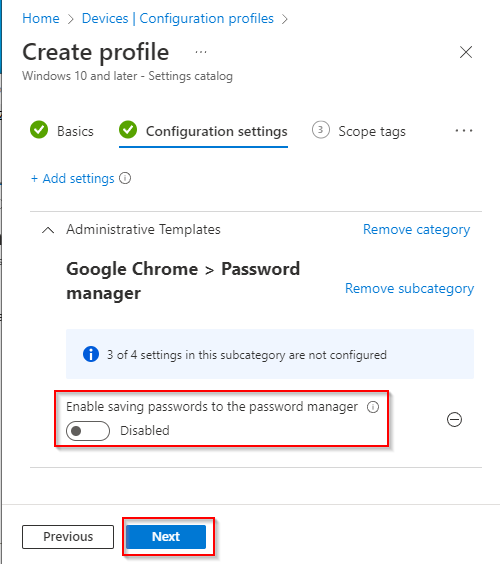
- Type “google” in “Search” and select “Administrative Templates\ Google\ Google Chrome\ Password manager“. Then tick the box “Enable saving passwords to the password manager”
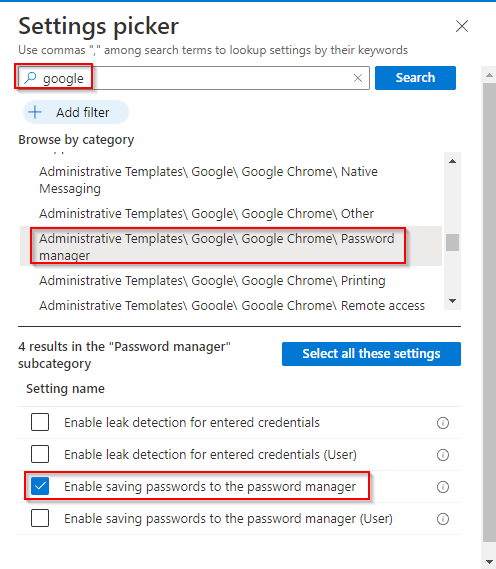
- Make sure that the policy is set to “Disabled” as it showed in the screenshot below and click “Next“.
- Click “Add all users” under Included groups to deploy the policy to all users.
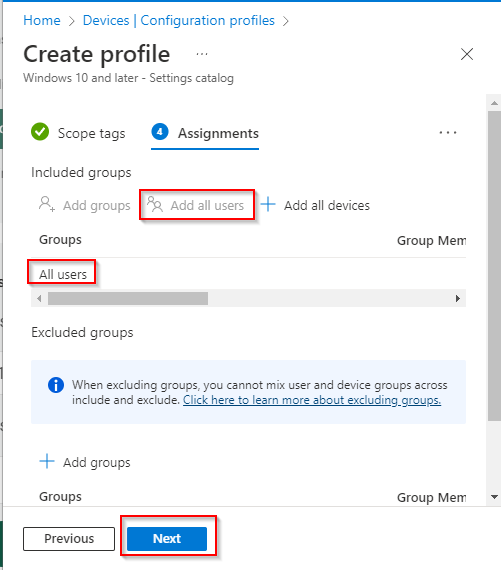
- Click “Next” and “Create” to finish
- Continue below for Firefox Polices.
Mozilla Firefox
- Download FireFox Polices from: https://github.com/mozilla/policy-templates/releases
- Under Assets, Click policy_templates.zip to Download.
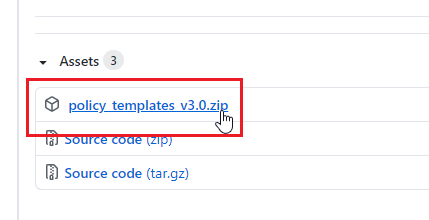
- Unzip/Extract the downloaded Zip File.
- Open the extracted folder and Go to policy_templates_v3.0\windows and look for firefox.admx
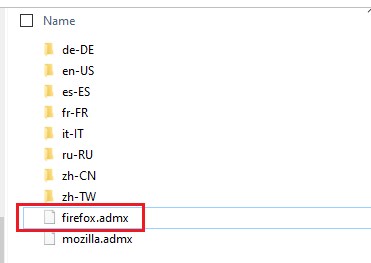
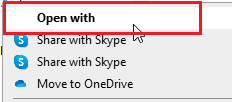
- Right Click on FireFox.admx and click Open with.
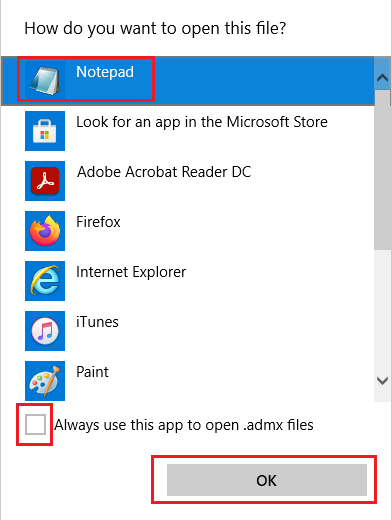
- Chose Notepad and unselect Always Use and click Ok.
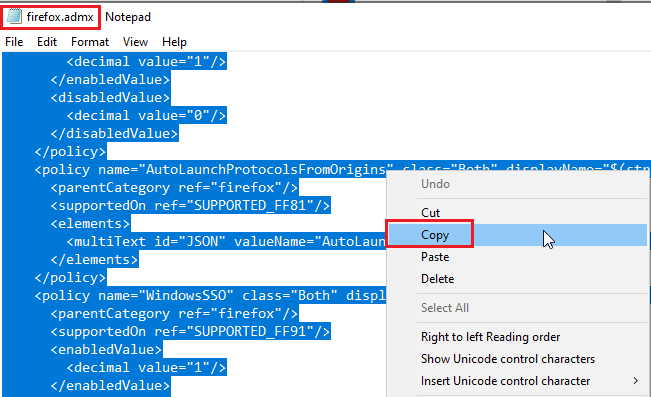
- Ctrl+A to select everything and Right-Click and Copy. This will be needed in step 11
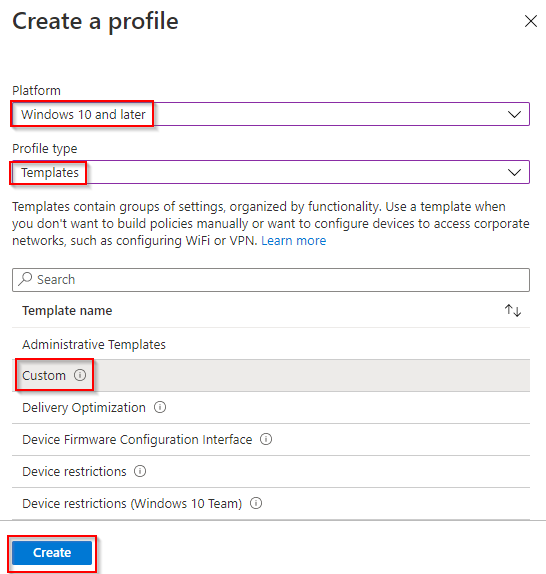
- Back in End Point Manage. Click Create Profile.

- Configure the following and click Create. Platform “Windows 10 and Later”, Profile Type “Templates”, Template name “Custom”.
- Name and Description “Block Password Saving Mozilla FireFox” and click Next.
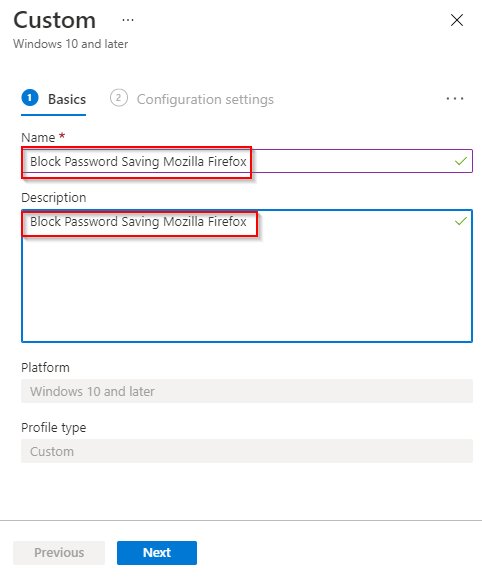
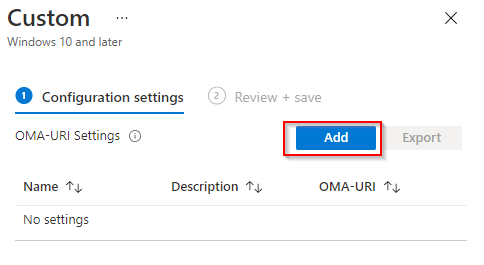
- Click Add.
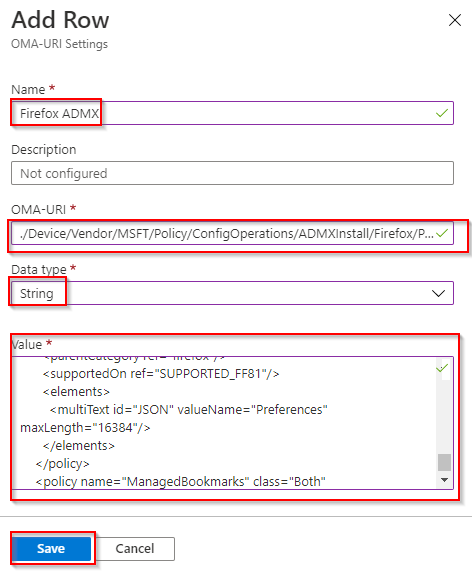
- Configure the following and click Save. Name: “FireFox ADMX ” OMA-URI: “./Device/Vendor/MSFT/Policy/ConfigOperations/ADMXInstall/Firefox/Policy/FirefoxAdmx” Datatype: “String” Value: “Contents of Step 7” then click Save.
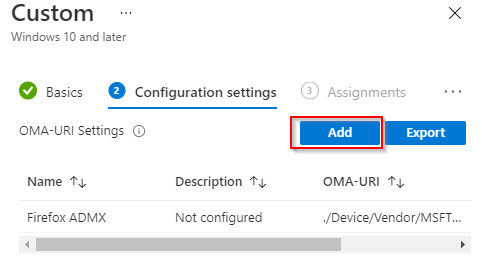
- Click Add again.
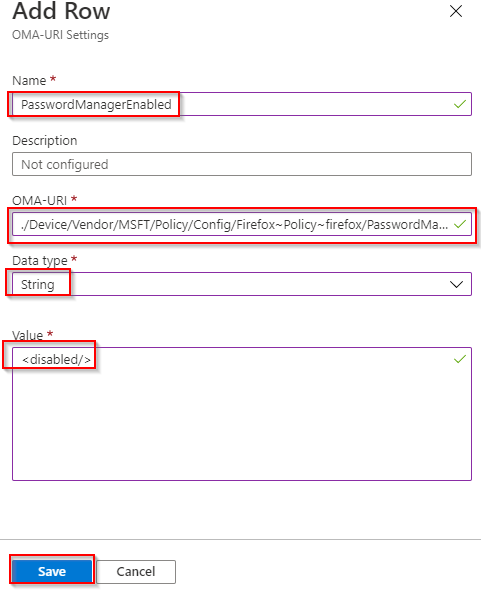
- Configure the following and click Save. Name: “PasswordManagerEnabled” OMA-URI: “./Device/Vendor/MSFT/Policy/Config/Firefox~Policy~firefox/PasswordManagerEnabled” Datatype: “String” Value: “<disabled/>” then click Save.
- Click Add again.

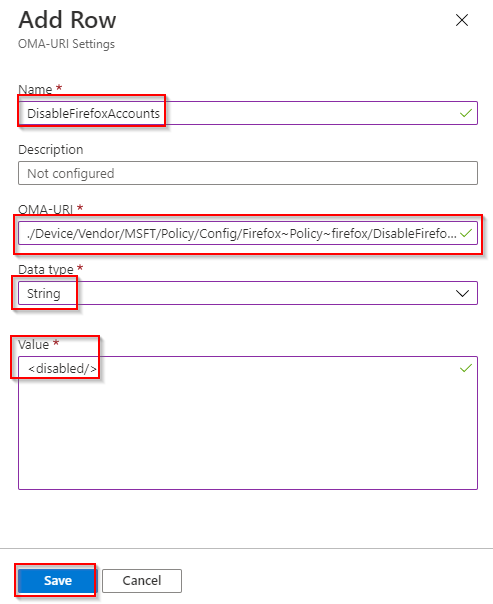
- Configure the following and click Save. Name: “DisbaleFireFoxAccounts” OMA-URI: “./Device/Vendor/MSFT/Policy/Config/Firefox~Policy~firefox/DisableFirefoxAccounts” Datatype: “String” Value: “<enabled/>” then click Save.
- Click Add again

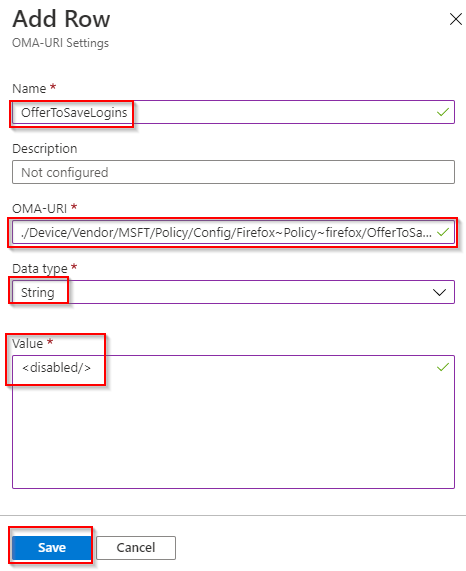
- Configure the following and click Save. Name: “OfferToSaveLogins” OMA-URI: “./Device/Vendor/MSFT/Policy/Config/Firefox~Policy~firefox/OfferToSaveLogins” Datatype: “String” Value: “<disabled/>” then click Save.
- Click Next.

- Select All Users and All Devices (You may use custom groups as well). Click Next

- Confirm the configuration and click Next.
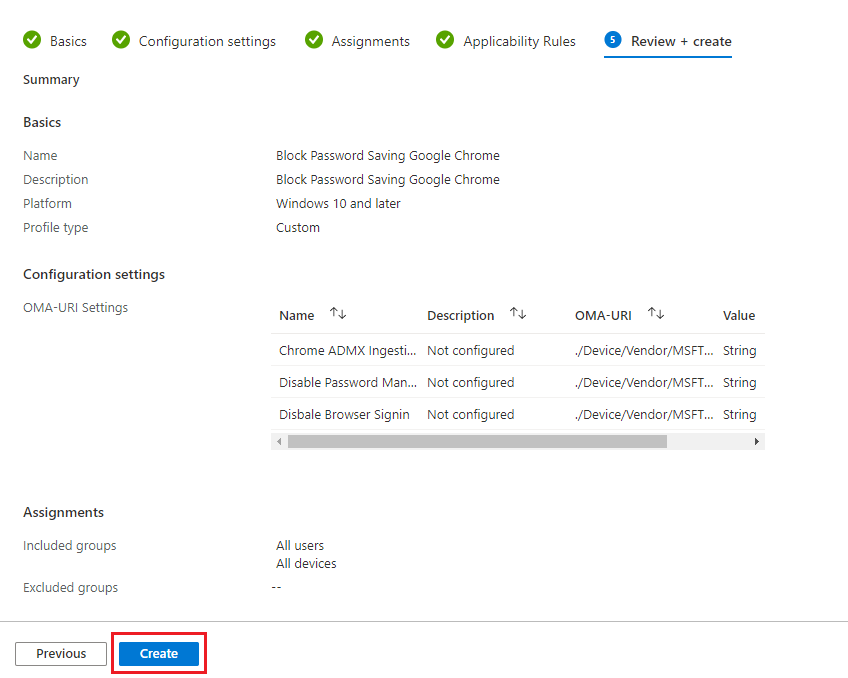
- The policy will now deploy out to devices when they next check-in.
- Finished
