
Purpose
Dropbox offers single sign-on via SAML integration with Practice Protect. This provides a seamless login experience to the Dropbox platform using IdP-initiated SSO.
Practice Protect will configure this on your behalf. Please send us an email at support@practiceprotect.com
When you require SSO for Dropbox, two-step verification is automatically disabled to avoid overlapping settings.
Prerequisites
- Active Dropbox account with administrator rights for your organization (Note: this can be your account so you don’t have to pay and create for another license account)
- Dropbox for Business Plus Subscription (SSO is only available in this subscription)
- Dropbox Username/Email for staff should match the login names in Practice Protect.
- Admin Access to Practice Protect
Instructions
- Login to your Practice Protect and switch to Admin portal (ex. mydomain.practiceprotect.app)
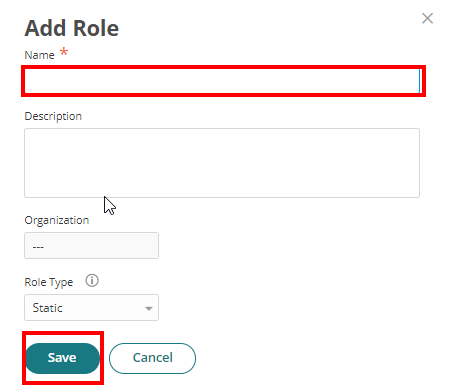
- On Core Services, Click on Roles > Add Roles. Create a role and set the name field to Dropbox SSO Users. Then Save.
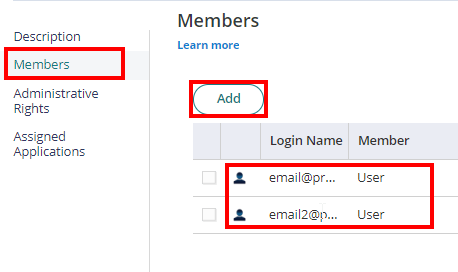
- With the created role, click on Members > Add. Add each user that will have access to the app. Then Save.
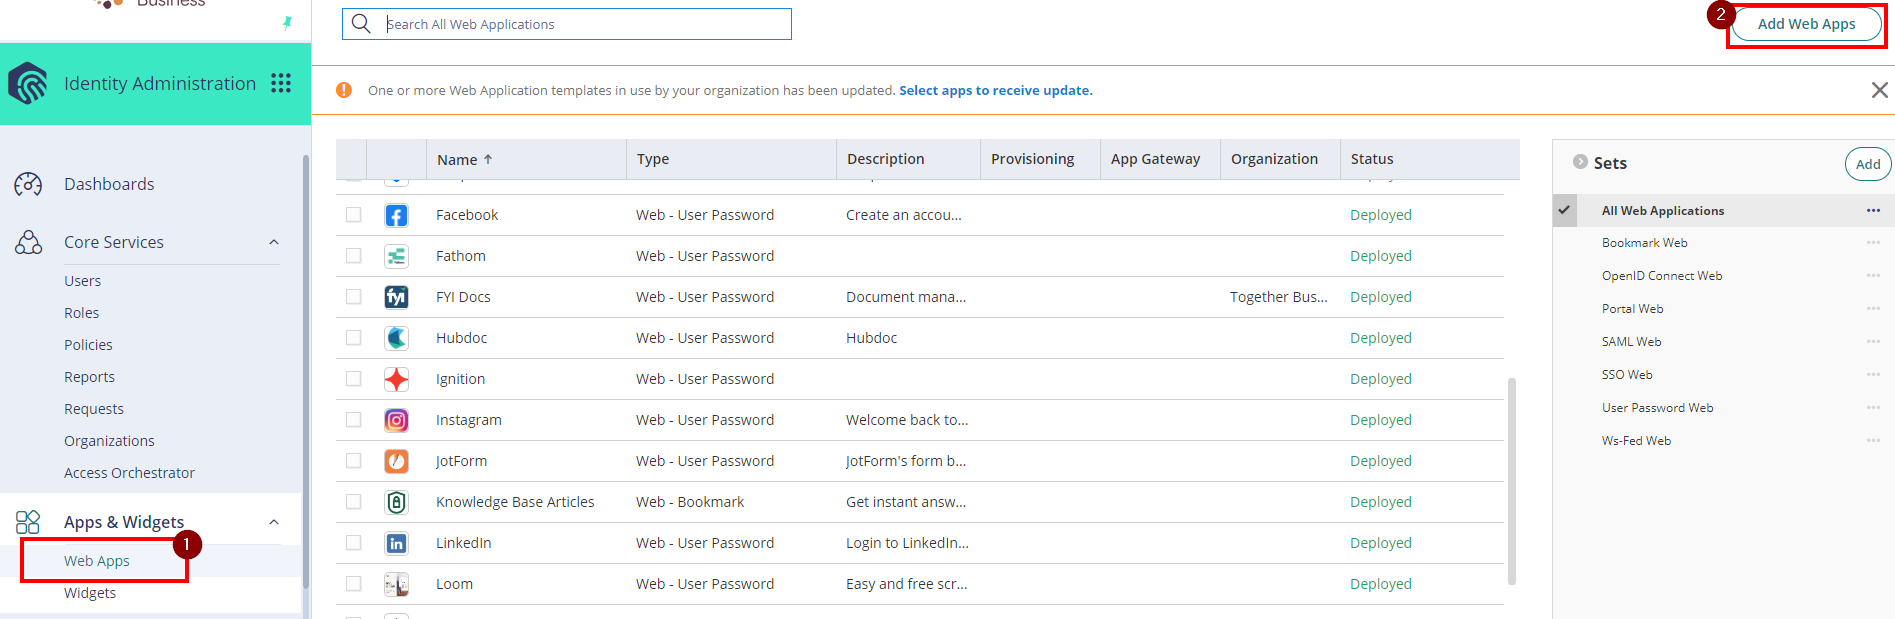
- From the Apps & Widgets, go to Web Apps section. Then, choose Add Web Apps on the top right corner.
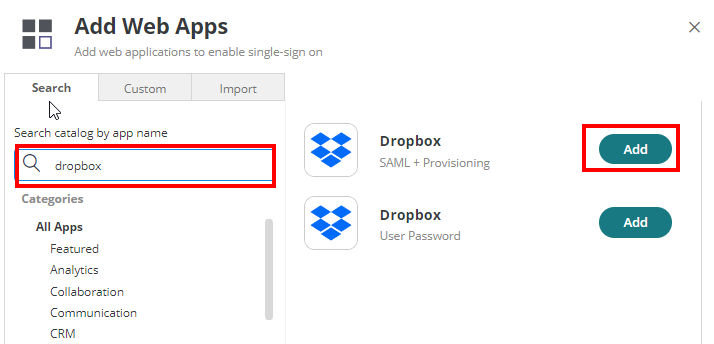
- Search for Dropbox– SAML then next to it click Add. Click Yes to confirm.
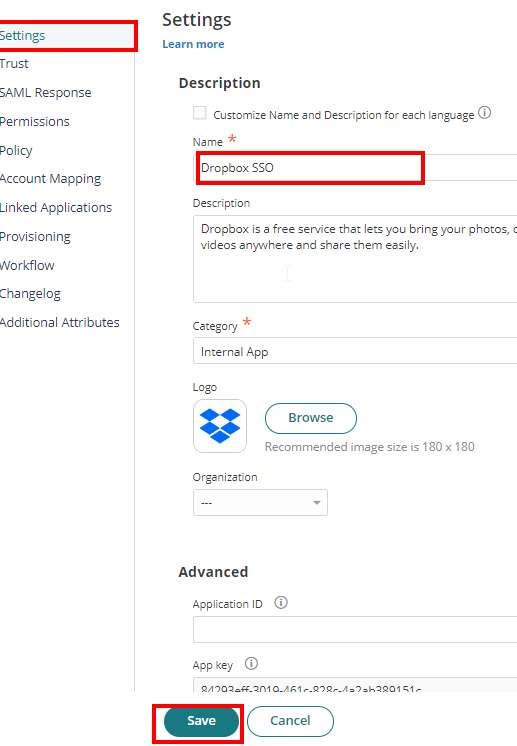
- On Settings, set name as Dropbox SSO and select Save. You can also set category and logo.
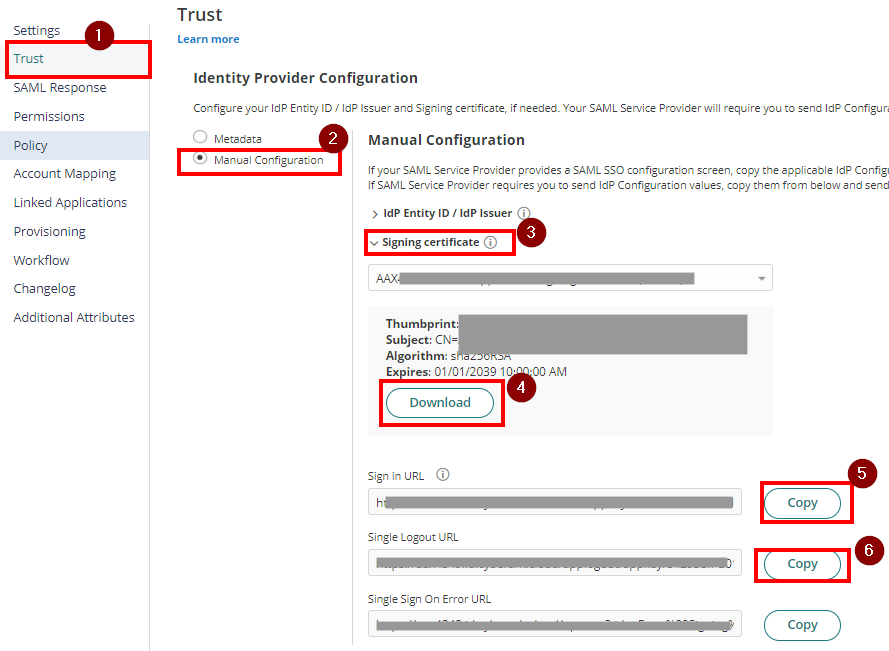
- Click on Trust > On Identity Provider Configuration select Manual Configuration > Click on Signing Certificate and click Download. This will download the certificate on your local PC which you will need on the succeeding instructions.
- Copy the Sign In URL and Single Logout URL and temporarily save it in Notepad.
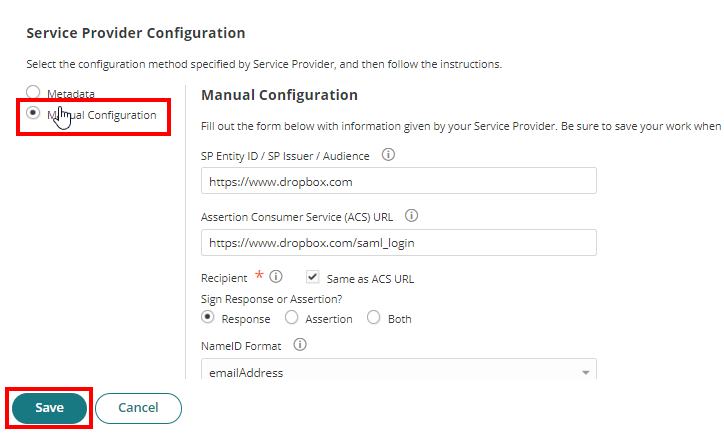
- On the Service Provider Configuration, select Manual configuration and click Save.
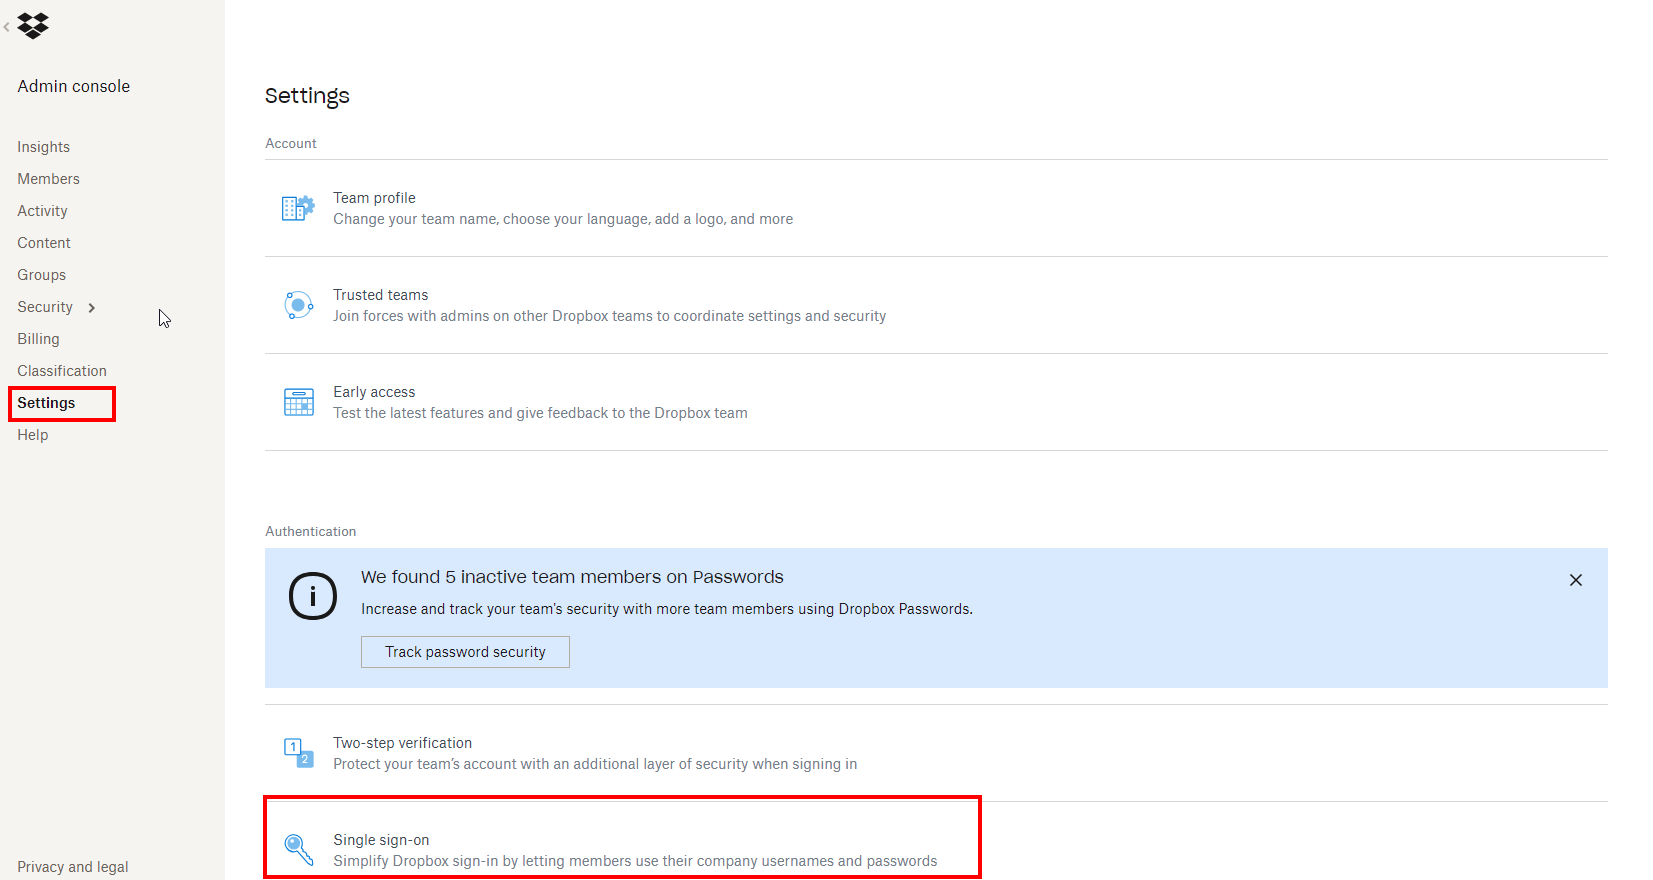
- Login as Admin in Dropbox and go to the Admin Console.
- Click on Settings. From Authentication select Single sign-on.
- Follow the settings as per below:
- From the Single Sign On, select Optional. This will let users be able to sign in using SSO or Password to avoid issues while setting up SSO.
- Paste the URLs you copied from Step 8 to the Identity Provider sign-in URL and sign-out URL.
- Upload the certificate you downloaded from Step 7 to the X.509 certificate.
- On the alternative sign-in options, switch off Google Sign On.
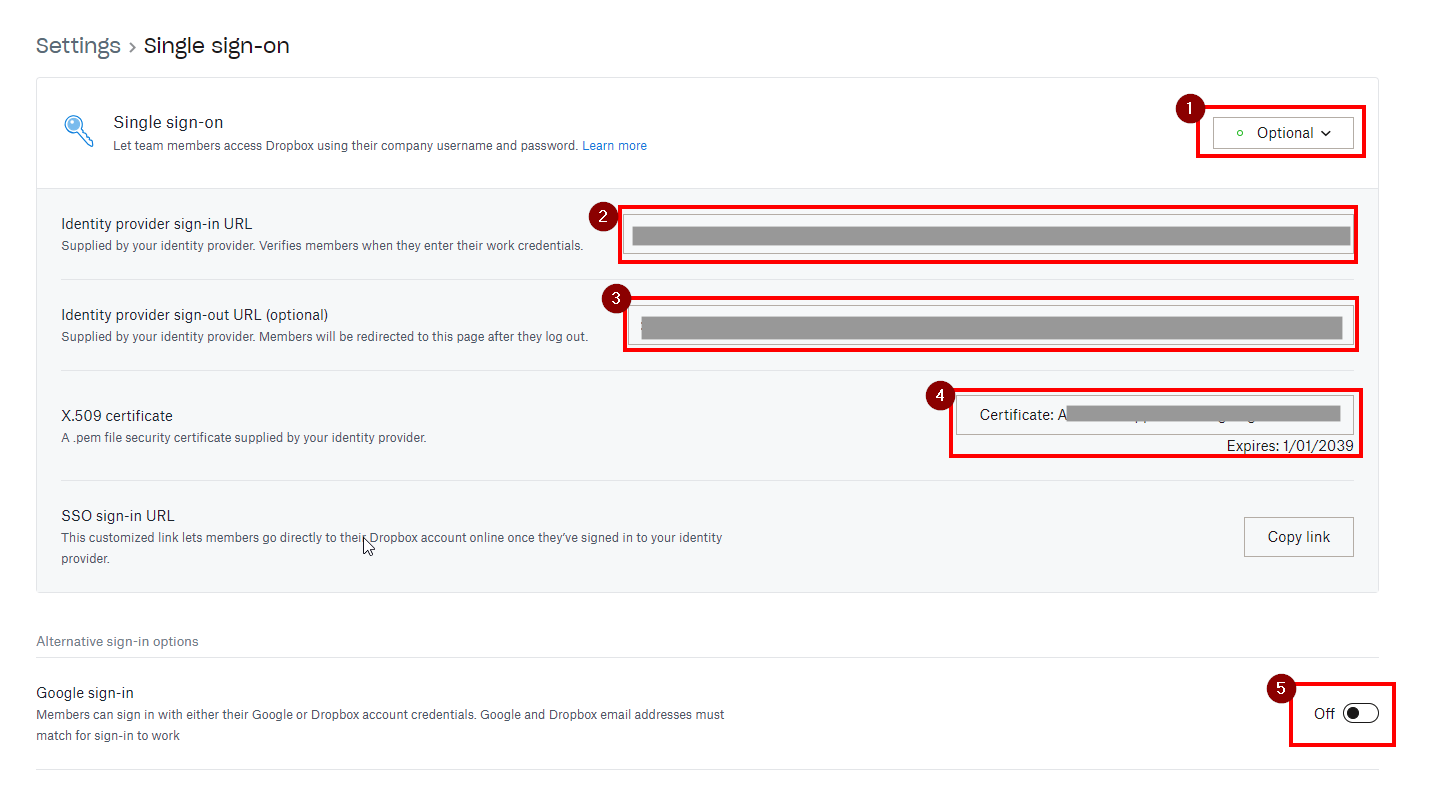
- Click Save.
Enable and Enforce SSO
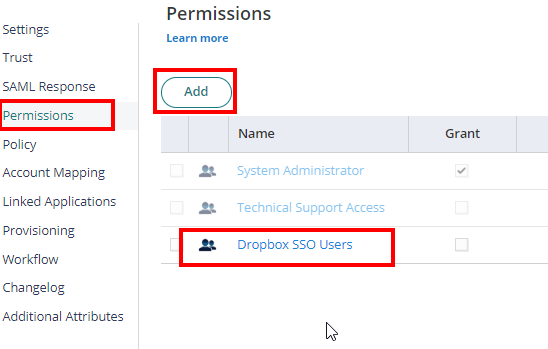
- Return to the Dropbox SSO app in Practice Protect and go to Permissions. Add the role we created in an earlier step to the permissions page (e.g. Dropbox SSO Users) and click Save.
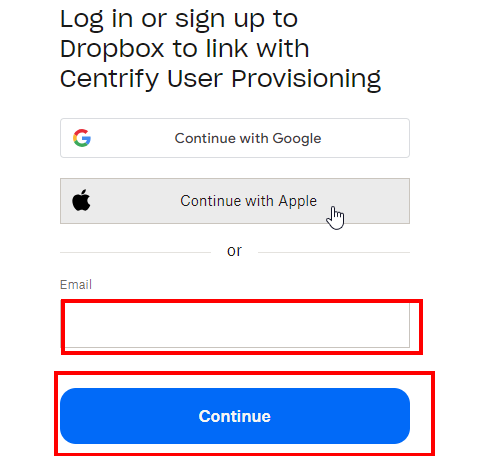
- Test user by signing in to Dropbox login. Once you type the user name the system will know that SSO (Single sign-on is enabled). Click Continue and sign in. If should redirect you to Practice Protect Portal if you’re not signed in yet.
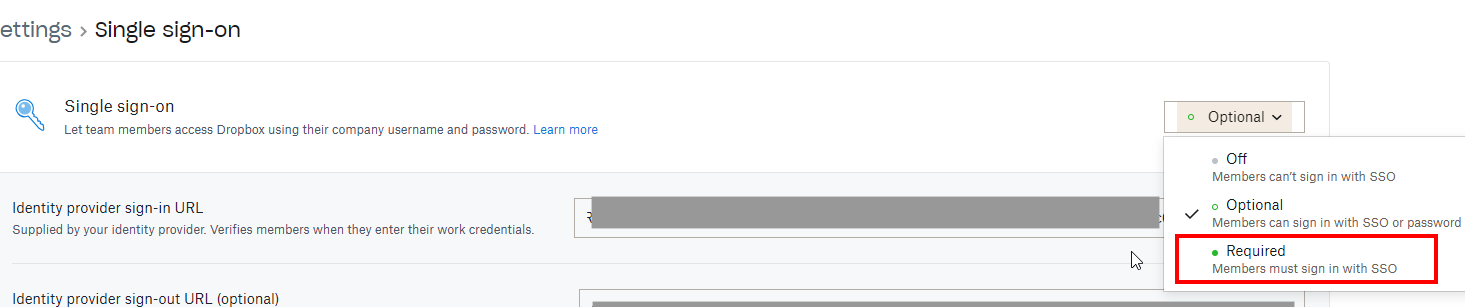
- Once the SSO is working, go back to Dropbox Admin Console > Settings > Single Sign On.
- On Single Sign On, select Required and click Save. This enforces users to only sign in via SSO.
- Dropbox SSO Integration is now completed. Please use Dropbox SSO app on your Practice Protect User Portal to automatically sign in to the app.
Enable Provisioning
Enabling provisioning means that you can create users in Practice Protect and will automatically provision users in Dropbox. Once auto provisioning is enabled you do not need to create the user in Dropbox manually as it will just sync the users attributes from the platform
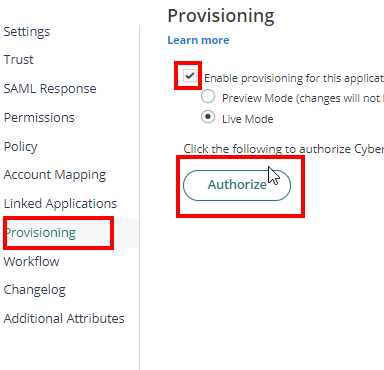
- From the Dropbox SSO app in the Portal > click Provisioning
- tick the box next to Enable provisioning for this application and then click on Authorize.
- Validate using the Dropbox admin account. If you encounter an error, please reach out to our support team.
- Wait for a few minutes to complete the Authorization. Close the window and Click Save. You may need refresh or reload rights of the current admin portal page.

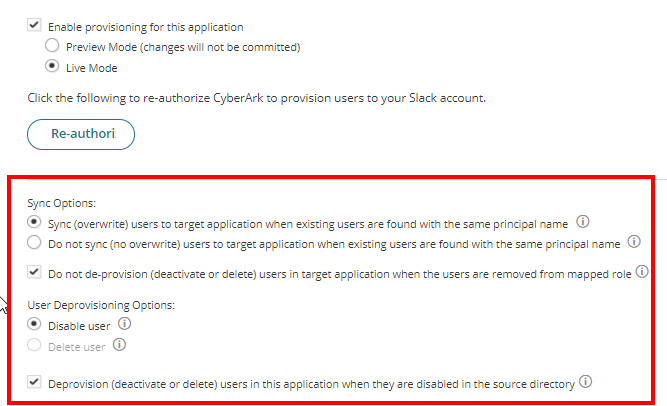
- Return to the provisioning settings of the Dropbox app. On Sync Options: Select Sync (overwrite) users to target application when existing users are found with the same principal name. Leave Do not de-provision (deactivate or delete) users in target application when the users are removed from mapped role ticked.
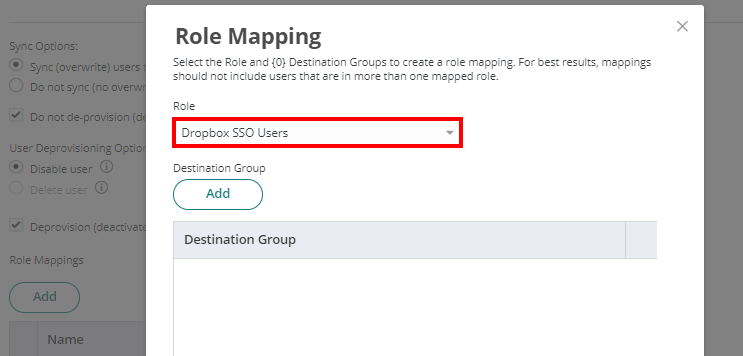
- On Role Mappings, Click Add. Select the respective Role (i.e. Dropbox SSO users – this is the equivalent group in Practice Protect)
- Click Done and Save.
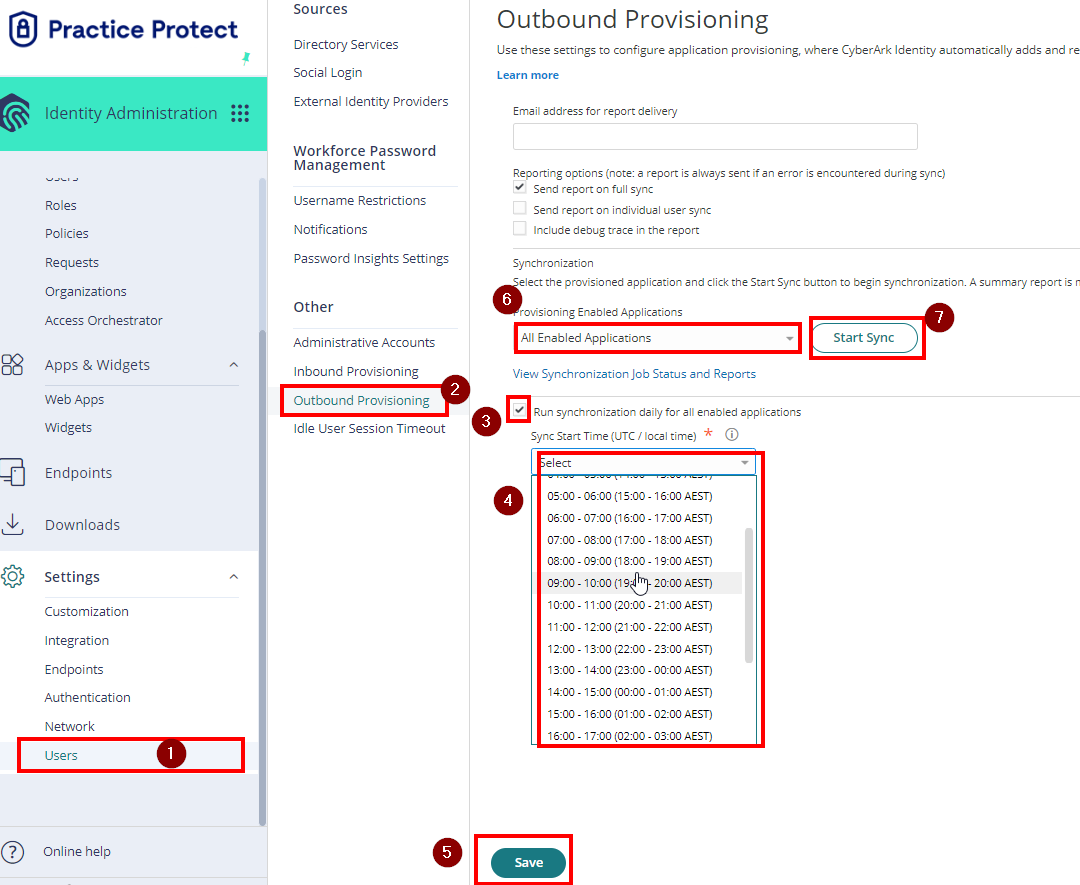
- (Optional) Go to Settings > Click Users > Click on Outbound Provisioning > Tick the box beside Run synchronization daily for all enabled applications > On Sync Start Time (UTC / local time), select the time to run the synchronization. The synchronization runs daily on the specified time.
- Click Save. This completes the setup of Dropbox SSO with provisioning in Practice Protect.
- Run a manual synchronization. Go to Provisioning Enabled Application > Select Dropbox SSO, then Click on Start Sync.
- You can view the real time status of synchronization by clicking on View Synchronization Job Status and Reports. Once the Synchronization completes any changes in Practice Protect will be reflected in the Dropbox Admin Console.
- This completes the enablement of provisioning for Dropbox SSO.