Purpose
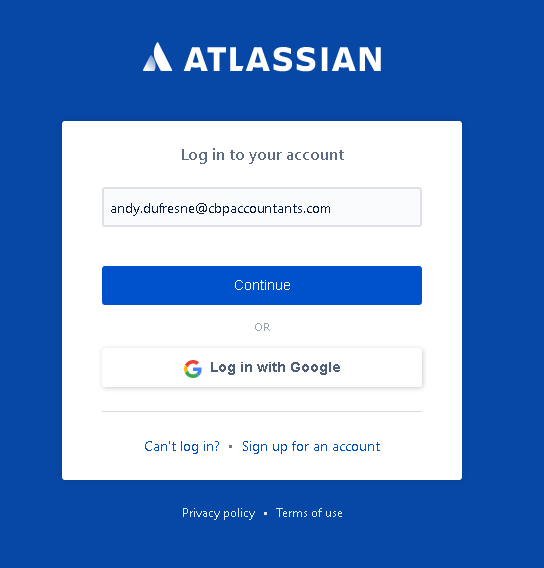
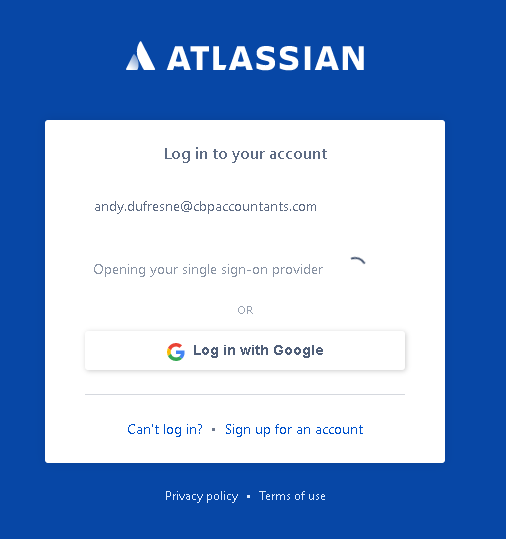
With Practice Protect as your privileged access service, you can choose single-sign-on (SSO) access to the Jira Cloud web and mobile applications with IdP-initiated SAML SSO (for SSO access through the Practice Protect Portal) or SP-initiated SAML SSO (for SSO access directly through the Jira Cloud web application) or both. Providing both methods gives you and your users maximum flexibility. This article will guide you through on how to enable SSO (SAML) for Jira in Practice Protect
Prerequisites
Before you configure the Jira Cloud web application for SSO, you need the following:
- A Jira Cloud account.
- Attlasian Access Product
- An organization administrator and Jira Cloud site administrator (user with admin permission in the group “site-admins”)
- Domains of SSO users’ email addresses added and verified before configuration.
- Configuring your organizations – Atlassian uses organizations to manage your domains and user accounts, providing control and visibility across your Atlassian Cloud applications. Setting up your organization and verifying a domain are pre-requisites to configuring SSO. Refer to this link for more information about configuring your organization with Atlassian.
- Jira Cloud login name exactly the same as the Practice Protect login name
Instructions
1. Login to Practice Protect Admin portal.
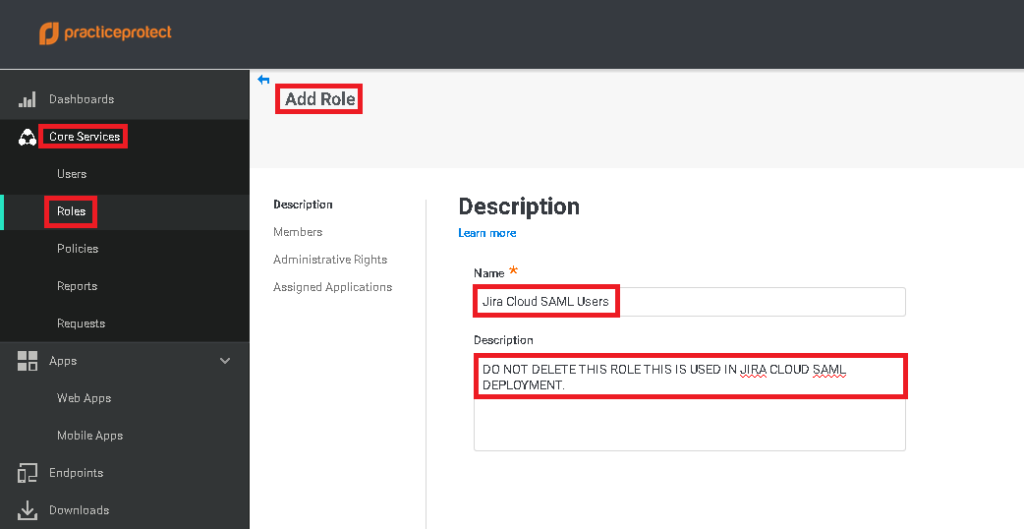
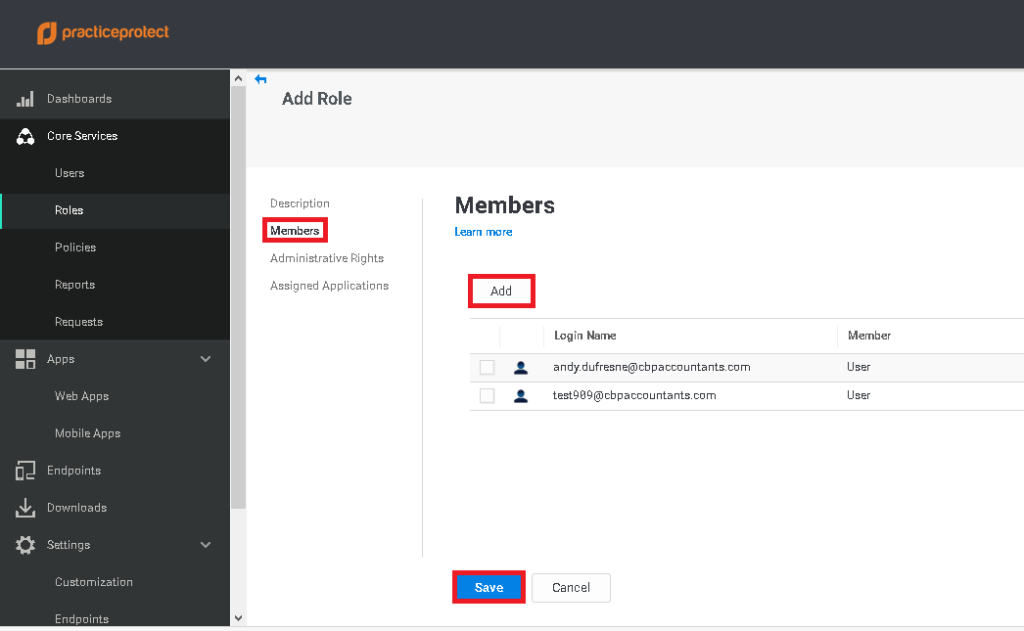
2. On Core Services, select Role. Click Add Role. On the Name Field, Enter the Role name i.e. Jira Cloud SAML Users and a Description of the role.
3. Click Members > Click Add, add the desired users that needs access to Jira Cloud (i.e. [email protected] and [email protected]). Click Save.
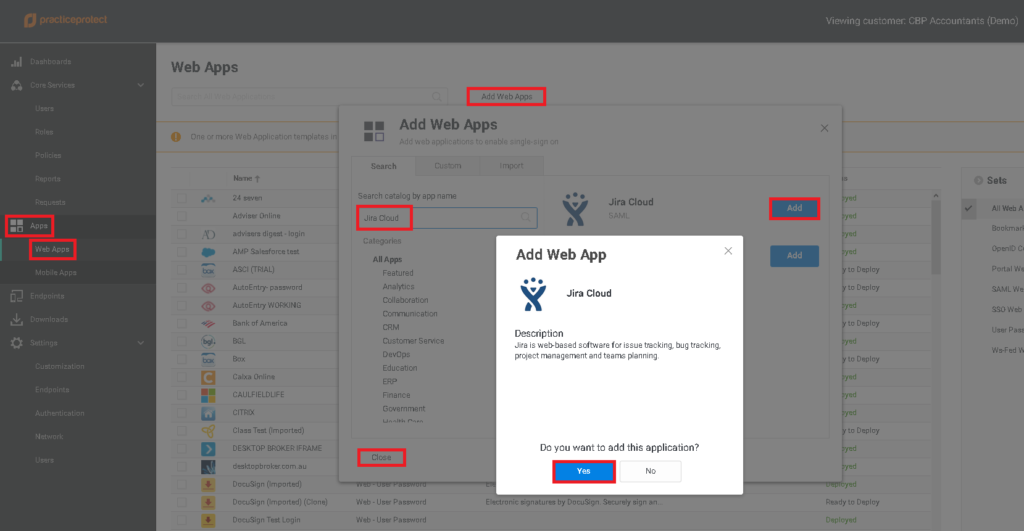
4. On Apps, Click Web Apps > Click Add Web Apps. Type “Jira Cloud” on the search field. Select Jira Cloud SAML and click Add. Select Yes when prompted Do you want to add this application?. Click Close.
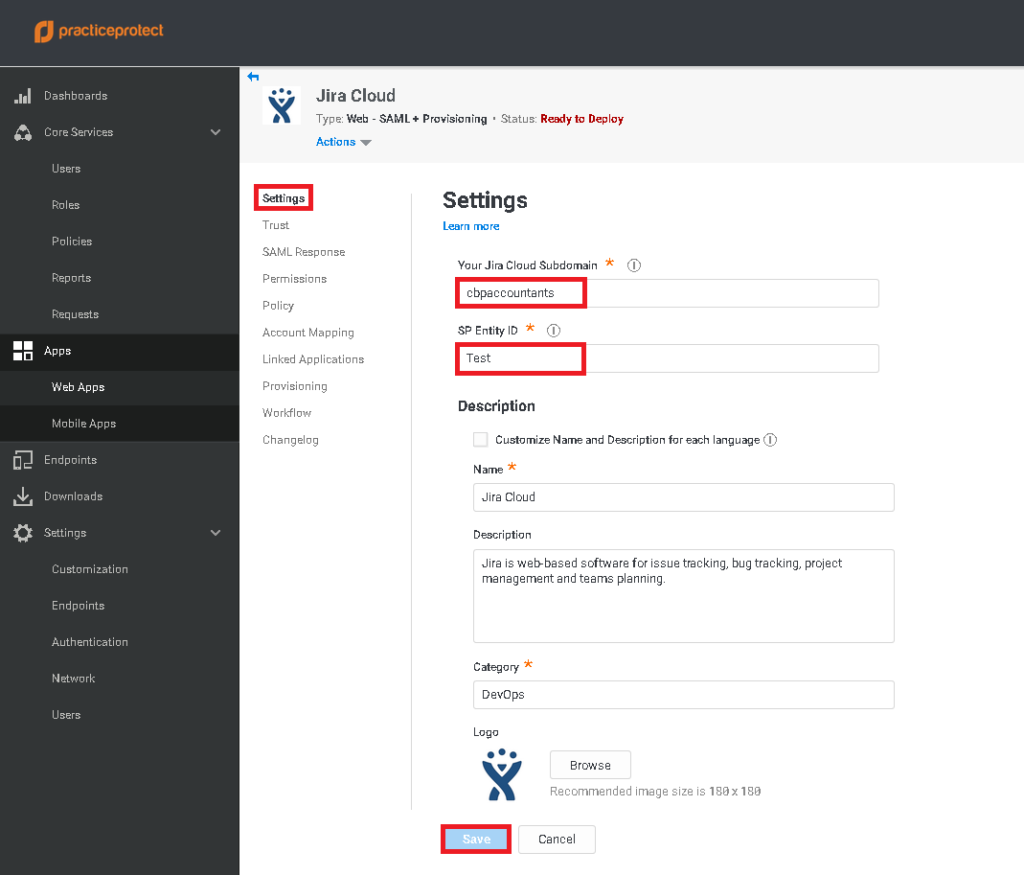
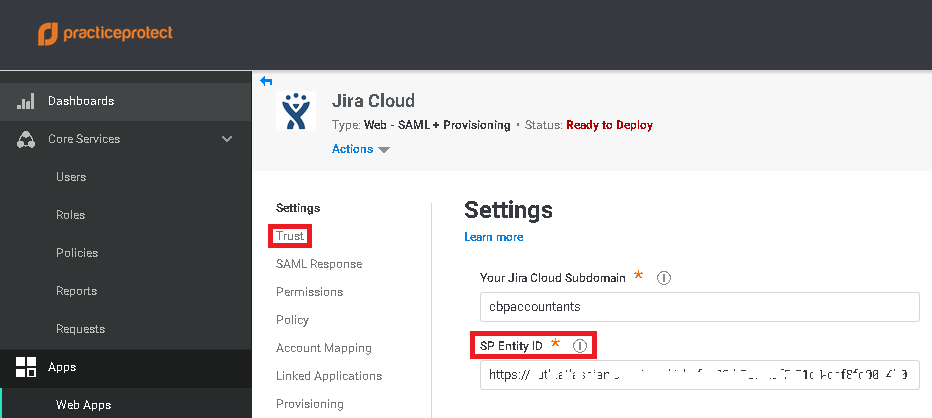
5. On Settings, Enter the value of Your Jira Cloud Subdomain (i.e. cbpaccountants). Enter a dummy value on SP Identity ID field for now i.e. Test. Click Save. You will get the correct value of SP Identity ID later on the Jira Cloud admin.
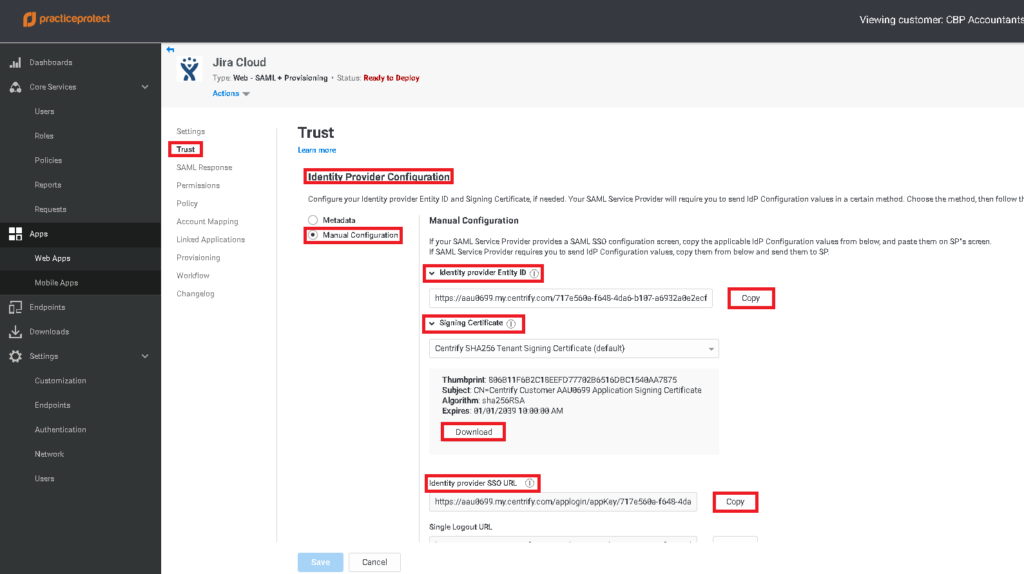
6. Click on Trust. On Identity Provide Configuration, select Manual Configuration. Copy the value of Identity provider Entity ID and Identity provider SSO URL. Download the Signing Certiticate. You will need these detail on the next steps.
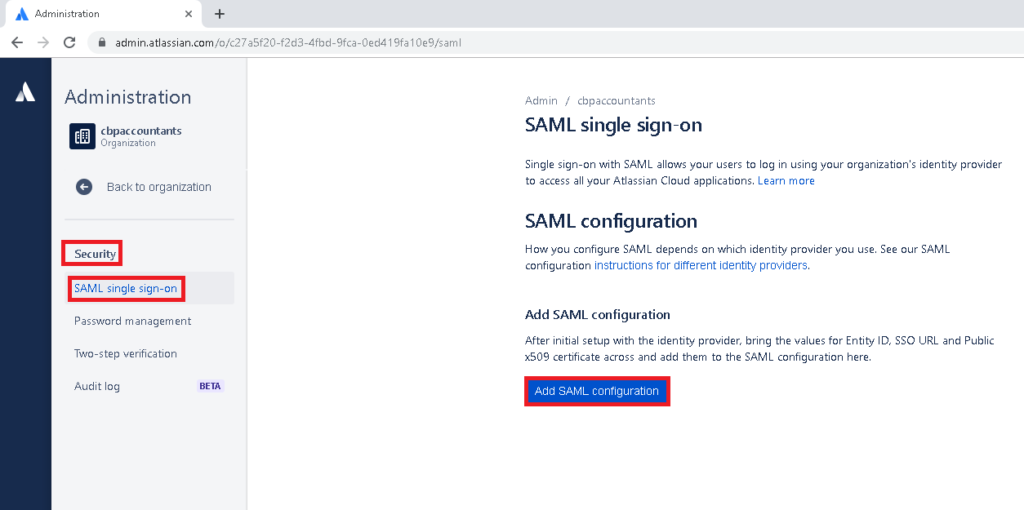
7. Open another browser and login to https://admin.atlassian.com/ using the administrator account. Click on Security > SAML single sign-on > Click on Add SAML configuration.
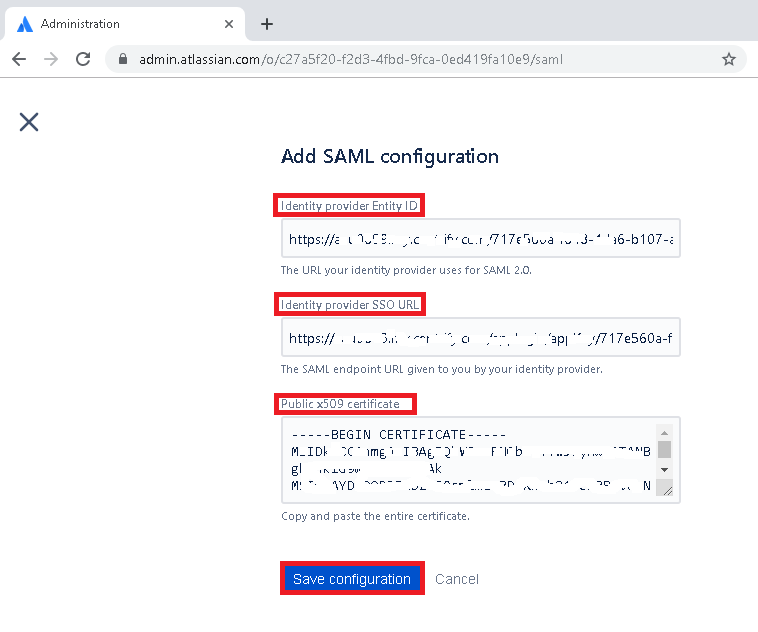
8. This open the Add SAML configuration window. Enter the value of of Identity provider Entity ID and Identity provider SSO URL. Copy and paste the entire certificate from step no. 6. Click Save configuration.
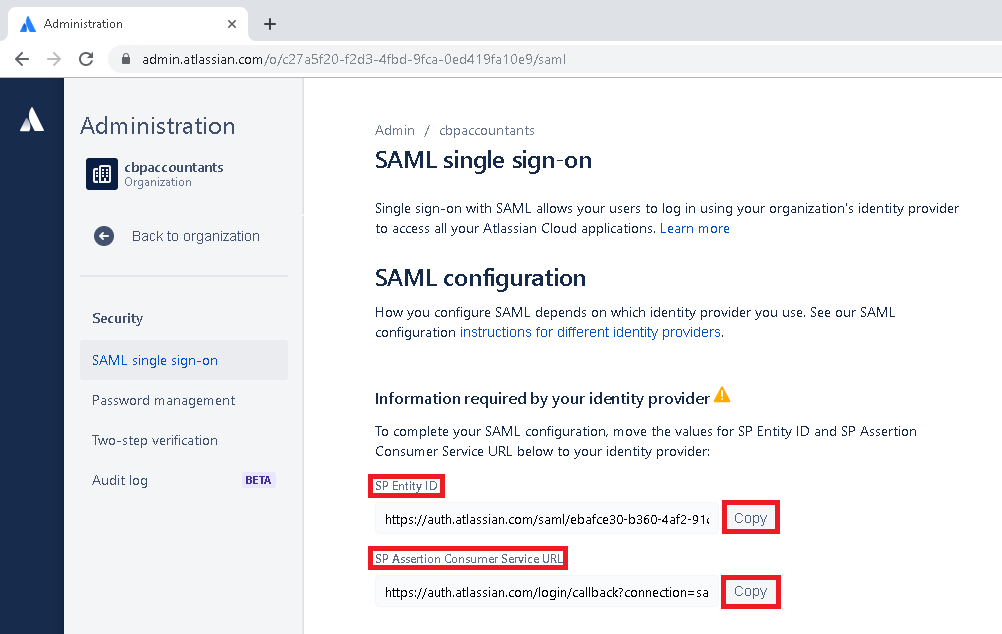
9. Copy the value of SP Entity ID and SP Assertion Consumer Service URL.
10. Go back to PPO Admin portal.
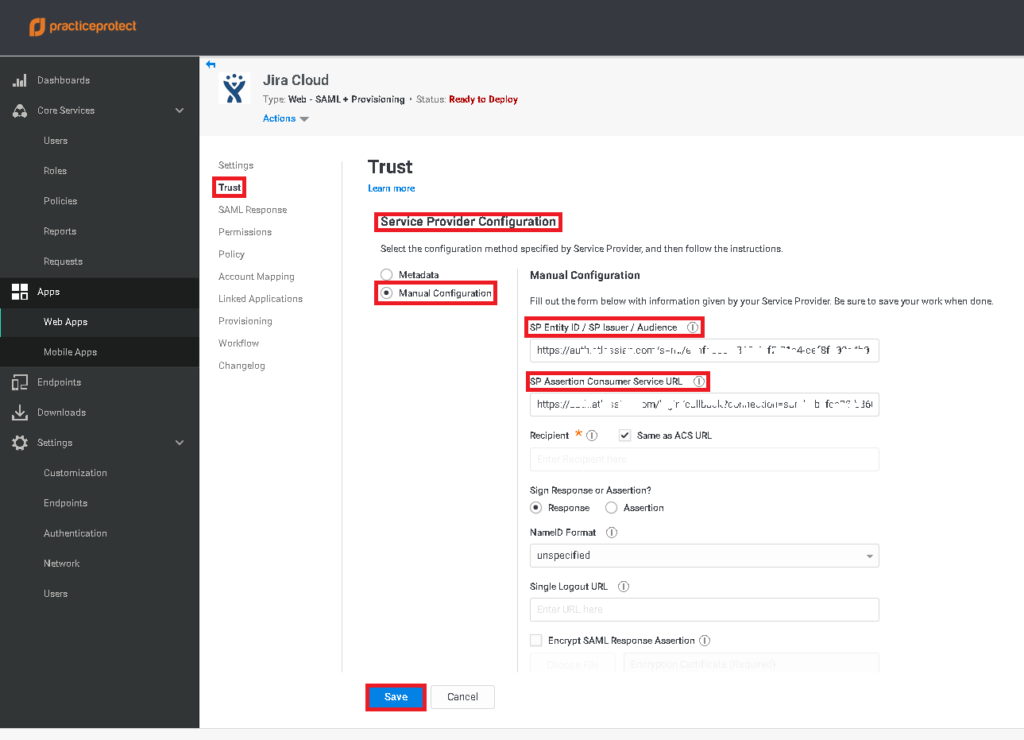
11. On Trust, scroll down to Service Provider Configuration and select Manual configuration. Enter the value of SP Entity ID and SP Assertion Consumer Service URL from step no. 9 then click Save.
12. Click on Settings, Enter the value of SP Entity ID. Click Save.
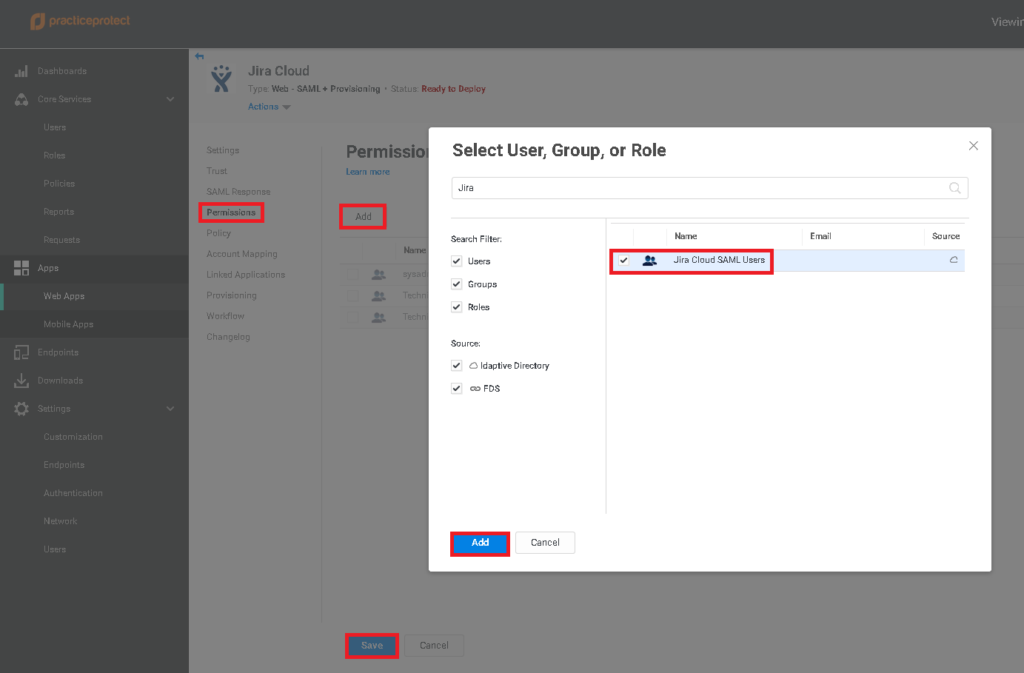
13. Click on Permissions > Add > search the Role created in step no. 2 ie. Jira Cloud SAML Users. Click Add then Save.
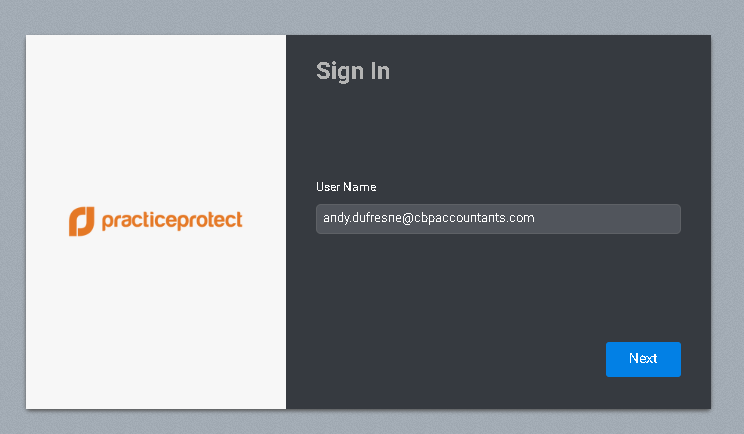
14. You can now test the access in Jira Cloud login. It should now redirect the login to Practice Protect.