
Purpose
Annature offers single sign-on via an OpenId integration with Practice Protect. This provides a seamless login experience for Annature.
Practice Protect can configure this on your behalf. Please send us an email at support@practiceprotect.com
Prerequisites
- Administrator Access in Practice Protect
- Active Annature account with administrator rights for your organization (Note: this can be your account so you don’t have to pay and create for another license account)
- The Annature username for all staff should match the login names in Practice Protect.
- The paid version of Annature
Instructions
1. Login to Practice Protect and switch to Admin portal.
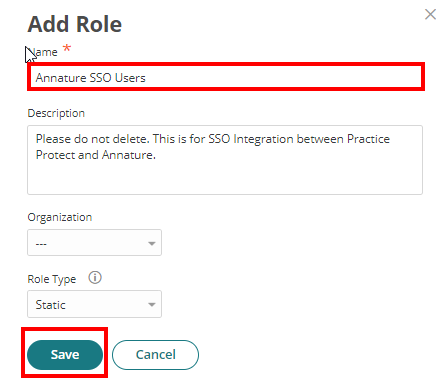
2. Go to Roles > Add Role > Under Description, enter the name of the Role on the Name field (i.e. Annature SSO Users)
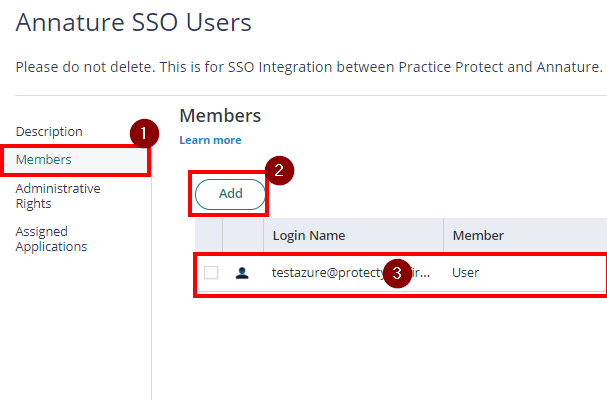
3. Click on Members > Click Add > Add all Annature users. All users must be added, otherwise they wont be able to access Annature.
4. Click Save.
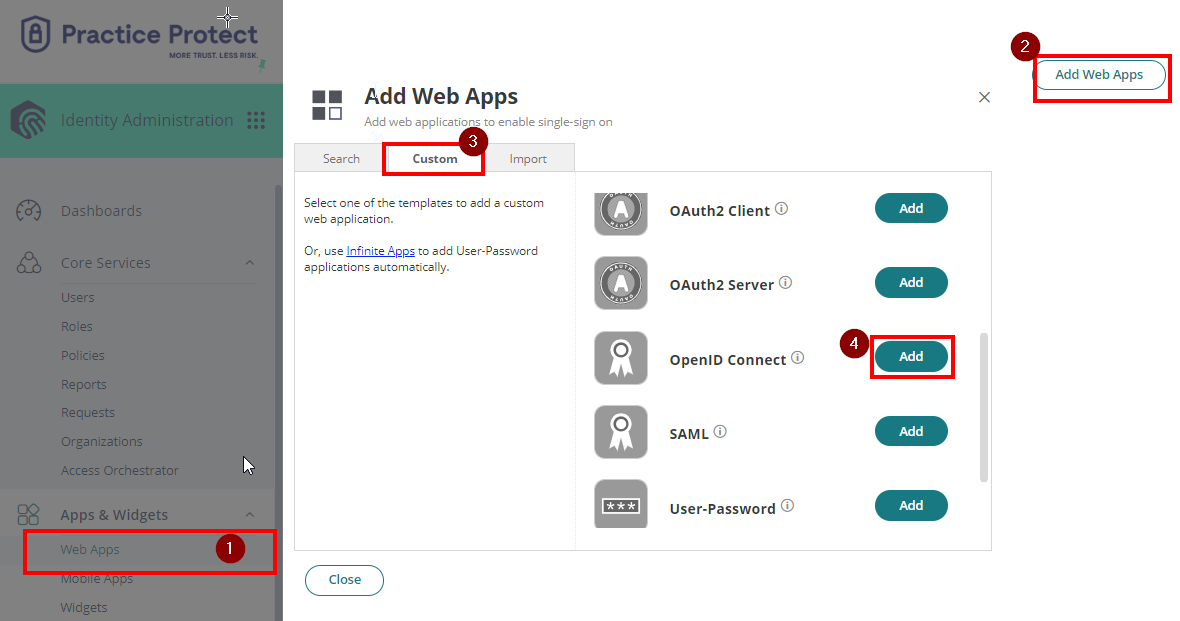
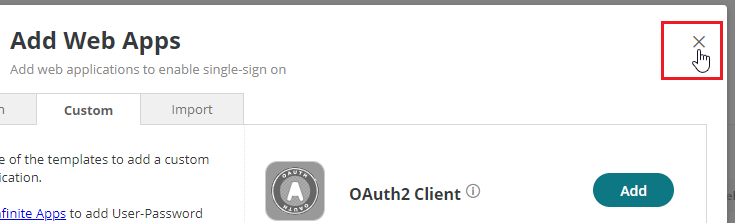
5. Proceed to Apps & Widgets > Web Apps > Click Add Web Apps > Go to Custom tab > Select OpenID Connect then click Add.
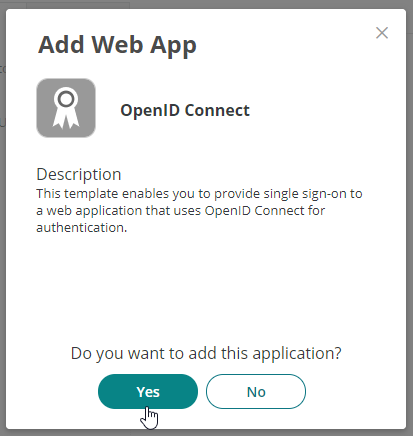
6. Click Yes to add.
7. Close out of the Add section.
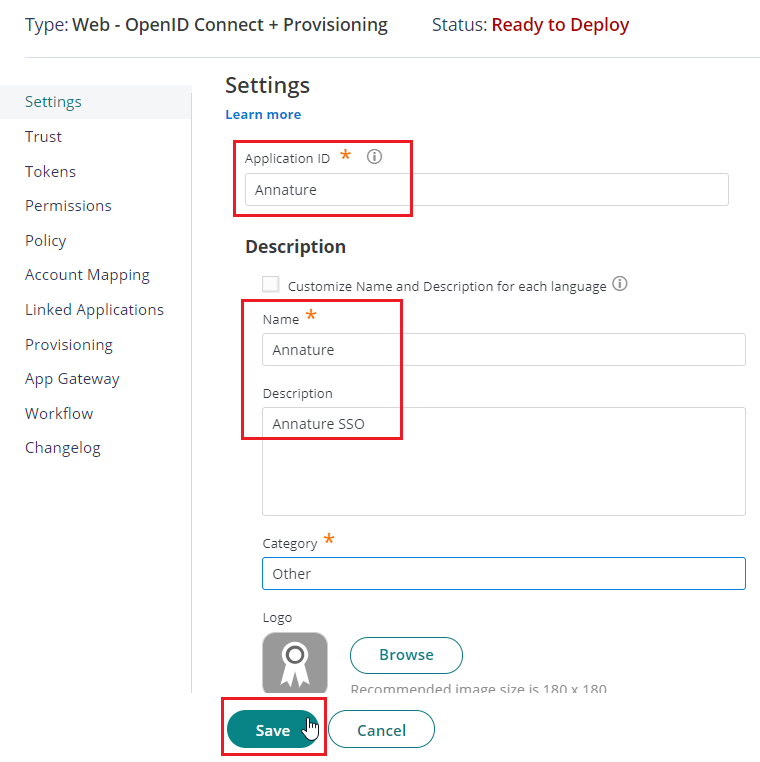
8. On the App Settings, set the following fields:
- Application ID: Annature
- Name: Annature SSO
- Description: SSO Integration with Annature and Practice Protect
9. For the logo, you can save the image/icon below and upload it by clicking on Browse
![]()
———————————————————————
![]()
10. Click Save.
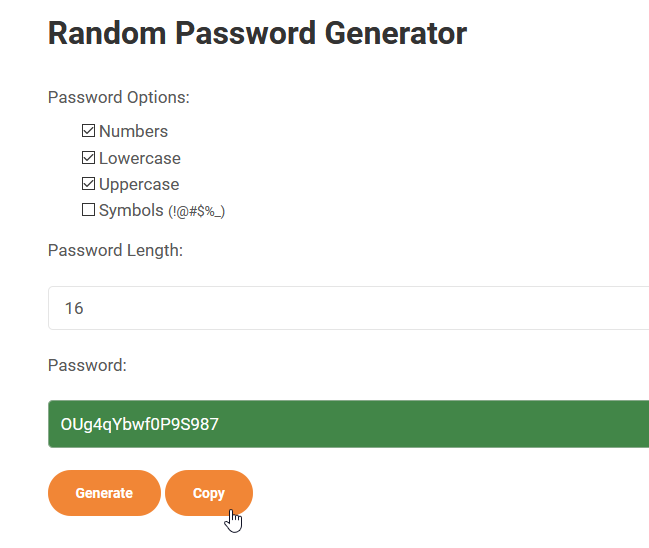
11. Generate a Client Secret here. Select a combination of numbers, and letters (lowercase, uppercase) and set the length to 16. Note: Please don’t include Symbols. Then click Generate and Copy. This will be used in the next steps.
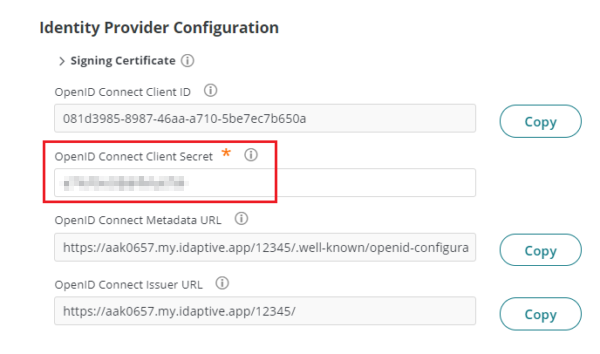
12. Go to Trust then paste the generated password from Step 11 to the OpenID Connect Client Secret field. Click Save.
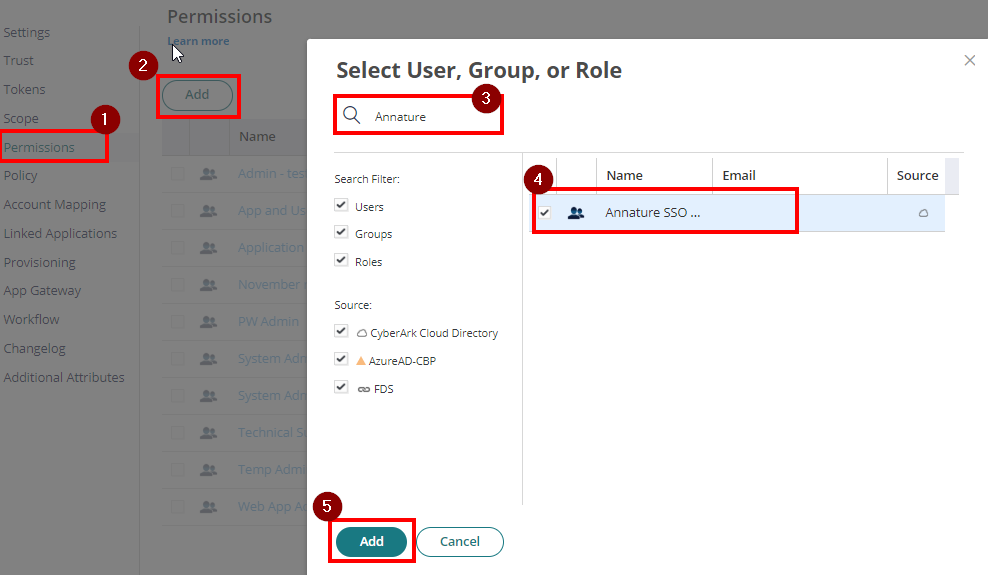
13. On Permissions settings, add the role which contains the Annature users. (i.e. Annature SSO Users) and Add.
14. Click Save.
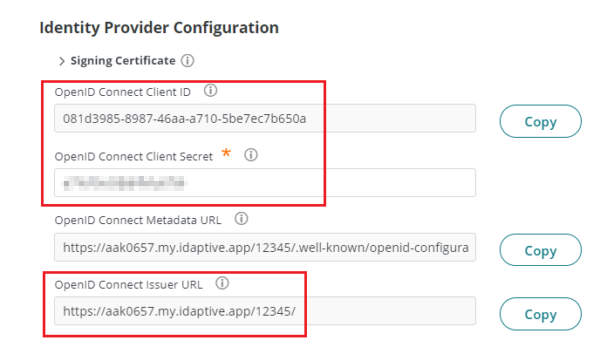
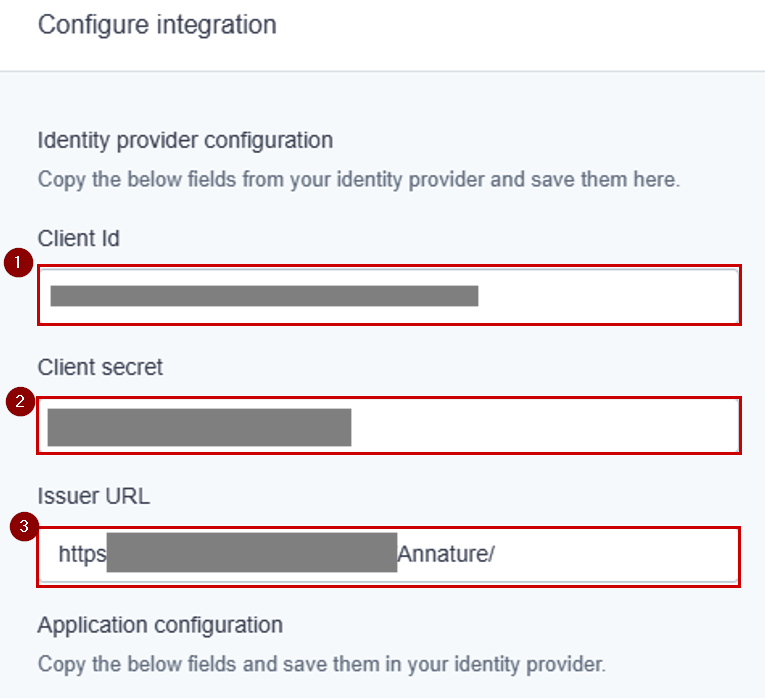
15. Go back to Trust. Note down the Client ID, Client Secret and Connect Issuer URL.
16. Login to Annature with your Administrator Account
17. Go to the Settings. 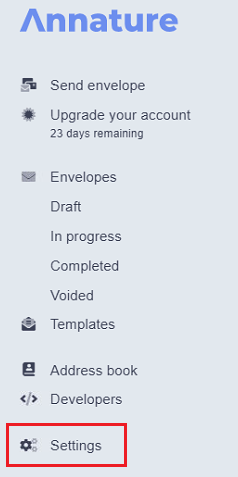
18. Click on Integrations.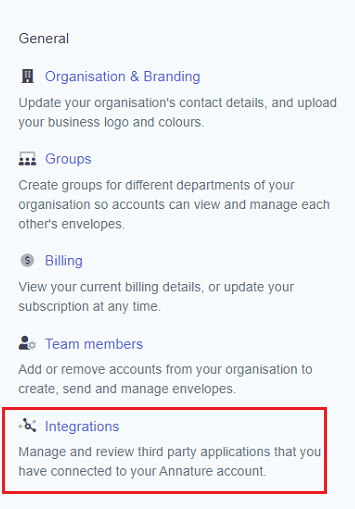
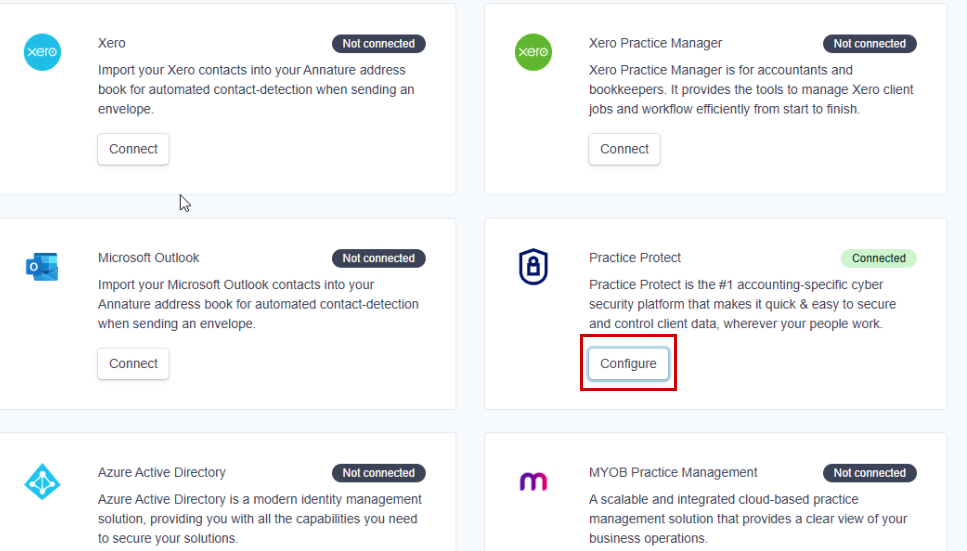
19. Find Practice Protect and click on Configure.
20. Paste the values you copied from Step 15 into Client ID, Client Secret and Issuer URL fields to Annature SSO Settings.
21. Then, copy both Login URL and Redirect URI. It is important to keep these URLS

22. Hit Save changes. NOTE: This should enable SSO and apply the settings we setup. Users will be redirected to Practice Protect when they try to sign in.
23. Return to Practice Protect Admin Portal > Apps & Widgets > Web Apps > Annature SSO app.
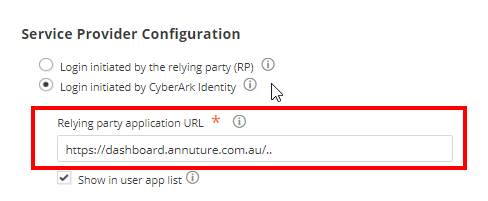
On Trust, proceed to Service Provider Configuration and the following:
- Choose Login initiated by CyberArk Identity
- Relying party application URL: Paste Login Url from Step 21.
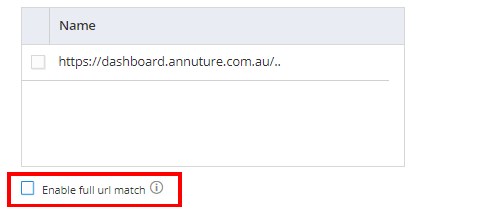
24. On the Authorized Redirect URIs, click Add and paste the Redirect URI copied from Step 21
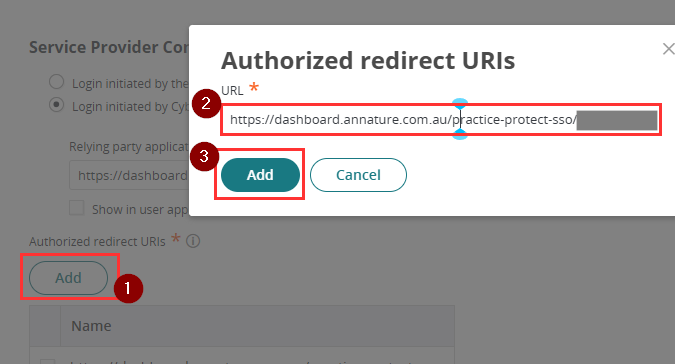
25. Uncheck the box for Enable full url match.
26. Click Save to apply all changes.
27. Test the Single Sign On by launching the app in the Portal or by using the Login URL from Step 21. This now completes the SSO Configuration for Annature.