
Purpose
CaseWare offers single sign-on via OpenId integration with Practice Protect. This provides a seamless login experience to CaseWare Cloud, including the desktop app. Practice Protect will configure this on your behalf. Please send us an email at support@practiceprotect.comPrerequisites for CaseWare SSO
- Administrator Access in Practice Protect
- Administrator Access to CaseWare Cloud
- Disable Password Expiry & MFA in CaseWare
- List of All Users in CaseWare
Instructions
- Login to your Practice Protect and switch to the Admin portal (ex. mydomain.id.cyberark.cloud)
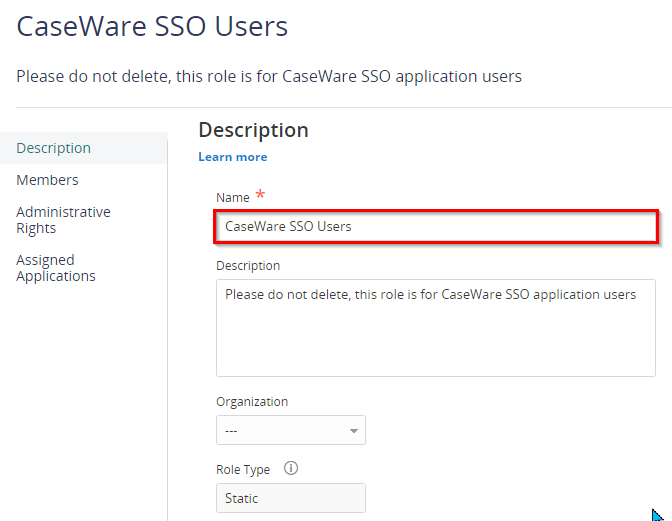
- On Core Services, Click on Roles > Add Roles. Create a role and set the name field to CaseWare SSO Users. Then Save.
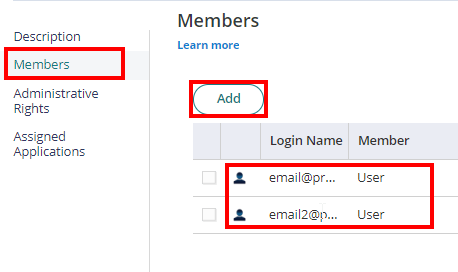
- With the created role, click on Members > Add. Add each user that will have access to the app. Then Save.
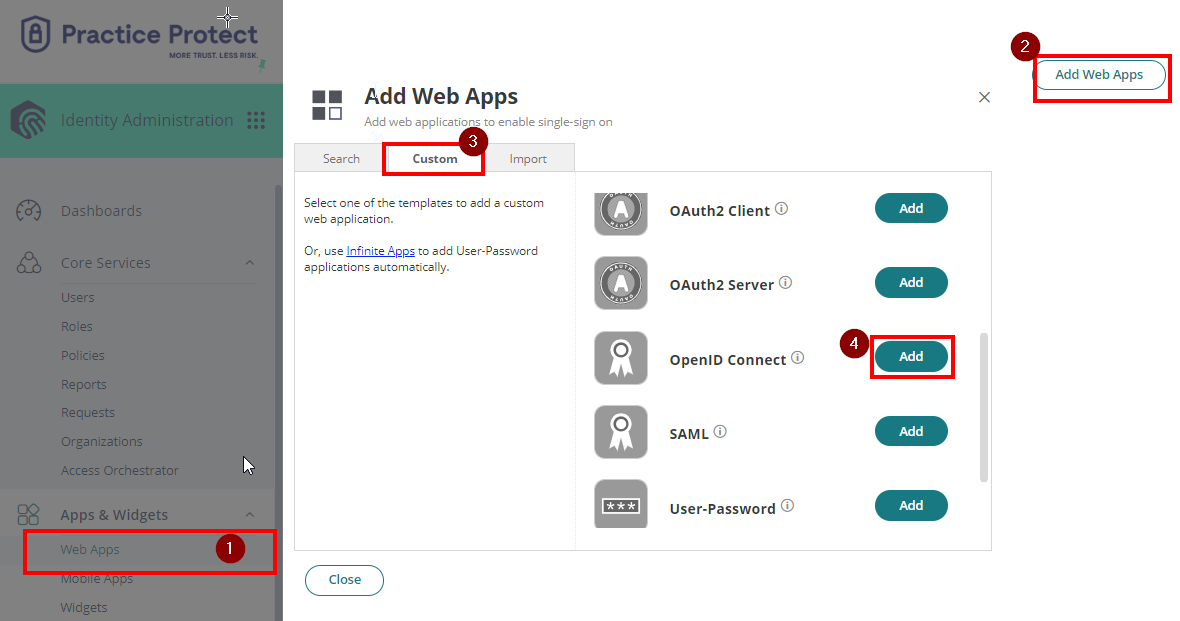
- From the Apps & Widgets, go to the Web Apps section. Then, choose Custom and select OpenID Connect. Click Add
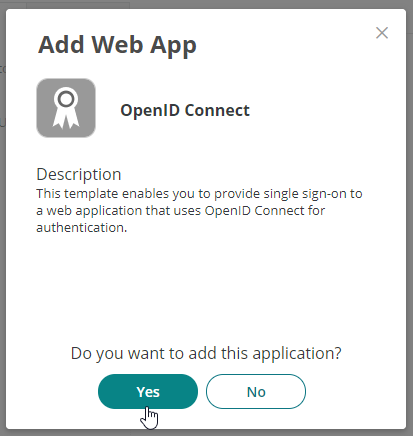
- Click Yes to add.
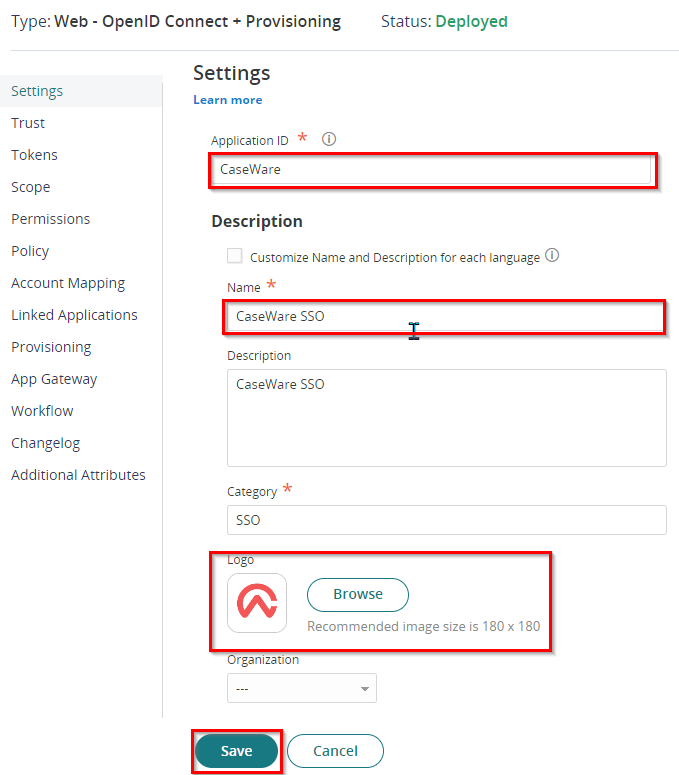
- The application that you just added opens to the Settings page. Set the following details:
- Application ID: CaseWare
- Name: CaseWare SSO
- You can use the logo below as the icon for the app. Right-click and save the image as.

- Hit Save.
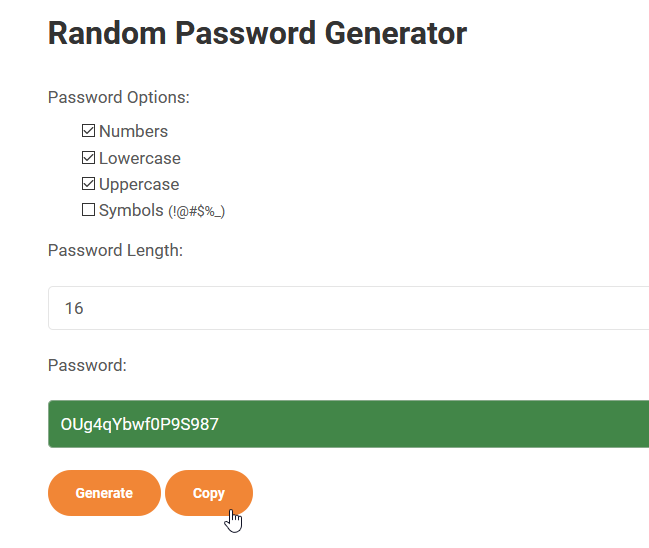
- Generate Client Secret using the Password Generator. Set it to 16 characters, combining Uppercase, Lowercase, and Numbers. Don’t include symbols in the generated password
- Copy it.
- Return to the CaseWare SSO app in Practice Protect. Go to Trust and paste the password in the Client Secret Field.
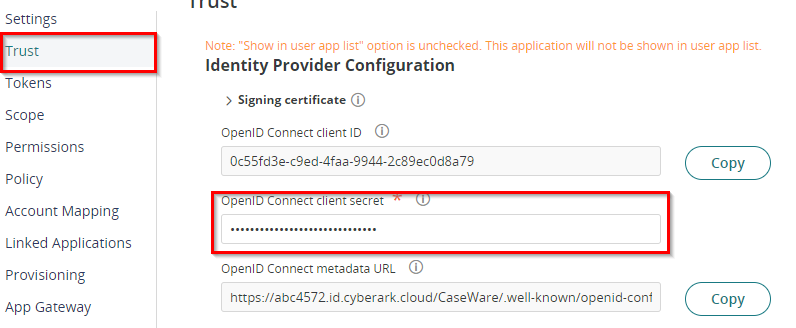
- Hit Save.
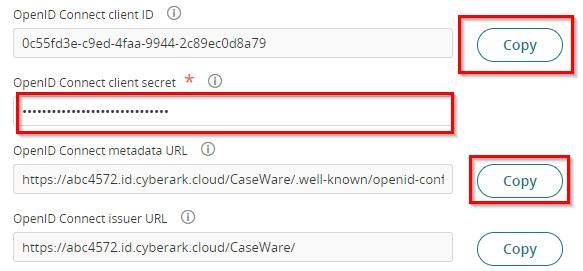
- Copy the Client ID and Metadata URL.
- Login to the CaseWare Cloud Portal with the admin account. (Confirm MFA and Password Expiry is Disabled Before Continuing)
- From the Cloud menu, go to Settings > Single Sign-On > Identity Provider. If this option is not available. please reach out to CaseWare SSO Support (support.au@caseware.com)
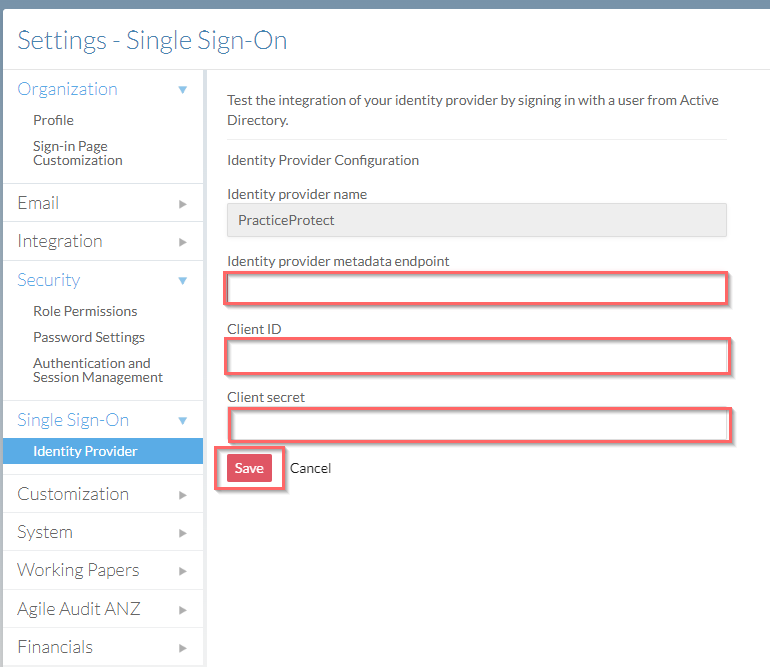
- On the Identity Provider page, complete the following fields:
- Identity Provider Name: Practice Protect
- Identity Provider metadata endpoint: Paste the Metadata URL copied from Step 13
- Client ID: Paste the Client ID copied from Step 13
- Client Secret: Paste the Client Secret generated from Step 9
- Click Save.
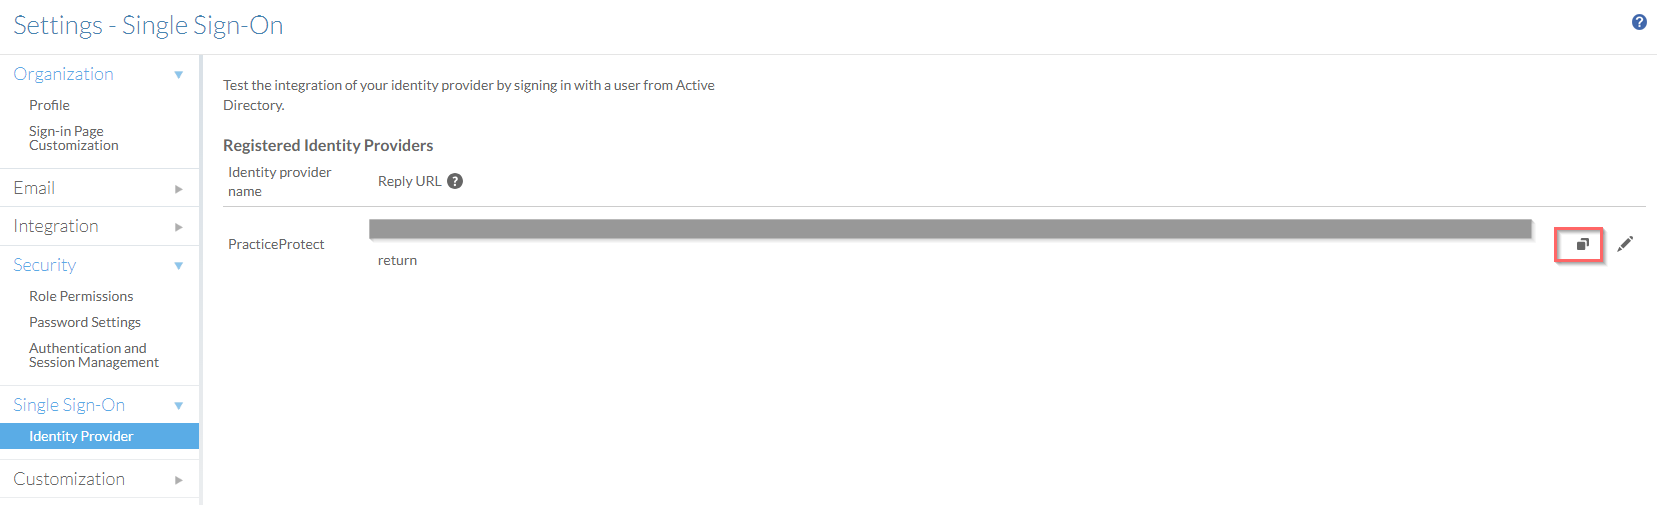
- Copy the Reply URL Keep this as we will use it in the next steps.
- Return to Practice Protec CaseWare SSO app. Go to Trust. Under Service Provider Configuration, set the Relying Party application URL field with the below
- https://au.casewarecloud.com/firmname – change firm name to company domain
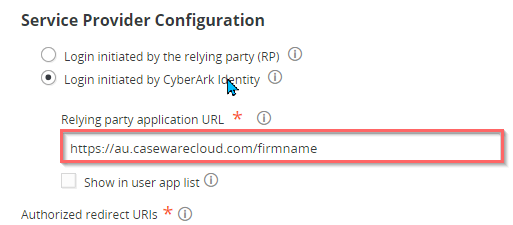 NOTE: If you’re unsure of the URL, get the URL by signing in to my.caseware.com > Cloud Licenses > Website URL
- https://au.casewarecloud.com/firmname – change firm name to company domain
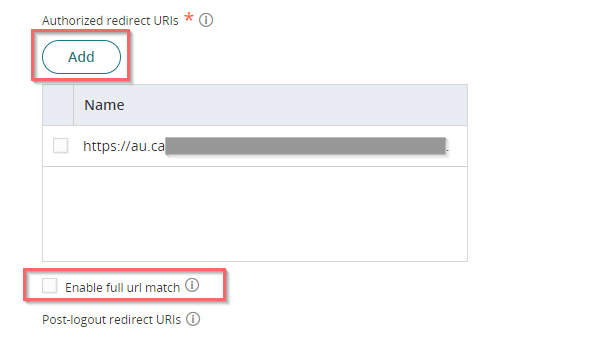
- Under Authorized redirect URIs, Click Add and paste the Reply URL copied from Step 18
- Make sure that Enable full URL match is not ticked.
- Click Save.
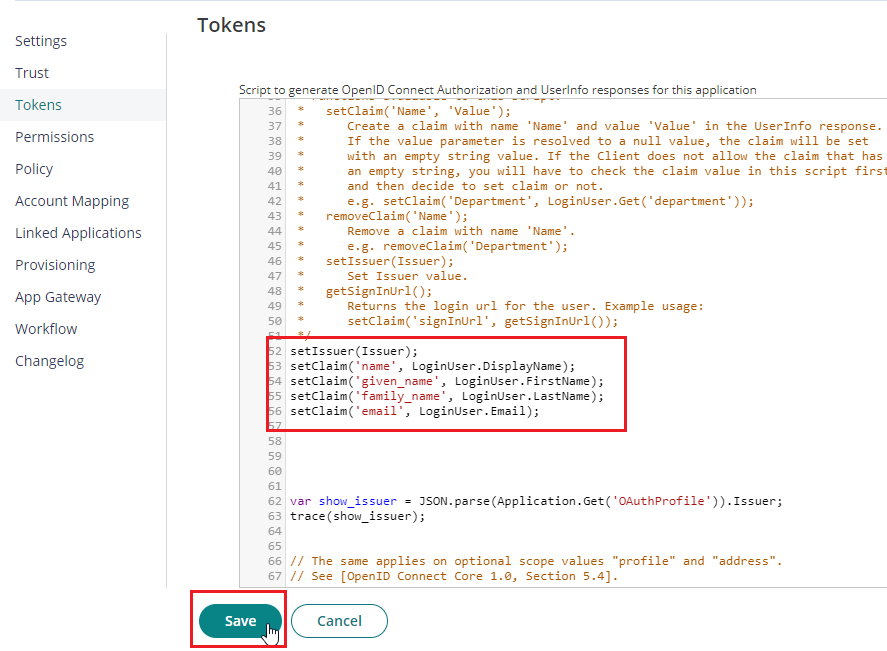
- Proceed to Tokens. Scroll down and replace the default script with the below custom claims. Click Save.
- Go to Permissions. Add the role we created in an earlier step to the permissions page (e.g. CaseWare SSO Users) and click Save.
- Test SSO by going to the Caseware Login Page. Click Go to Single Sign-On, the first time will link your account. Once linked you can only sign in with SSO.

- The SSO Integration is now completed. Note: If you require to disable SSO, you must log a support request through CaseWare Support.