Purpose
DocuSign offers single sign-on via SAML integration with Practice Protect. This provides a seamless login experience to the DocuSign platform using IdP-initiated SSO.
Practice Protect will configure this on your behalf. Please send us an email at [email protected]
Prerequisites
- Must have DocuSign Enterprise license.
- Access to the DNS management of the email domain to verify the domain ownership.
- Active DocuSign account with administrator rights to access DocuSign Organization and add domain. Note: This can be your account so you don’t have to pay and create another license account)
- Admin Access to Practice Protect
Instructions
- Login to your Practice Protect and switch to the Admin portal (ex. mydomain.practiceprotect.app)
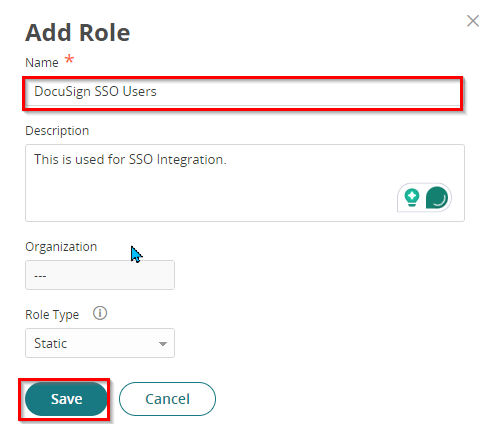
- On Core Services, Click on Roles > Add Roles. Create a role and set the name field to DocuSign SSO Users. Then Save.
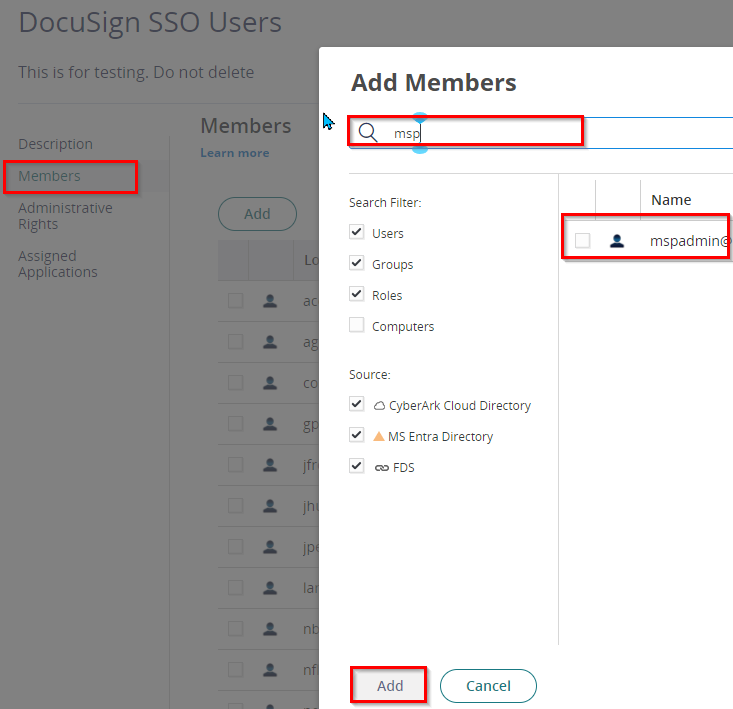
- With the created role, click on Members > Add. Add each user that will have access to the app. Then Save.
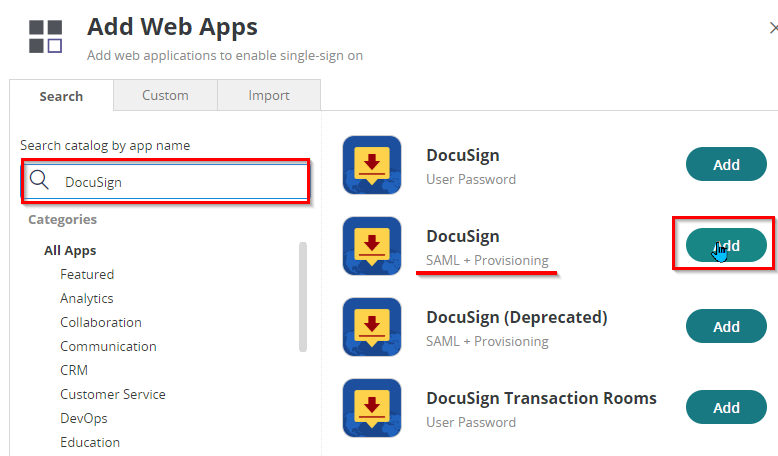
- From the Apps & Widgets, go to the Web Apps section. Then, choose Add Web Apps in the top right corner.

- Search for DocuSign then click Add on DocuSign (SAML + Provisioning)
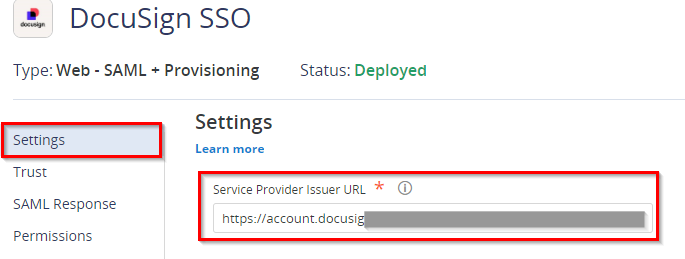
- On Settings, temporarily set the Service Provider Issuer URL to https://account.docusign.com/organizations. We will change it once we retrieve the right value from DocuSign.
- Set the Name as DocuSign SSO. You can also set the category and logo.

- Hit Save.
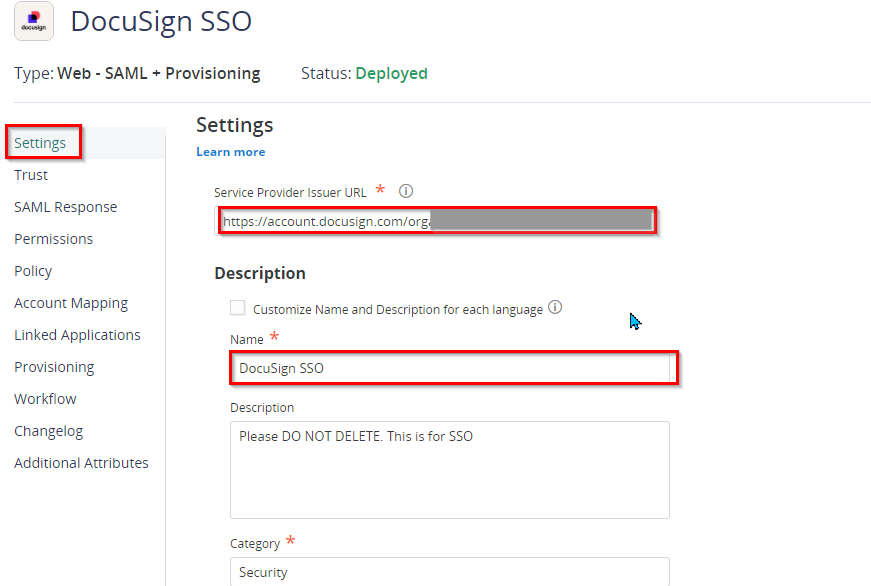
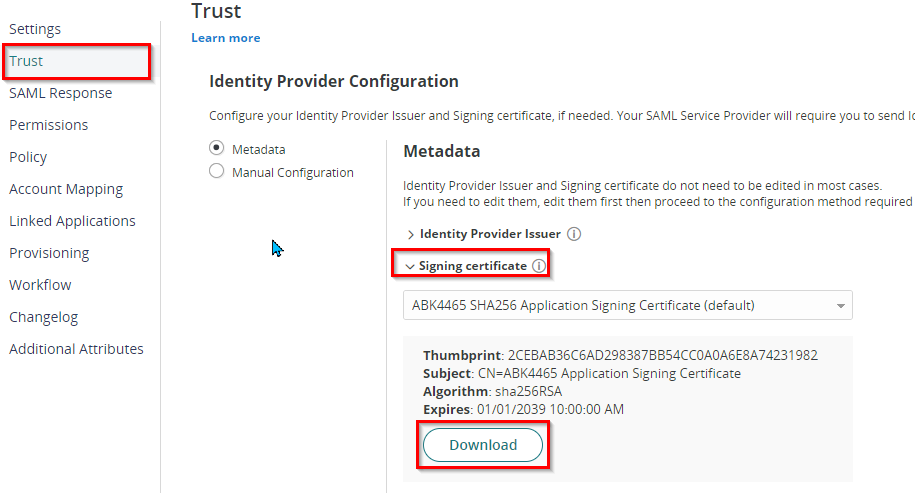
- Go to Trust > under Identity Provider Configuration and select Metadata. Click on the dropdown for Signing Certificate and download. Keep the file as this is needed in DocuSign Admin
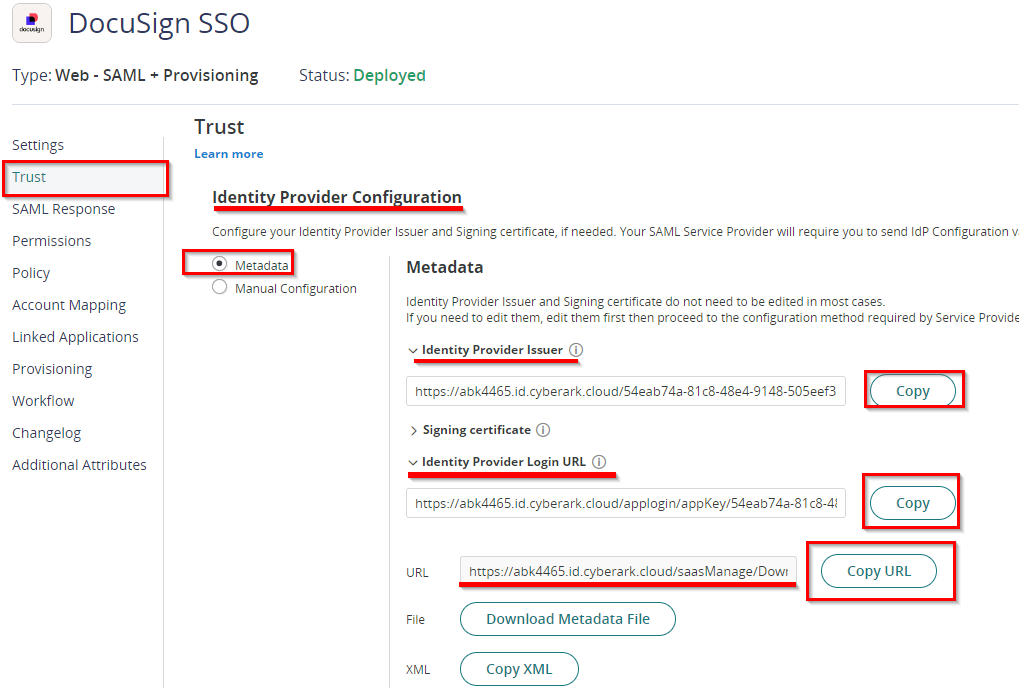
- On the same page, copy the Identity Provider Issuer, Login URL, and Metadata URL. Keep the URLs on your Notepad as this will be needed for the next steps.
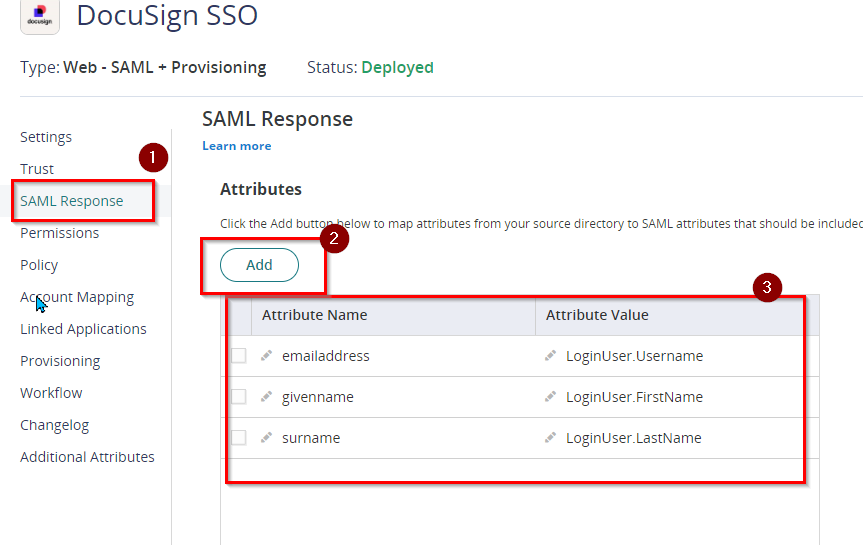
- Proceed to SAML Response. Add the following Attribute Names and Attribute Values
- emailaddress – LoginUser.Username
- givenname – LoginUser.FirstName
- surname – LoginUser.LastName
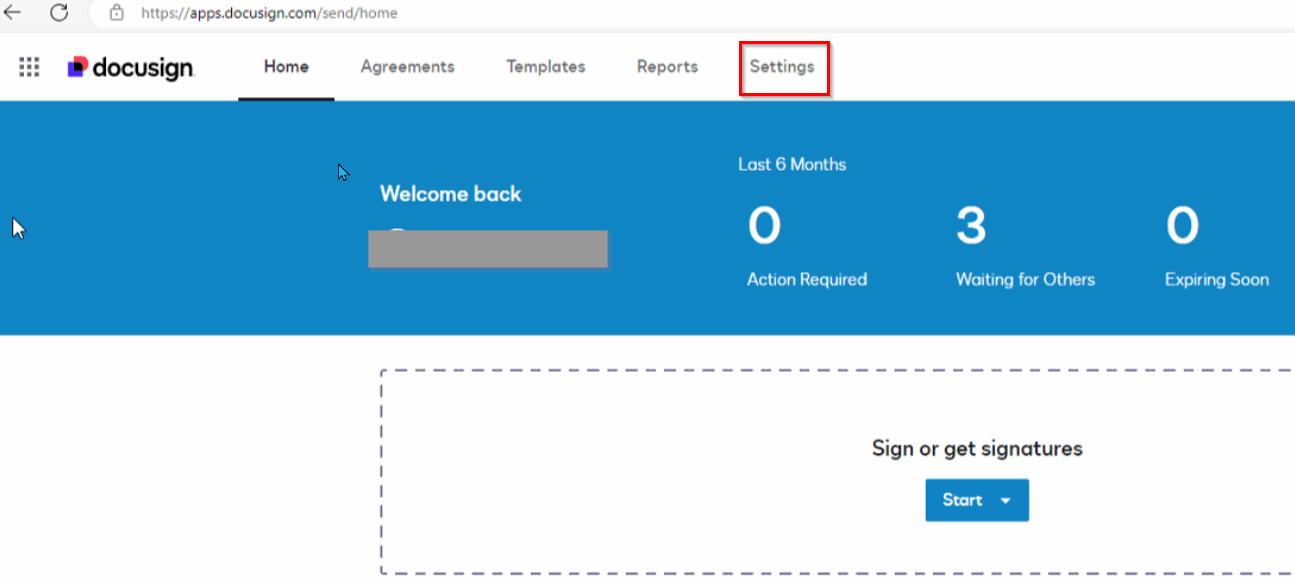
- Log in to DocuSign as an Admin. Go to Settings.
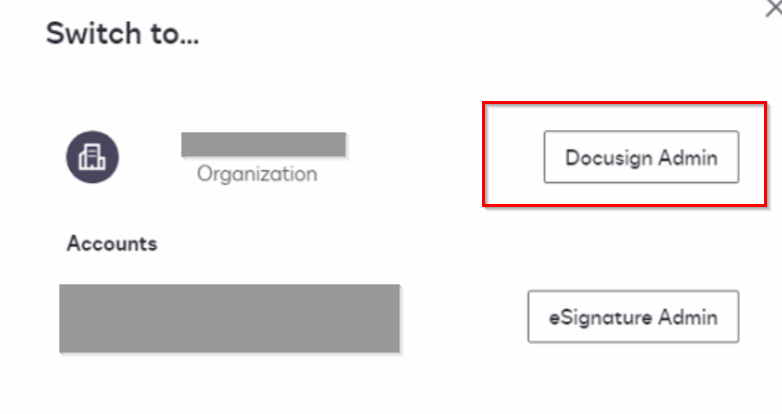
- Switch to DocuSign Admin
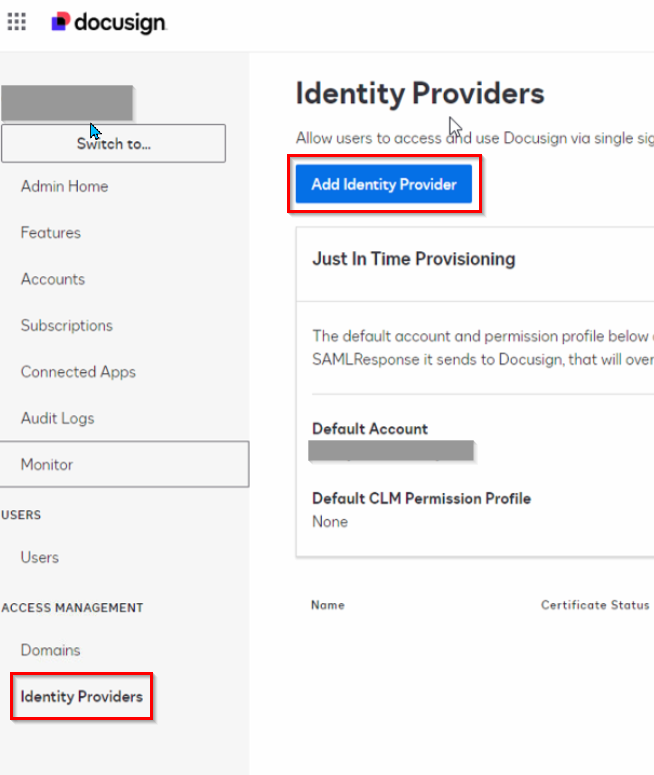
- Click Identity Providers under ACCESS MANAGEMENT. Click Add Identity Provider
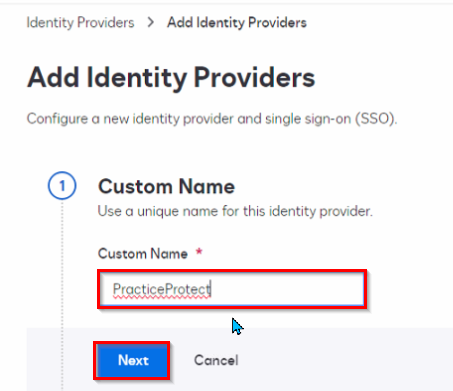
- Enter PracticeProtect as the Custom Name and click Next.
- Configure Identity Provider with the following settings:
- Identity Provider Issuer: Paste the Issuer URL copied from Step 10
- Identity Provider Login URL: Paste the Login URL copied from Step 10
- Identity Provider Metadata URL: Paste the Metadata URL copied from Step 10
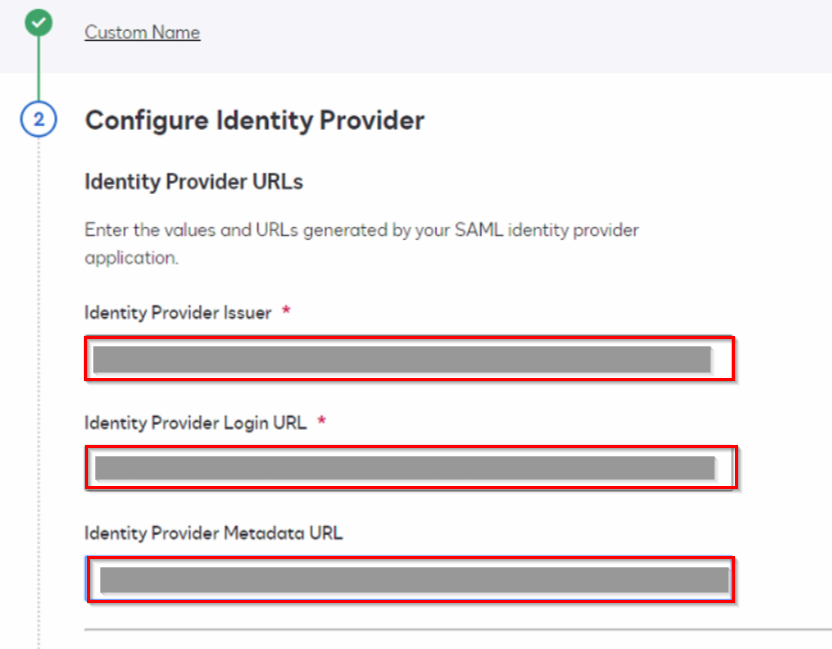
- Add and set the Attribute and Custom Attribute Name with the following:
- emailaddress – emailaddress
- givenname – givenname
- surname – surname
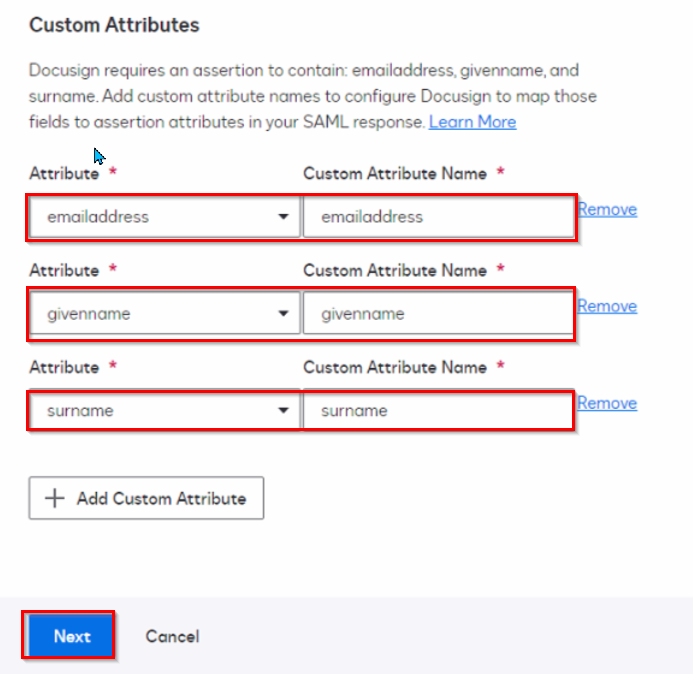
- Click Next.
- On the Edit Single Sign-On (SSO) Settings, leave the rest of the setting as is and hit Save.
- Once the Identity Provider (PracticeProtect) is added, go to the Certification tab and click Add Certificate.
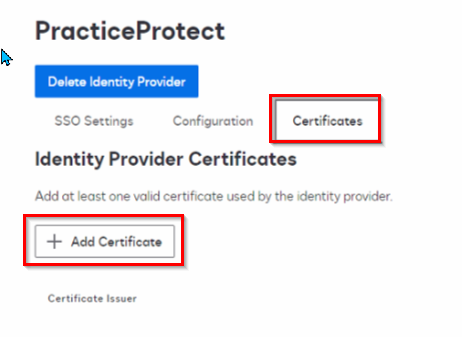
- Upload the certificate downloaded from Step 9 and hit Save.
- Return to the Configuration tab and copy the Service Provider Issuer and Service Provider Metadata URLs.
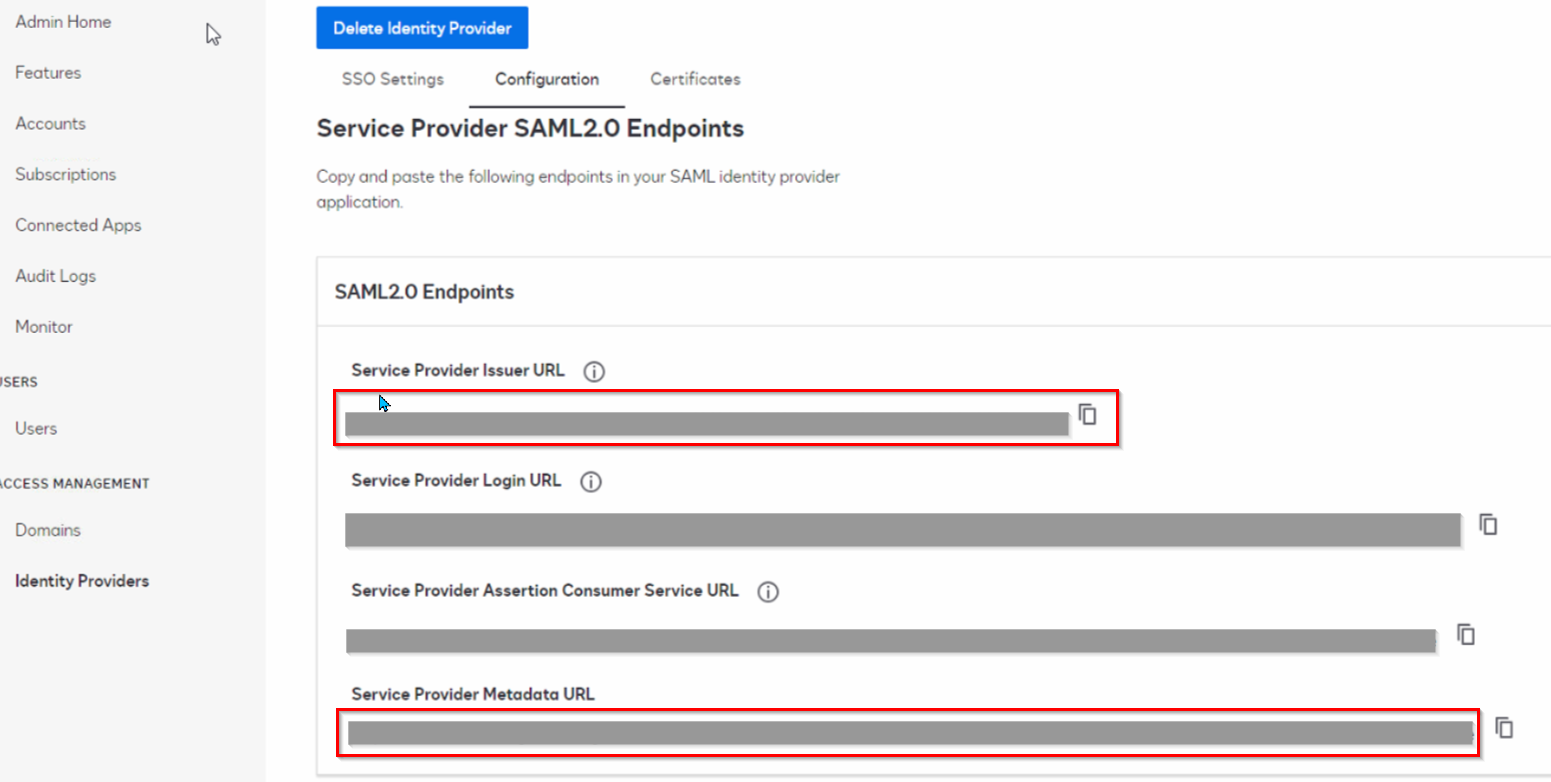
- Return to Practice Protect > DocuSign SSO App. On the Settings, paste the Service Provider Issuer URL copied from Step 22.
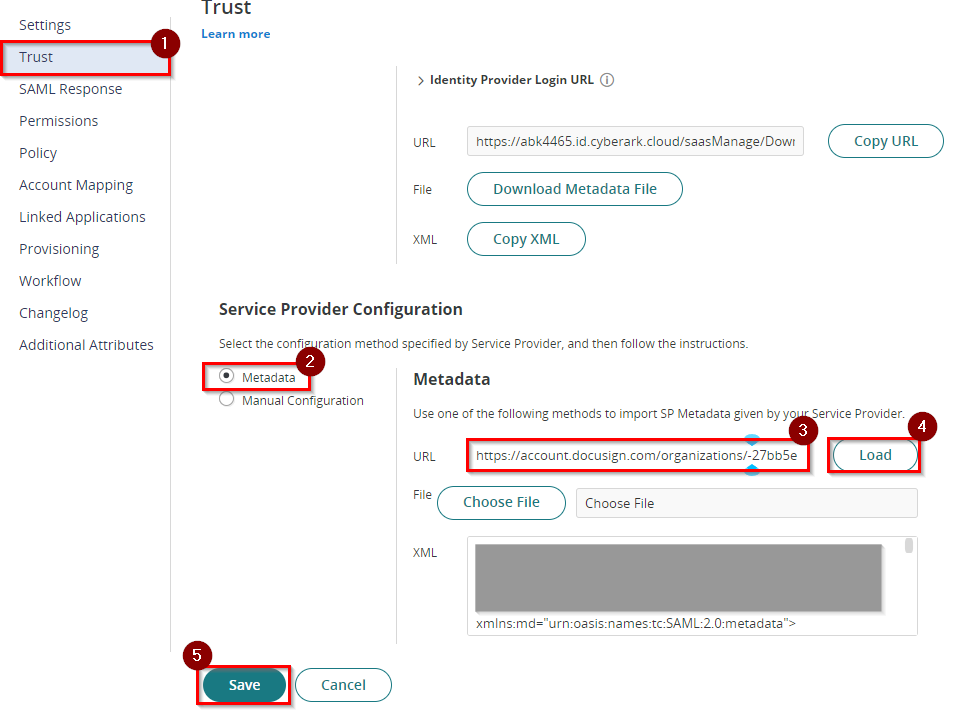
- Go to Trust and scroll down to Service Provider Configuration. Select Metadata and paste the Metadata URL copied from Step 22.
- Click Load and hit Save.
Add and Verify Domain
This step is required to enable SSO on your domain
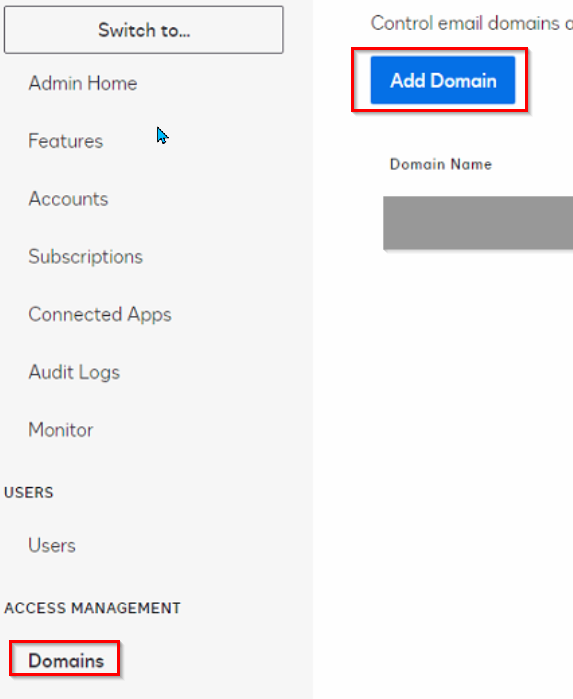
- In DocuSign Admin, click on Domains
- Choose Add Domain
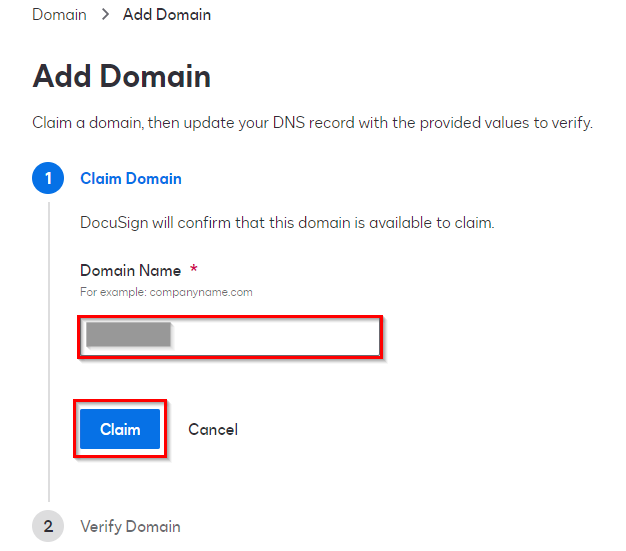
- Enter the domain name. (ex. emaildomain.com)
Note: An error message displays if another organization has claimed this domain.
- Click Claim. This opens up the domain verification page which will display DNS records that DocuSign recommends to be added.
- Once the records are added return to the DocuSign Domain page and click Verify Domain.
Enable Docusign SSO
- On the DocuSign Admin, go to Domains under ACCESS MANAGEMENT. On the selected Active domain (domain.com) select the Actions dropdown and choose Manage Settings.

- Scroll down to the Single Sign-on (SSO) login section, choose Specify an identity provider for SSO login
- Pick PracticeProtect on the dropdown option
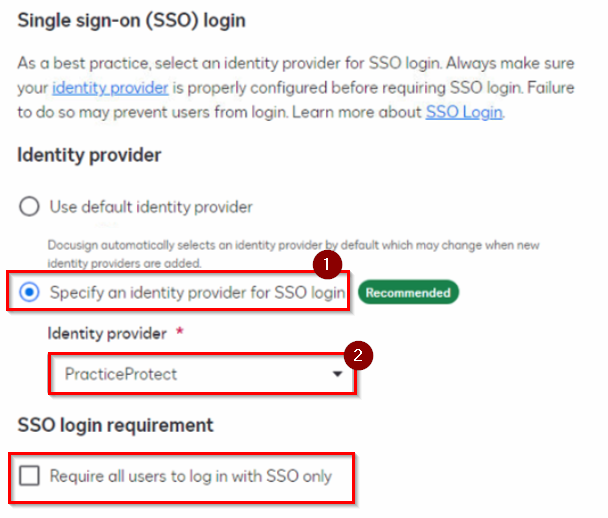
- For the SSO Login requirement, tick the box for Require all users to login with SSO only if you wish to force users to sign in only via Practice Protect
- Click Save.
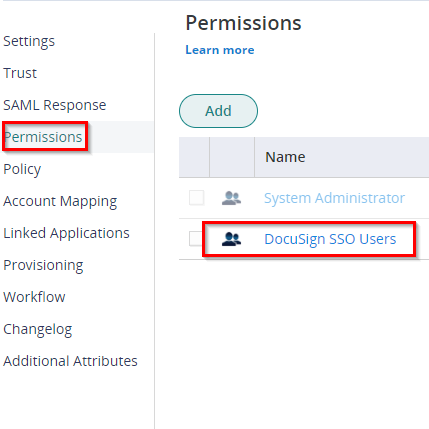
- Return to the DocuSign SSO app in Practice Protect and go to Permissions. Add the role we created in an earlier step to the permissions page (e.g. DocuSign SSO Users) and click Save.
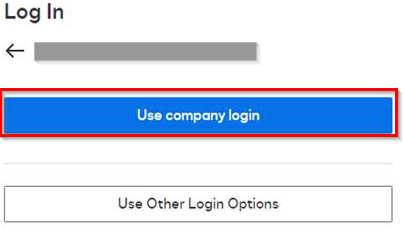
- SSO Integration is now completed. Note: You can use the tile on your Practice Protect User Portal to automatically sign in to the app. On the other hand, if you sign in directly to the DocuSign page, once you enter your DocuSign Username, it will recognize your active account and automatically reroute you to Practice Protect after choosing Use Company Login
