
Purpose
FuseWorks offers single sign-on via an OpenId integration with Practice Protect. This provides a seamless login experience to FuseDocs, FuseSign & FuseWorks, including the desktop app.
Practice Protect will configure this on your behalf with FuseWorks. Please send us an email at support@practiceprotect.com
Prerequisites
- Administrator Access in Practice Protect
- FuseSign must be on Business Lite, Business or Enterprise Plan
- Active Fuse Works account with administrator rights for your organization (Note: this can be your account so you don’t have to pay and create for another license account)
- Username/Email for staff should match the login names in Practice Protect.
Instructions
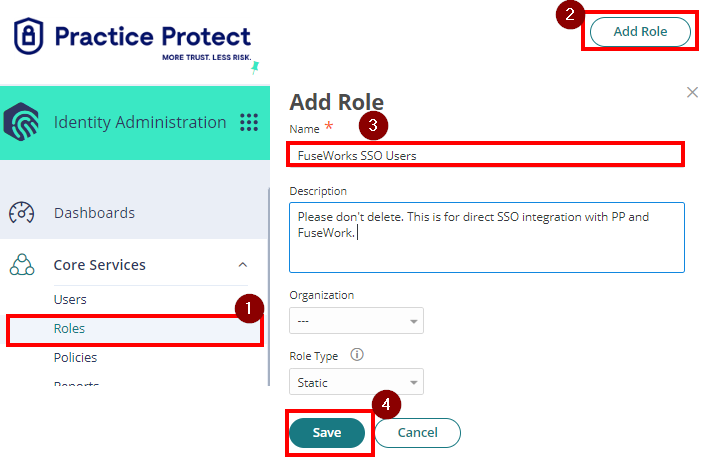
- Login to Practice Protect and switch to Admin portal.
- On Core Services, Click on Roles > Add Roles. Create a role and set the name field to “FuseWorks SSO Users“. Then Save.
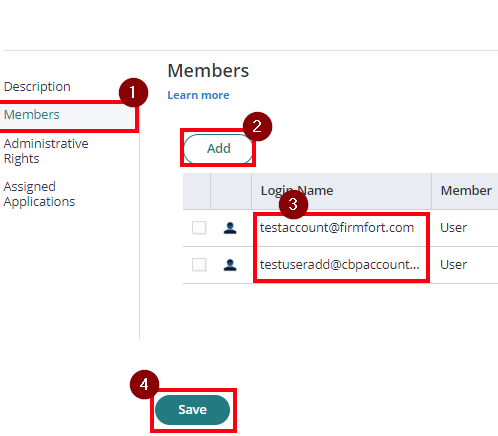
- With the created role, click on Members > Add. Add each member/user that will be part of the SSO. Then Save.
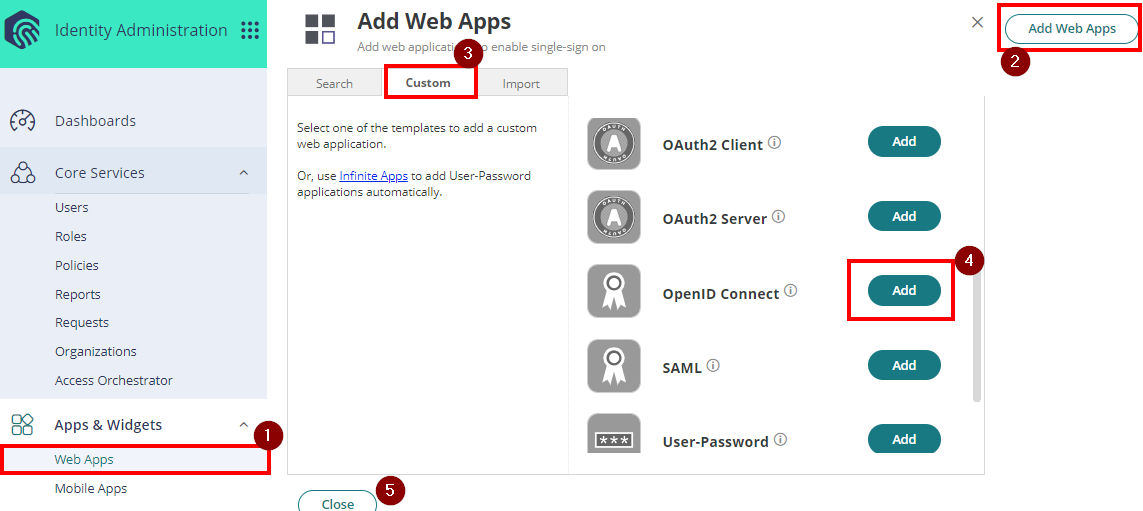
- From the Apps & Widgets, go to Web Apps section. Then, choose Custom and select OpenID Connect. Click Add
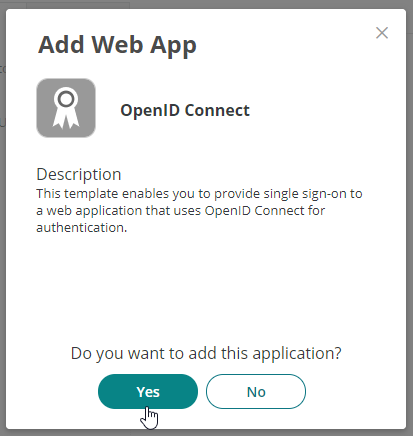
- Click Yes to add.
- The application that you just added opens to the Settings page. Set the following details:Application ID: FuseWorks
Name: FuseWorks
Description: FuseWorks SSO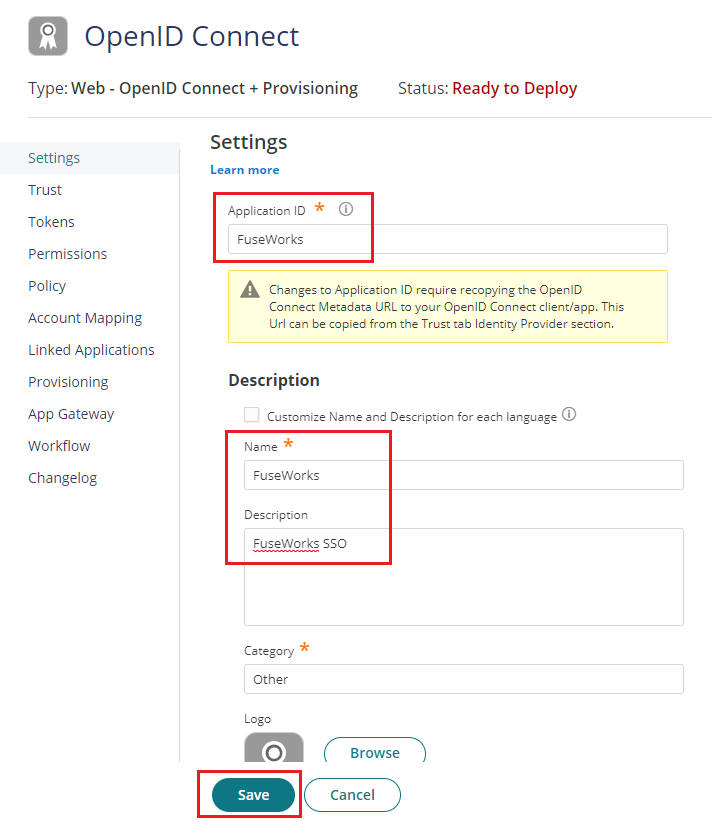
Note: You can change the name, category or logo based on your preference. - You can use logo below as the icon for the app. Just right click and save image as.

- Click Save to apply.
- Use the password generator tool here and generate a password for the Client Secret. Important! Select only Numbers, Lowercase and Uppercase, and set the Length to 16. Then, click Generate.
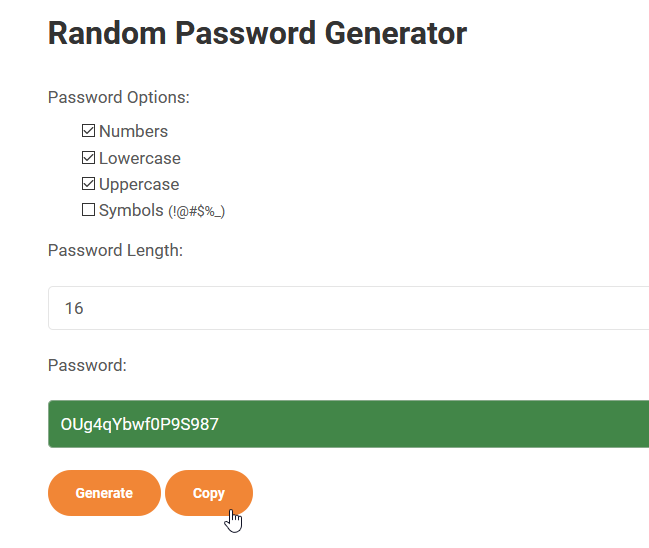
- Copy the Password
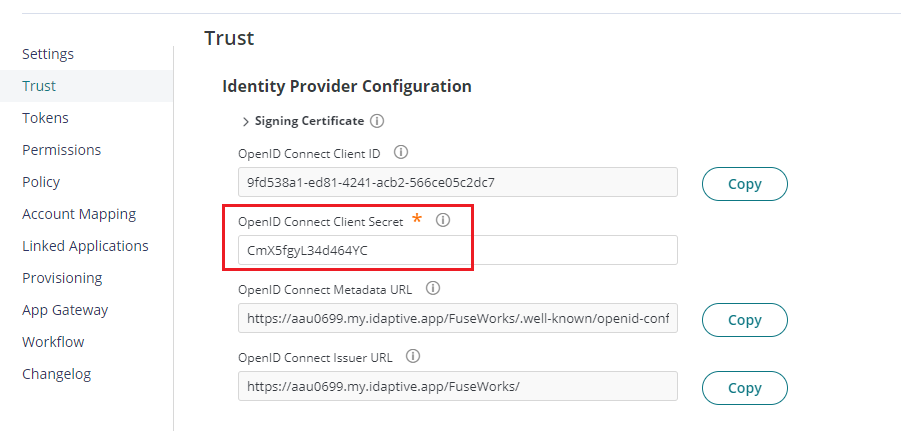
- On FuseWork app settings, go to Trust. Paste the password on the Open ID Connect Client Secret field.
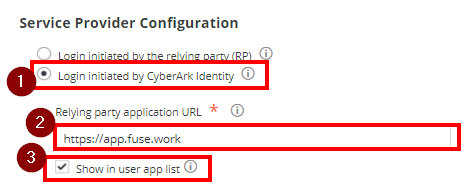
- Go down to Service Provider Configuration and choose Login initiated by CyberArk Identity
- On the Relying party application URL field paste this https://app.fuse.work
- Tick Show in user app list. If you have an existing Fusework tile, you can remove it.
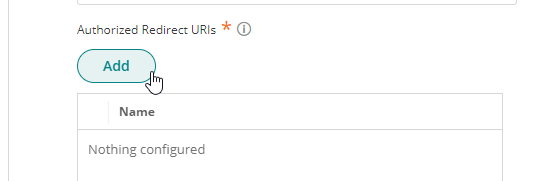
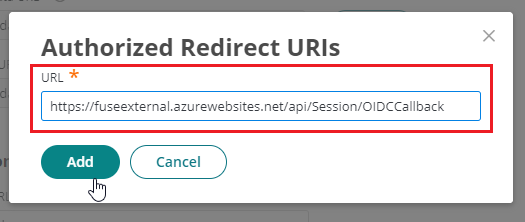
- Under Authorized Redirect URIs click Add.
- Add each of the following URLs. Note: don’t include double quotation symbols.”https://fuseexternal.azurewebsites.net/api/Session/OIDCCallback”
“https://fusewebapi.azurewebsites.net/api/Session/OIDCCallback”
“https://api.fuse.work/internal/api/Session/OIDCCallback”
- Confirm all three URLs are showing.
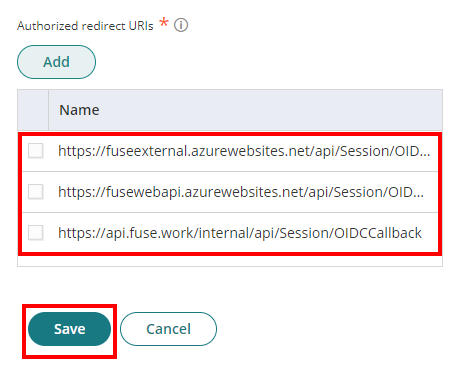
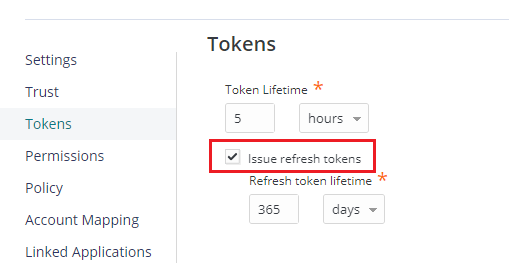
Then, click Save. - Go to Tokens. Check the box for “issue refresh tokens”.
- Scroll down and go to Script to set custom claims. Remove all existing scripts, then copy and paste the following script.
setIssuer(Issuer);

setClaim('name', LoginUser.DisplayName);

setClaim('preferred_username', LoginUser.Username);

// Claims "email" & "email_verified" will only be set

// if "email" is specified in scope.

var email = LoginUser.Username;

setClaim('email', email);

if (email && email != 'unset')

setClaim('email_verified', true);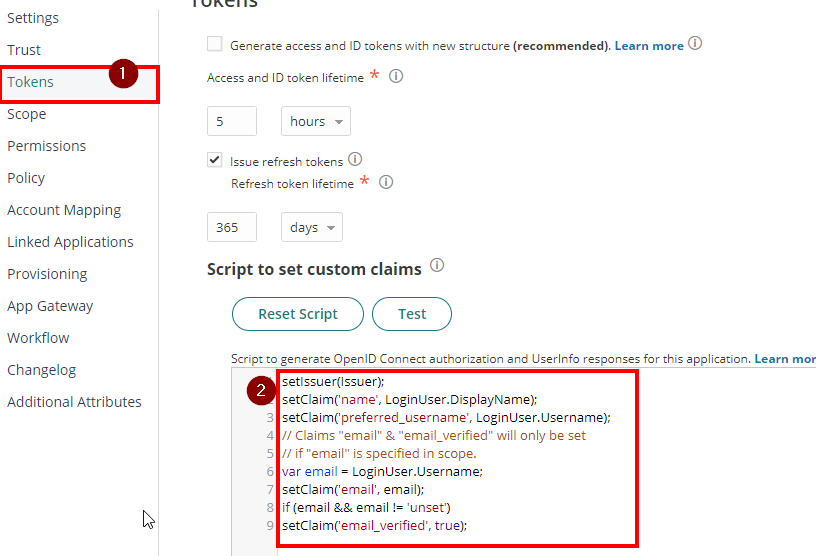
- Hit Save to apply.
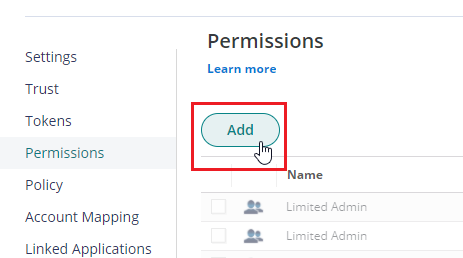
- Return to the Permission section of the app settings and click Add.
- Search for the role created in step 2 (e.g. FuseWorks SSO Users), select and Add.
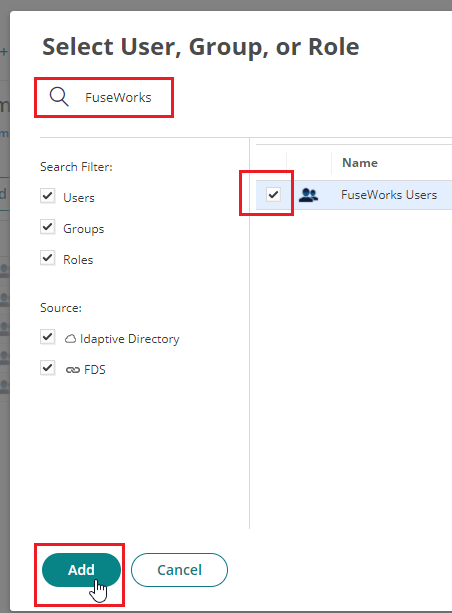
- Hit Save after.
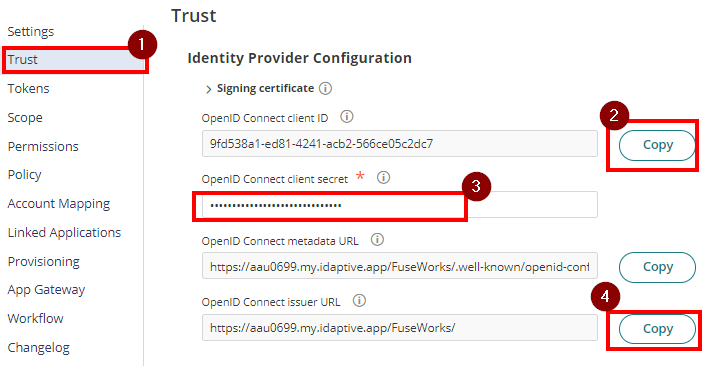
- Go back to Trust. Note down the Client ID, Client Secret and Issuer URL. This will be use on the next steps.
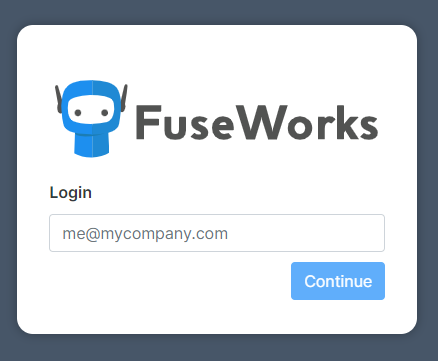
- Login to FuseWorks with the admin account.
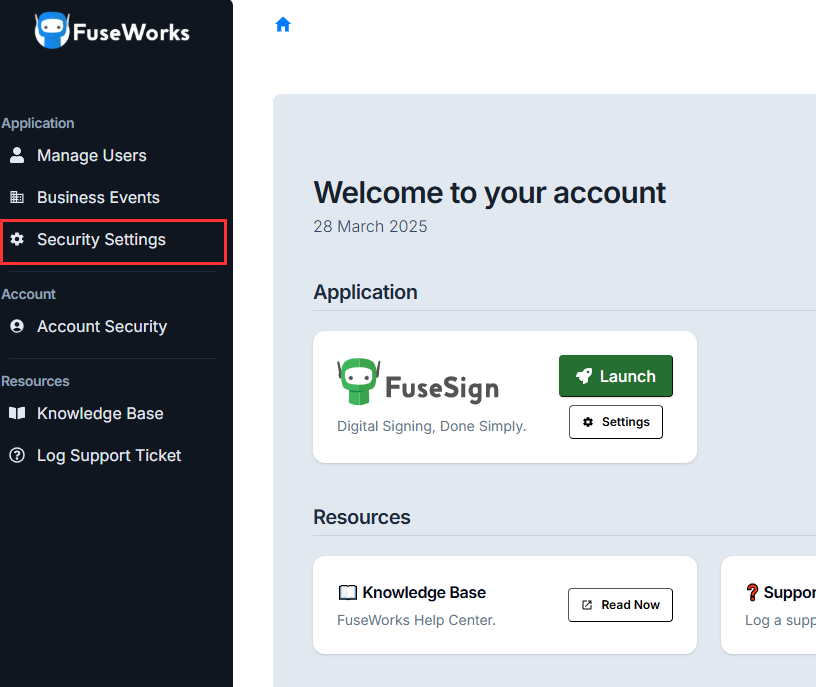
- On the left menu, click on Security Settings under Application.
NOTE: If you don’t have access to the above settings, we will reach out to FuseWorks Support (support@fuse.work) to configure this for us. Sample email below:To: support@fuse.work Subject: Practice Protect SSO Request Hi FuseWorks Support, We have configured FuseWorks for SSO in Practice Protect for [firmname]. Please see configuration details below: Client ID: (from step 24) Client Secret: (from step 24) Metadata URL: (from step 24) Issuer URL: (from step 24)
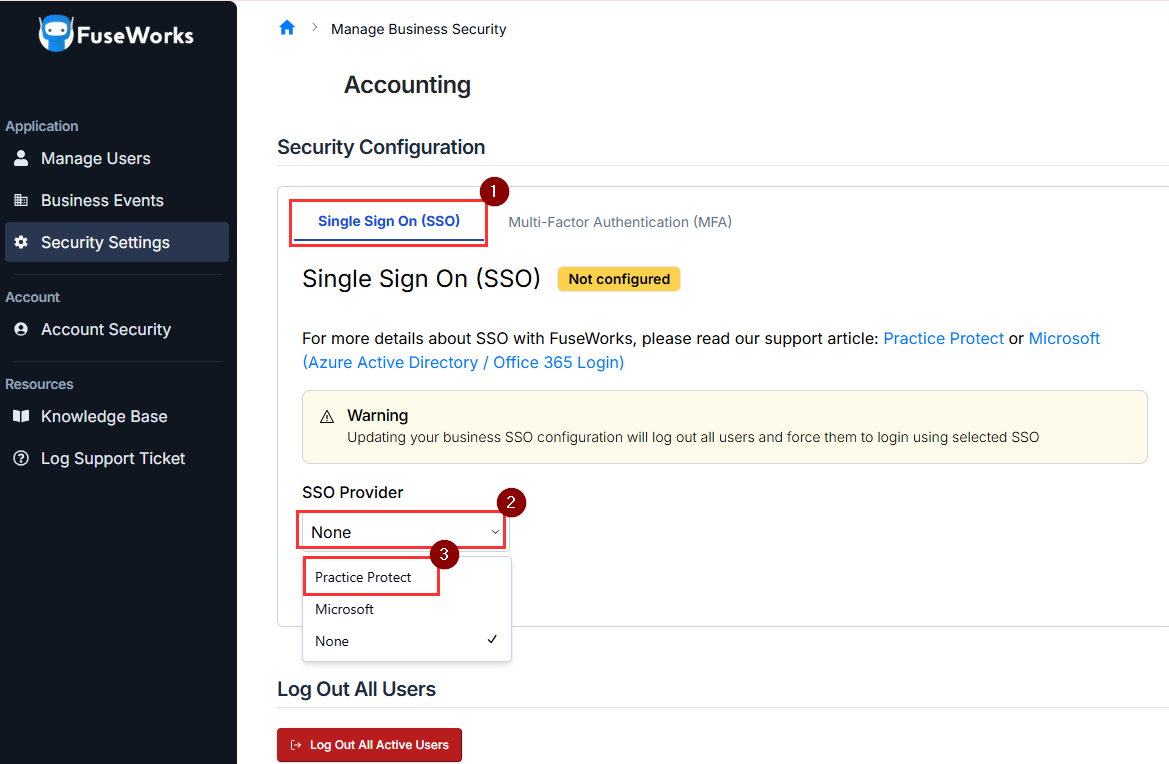
- In the Security Configuration, click Single Sign On (SSO). This open up an option for selecting the SSO provider.
- For the SSO Provider dropdown, choose Practice Protect. Afterwards, it will show the configuration setup for the SSO.
- Copy the details you noted down on Step 24 and paste it on each fields. Note Connection URL field is the Issuer URL. Ensure that you also remove the symbol “/” at the end of the URL
- For the UsernameKey, choose email.
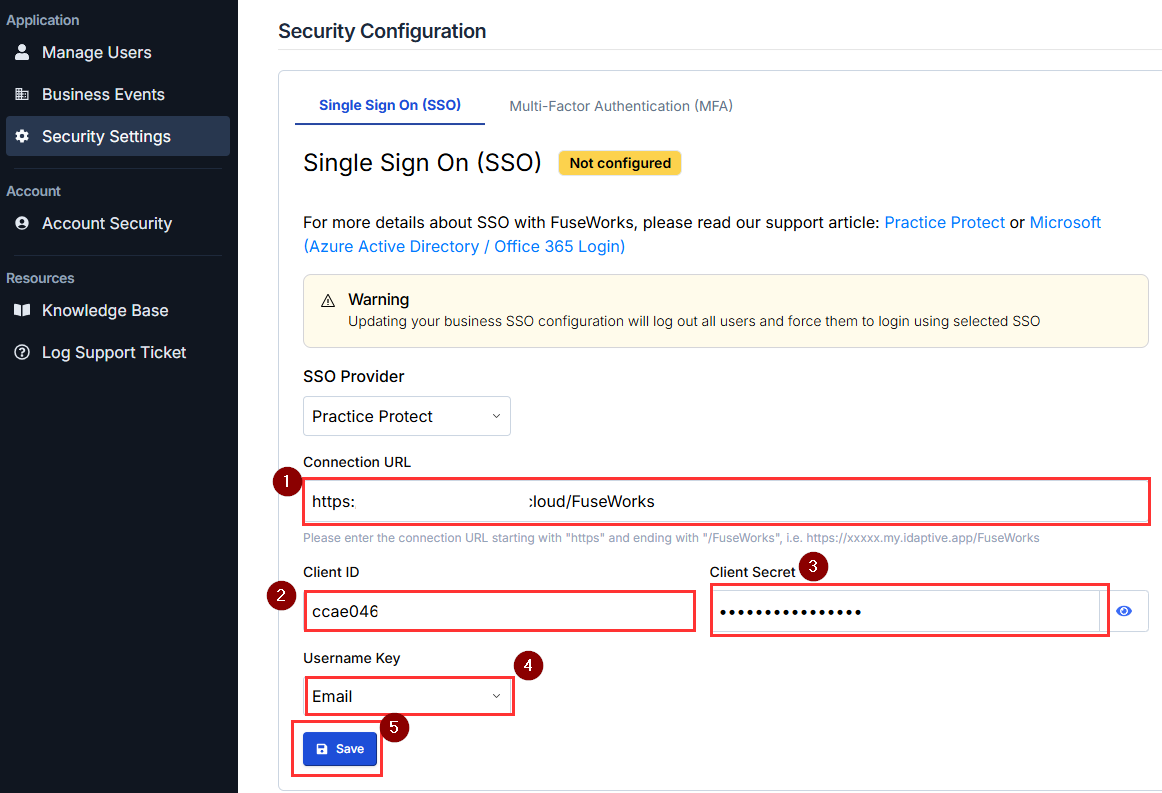
- Hit Save. Important! Once you hit Save, all users will be logout of FuseWorks and they will be force to login via SSO.
- This should now enable SSO for FuseWorks. Please login using Practice Protect credential.