Purpose
Notion offers single sign-on via SAML integration with Practice Protect. This provides a seamless login experience to the Notion platform using IdP-initiated SAML.
Important! Guests are not supported with SAML SSO on Notion. Also, Workspace owners will always have the option to bypass SAML SSO by using their email and password credentials. This is to allow them to access Notion in the event of IdP/SAML failure. They will be able to log in and disable or update their configuration.
Practice Protect will configure this on your behalf. Please send us an email at support@practiceprotect.com
Pre-requisites
- Your Notion workspace must be on a Business or Enterprise Plan
- Active Notion account with administrator rights for your organization (Note: this can be your account so you don’t have to pay and create for another license account)
-
At least one domain has been verified by a Workspace owner in Notion. Click here on how
- Admin Access to Practice Protect
- Username/Email for staff should match the login names in Practice Protect.
Instructions
- Login to your Practice Protect and switch to Admin portal (ex. mydomain.practiceprotect.app)
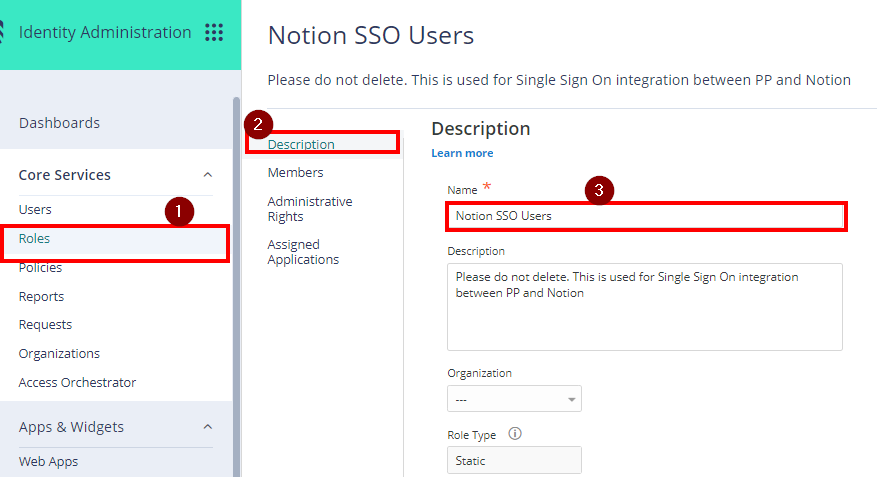
- On Core Services, Click on Roles > Add Roles. Create a role and set the name field to “Notion SSO Users“. Then Save.
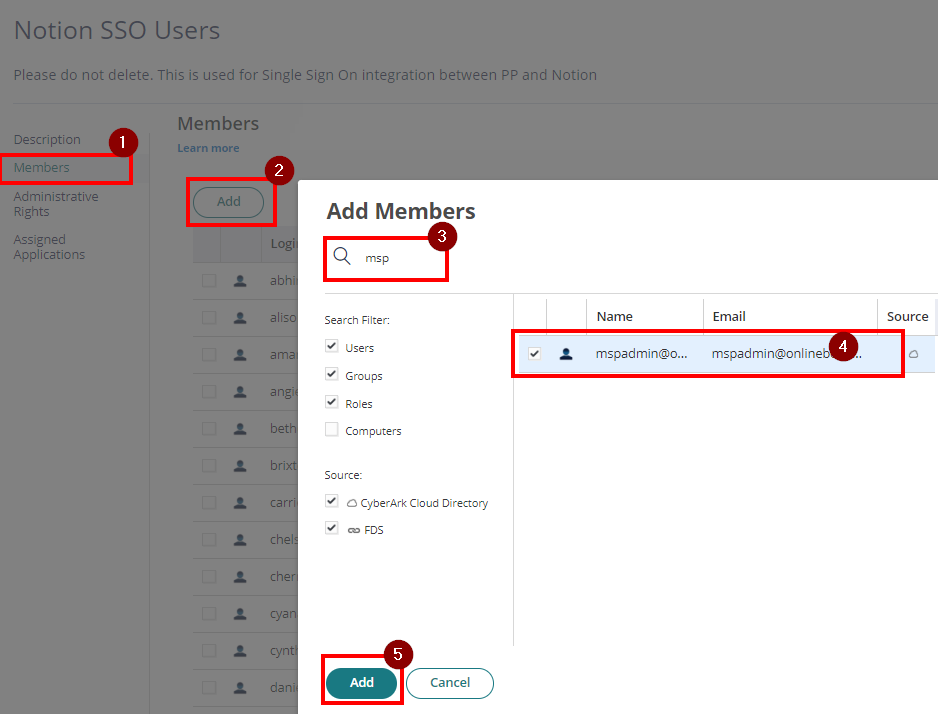
- With the created role, click on Members > Add. Add each member/user that will be part of the SSO. Then Save.
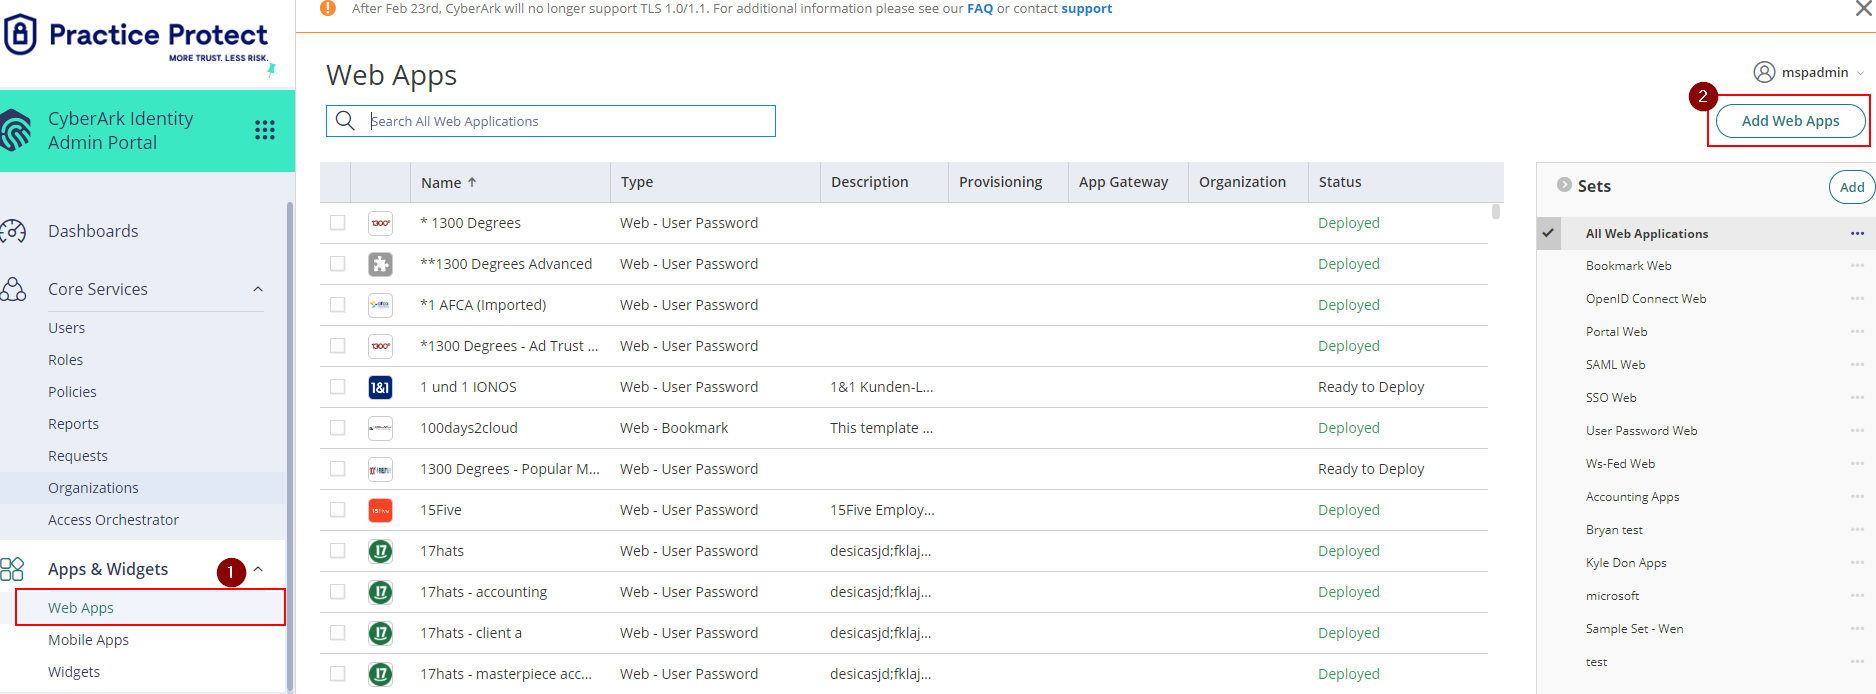
- From the Apps & Widgets, go to Web Apps section. Then, choose Add Web Apps on the top right corner.
- On the app catalog, search for “Notion” and Add the app Notion “SAML”. Hit “Yes” to add the application.

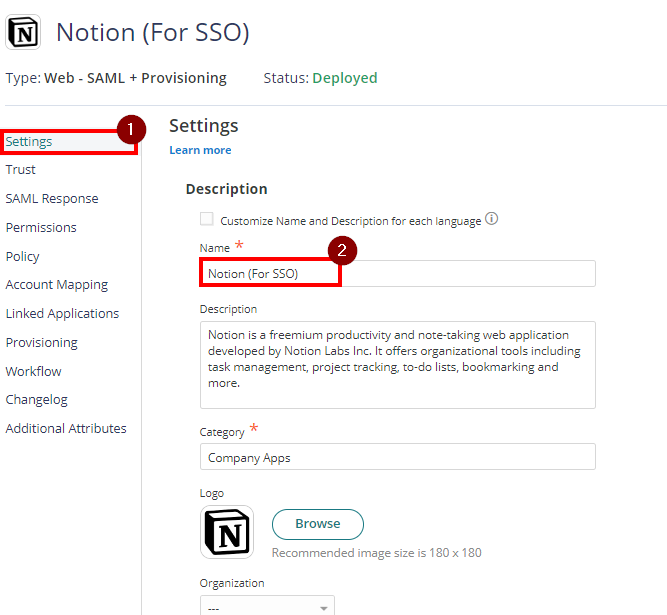
- The application that you just added opens to the Settings page. Set the Name to “Notion SSO” then click Save. Note: You can change the name, category or logo based on your preference.
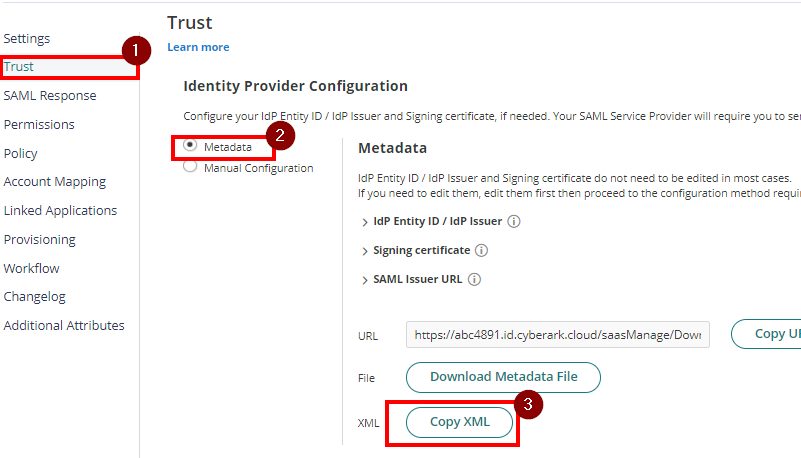
- Click on Trust > On Identity Provider Configuration and select Metadata. Down below click on Copy XML to copy the Metadata in XML format and temporarily put it in a Notepad app. You will need this details later.
- On the SAML Response, Attributes section, click Add. Then, add the below:
Attribute Name: email
Attribute Value: LoginUser.Username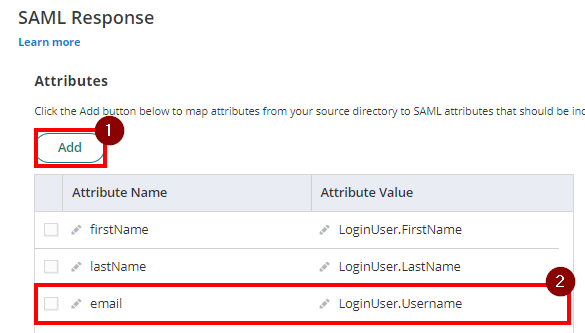
- Removed all the existing script from the Custom Logic as this will be automated.
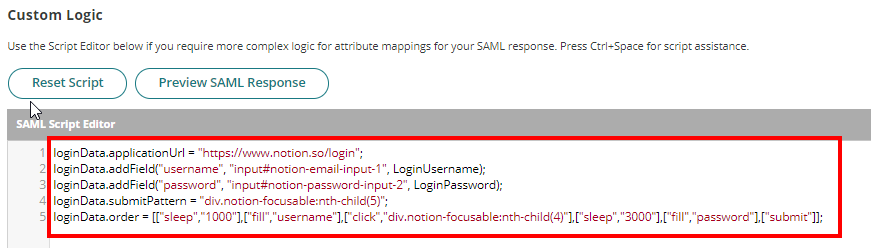
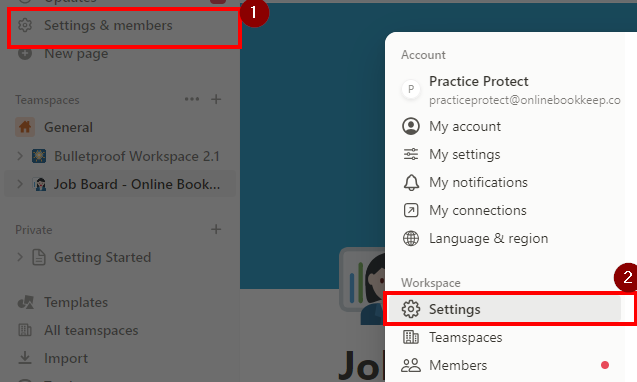
Click Save to apply changes. - Login to Notion as Admin. Go to Settings & Members, then select the Settings tab.
-
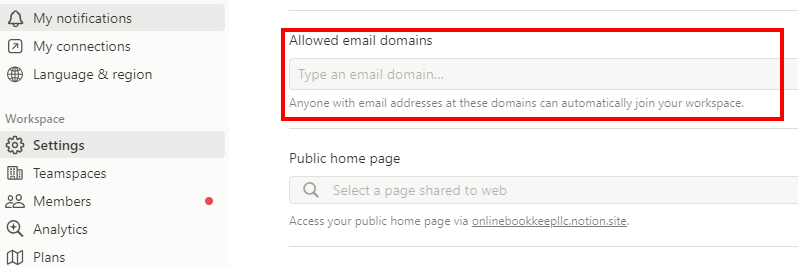
In the Allow Email Domain section, remove all email domains. Click Update if any changes were made.
-
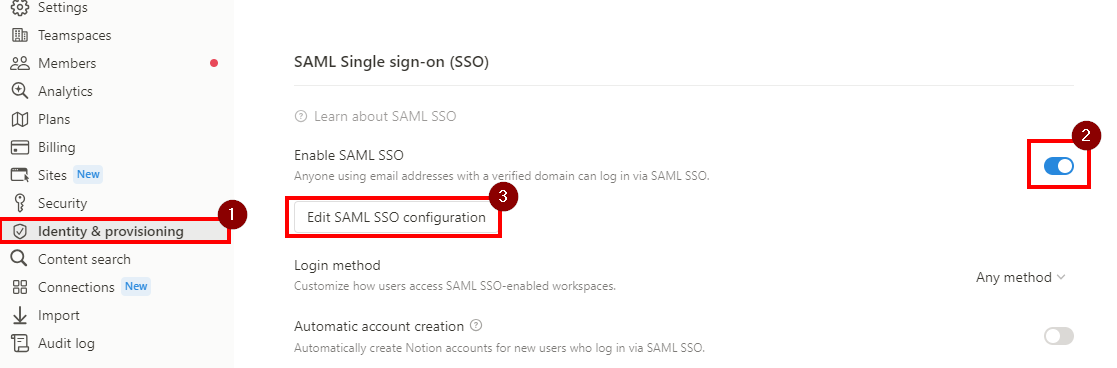
Then select the Identity & Provisioning tab.
-
Toggle on Enable SAML SSO and click Edit SAML SSO Configuration. The modal will pop up and prompt you to complete the set-up.
The SAML SSO Configuration is divided into two parts: The Assertion Consumer Service (ACS) URL is to be entered in your Identity Provider (IDP) portal. The Identity Provider Details is a field in which either an IDP URL or IDP metadata XML must be provided to Notion. - Copy the Assertion Consumer Service (ACS) URL and and temporarily put it in a Notepad as well.
- On the Identity Provider Details, Select Identity Provider Metadata XML and paste the XML data you copied from Step 7.
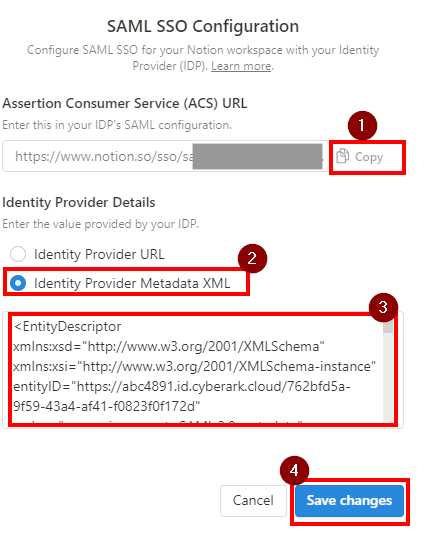
- Hit Save Changes.
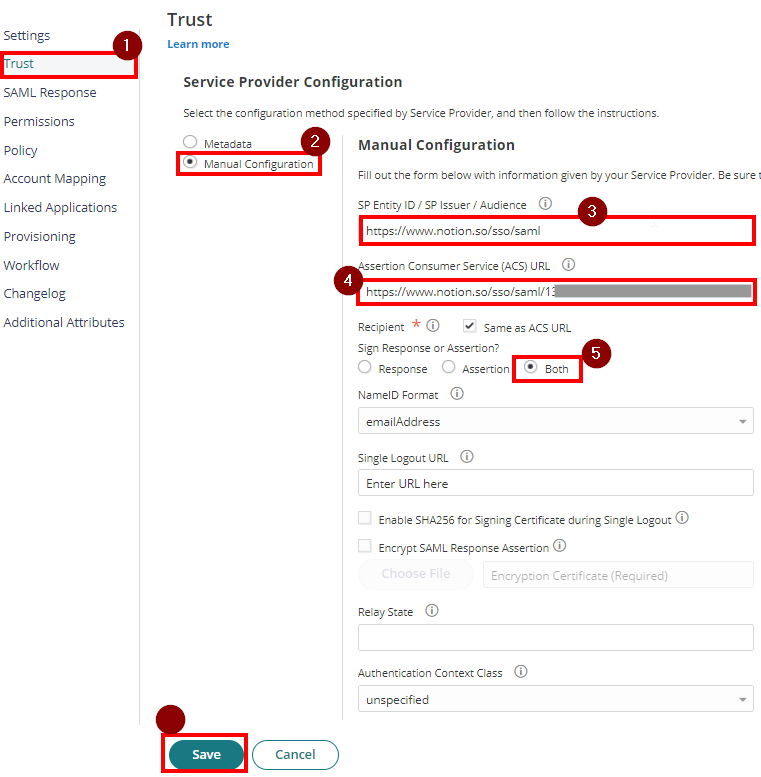
- Go back to Notion App Settings in the Practice Protect Admin Portal. Then, proceed Trust > Service Provider Configuration > Click Manual Configuration
- For the SP Entity ID / SP Issuer Audience, remove the existing URL and paste this URL instead:
https://www.notion.so/sso/saml - Paste the Assertion Consumer Service (ACS) URL that you copied from Step 13 to the Assertion Consumer Service (ACS) URL
- On Sign Response or Assertion, select Both.
- Hit Save.
Enable SCIM Provisioning
Note: Please turn off Just-in Time provisioning if you are using SCIM provisioning
- Return to Notion > Settings & Members > Identity & Provisioning
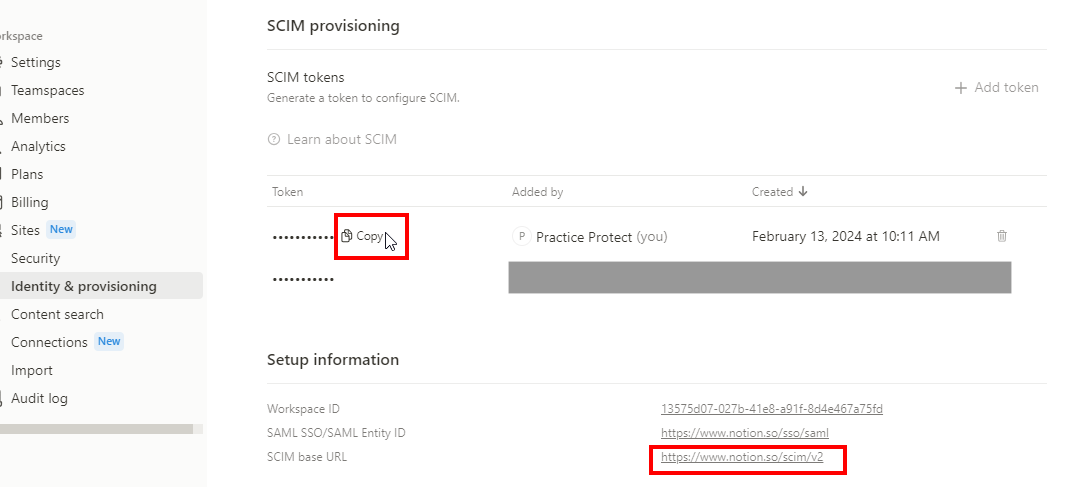
- On SCIM Provisioning, click Add Token. This will generate a token which we will need later

- Copy the token and the SCIM base URL under Setup informationSCIM base URL: https://www.notion.so/scim/v2
- Go back to the Web App Notion SSO in the Admin Portal. Then proceed to Provisioning
- Tick the box for Enable Provisioning for this application.
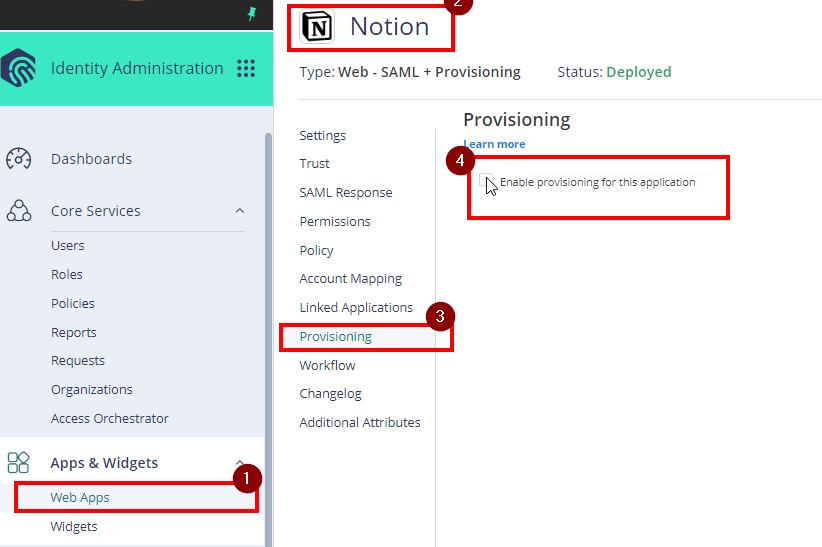
Hit Yes if prompted for confirmation
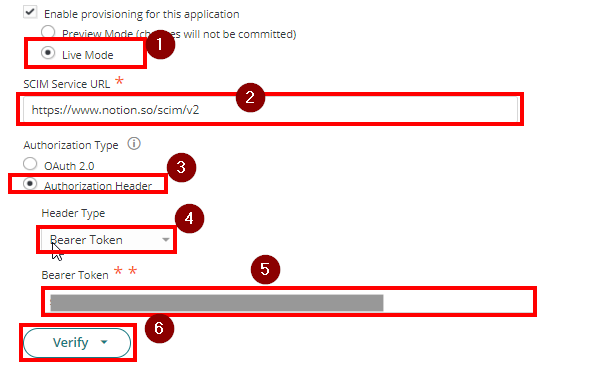
- Follow the below settings:
- Live Mode is selected
- SCIM Service URL – paste the scim base URL from Step 3
- Authorization Type – select Authorization Header
- Header Type: Bearer Token
- Bearer Token – paste the token generated from Step 3
- Hit Verify
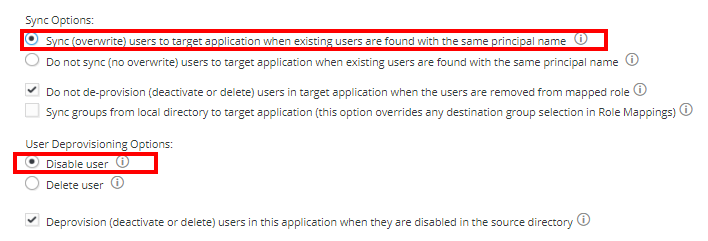
- Sync Options: Select Sync (overwrite) users to target application when existing users are found with the same principal name
- User Deprovisioning Options: Set Disable User
- Under Role Mapping, click Add.
- On Role dropdown, choose Notion SSO Users role.
- Click Add Destination Group and select Notion SSO Users too. Hit Done
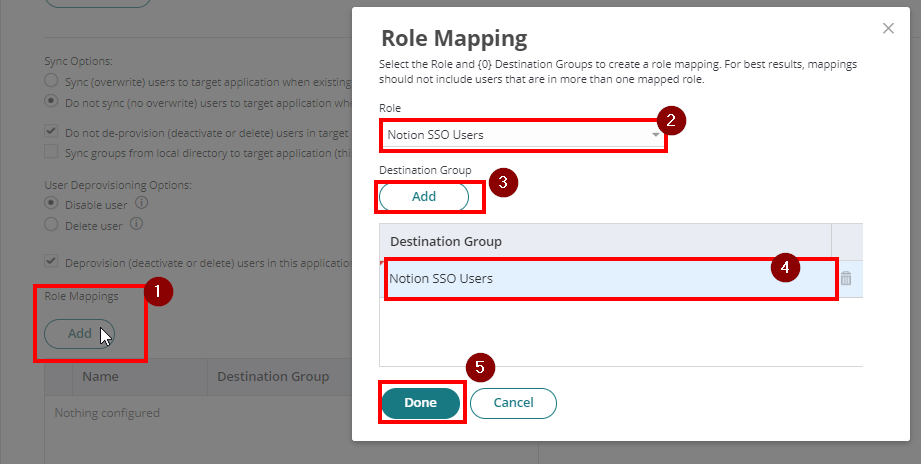
- Click Save to apply.
- Go to Settings > Outbound Provisioning. Select Notion on provisioning enabled applications
- Start Sync.
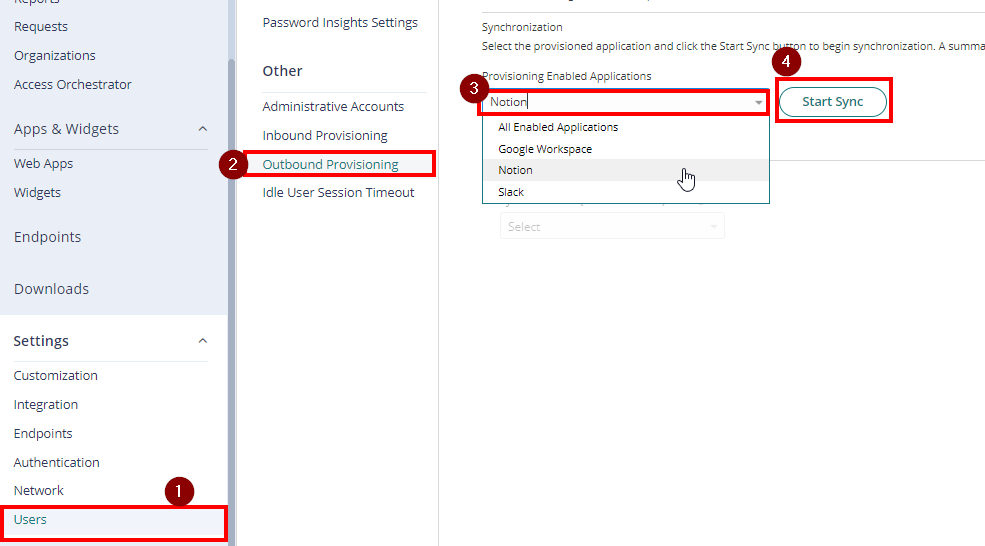
- Click View Synchronization Job Status and Reports to check the Status.
Enforce & Enable Single Sign On
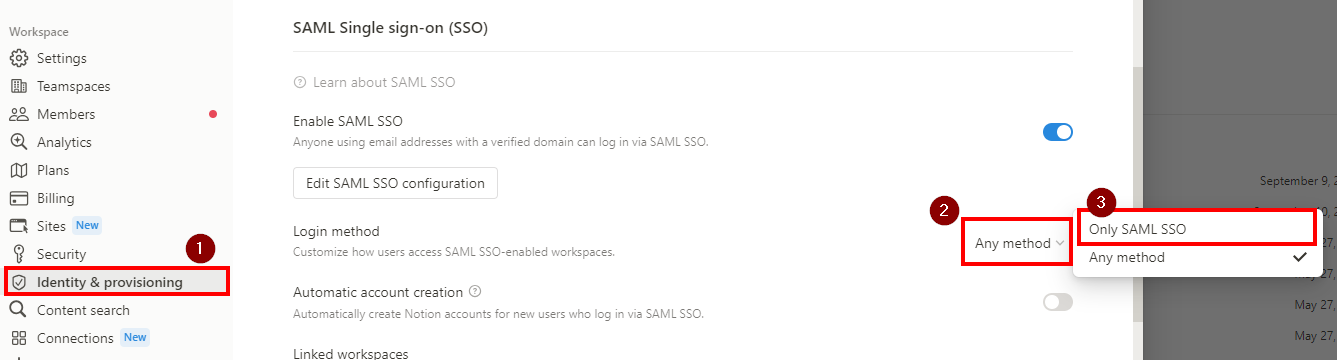
- Go back to Notion > Settings & Members > Identity & Provisioning > SAML Single Sign-On (SSO)
- To ensure that users can only log in using SAML SSO and no other method, update the Login method to ONLY SAML SSO. SAML SSO will only be enforced for users with your verified domain and who have access to the primary workspace or a linked workspace.
- Make sure that Automatic account creation is disable if SCIM Provisioning is enabled.
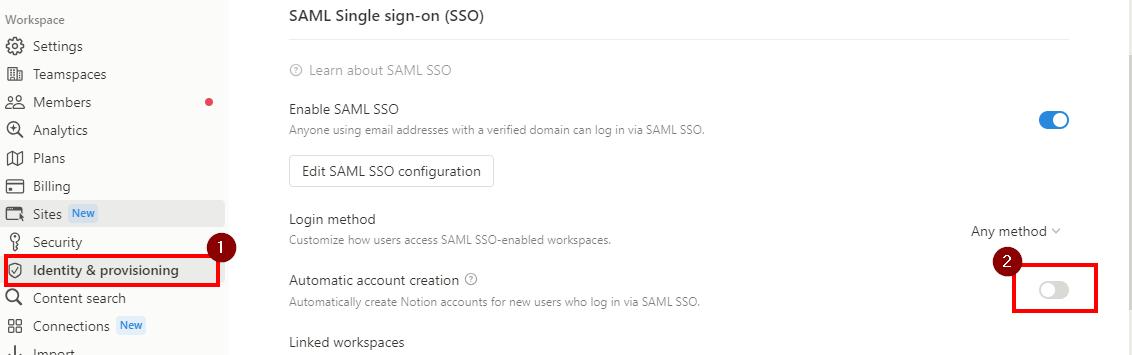
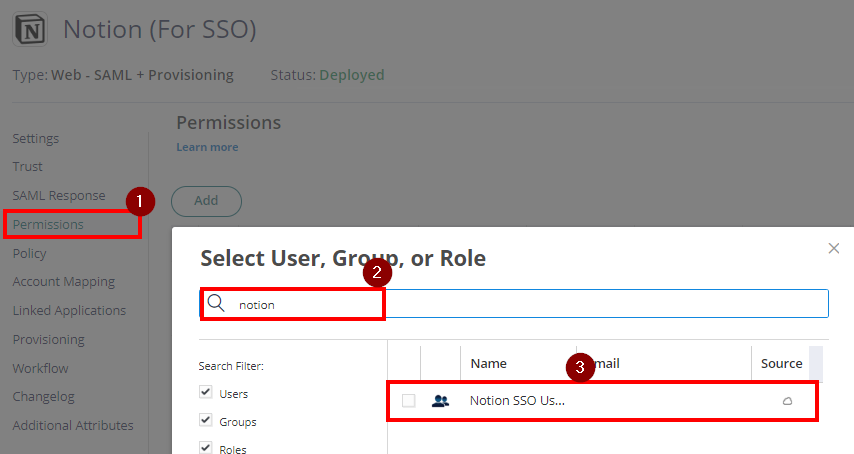
This allows new user signing in via SAML SSO to join the workspace automatically as a member. - Return to Notion app settings in the Practice Protect Admin Portal.
- On Permissions settings, add the role which contains the Notion SSO users. (i.e. Notion SSO Users) and Save.
- This completes the process of enabling Notion SSO. Users should be able to securely access the app through Practice Protect.
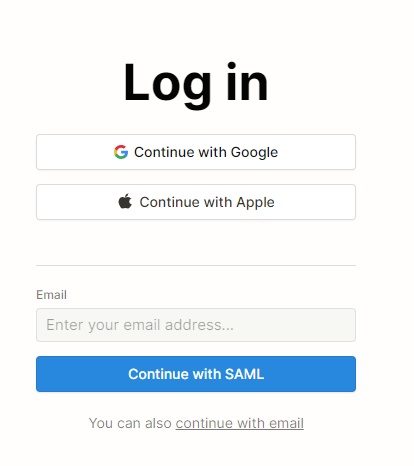
- When signing in directly to the app, enter your email address and click on “Continue with SAML” and use Practice Protect credentials.