Purpose
ShareFile offers single sign-on via SAML integration with Practice Protect. This provides a seamless login experience to the ShareFile platform using IdP-initiated SAML.
Practice Protect will configure this on your behalf. Please send us an email at [email protected]
Pre-requisites
- At least on a Business or Enterprise plan
- Active Sharefile account with administrator rights for your organization (Note: this can be your account so you don’t have to pay and create for another license account)
- Admin Access to Practice Protect
- Username/Email for staff should match the login names in Practice Protect
Instructions
1. Login to your Practice Protect and switch to Admin portal (ex. mydomain.practiceprotect.app)
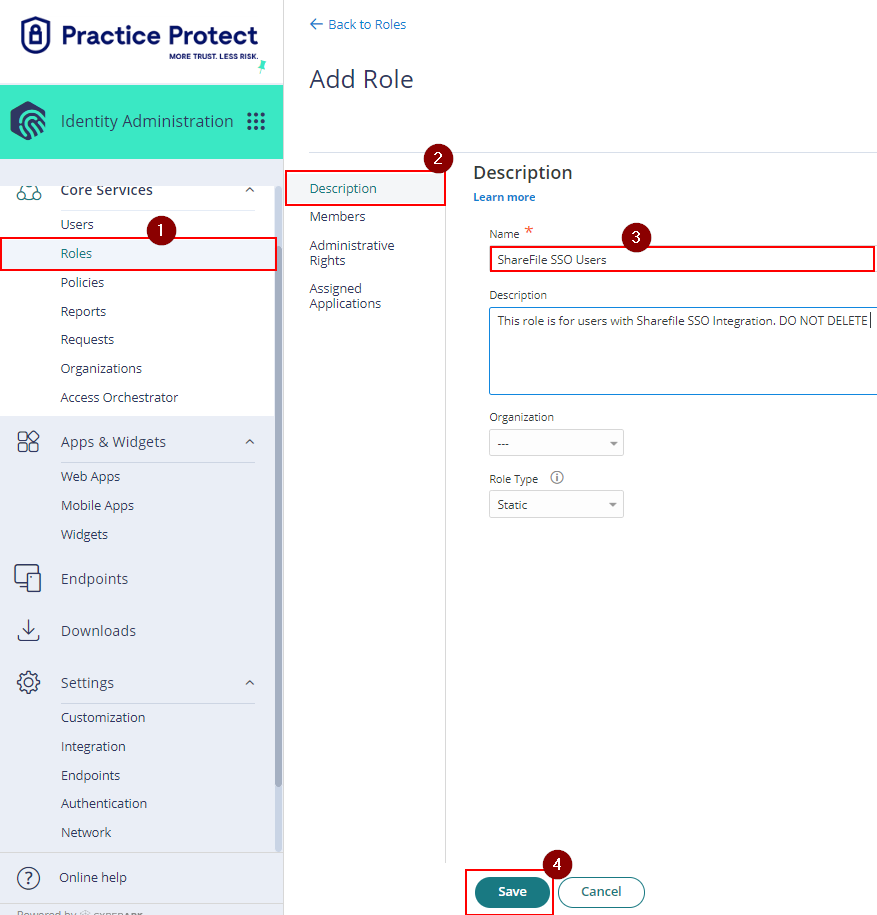
2. On Core Services, Click on Roles > Add Roles. Create a role and set the name field to “ShareFile SSO Users“. Then Save.
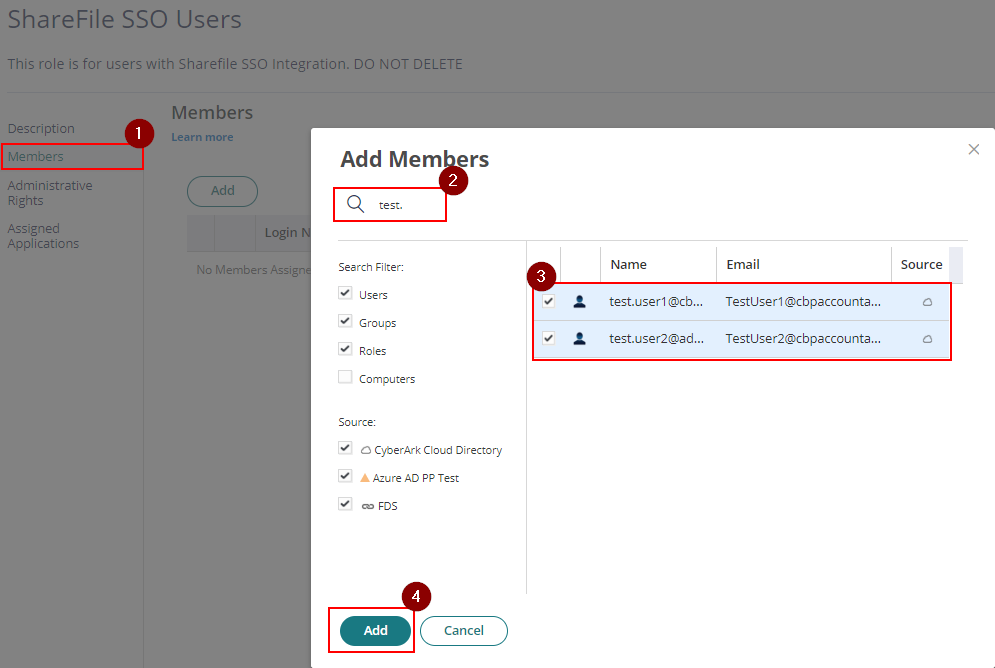
3. With the created role, click on Members > Add. Add each member/user that will be part of the SSO. Then Save.
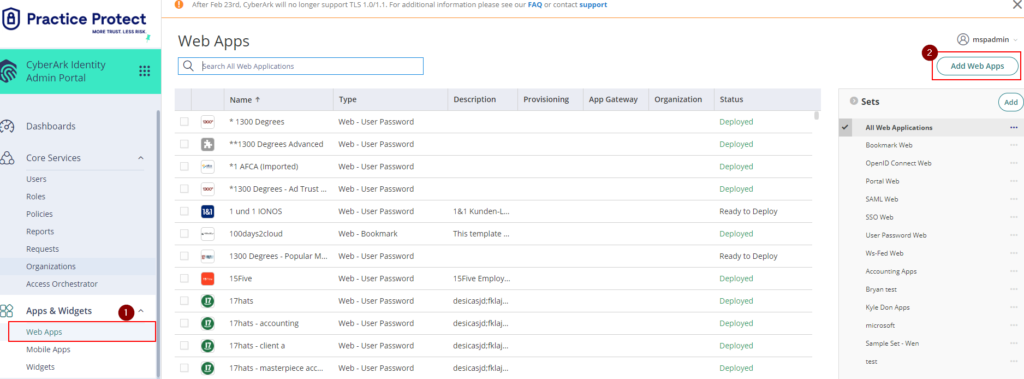
4. From the Apps & Widgets, go to Web Apps section. Then, choose Add Web Apps on the top right corner.
5. On the app catalog, search for “Citrix ShareFile” and Add the app Citrix ShareFile “SAML”. Hit “Yes” to add the application.
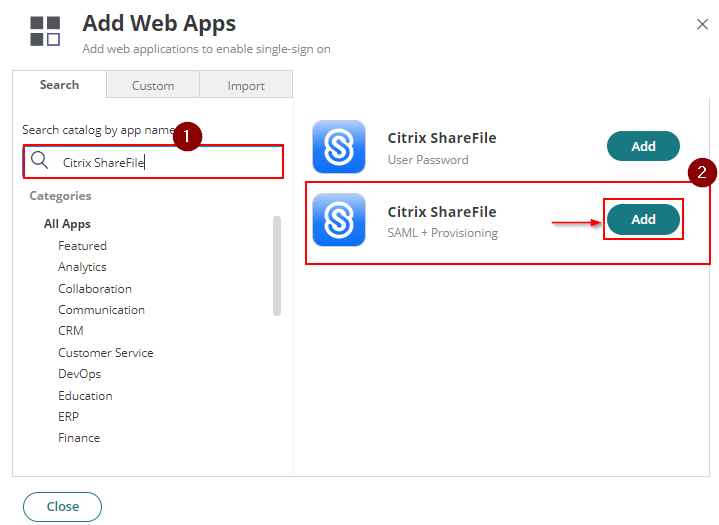
6. The application that you just added opens to the Settings page. Set the Name to “ShareFile SSO” then click Save. Note: You can change the name, category or logo based on your preference.
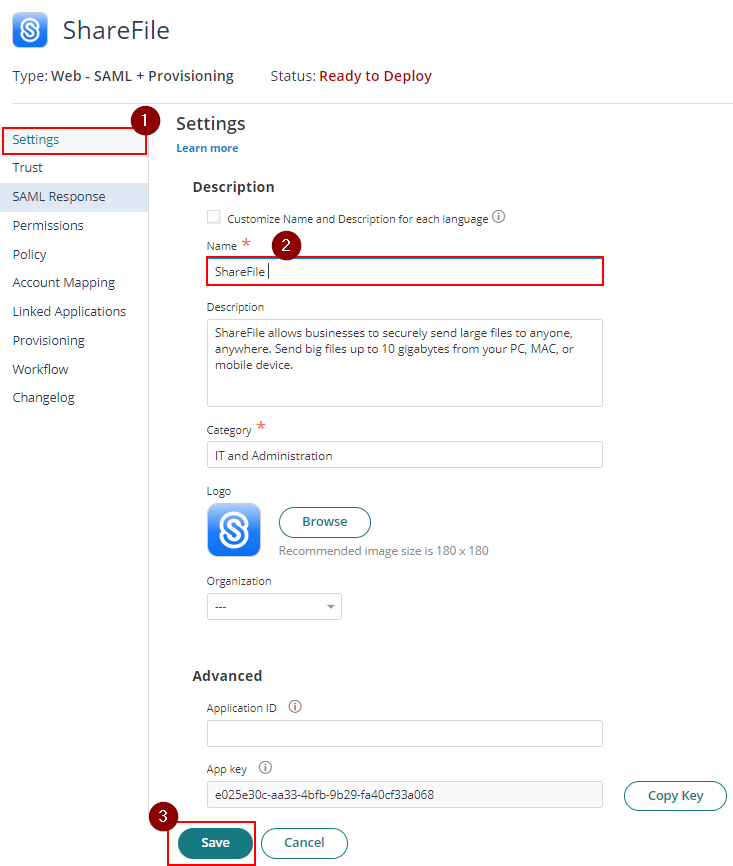
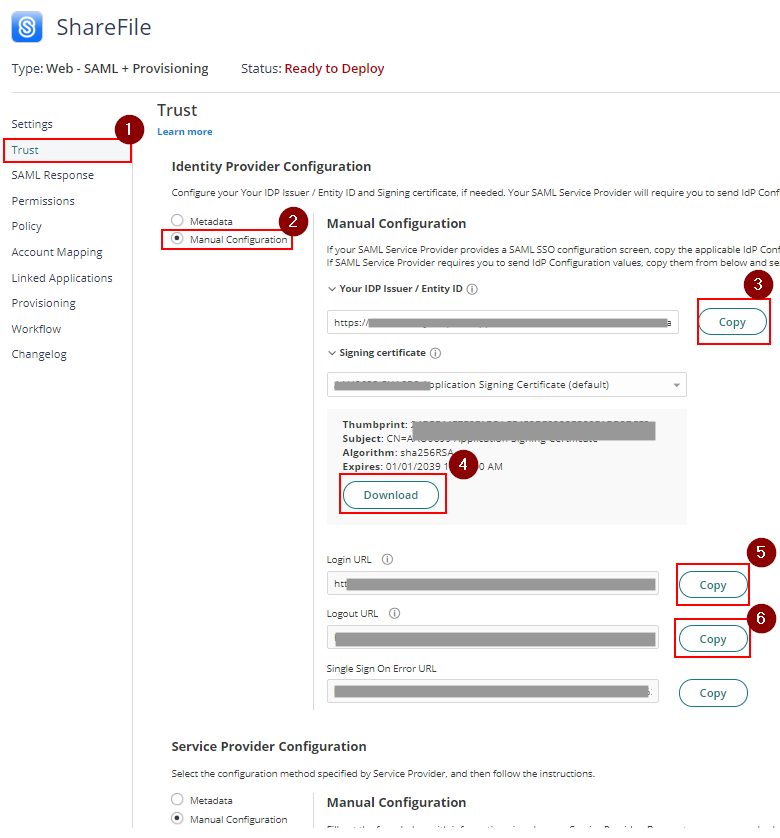
7. Click on Trust > On Identity Provider Configuration select Manual Configuration > Click on Signing Certificate and click Download. This will download the certificate on your local PC which you will need for the below steps. Copy the IDP Issuer/Entity ID URL, Login URL, and Logout URL and temporarily put it in a notepad. You will need these details for the below steps as well.
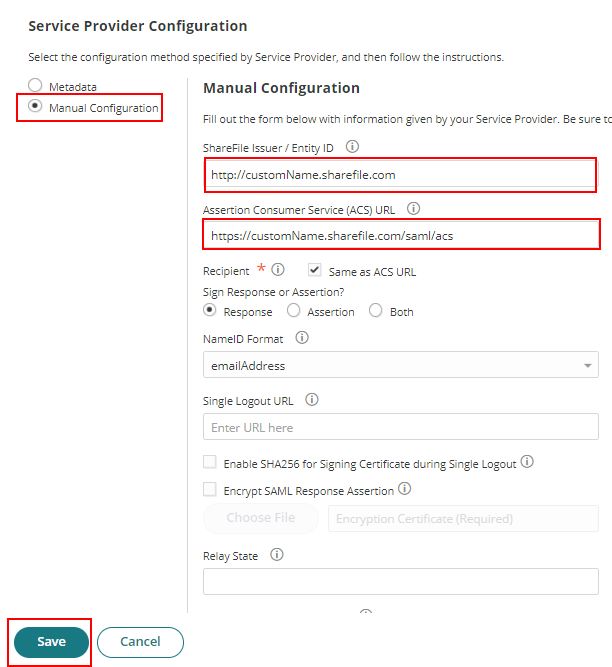
8. Scroll down to Service Provider Configuration and tick Manual Configuration
9. Fill out the ShareFile Issuer / Entity ID and Assertion Consumer Service (ACS) URL with the below URL, and leave the rest of the settings.
- ShareFile Issuer / Entity ID – https://customName.sharefile.com
- Assertion Consumer Service (ACS) URL – https://customName.sharefile.com/saml/acs
Note: change customName to your specific domain/company name
10. Click Save to apply the changes
11. In your web browser, go to ShareFile and login with an administrator account.(ex. https://customName.sharefile.com)
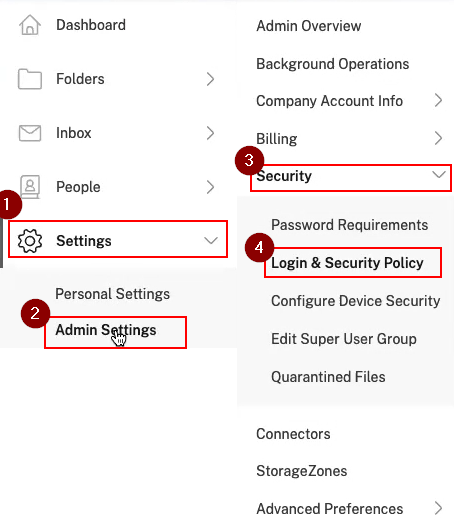
12. Go to Settings > Admin Settings > Security > Login & Security Policy. Use this page to configure the application for single sign-on from the user portal.
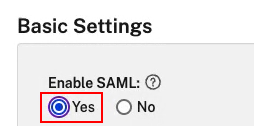
13. Scroll down to the Single sign-on / SAML 2.0 Configuration section. In the Basic Settings, select Yes to Enable SAML.
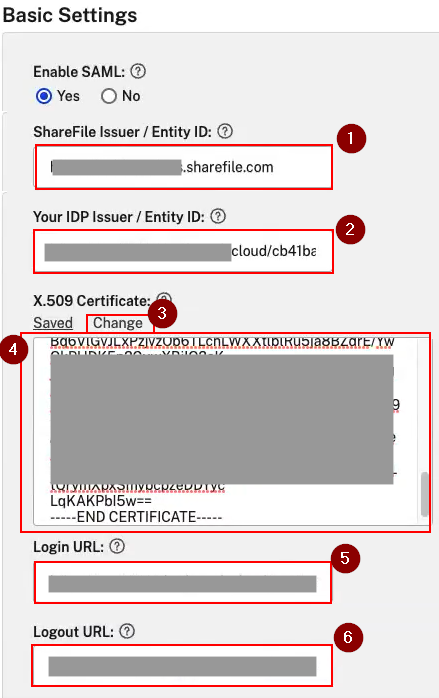
14. In the Basic Settings section, enter the following:
- ShareFile Issuer / Entity ID: Enter your ShareFile Issuer: For example: https://customName.sharefile.com
- Your IDP Issuer / Entity ID: Copy and paste the Issuer from Step 7.
- X.509 Certificate: Click Change, then open the certificate in any text editor (Ex. Notepad) you downloaded from Step 7 then copy and paste it.
- Login URL: Copy and paste the Login URL from Step 7.
- Logout URL (Optional): Copy and paste the Logout URL from Step 7.
15. In the Optional Settings, follow below setup to enforce SSO login.
- Requires SSO Login: Yes
- SP-Initiated SSO Certificate: HTTP Redirect with no Signature
- Enable Web Authentication: Yes
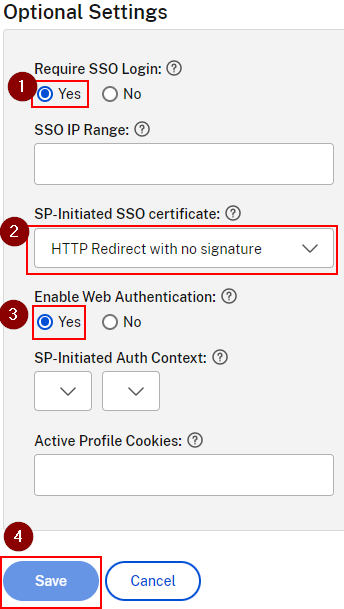
16. Click Save. Log out of your ShareFile Account
17. Return to ShareFile SSO app settings in the Practice Protect Admin Portal
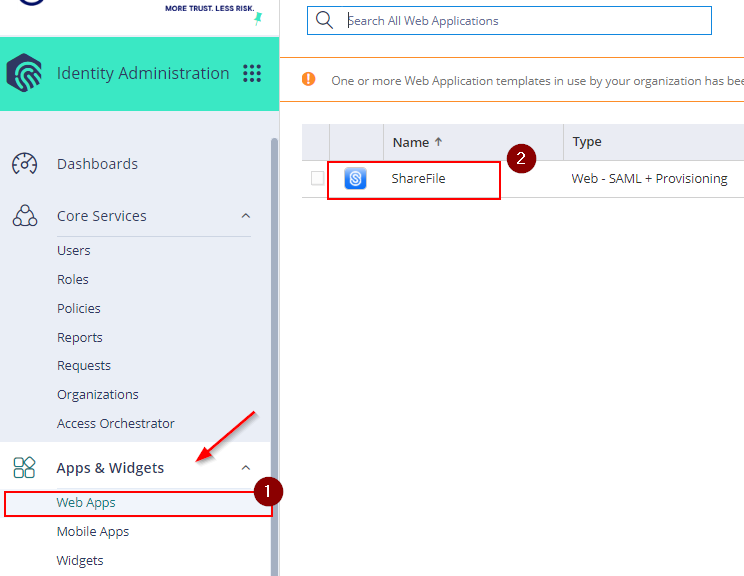
18. On Permission settings, add the role “ShareFile SSO Users” and hit Save.
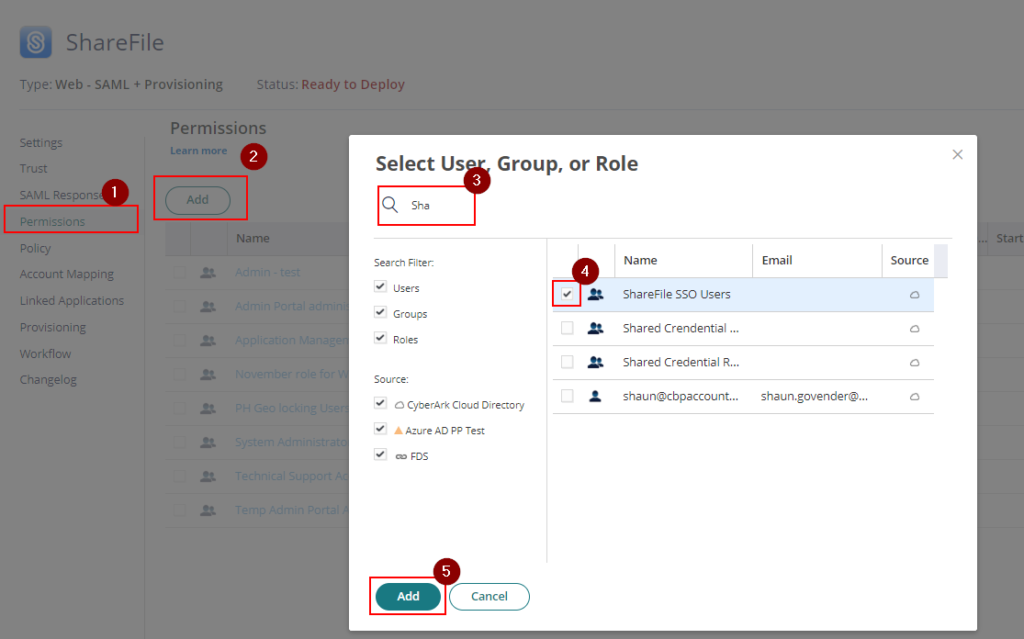
This will now activate Single Sign On for ShareFile and deployed to its users.
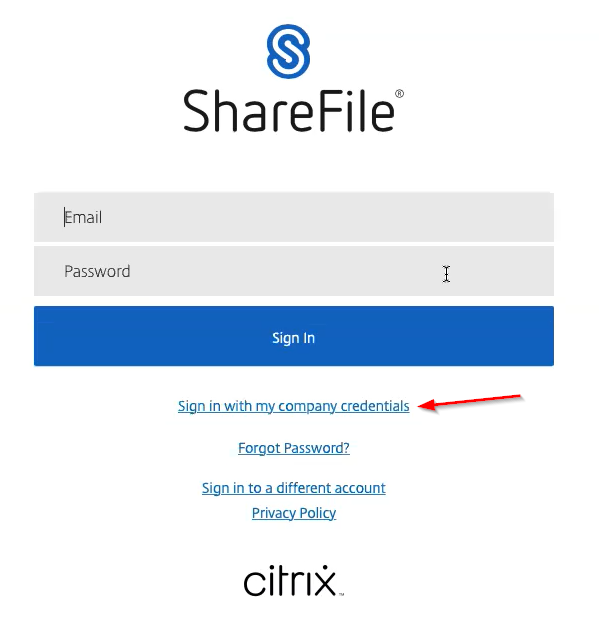
19. Users can directly access it by launching the app from the Portal. Otherwise, if within the web/desktop app, choose “Sign in with my company credentials” and use Practice Protect credentials.
