Purpose
TeamViewer offers single sign-on via SAML integration with Practice Protect. This provides a seamless login experience to the TeamViewer platform using IdP-initiated SSO.
Practice Protect will configure this on your behalf. Please send us an email at support@practiceprotect.com
Prerequisites
- TeamViewer version 13.2.1080 or newer
- Access to the DNS management of the email domain to verify the domain ownership
- Must have TeamViewer Enterprise/Tensor license.
- Active TeamViewer account with administrator rights for your organization to access Management Console and add domains (Note: this can be your account so you don’t have to pay and create another license account)
- Admin Access to Practice Protect
- The username/Email for staff should match the login names in Practice Protect.
Instructions
- Login to your Practice Protect and switch to the Admin portal (ex. mydomain.practiceprotect.app)
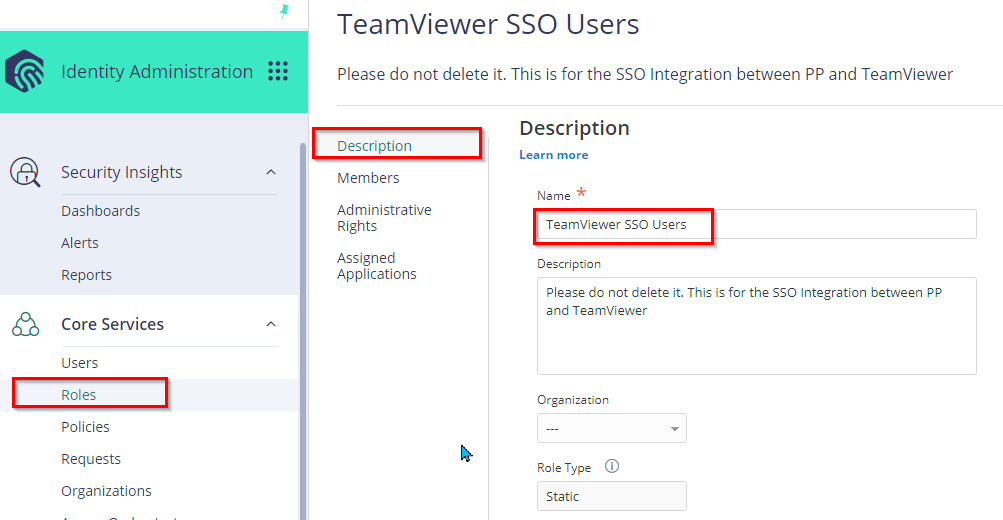
- On Core Services, Click on Roles > Add Roles. Create a role and set the name field to TeamViewer SSO Users. Then Save.
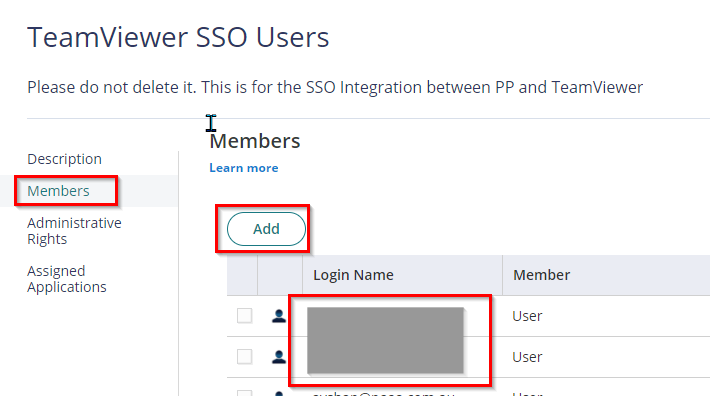
- With the created role, click on Members > Add. Add each user that will have access to the app. Then Save.
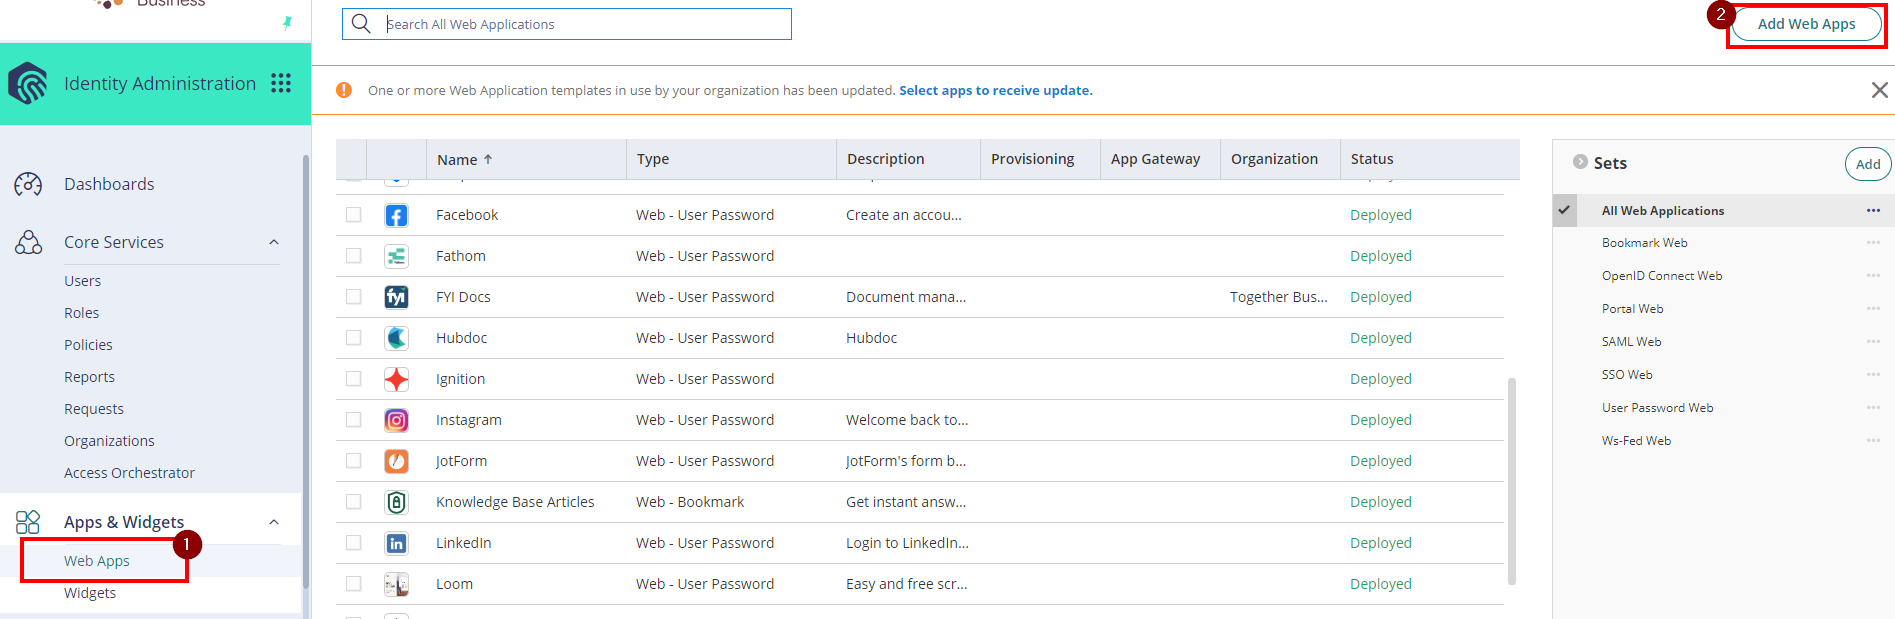
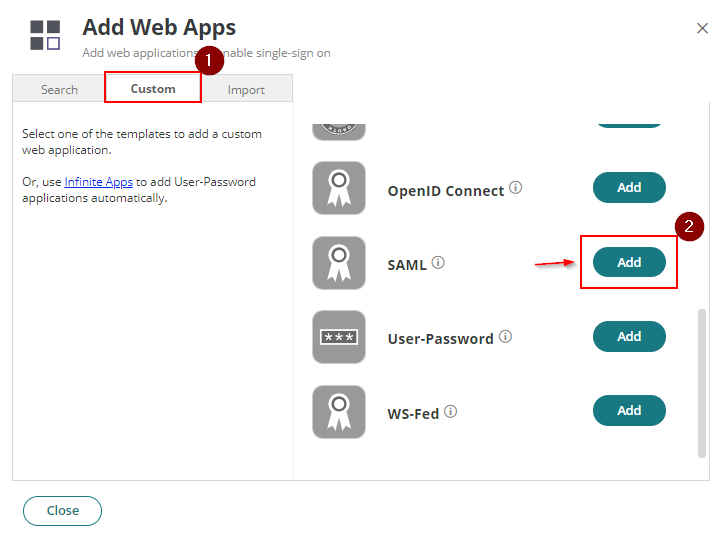
- From the Apps & Widgets, go to the Web Apps section. Then, choose Add Web Apps in the top right corner.
- Select Custom then next to SAML click Add
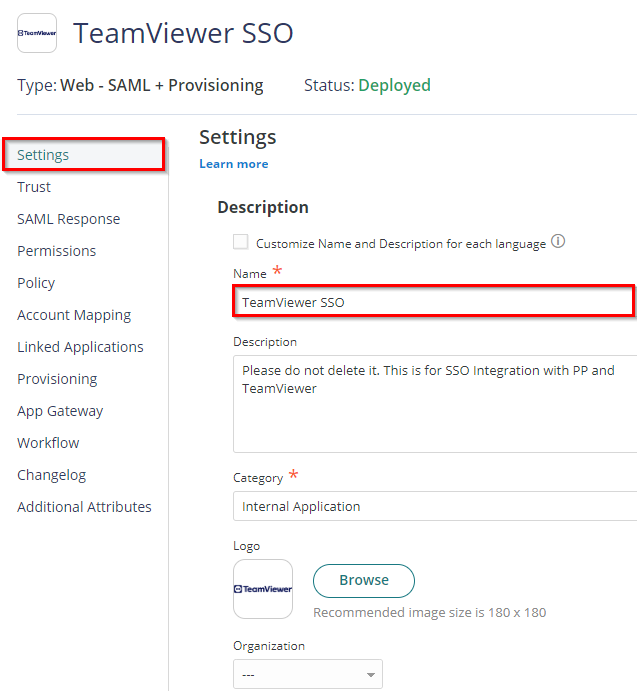
- On Settings, set the Name as TeamViewer SSO and select Save. You can also set the category and logo.
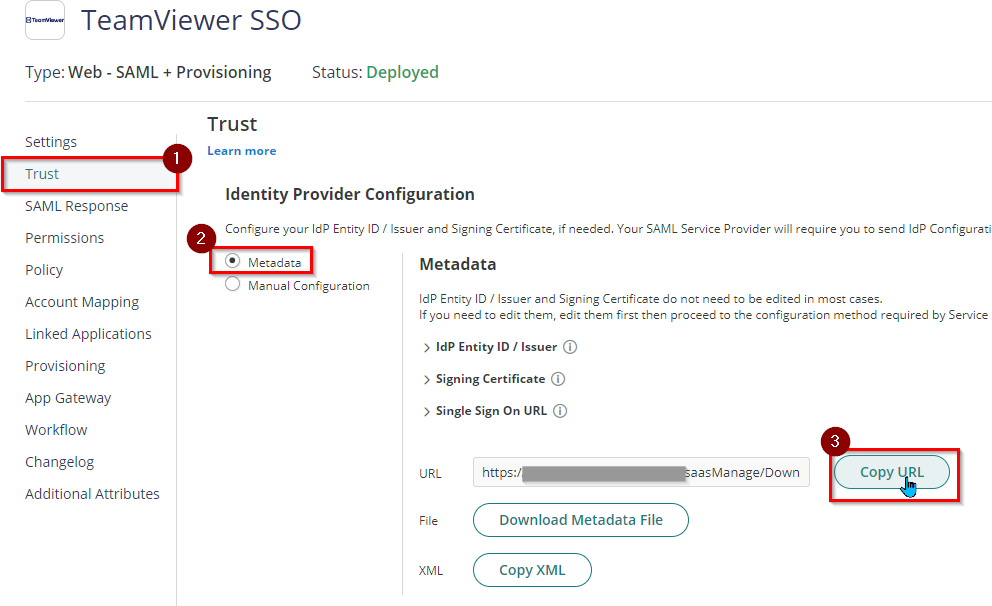
- Click on Trust > under Identity Provider Configuration select Metadata. Click on Copy URL to copy the Metadata URL. Keep the URL on your Notepad as this will be needed for the next steps.
- In the Service Provider Configuration, select Metadata.
- Copy this URL: https://sso.teamviewer.com/saml/metadata.xml
- Paste to the URL field and click Load.
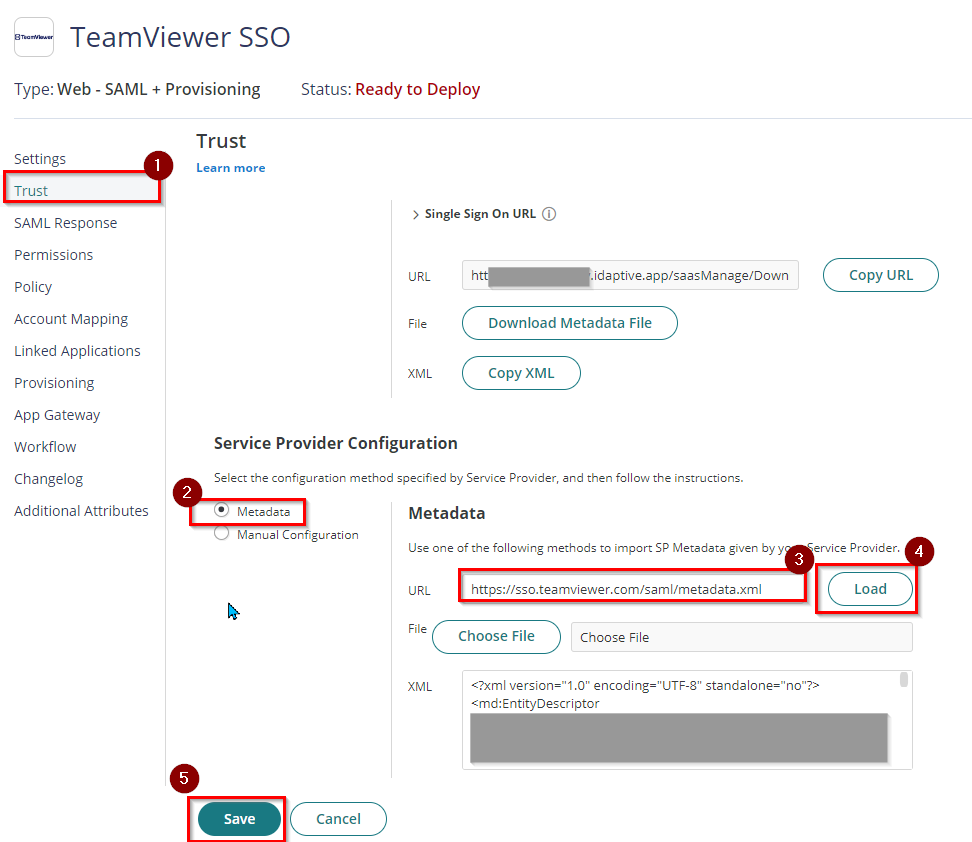
- Hit Save.
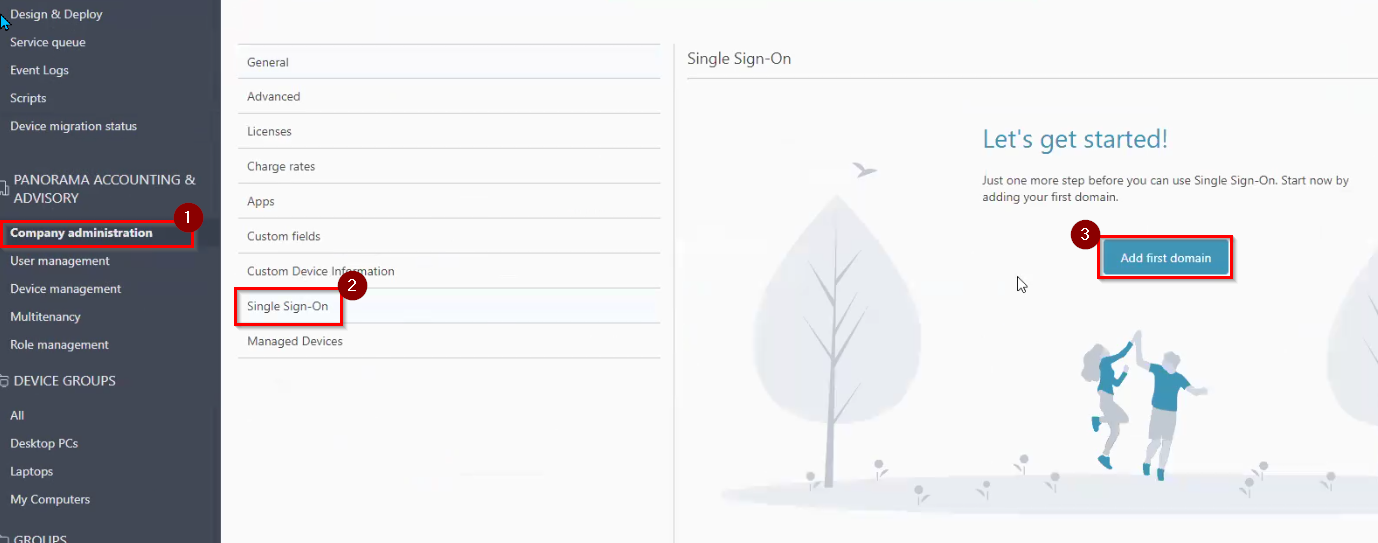
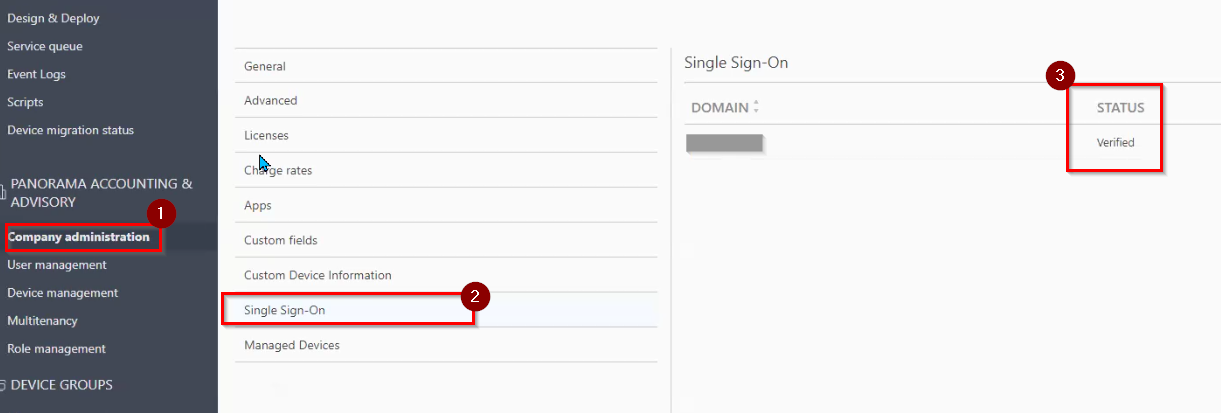
- Login to TeamViewer Admin Console and go to Company Administration > Single Sign On > Click Add First domain
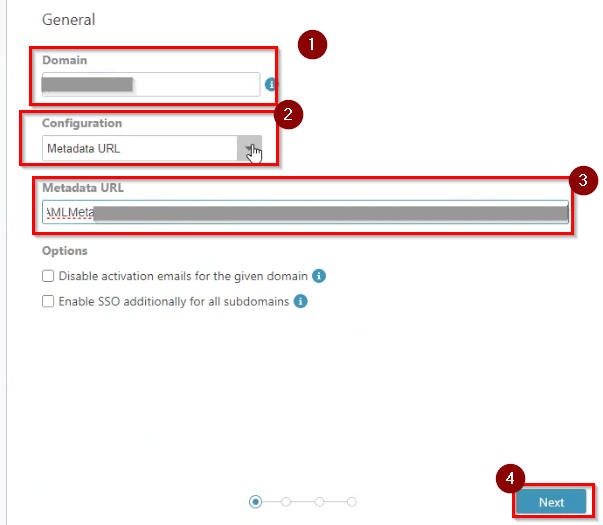
- On General Settings, fill in your domain (ex. domain.com). Select the Metadata URL on the configuration
- Paste the URL you copied from Step 7. Click Next.
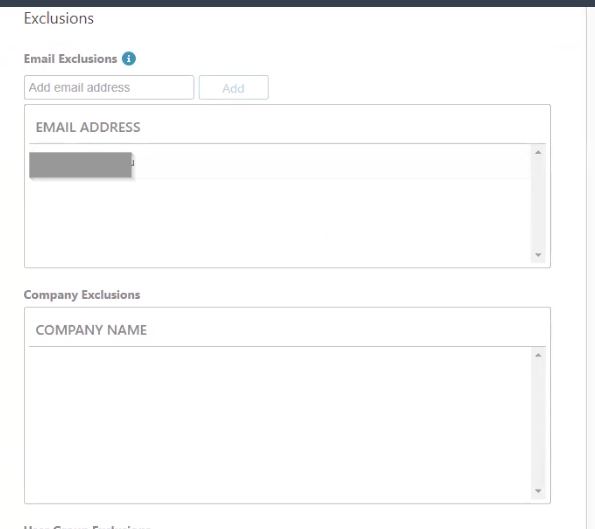
- Add an email address that you want to exclude within the Exclusion page. Note: The admin account will automatically be added. Click Next.
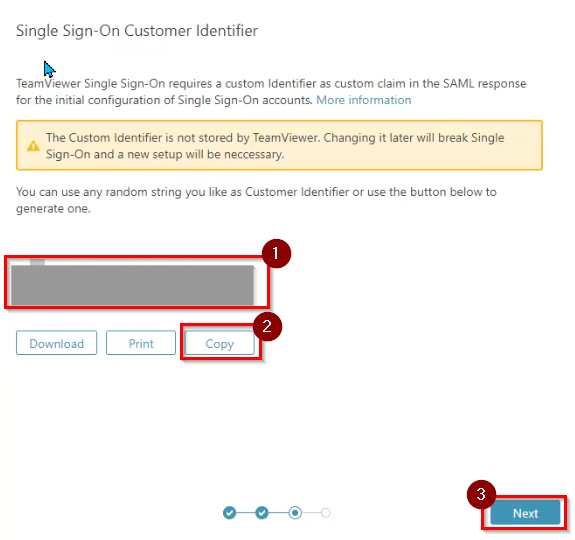
- Read the warning and click Generate Customer Identifier. Copy it.
Note: It is important to keep that as it will be used for the next steps
- Click Next. Note: Do not close the tab open for SSO setup in TeamViewer.
- Return to the TeamViewer SSO app in Practice Protect. Go to SAML Response and add the below attributes and values.
- Attribute 1 Name: http://schemas.xmlsoap.org/ws/2005/05/identity/claims/emailaddress
Attribute 1 Value: LoginUser.Username - Attribute 2 Name: http://sso.teamviewer.com/saml/claims/customeridentifier
Attribute 2 Value: Paste the custom identifier you copied on Step 16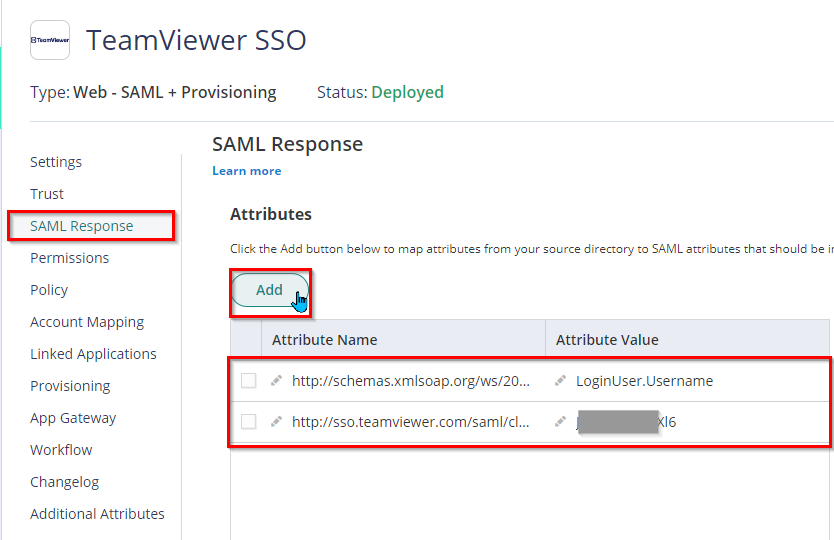
- Attribute 1 Name: http://schemas.xmlsoap.org/ws/2005/05/identity/claims/emailaddress
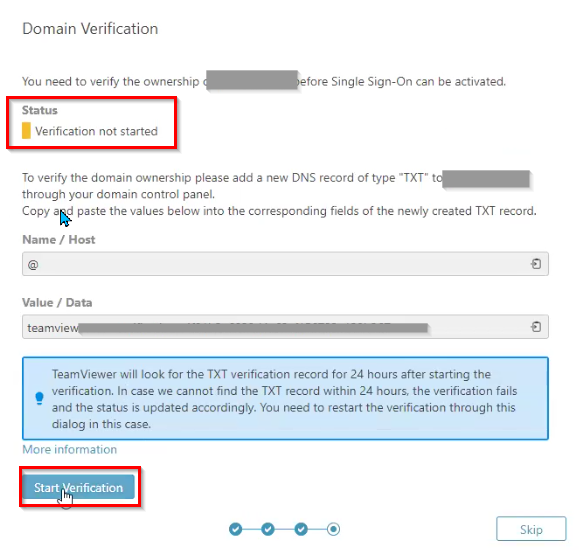
- Return to TeamViewer Admin Console, SSO setup page, and verify the domain ownership for SSO enablement.
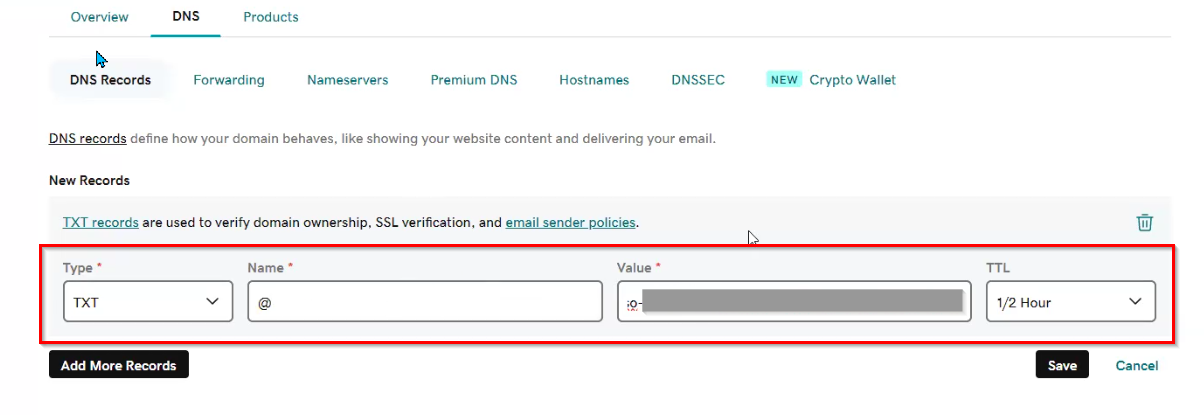
- Copy the Name/Host and Value/Data. Keep the details temporarily.

- Login to your respective Domain Hosting Provider (ex. GoDaddy). Add the TXT Record and use the value from the previous step. Note: If you don’t have access to this or don’t know how, please reach out to your IT to add this for you.
- Once added, return to the Teamviewer SSO page, and click Start Verification.
- The Status above will change to Verification pending. Click Finish.
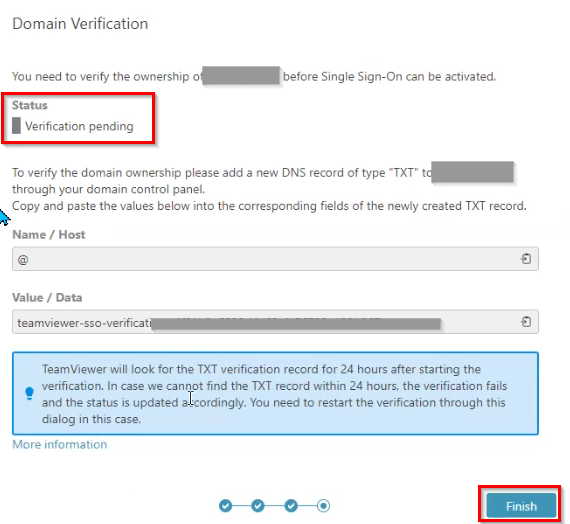
Note: TeamViewer will start verifying the domain. In this case, propagation time only takes up to 15 minutes. - Check if the Status is verified. Once verified, SSO is now activated.
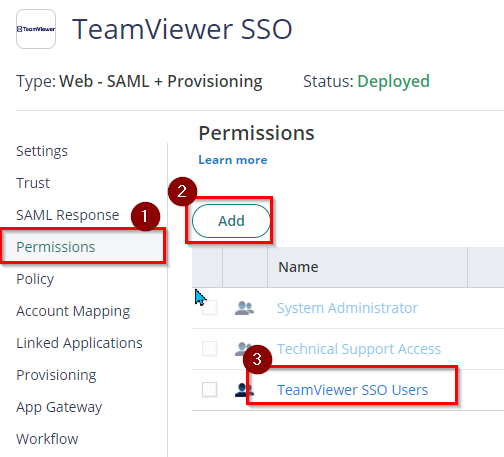
- Return to the TeamViewer SSO app in Practice Protect and go to Permissions. Add the role we created in an earlier step to the permissions page (e.g. TeamViewer SSO Users) and click Save.
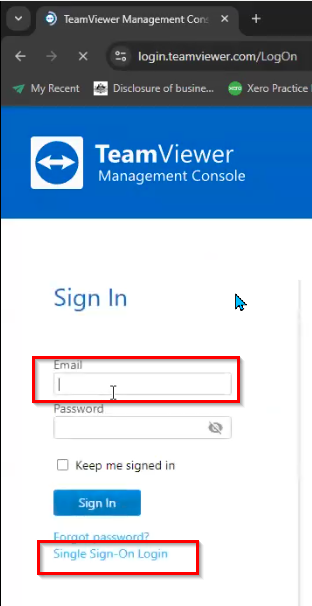
- SSO Integration is now completed. You can use the tile on your Practice Protect User Portal to automatically sign in to the app. On the other hand, if you sign in directly to the TeamViewer Page, once you enter your TeamViewer email address, it will recognize your account and automatically reroute you to Practice Protect to sign in.