
Microsoft has deprecated basic authentication access to Exchange Online APIs. Microsoft has switched to Modern Authentication, which is based on OAuth 2.0 to increase security. Users with existing Microsoft Online tenants can continue using basic authentication until Microsoft ends support in the second half of 2021; However, new tenants must use token-based authentication.
Token-based authentication also changes the attributes controlled in Practice Protect and Microsoft 365. Below are the main changes to take into account, as certain attributes will no longer be controlled or synced from Practice Protect:
Controlled in Practice Protect: (Will Overwrite)
- Display Name
- Location
- Immutable ID
- Primary Email/Username/UPN (it will be the primary)
Controlled in Microsoft 365: (Will Not Overwrite)
- Email Alias’s (Proxy Addresses)
- Microsoft 365 Licensing.
- HideFromAddressList
- Manager
- Addresses
- Other Contact Fields
Steps to Disable DirSync using Microsoft Graph
Since Token-Based Authentication uses the Microsoft Graph API and not the Entra ID DirSync module, you’ll need to disable DirSync via Microsoft Graph instead.
- Open Powershell, then run the command to authenticate to Microsoft Graph with the necessary permissions:
Connect-MgGraph -Scopes “Directory.ReadWrite.All”, “Organization.Read.All”
- To disable DirSync, you will use the Microsoft Graph API via the Update-MgOrganization cmdlet:
Update-MgOrganization -OrganizationId (Get-MgOrganization).Id -DirectorySynchronizationEnabled $false
Note: This process can take up to 72 hours to complete. During this time, logins will remain functional, but you won’t be able to create or modify users. - You can monitor the DirSync status to check if the operation is complete. Use this command:
(Get-MgOrganization) | Select-Object DisplayName, DirectorySynchronizationStatus
Instructions: Register an Entra ID application
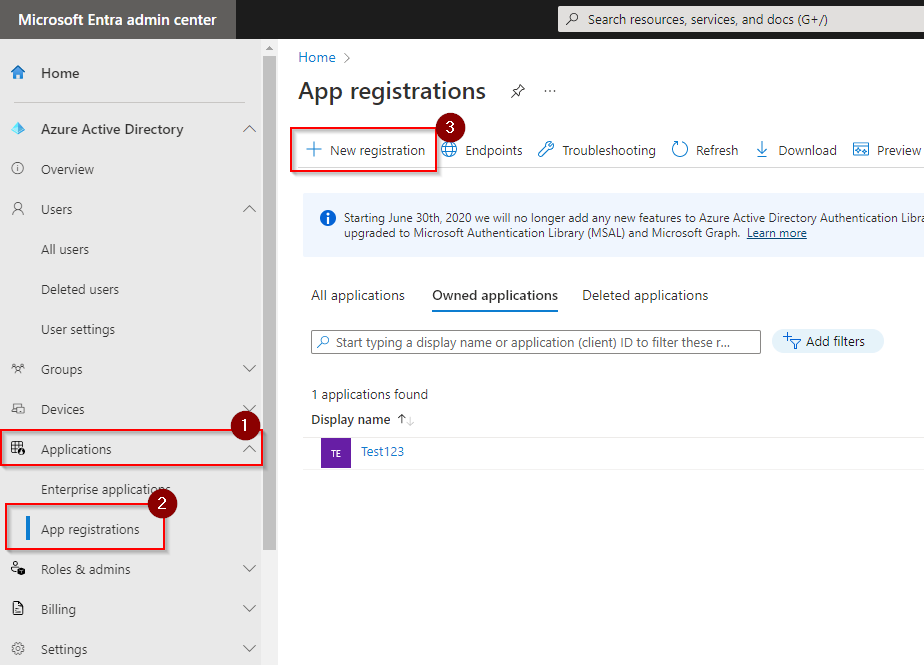
- Log in to Microsoft Entra ID using an Admin Account.
- On the left navigation menu, go to Applications > App registrations, then click New registration.
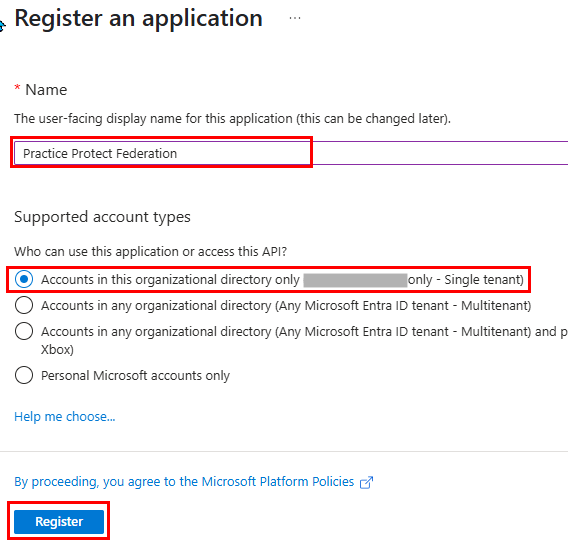
- Enter a name for your app. “Practice Protect Federation”
- Select Accounts in this organizational directory only (your_domain only – Single Tenant).
- Click Register. It will go to the Overview section of the App
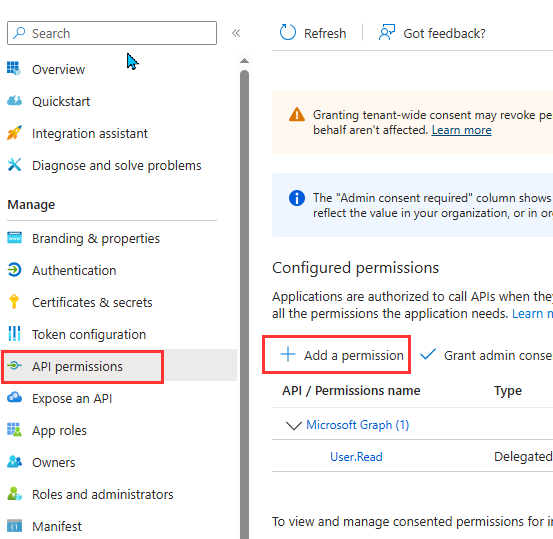
- Go to API permissions, then click Add a permission.
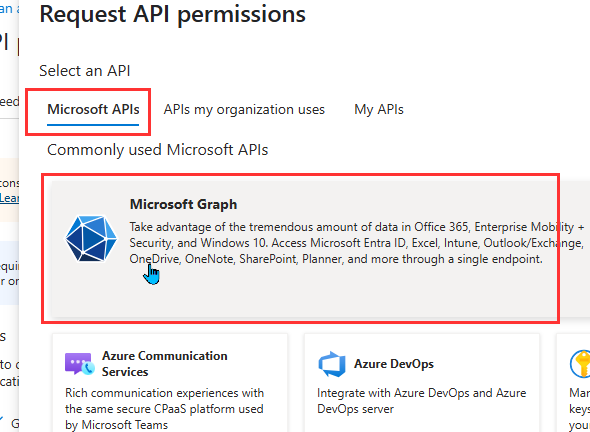
- Click Microsoft Graph.
- Choose the type of permissions (Delegated or Application), then select the following permissions from each category and click Add permissions.
Delegated Application Directory.AccessAsUser.All Application.ReadWrite.All Directory.ReadWrite.All Application.ReadWrite.OwnedBy Group.ReadWrite.All Directory.ReadWrite.All Organization.ReadWrite.All Domain.ReadWrite.All User.ManageIdentities.All Group.Create User.Read Group.ReadWrite.All User.Read.All Organization.ReadWrite.All User.ReadWrite User.ManageIdentities.All User.ReadWrite.All User.ReadWrite.All 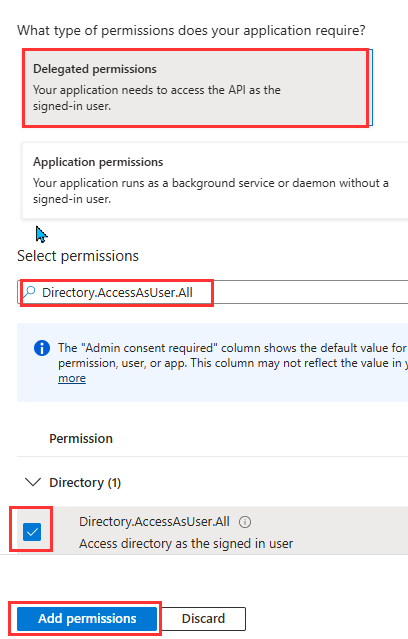
- Once finished adding all the permissions, click on Grant Admin Consent for <your
company>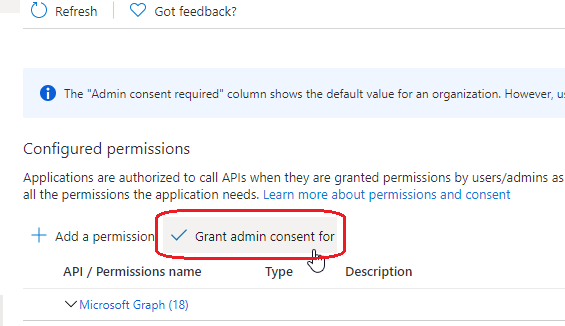
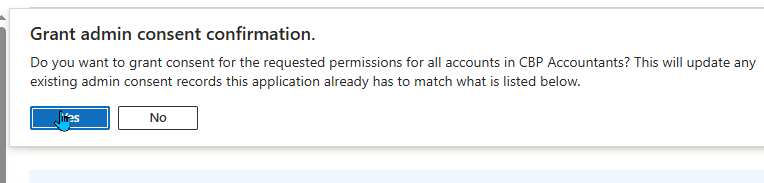
- Click Yes on the confirmation prompt.
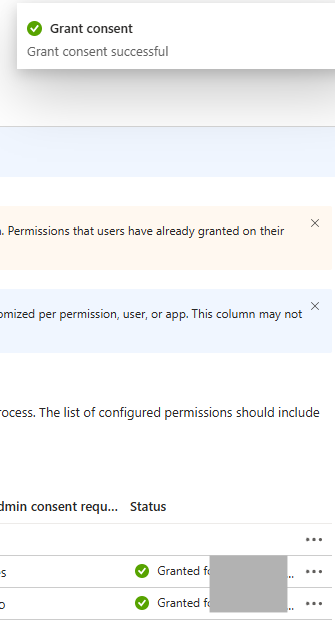
- The status of each added permission should now display as Granted.
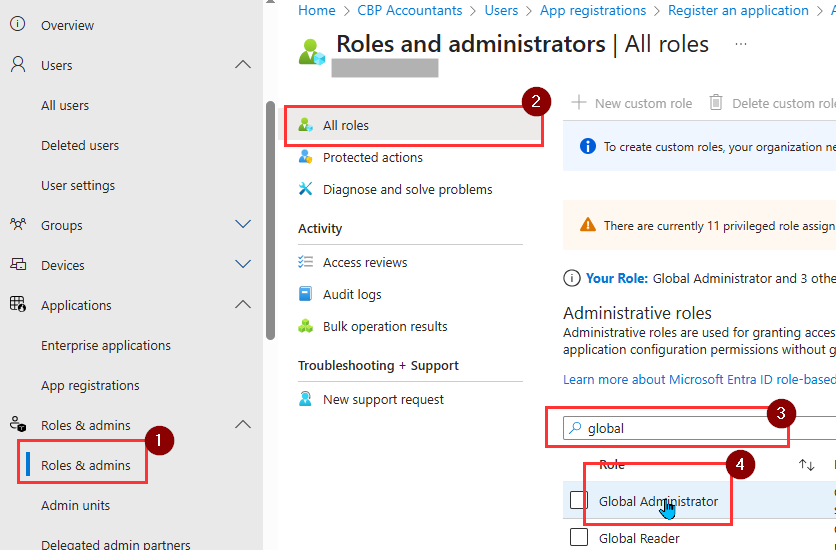
- Back on the left menu, click on Roles & Admins > Roles & admins. Search the Global Administrator role and click it.
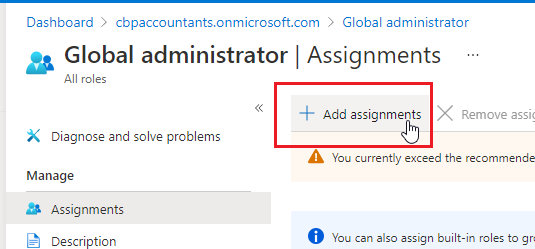
- Click on Add assignments.
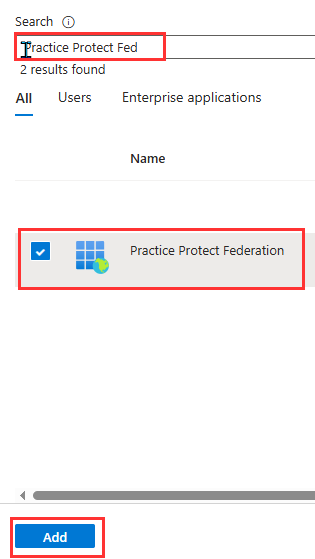
- Search for the App name created on Step 3 (ex. Practice Protect Federation). Select and click Add. This will assign the App to the Global Admin role.
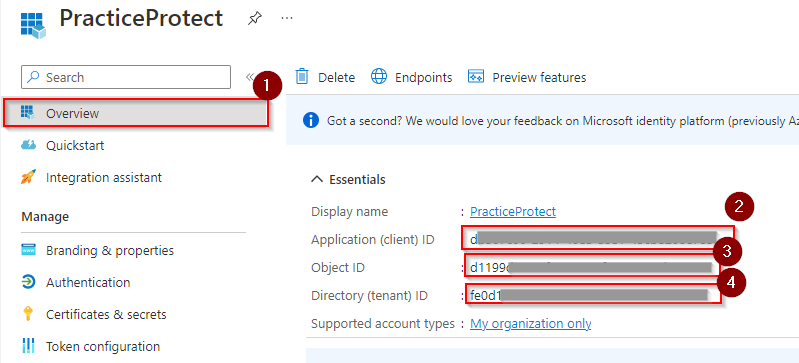
Note: This type is a ServicePrincipal, not a user. - Go back to the Overview setting of the app. Copy the Application (client) ID, Directory ID (tenant), and the Object ID. Keep those details as they will be used for the Federation or the next steps.
- Next, we will need to generate a client secret key. Open PowerShell and run the following command to connect to Microsoft Graph. Use the Microsoft Admin Account.
Connect-MgGraph -Scopes “Application.ReadWrite.All”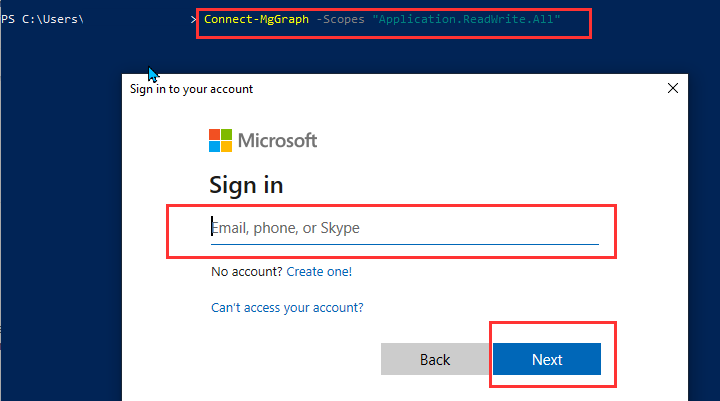
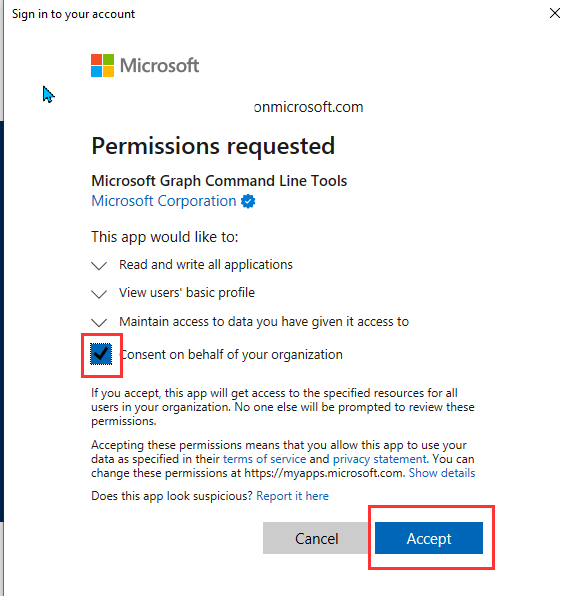
- Accept the permission request.
- Run the command to set the expiration date and display name of the client secret that we need to generate.
$StartDate = Get-Date
$EndDate = $StartDate.AddYears(100)
$passwordCredential = @{
displayName = “PPToken”
startDateTime = $StartDate
endDateTime = $EndDate
}
- Retrieve the Object ID of the app you created earlier. Then run the following command. Make sure to replace the placeholder with your actual Object ID:
Add-MgApplicationPassword -ApplicationId “enter the Object ID here” -PasswordCredential $passwordCredential
- The SecretText is shown only once. Be sure to copy it immediately or save it securely. Close the PowerShell.

Update Authentication Method (Token-Based Auth)
Practice Protect Microsoft 365 Email Integration/Federation uses token-based authentication nowadays. However, if your firm was set up with the old Basic Authentication, continue and follow the steps below:
1. Login to Practice Protect Admin, Web Apps > Office365 Federation app. On the Authentication Method, Select Token-Based Authentication.
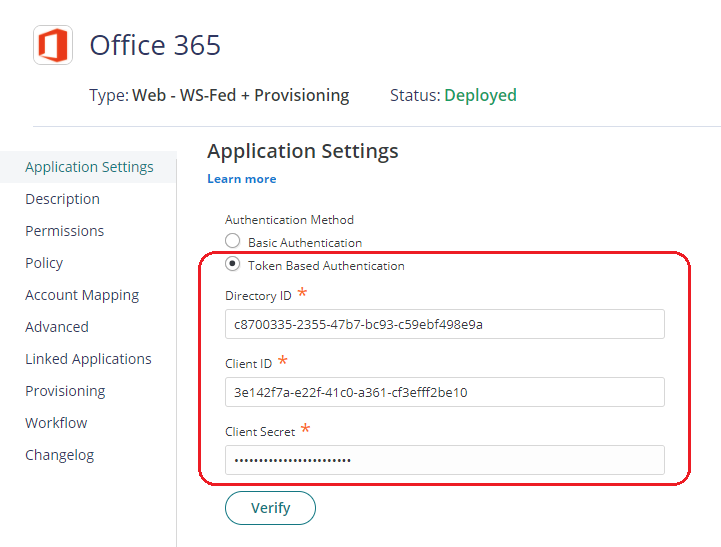
2. Copy and paste the value/output that was created from the steps above to these fields Directory (tenant) ID, Application (Client) ID, and Client Secret Key
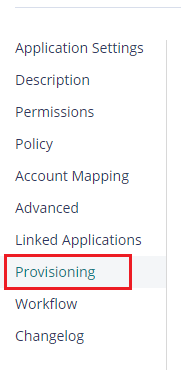
3. Go to Provisioning
20. Scroll down to Provisioning Script:
Update the Script to include the following:
if (isPerson()) {
//UsageLocation
destination.UsageLocation = “AU”;
destination.Mail = source.CanonicalizeName;
}
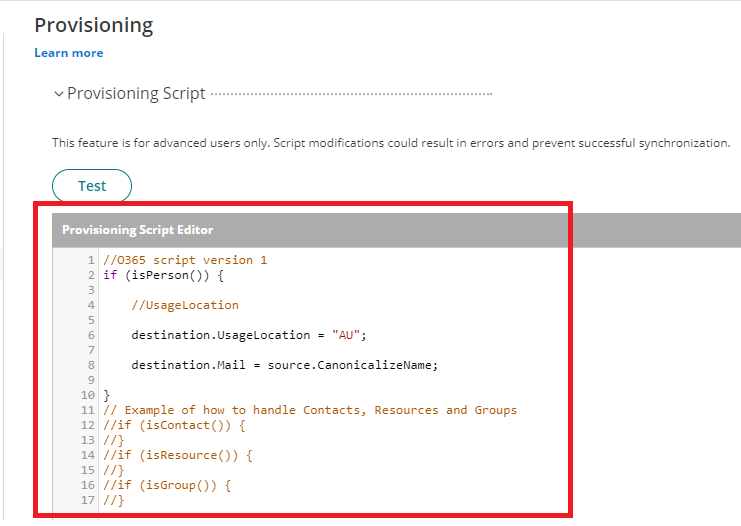
Save the Script.
21. Go to Settings – Users – Outbound Provisioning and Start Sync.