Purpose
Salesforce offers single sign-on via SAML integration with Practice Protect. This provides a seamless login experience to the Salesforce platform using IdP-initiated SAML.
Practice Protect will configure this on your behalf. Please send us an email at support@practiceprotect.com
Pre-requisites
- Must have with either Enterprise or Professional type of Subscription
- Active Salesforce account with administrator rights (Note: this can be your account so you don’t have to pay and create for another license account)
- Admin Access to Practice Protect
- Custom Login URL/Domain in Salesforce (For SP Initiated SSO) ex. mydomain.saleforce.com
- Username/Email for regular users should match the login names in Practice Protect.
Instructions
1. Login to your respective Practice Protect and switch to Admin portal (ex. mydomain.practiceprotect.app)
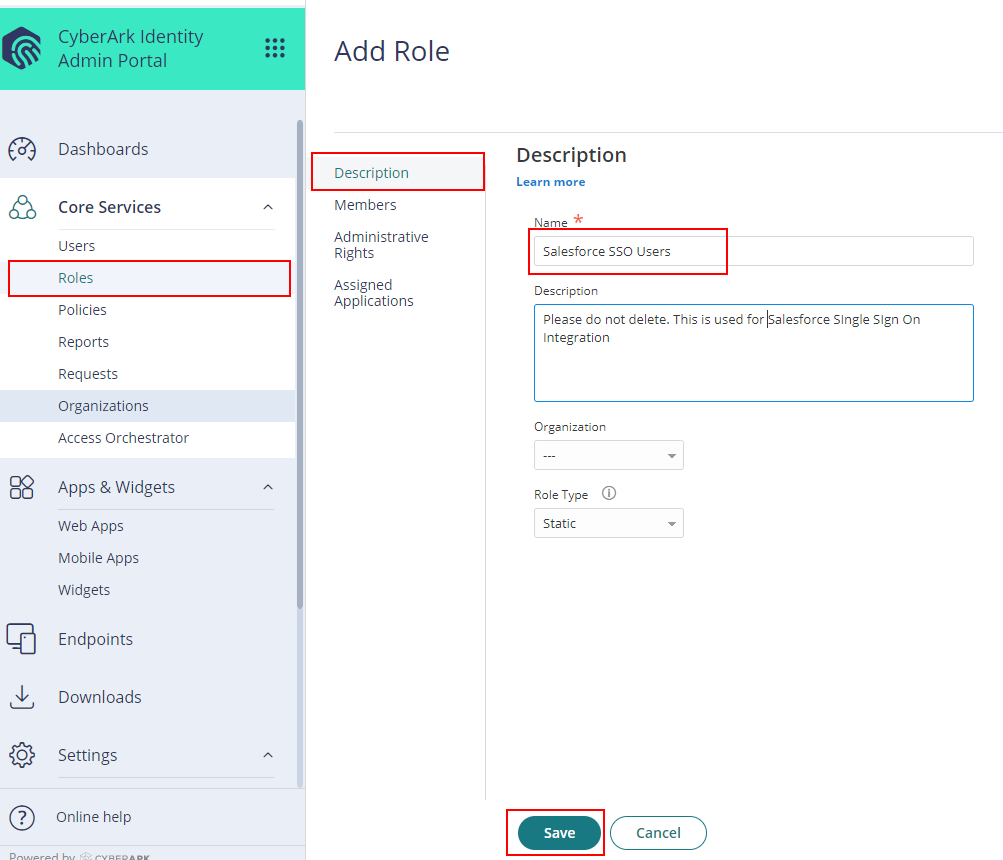
2. On Core Services, Click on Roles > Add Roles. Create a role and set the name field to “Salesforce SSO Users“. Then Save.
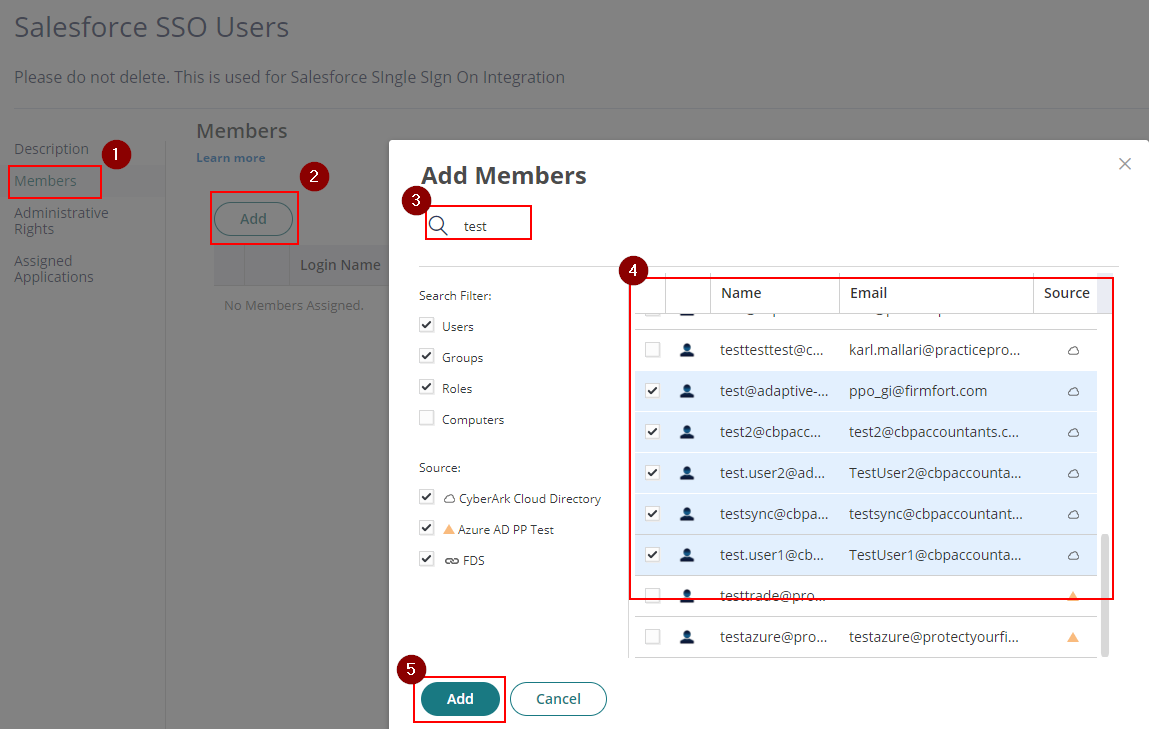
3. With the created role, click on Members > Add. Add each member/user that will be part of the SSO. Then Save.
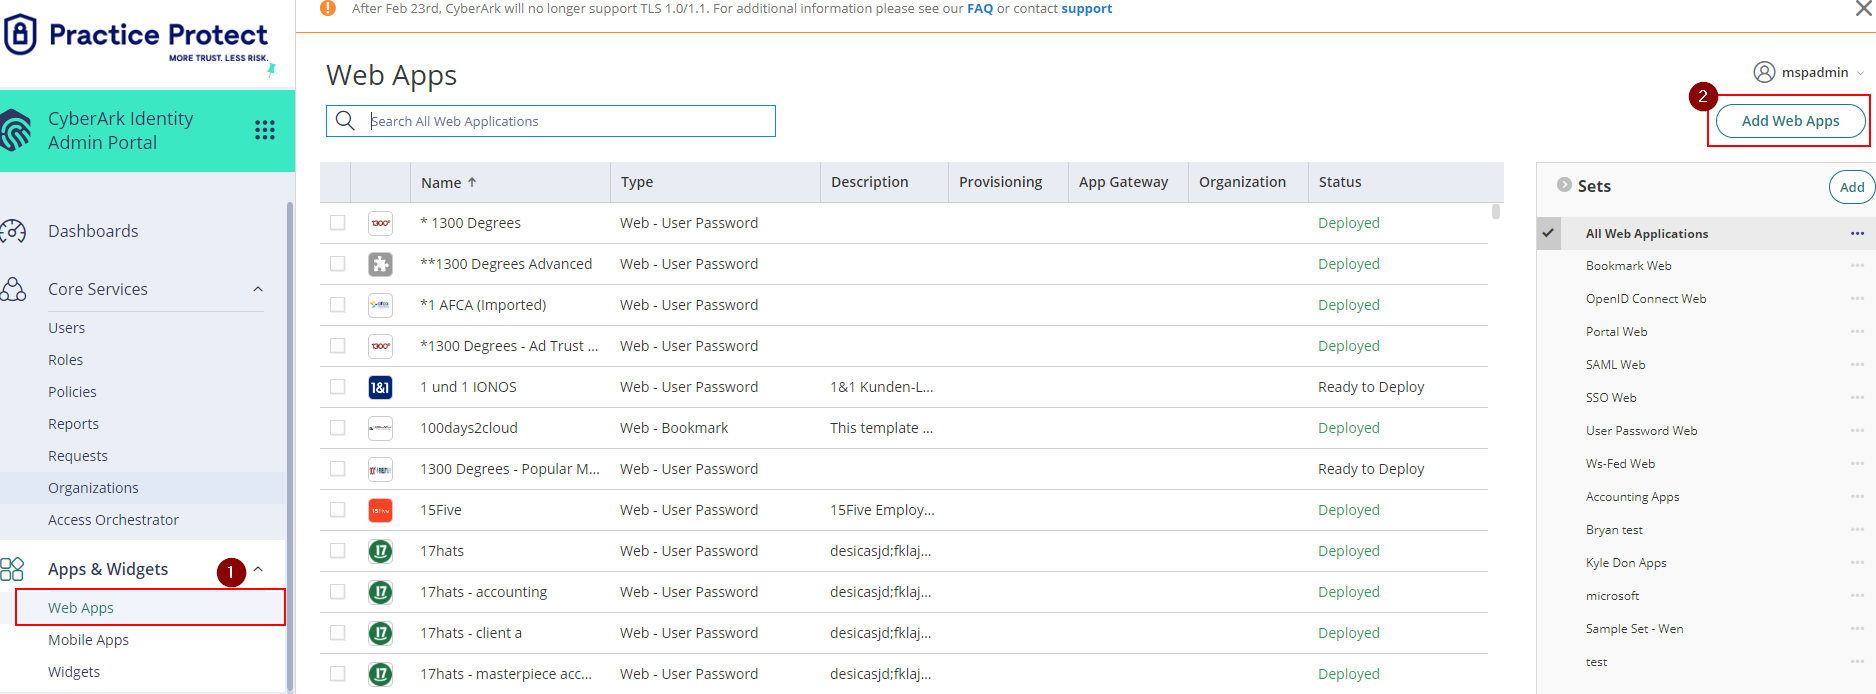
4. From the Apps & Widgets, go to Web Apps section. Then, choose Add Web Apps on the top right corner.
5. On the app catalog, search for “Salesforce” and Add the app Salesforce “SAML + Provisioning”. Hit “Yes” to add the application

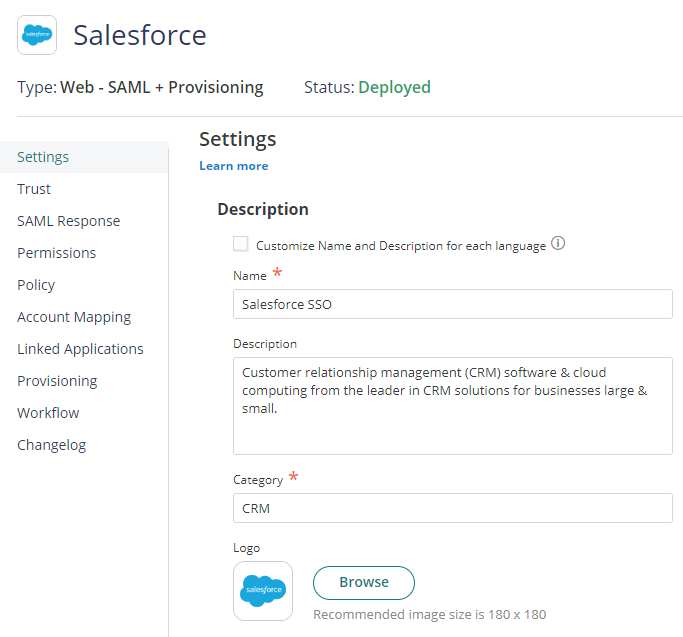
6. The application that you just added opens to the Settings page. Set the Name to “Salesforce SSO” then click Save. Note: You can change the name, category or logo based on your preference.
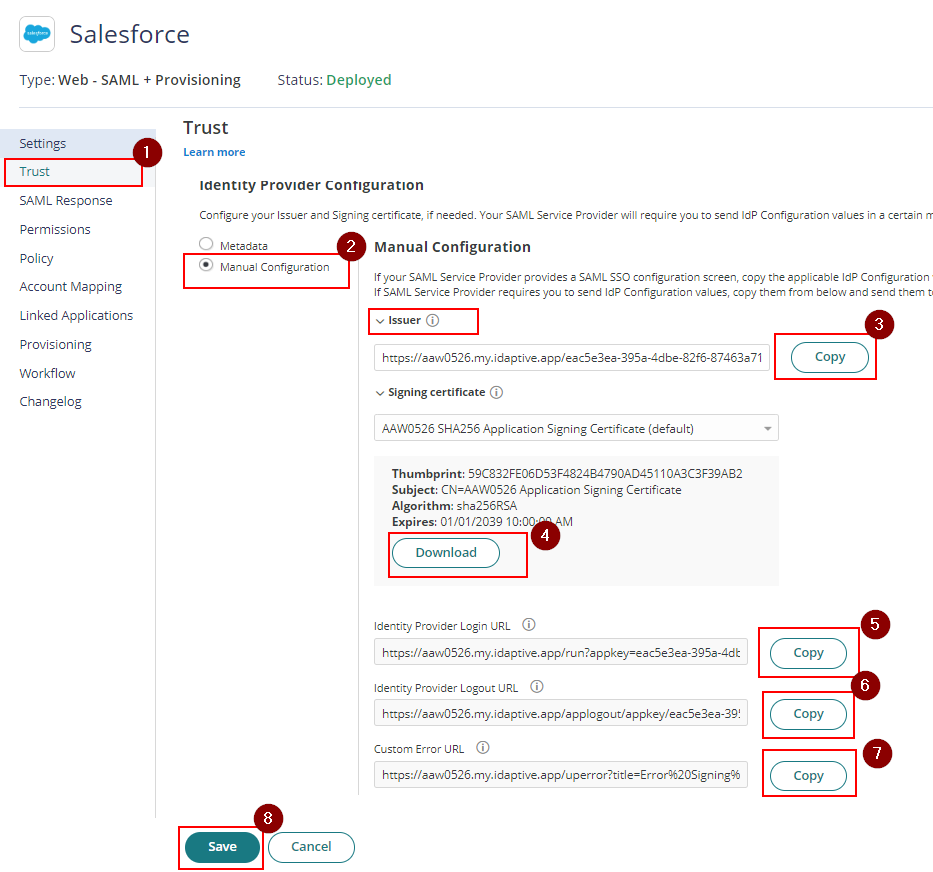
7. Click on Trust > On Identity Provider Configuration select Manual Configuration > Click on Signing Certificate and click Download. This will download the certificate on your local PC which you will need for the below steps. Copy the Issuer URL, Identity Provider Login URL, Identity Provider Logout URL (Optional) and Custom Error URL and temporarily put it in a notepad. You will need these details for the below steps as well. Hit Save.
8. Open a new tab and login to Salesforce using the admin account. If you have a custom Salesforce URL, use it(ex. mydomain.mysalesforce.com).
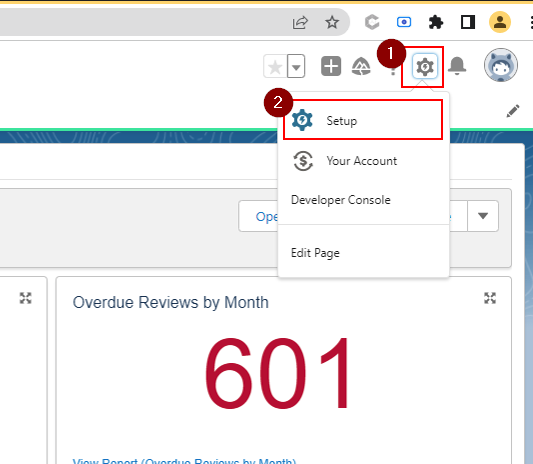
9. Right on top, click the gear settings icon and choose Setup to go the Salesforce Setup page.
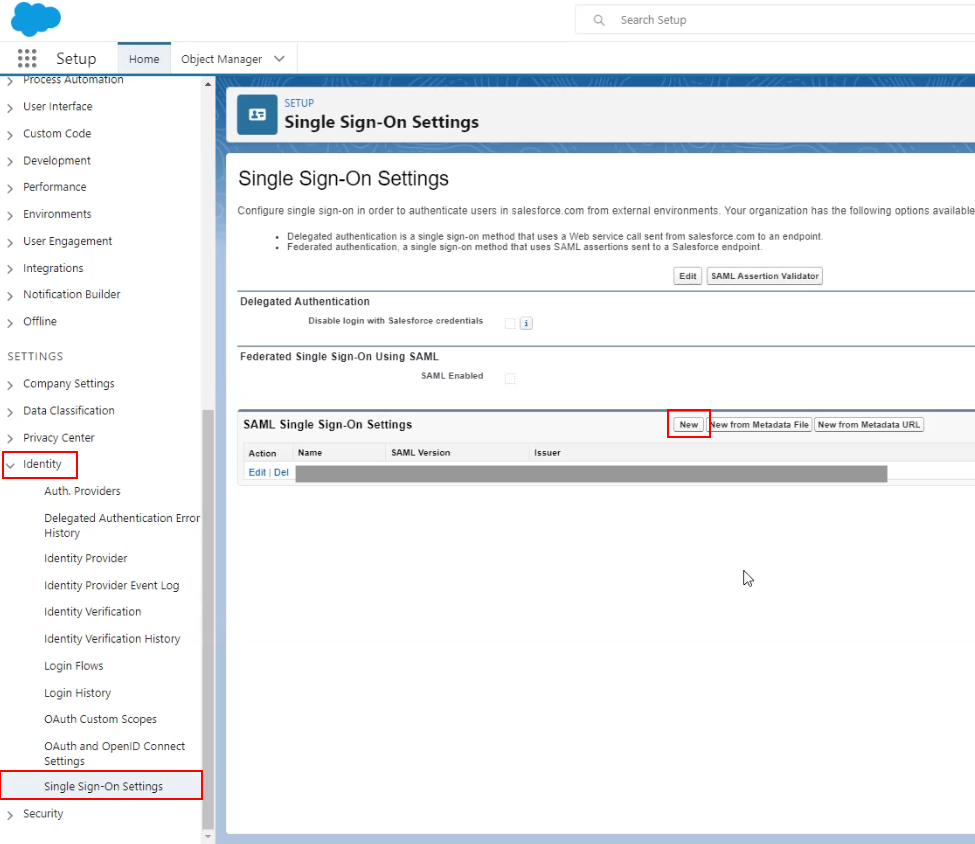
10. Scroll down to the Settings section > Identity > Click Single Sign-On Settings. On the SAML Single Sign On Settings, click New. This will open a dialog box for setting up the configuration
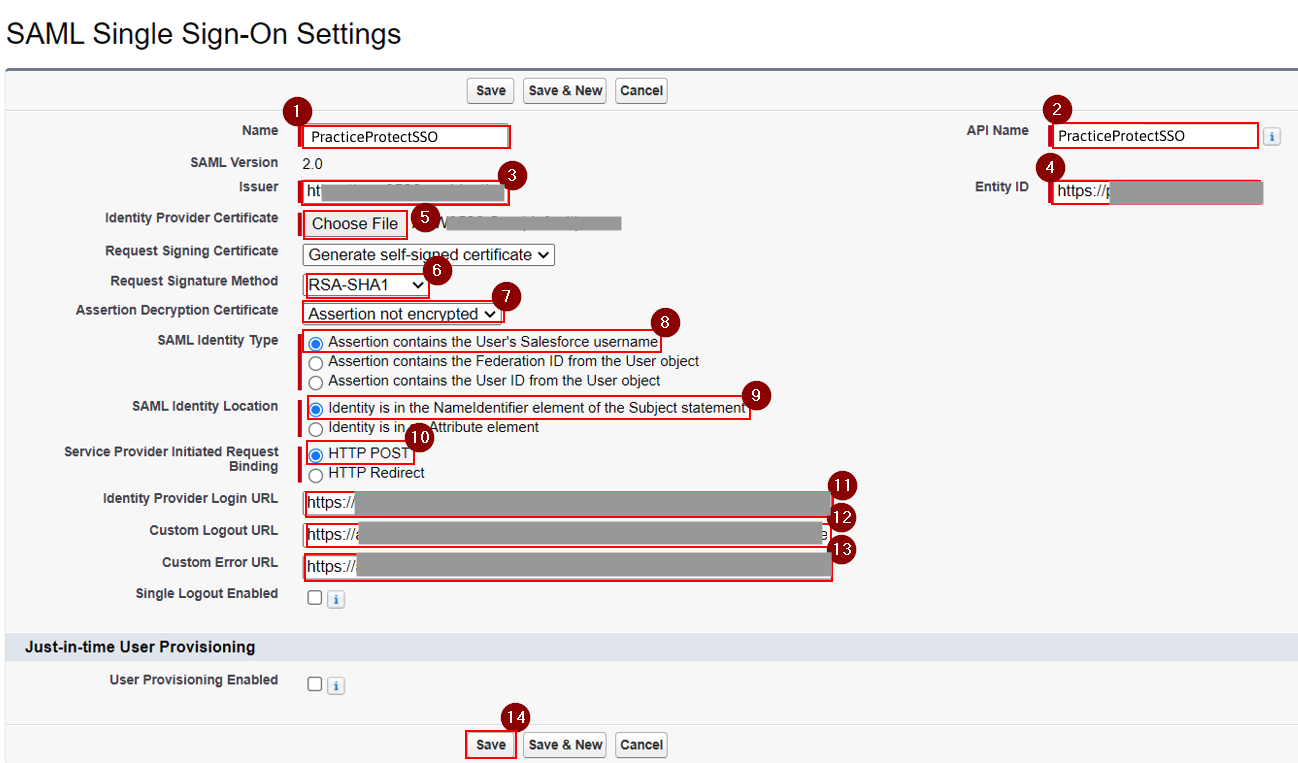
11. Follow the format below. Copy and paste each fields correctly. Once finished hit Save to apply.
Name: PracticeProtectSSO
API Name: PracticeProtect
Entity ID: https://mydomain.my.salesforce.com/ (Note: change this to the firm’s custom login URL)
Issuer: copy and paste the Issuer details from Step 7
Identity Provider Certificate: Upload the file (Signing Certificate) that you downloaded from Step 7
Request Signing Certificate: This will automatically be added once you upload the certificate
Request Signature Method: RSA-SHA1
Assertion Decryption Certificate: Assertion not encrypted
SAML Identity Type: Assertion contains the User’s Salesforce username
SAML Identity Location: Identity is in the NameIdentifier element of the Subject statement
Service Provider Initiated Request Binding: HTTP POST
Identity Provider Login URL: copy and paste the Identity Provider Login URL details from Step 7
Custom Logout URL (Optional): copy and paste the Identity Provider Logout URL details from Step 7
Custom Error URL: copy and paste the Custom Error URL details from Step 7.
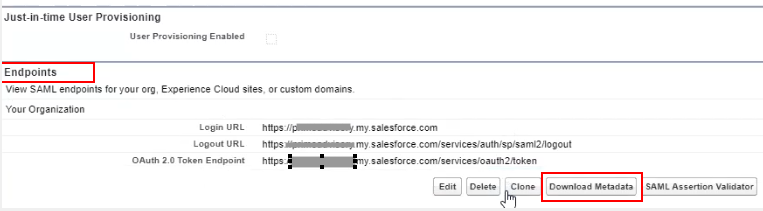
12. This will show an overview of what has been configured. On the Endpoints section, click Download Metadata.
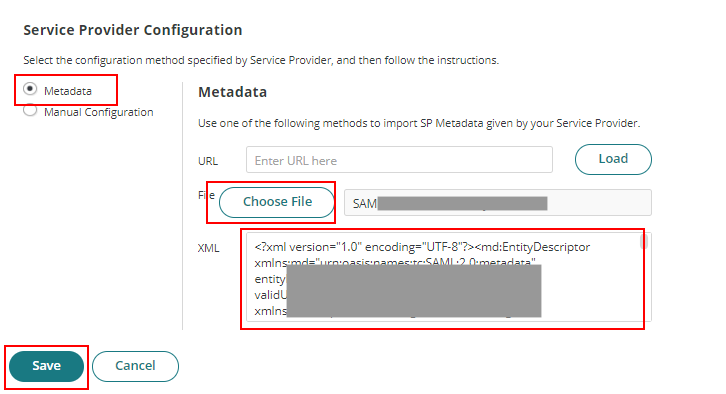
13. Return to the Salesforce app in Practice Protect. Go to Trust > Service Provider Configuration > Metadata. Choose and upload the file you downloaded from Step 13 and hit Save to apply.
Enable Single Sign On
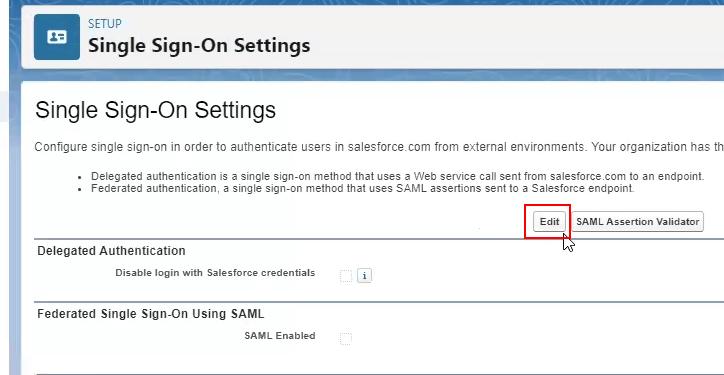
1. After setting up the configuration above, return to the Salesforce Setup > Single Sign On Settings and click on Edit
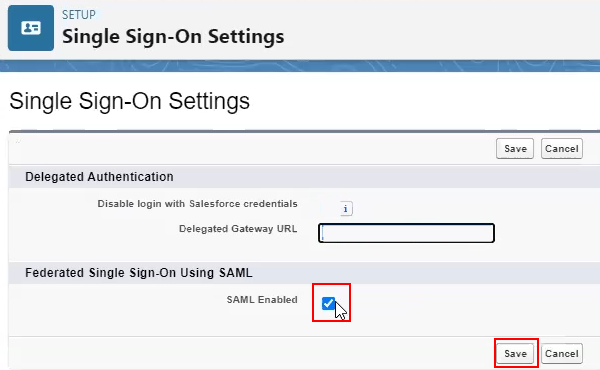
2. On the Federated Single Sign-On Using SAML, tick the box for the SAML Enabled and Save. This should now activate it.
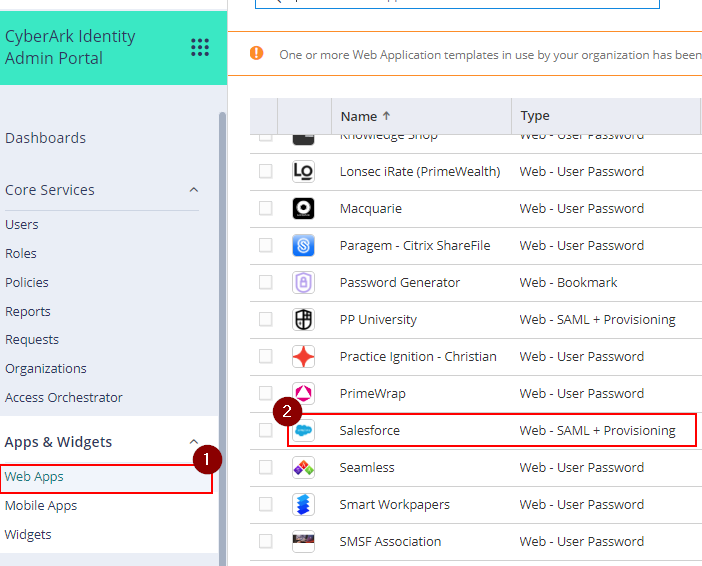
3.Return to the Salesforce app settings in the Practice Protect Admin Portal.
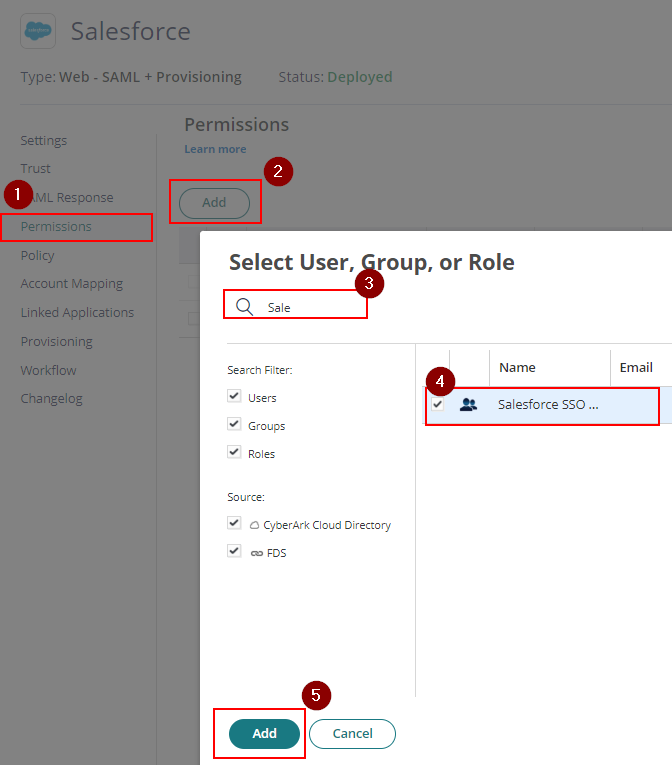
4. On Permissions, add the role which contains the Salesforce users. (i.e. Salesforce SSO Users) and Save
Users should now be able to directly login to Salesforce using the app added in the platform.
Enforce Single Sign On to Users
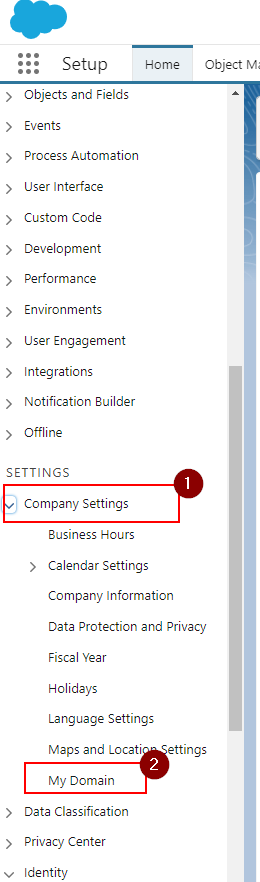
1. Go back to the Salesforce Setup page > Settings > Company Settings > My Domain.
2. Scroll Down to Authentication Configuration and click Edit. On the Authentication Configuration page > Authentication Service, tick the box for PracticeProtectSSO. Make sure Login Form is not ticked. Leave the rest of the settings as default
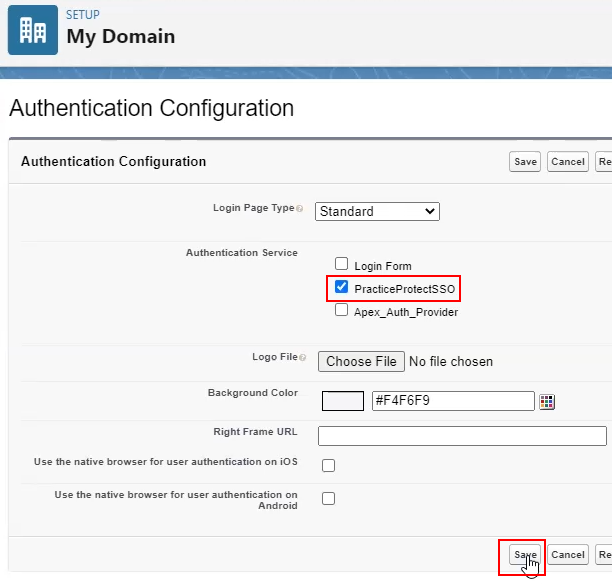
20. Hit Save to apply changes. This prevents users on accessing salesforce through a normal login page. Thus, this redirects user to Practice Protect to sign in.
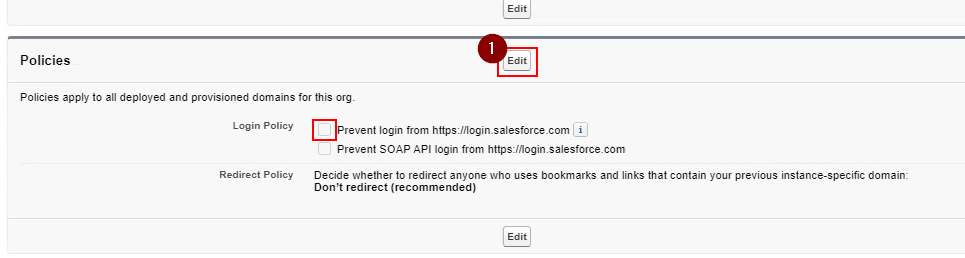
If you want to prevent staff from logging into Salesforce from the default page (https://login.salesforce.com), go to the Policies > Edit > Tick the box for “Prevent login from “https://login.salesforce.com”. Make sure to hit Save to apply.