Purpose
Zoom offers both IdP-initiated SAML SSO (for SSO access through the Practice Protect user portal or Idaptive mobile applications) and SP-initiated SAML SSO (for SSO access directly through the Zoom web application or Application).
It can be useful to open the web application and Admin Portal simultaneously and have them both open, perhaps side by side. As part of the SSO configuration process, you’ll need to copy and paste settings between the two browser windows.
What to know before configuring SSO for Zoom
- Once you enable Zoom Practice Protect SSO, Users will be able to login using SSO only from domain-specific Zoom URL (https://companydomain.zoom.us) but be aware that they can still log in Zoom account using the www.zoom.us URL or the desktop application with either SSO or Zoom username and password. To force only SSO, we recommend to add Zoom to the Practice Protect email redirection rule and then change the users passwords from Zoom admin portal. Once you do that, they won’t be able to login with username and password anymore and the only way to login will be through SSO.
- Zoom offers automatic user provisioning. After you’ve created your administrative account in Zoom and configured SSO, you don’t need to register additional users. Once Zoom receives the SAML response from Practice Protect, Zoom checks to see if the user already exists. If the user doesn’t already exist, Zoom creates the user account automatically with the user account received in the SAML response.
Prerequisites
- Administrator Access in Practice Protect
- Business or Education Zoom account
- An active Zoom account with administrator rights for your organization.
- Approved Vanity URL
- A signed certificate. You can either download one from Admin Portal or use your organization’s trusted certificate.
- Zoom login should have exact login names in Practice Protect.
- If the user already has PP login, ensure that the Zoom login is exactly the same as the PP login name. Rename the Zoom login if necessary so it will be exactly the same as the PP login
Instruction
1. Login to Practice Protect and switch to Admin portal.
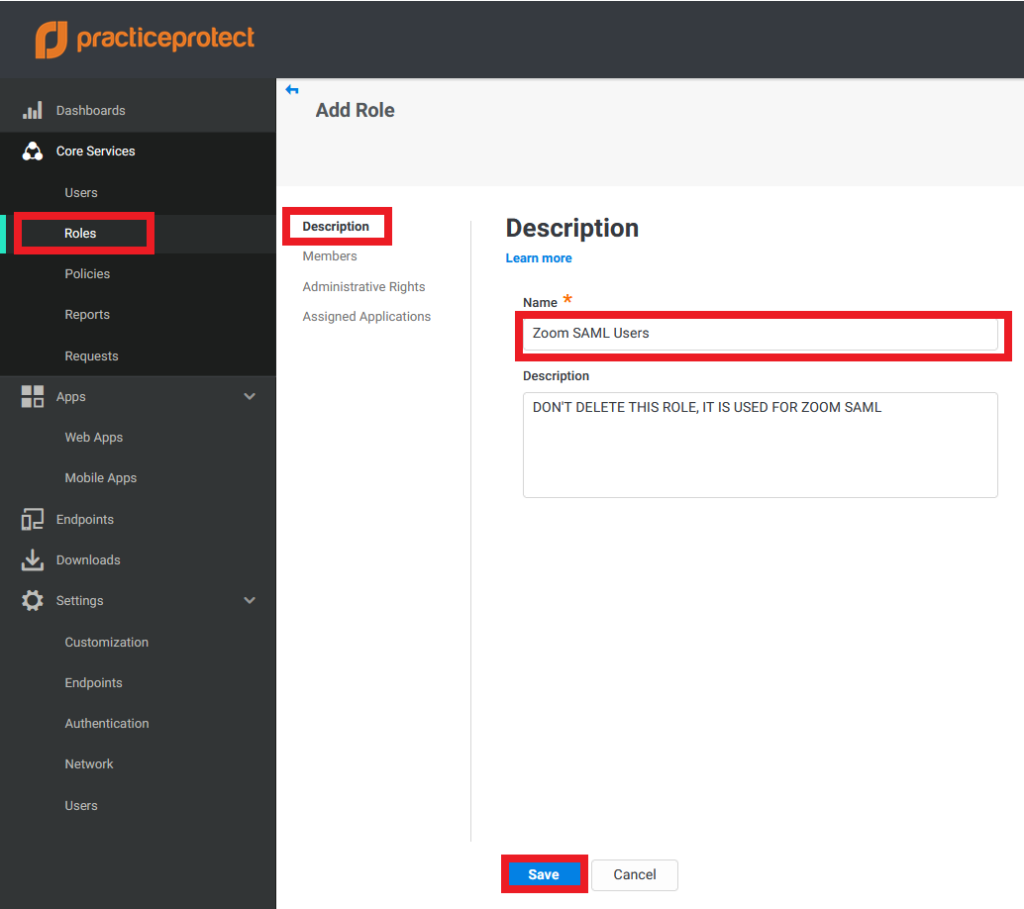
2. Go to Roles > Add Role > Under Description, enter the name of the Role on the Name field i.e. “Zoom SAML Users”.
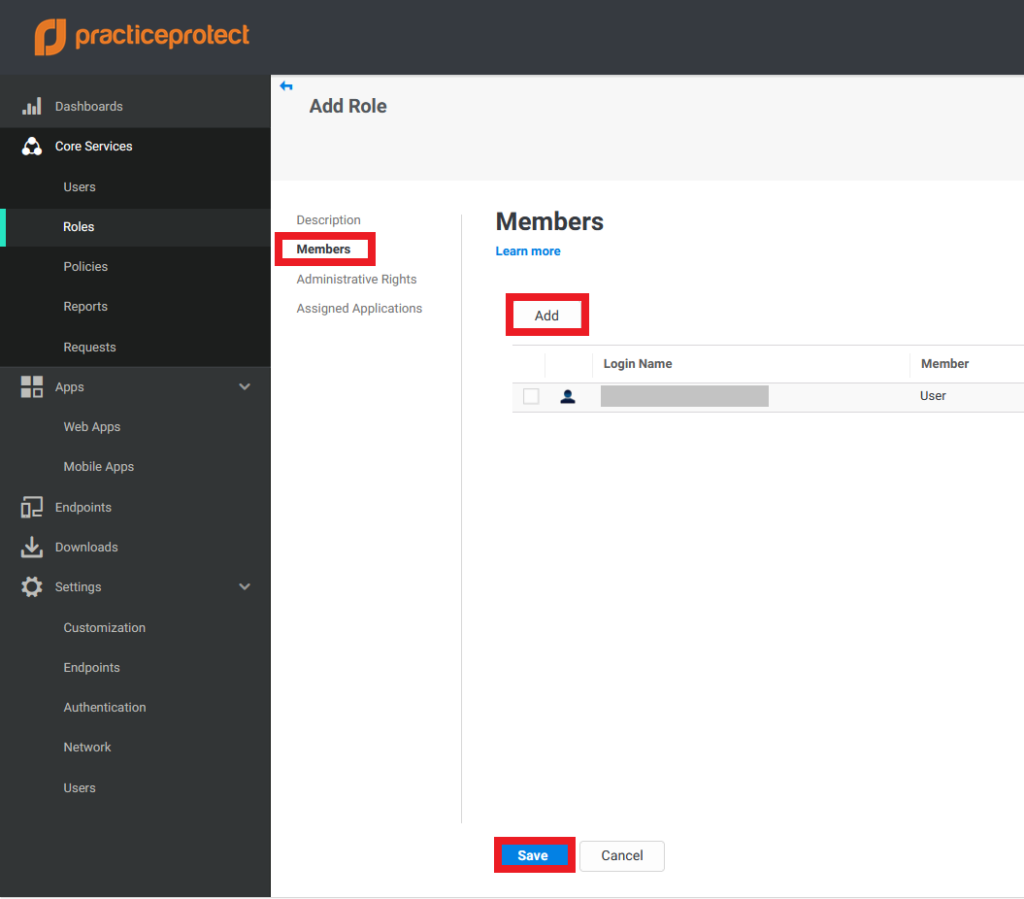
3. Click on Members > Click Add > Add the Zoom users and Click Save. If you have multiple Groups you may create these groups accordingly and repeat steps 2-3.
**Please ensure that the login name in PP is exactly the same as their respective Zoom login.
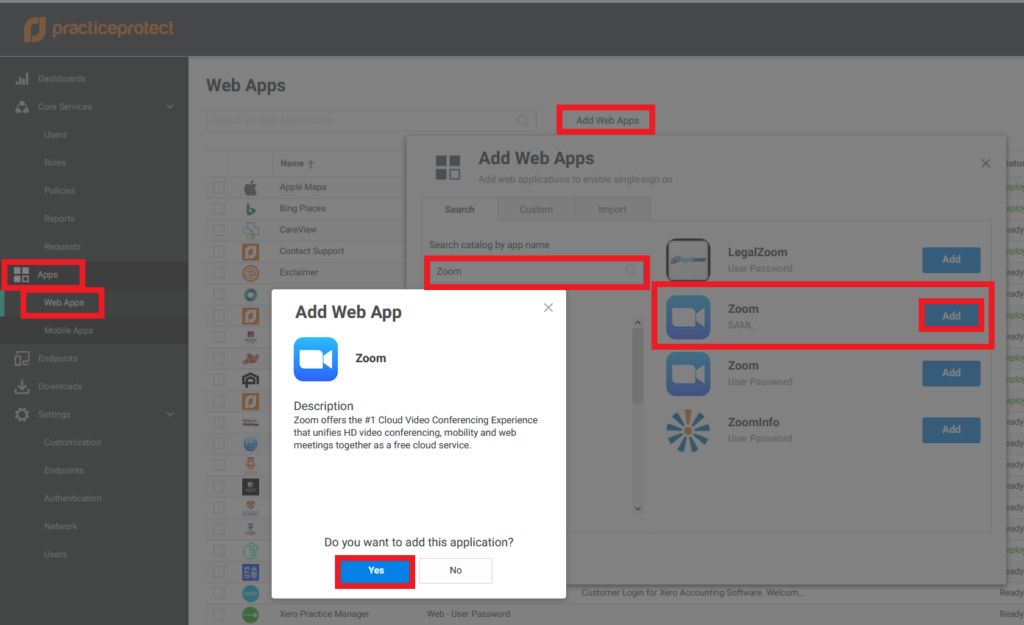
4. Go to Apps > Web Apps > Click on Add Web Apps > On the search field type “Zoom” > Select Zoom – SAML then click Add. On Add Web App window, Click Yes to add this application. Click Close.
5. Under Settings, add your company domain under Your Zoom domain name then click Save. (If your Zoom account URL is https://practiceprotect.zoom.us, then your domain is practiceprotect)

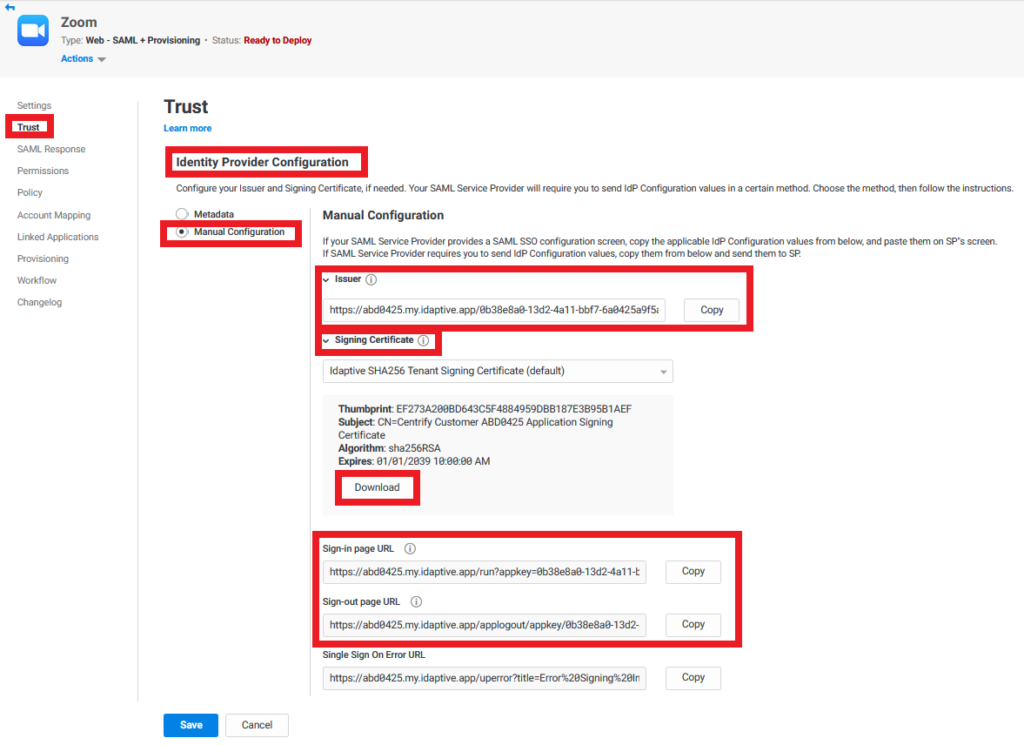
6. Click on Trust > On Identity Provider Configuration select Manual Configuration > Click on Signing Certificate and click Download. This will download the certificate on your local PC which you will need on the succeeding instructions. Copy the Issuer and Sign-in page URL and Sign-out page URL on a notepad. You will also need this details on the succeeding instructions.
7. Scroll down to Service Provider Configuration, add below URL in the URL field (where mycompany is your company Zoom domain) https://mycompany.zoom.us/saml/metadata/sp, then click Load and then click Save. (If your Zoom domain is practiceprotect then URL will be https://practiceprotect.zoom.us/saml/metadata/sp)

8. Click on Permissions > Click Add > Select the Role created on step 2 i.e. “Zoom SAML Users”. Click Save.

9. The status of the application will change from Ready to Deploy into Deployed. This means that the newly added app will now appear on the user portal for all users that are members of the role (i.e. “Zoom SAML Users”)
10. Login to Zoom using the Administrator Account. Under Admin click on Advanced > then click on Single Sign-On.

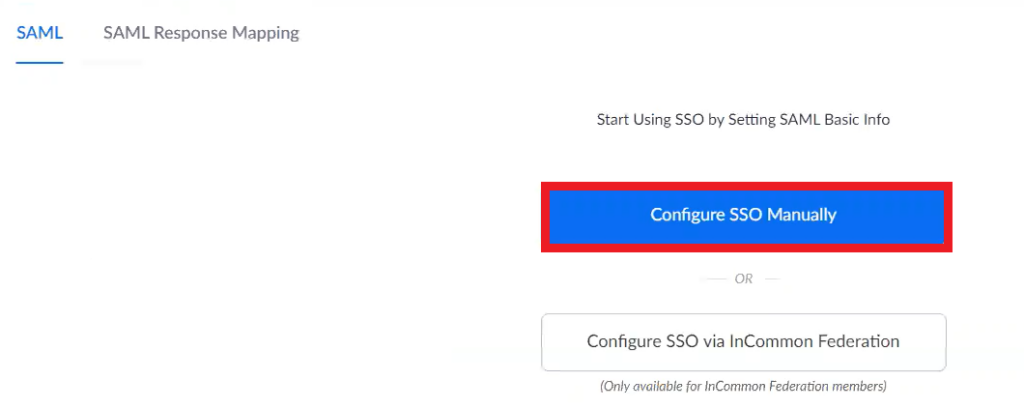
11. Click on Configure SSO Manually.
12. Under SAML. Add the Sign-in page URL , Sign-out page URL and Issuer from step 6 to the Sign-in page URL , Sign-out page URL and Issuer (IDP Entity ID) respectively. Under Service Provider (SP) Entity ID choose the https:// record (ex: https://mycompany.zoom.us).
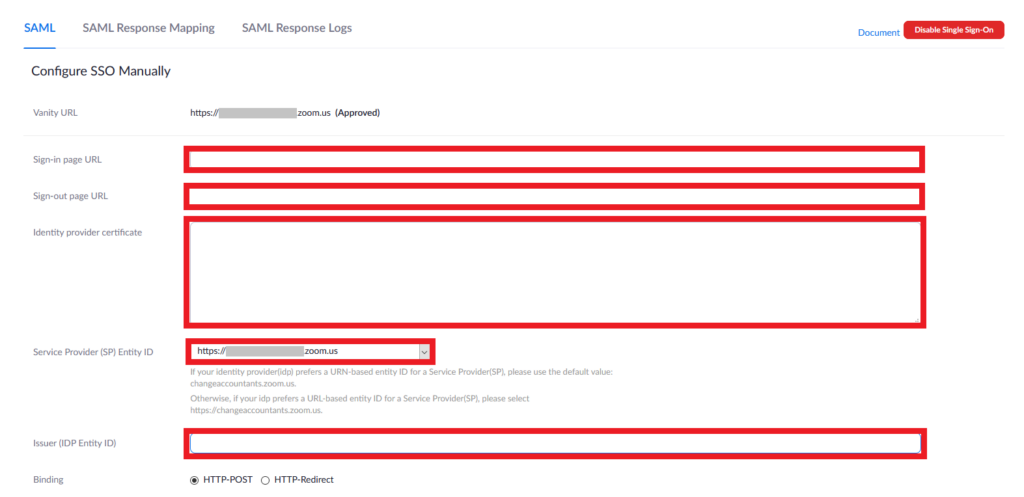
Open the Certificate downloaded in step 6 in any text editor and copy the body only (remove —–BEGIN CERTIFICATE—– and —–END CERTIFICATE—–) then paste it under Identity provider certificate

13. Scroll down and choose HTTP-POST under Binding, tick Sign SAML request , Sign SAML Logout request , Support encrypted assertions and Enforce automatic logout after user has been logged in for and choose 12 hours. Under Provision User , leave it At Sign-In (Default). Click Save Changes.

14. Go to SAML Response Mapping , click Edit beside Default user type and choose Basic and then click Save Changes.


15. Test if it is working by logging into a User account at Zoom Login. enter your Company name or Go to your Company URL (ex: https://mycompany.zoom.us) and click Sign in.
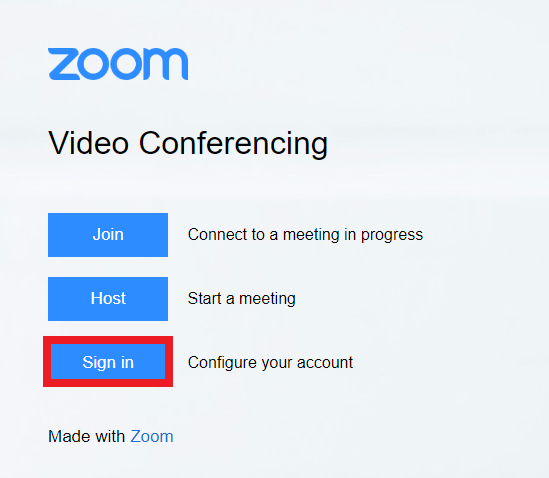
16. You will be redirected to the Practice Protect login page. Enter your Practice Protect credentials.

17. Once authentication is successful, you should be able to access your Zoom application.
18. Follow the below Guide (1- Setup Email redirection) to add Email Redirection Rule for Zoom and then got to the Zoom admin account and change the password of all the users with Random Password Generator to prevent the SSO users from login with Username and Password.
