Purpose
Claude AI offers single sign-on via SAML integration with Practice Protect. This provides a seamless login experience to the Claude AI platform using IdP-initiated SSO.
Practice Protect will configure this on your behalf. Please send us an email at support@practiceprotect.com
Prerequisites
- Admin Access to Practice Protect
- Claude Username/Email for staff should match the login names in Practice Protect.
-
Setup & Enable Single Sign-On
-
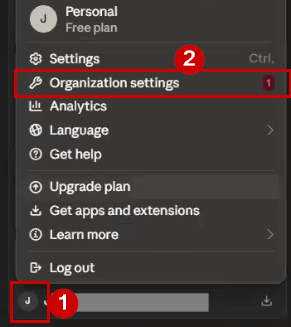
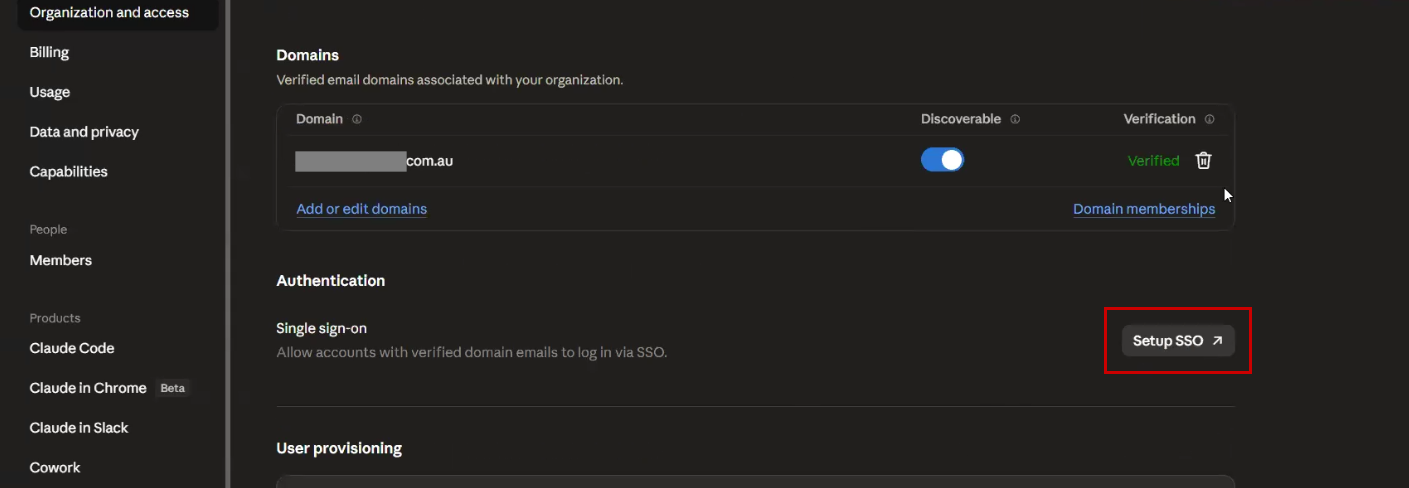
To get started, sign in to Claude and click your profile icon in the bottom-left corner, then select Organization Settings.
Alternatively, you can go directly to: Claude Organization Settings
-
Under Organization & Access, navigate to the Authentication section, then click Setup SSO to configure Single Sign-On.
-
This will open a new page in your browser for the SSO configuration.
-
Locate and select CyberArk SAML as the Identity Provider.

-
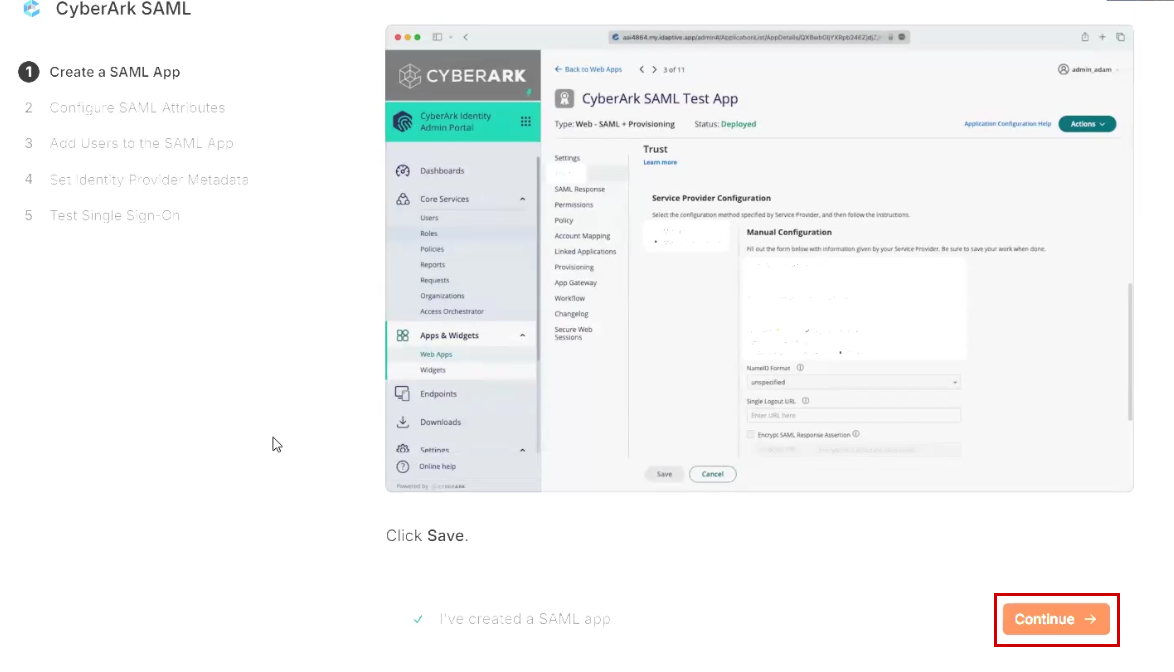
This will open the instructional setup page, which we will follow throughout the SSO configuration process. As outlined in the first step, begin by creating a SAML App.
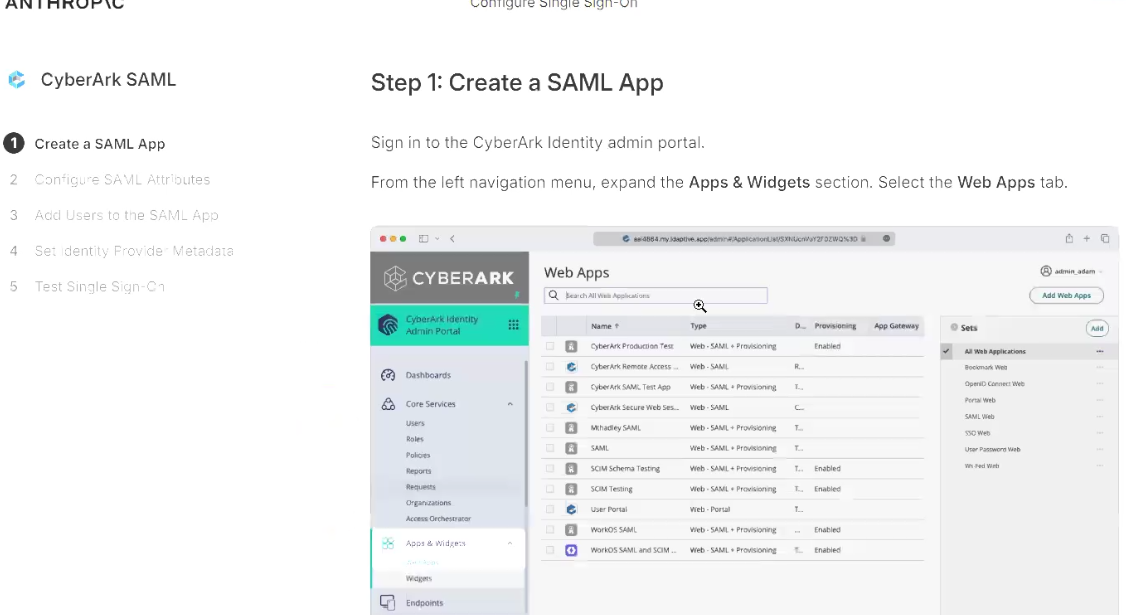
- Next step is sign in to Practice Protect and switch to the Admin Portal. It’s recommended to open a new tab for this while keeping the Claude SSO configuration page open, so you can work through both setups simultaneously
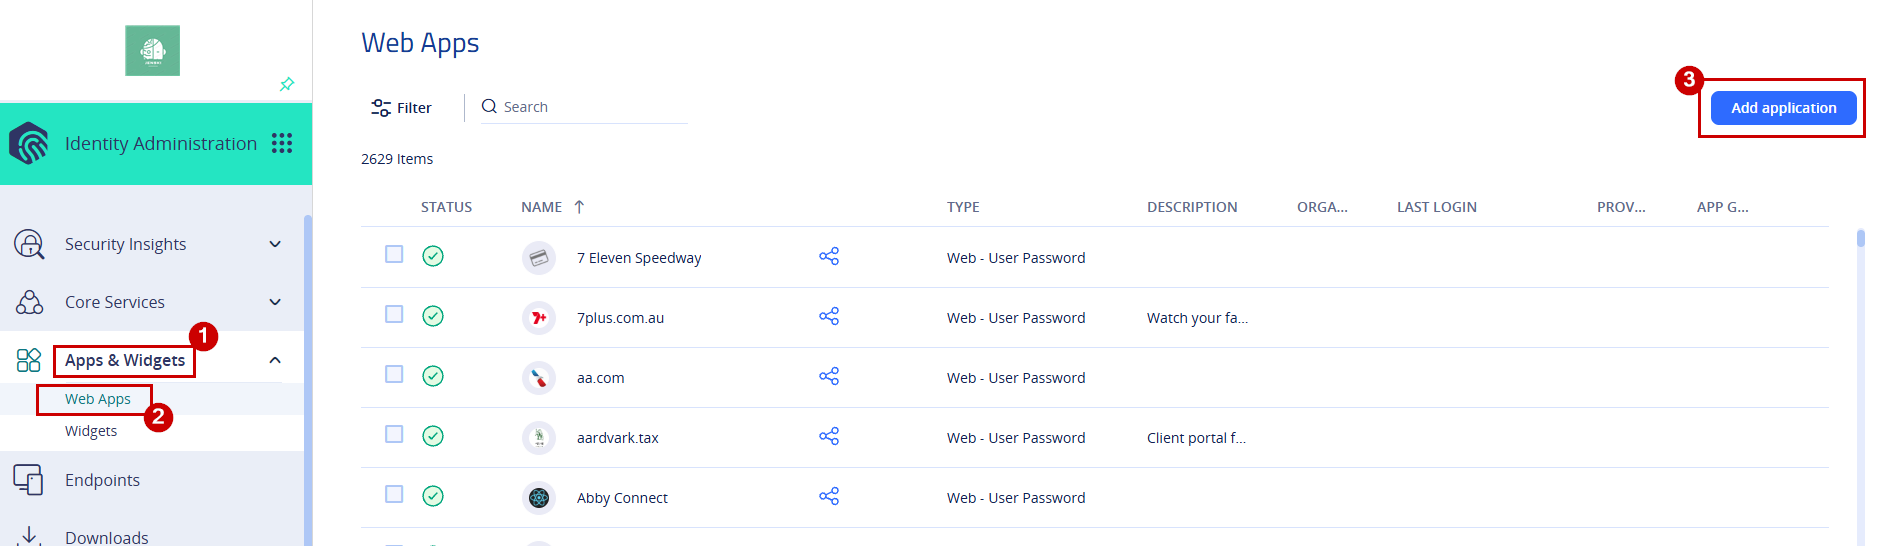
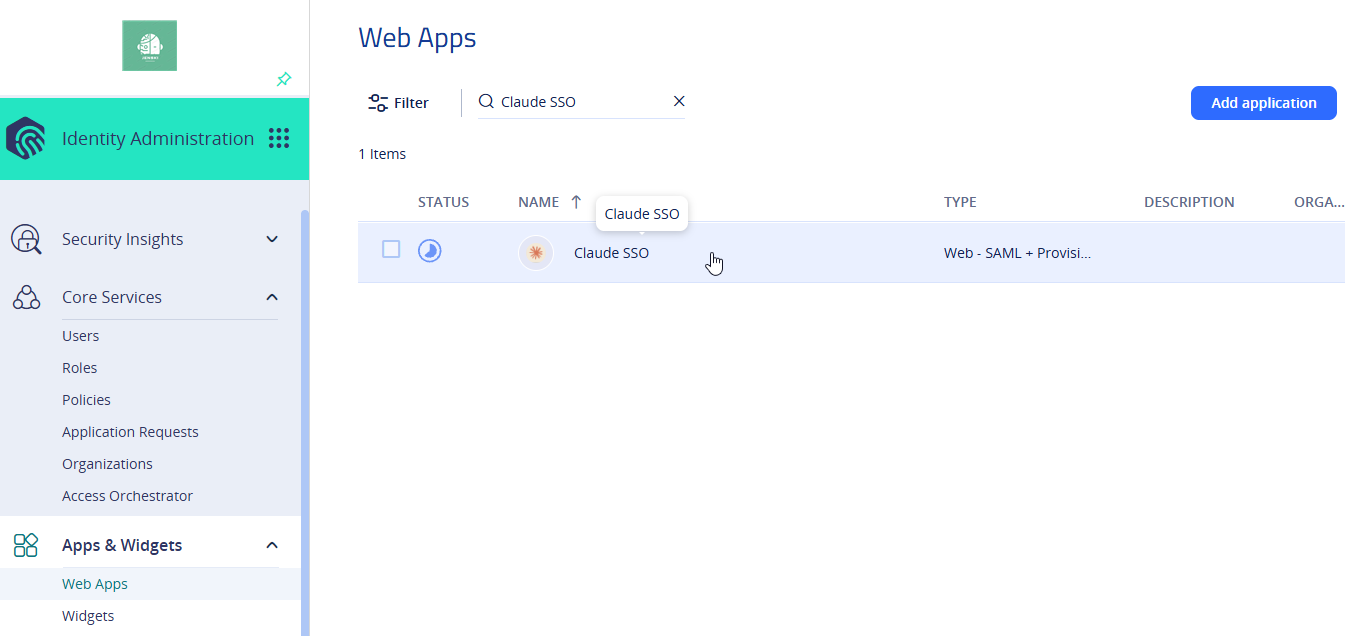
- Follow the instructions to navigate to Apps & Widgets > Web Apps, then click Add Application

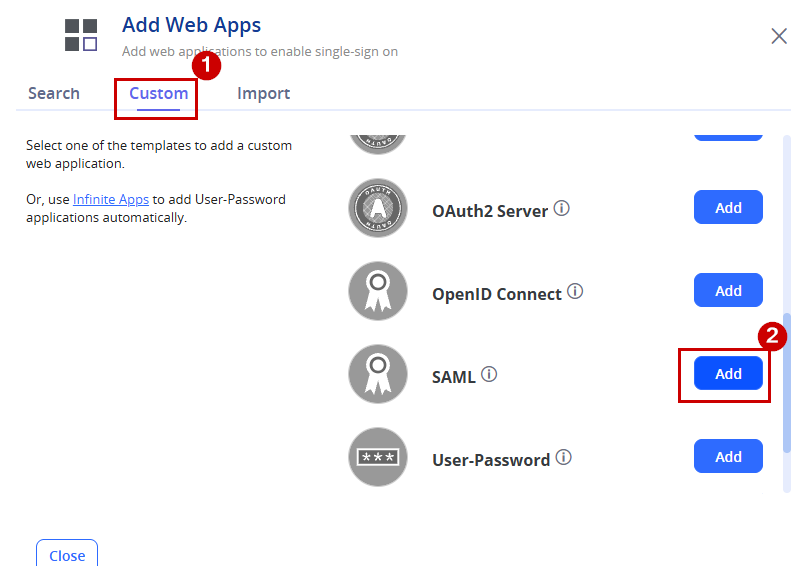
- Select the Custom tab, then click Add next to SAML
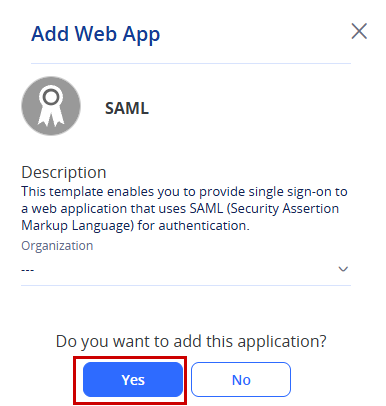
- Click Yes.
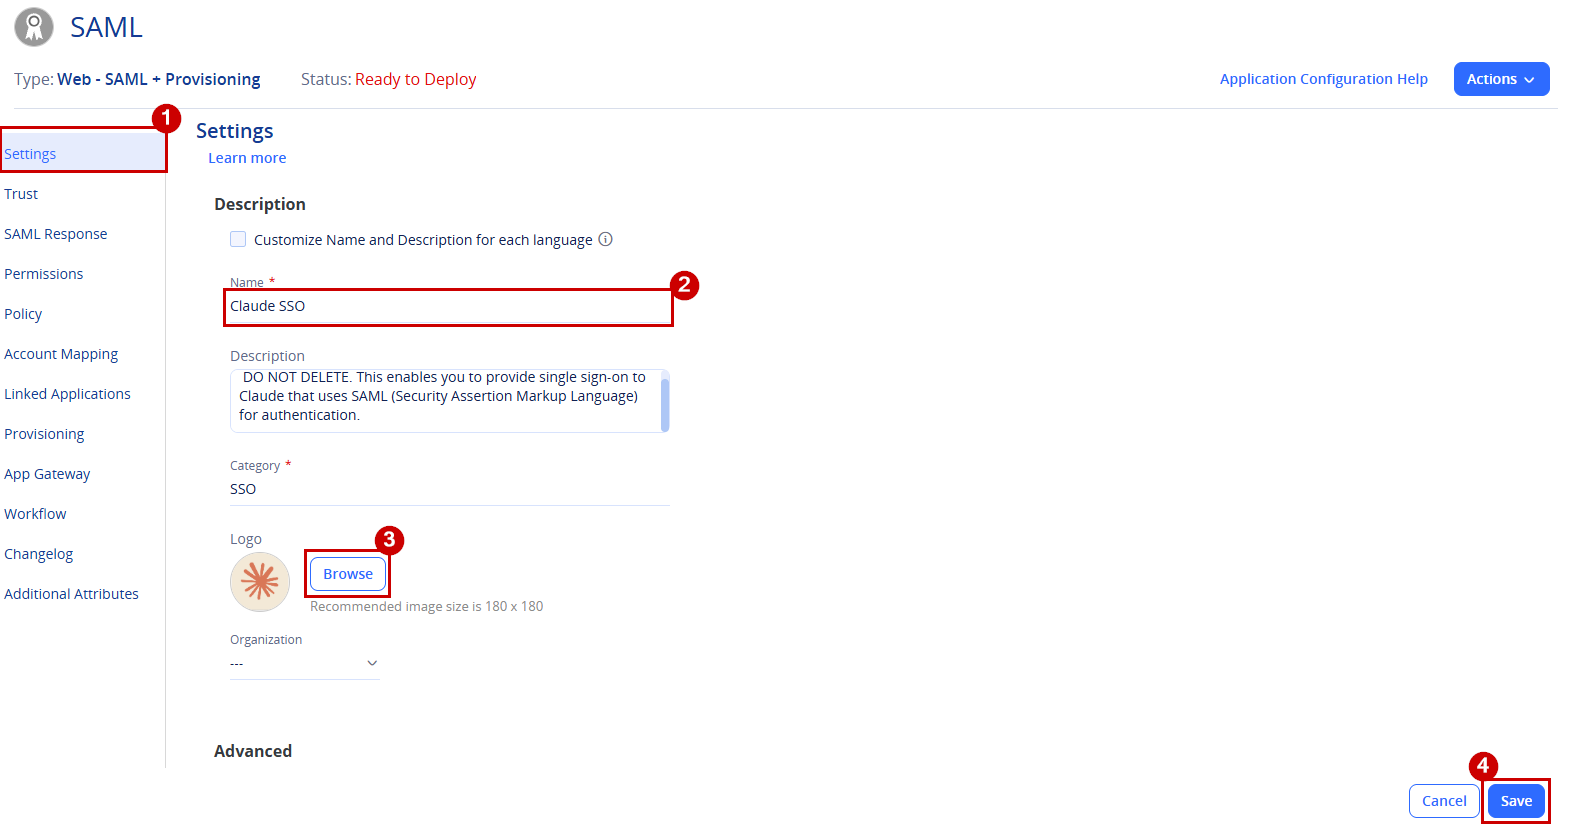
- Set the Name of the app to Claude SSO
- Click Browse to upload a logo. You can use and download the below icon.

- Click Save.

-
Return to the Create a SAML App page in Claude SSO Configuration.
-
Copy both the SP Entity ID and the Assertion Consumer Service (ACS) URL values, as these will be required for the SAML application setup.

-
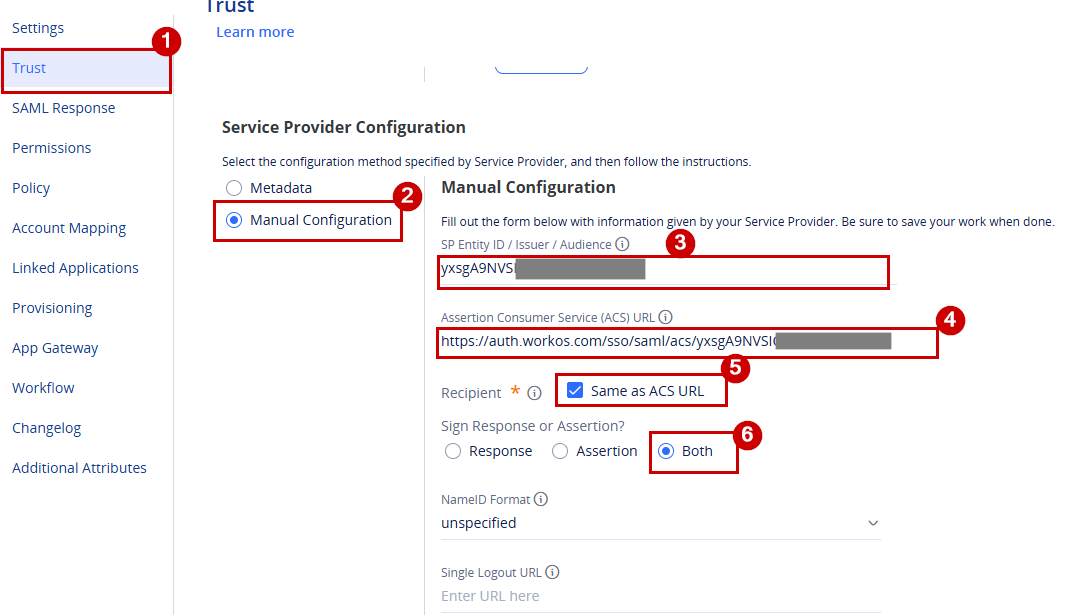
Return to the Claude application in the Practice Protect Admin Portal and proceed to the Trust tab.
-
Scroll down to Service Provider Configuration and follow the configuration below:
- Select Manual Configuration
- Paste the SP Entity ID into the corresponding field
- Paste the Assertion Consumer Service (ACS) URL into the corresponding field
- Ensure Same as ACS URL is ticked
- For Sign Response or Assertion?, select Both
The rest of the settings can be left as default. Once completed, click Save.
- Return to the Create a SAML App page in Claude and click Continue to proceed to the next step, Configure SAML Attributes.
-
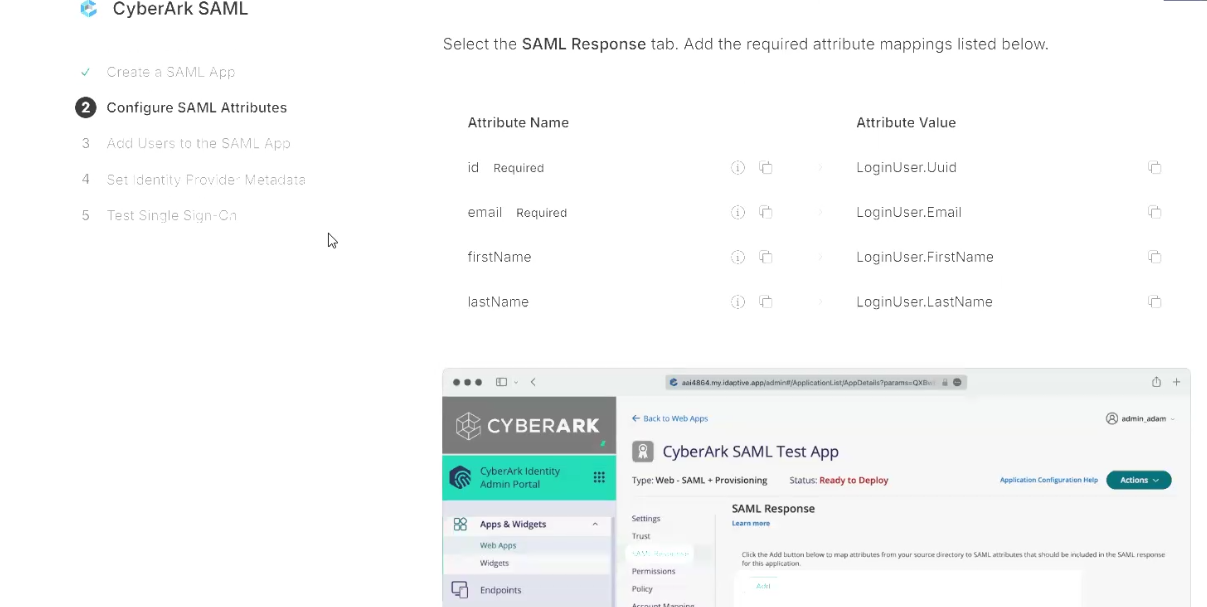
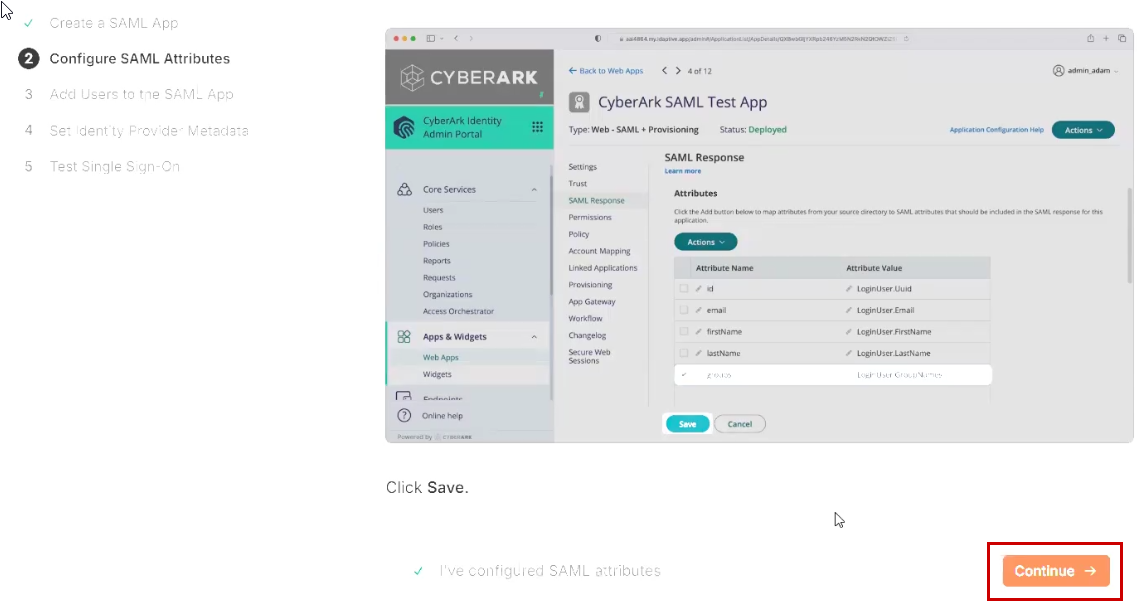
To configure the SAML Attributes, return to the Claude SSO application in the Practice Protect Admin Portal and navigate to the SAML Response section.
-
To add an attribute, click Add. Then, add the attributes listed below:
- Attribute Name: id – Attribute Value: LoginUser.Uuid
- Attribute Name: email – Attribute Value: LoginUser.Email
- Attribute Name: firstName – Attribute Value: LoginUser.FirstName
- Attribute Name: lastName – Attribute Value: LoginUser.LastName
- Attribute Name: groups – Attribute Value: LoginUser.GroupNames
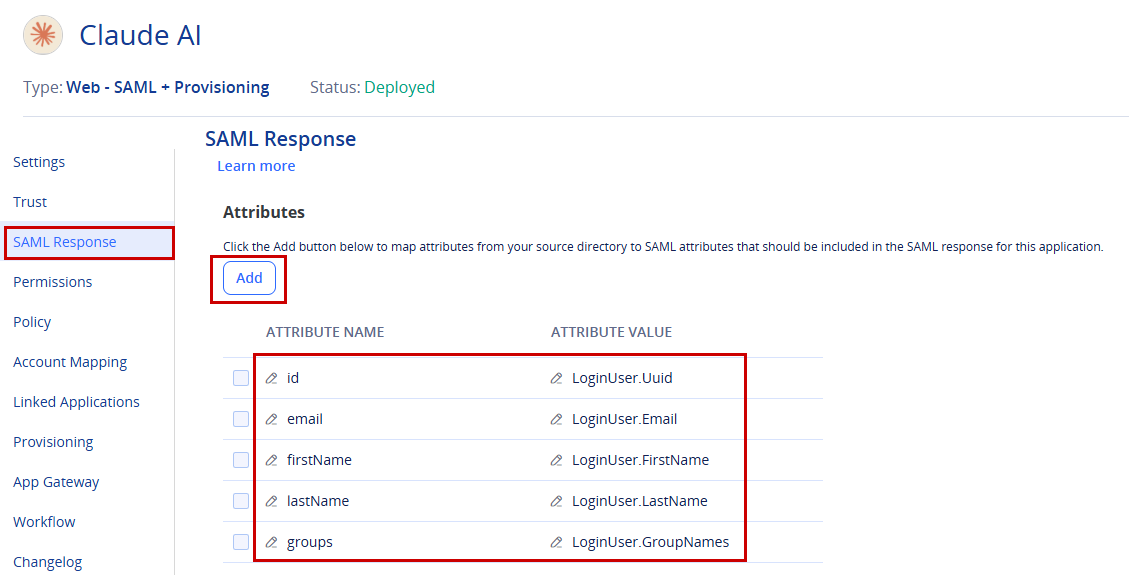
- Click Save.
- Return to the Configure SAML Attributes page in Claude and click Continue to proceed to the next step, Add Users to the SAML app.
-
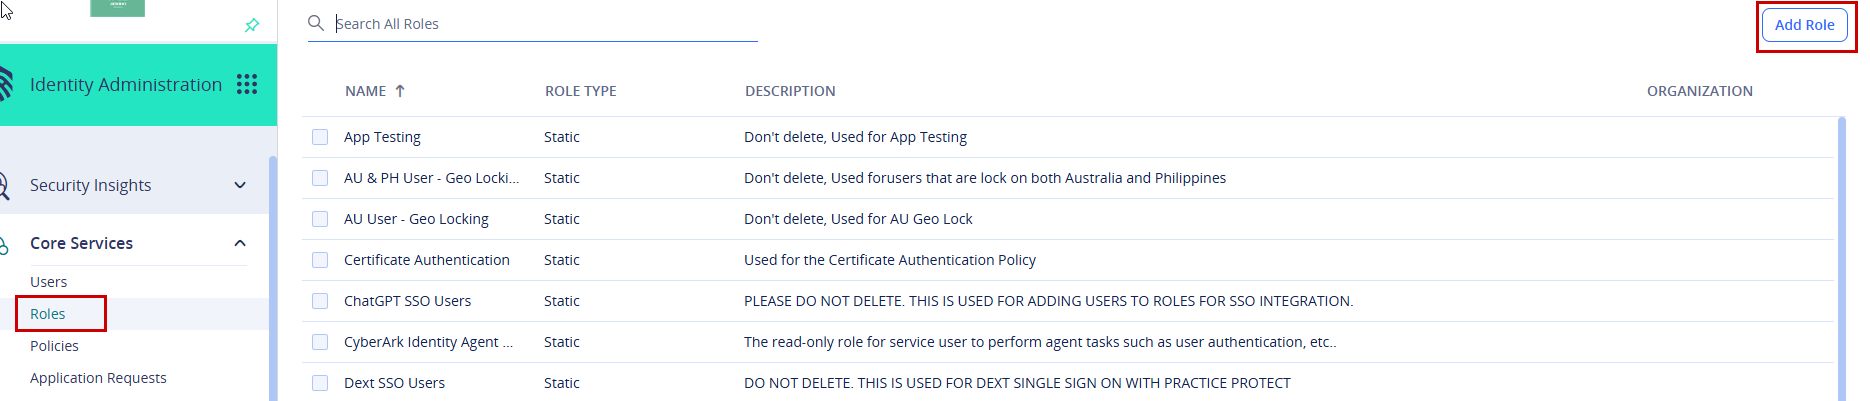
Proceed to Step 3: Add Users to the SAML App. In the Practice Protect Admin Portal, go to Core Services and navigate to Roles, then click Add Role.
-
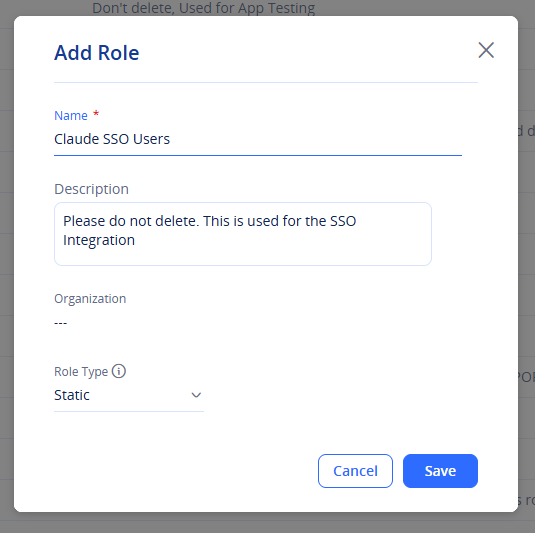
Create a new role named Claude SSO Users, then click Save.
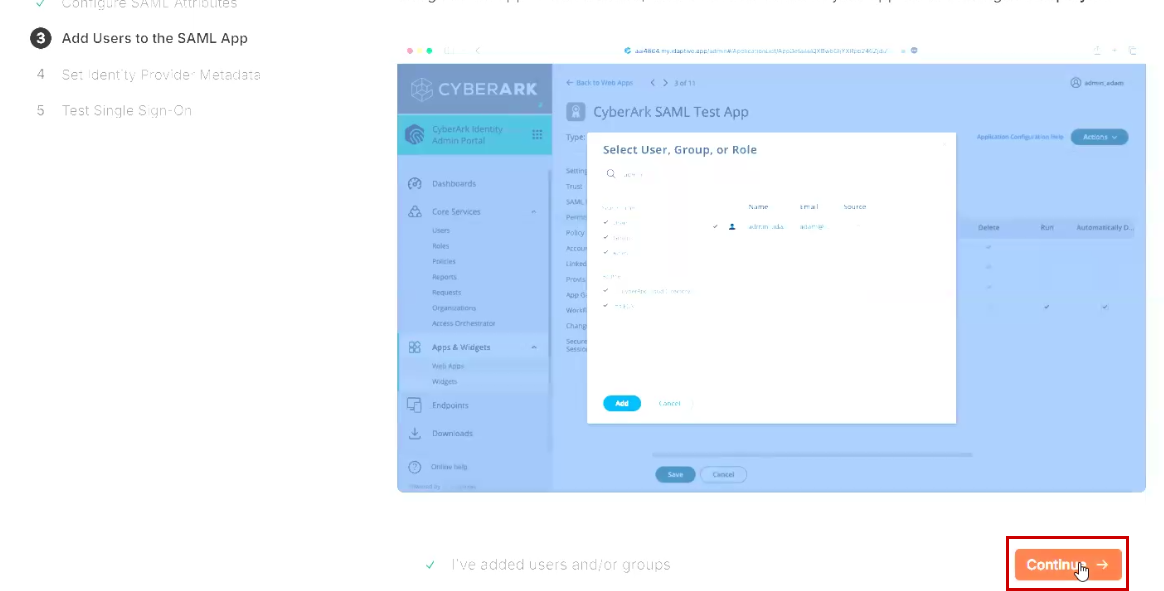
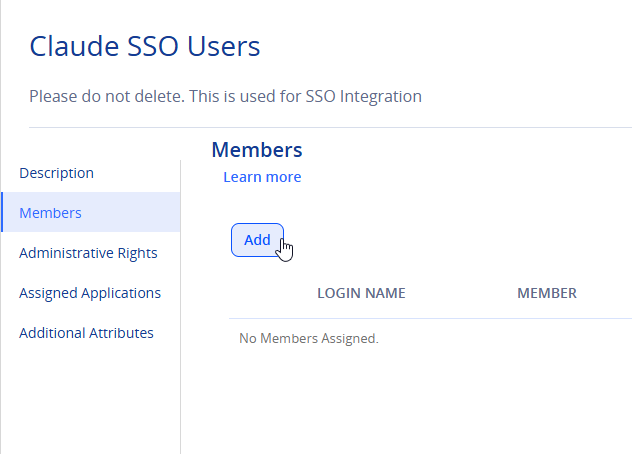
- With the newly created role selected, go to Members and click Add. Add the users who should have access to the application, then click Save.
- Once added, go to Apps & Widgets > Web Apps > Select the Claude SSO app.
- Navigate to Permissions and click Add.
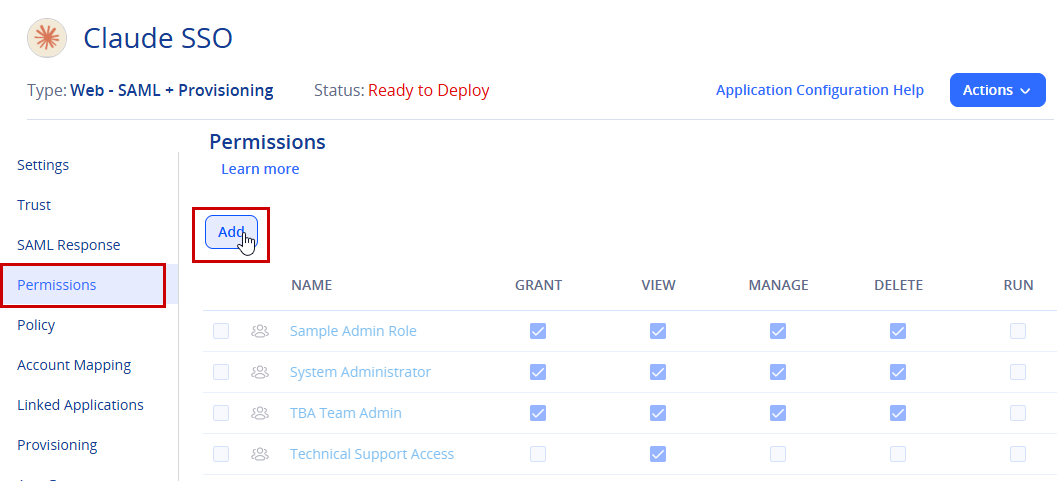
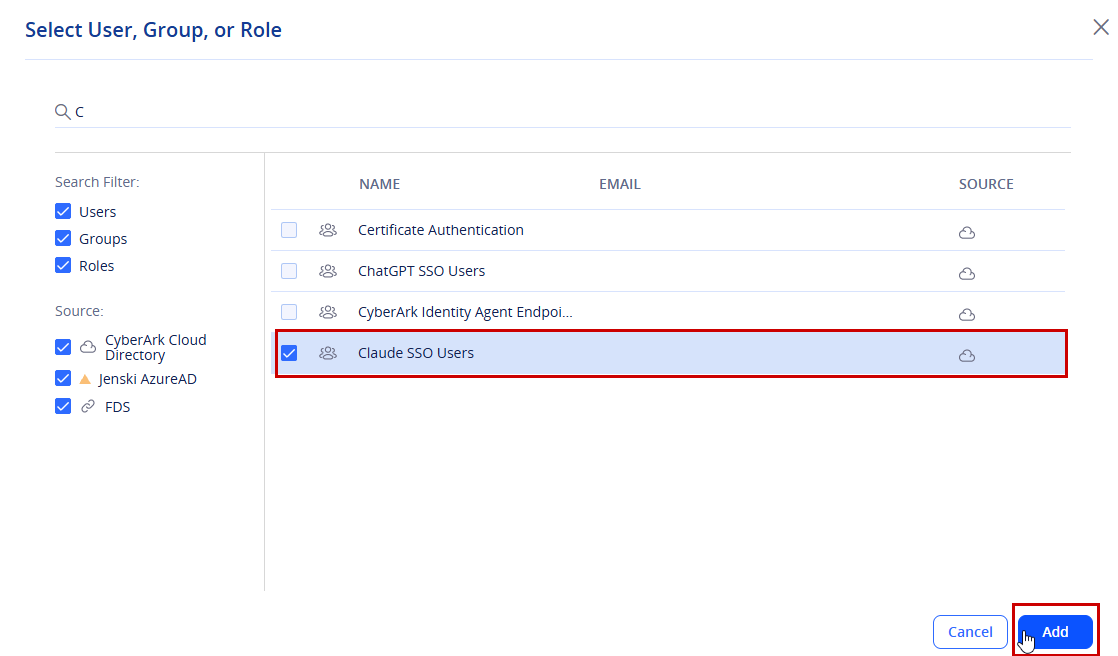
- Select the role you created earlier (e.g. Claude SSO Users), then click Add and Save
-
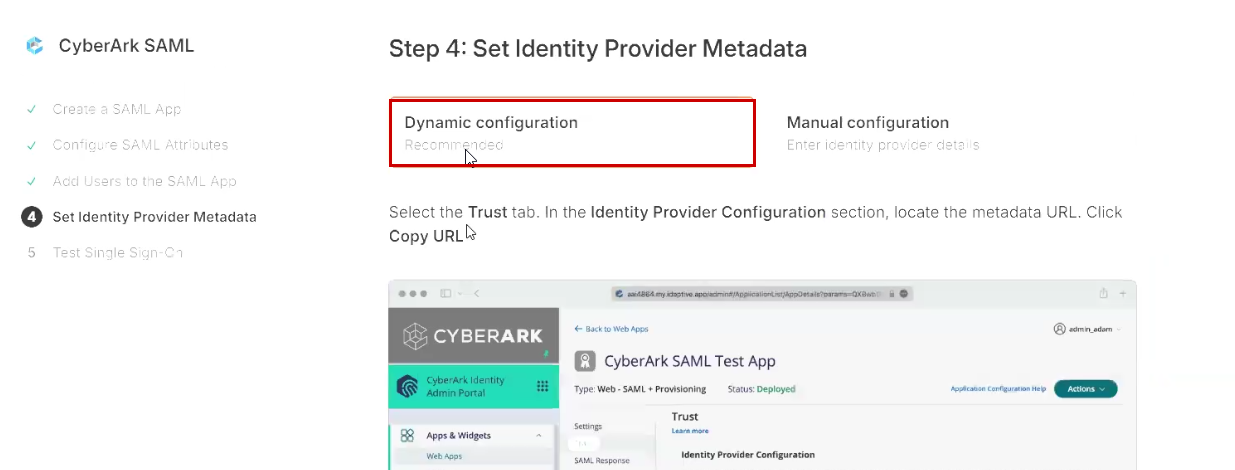
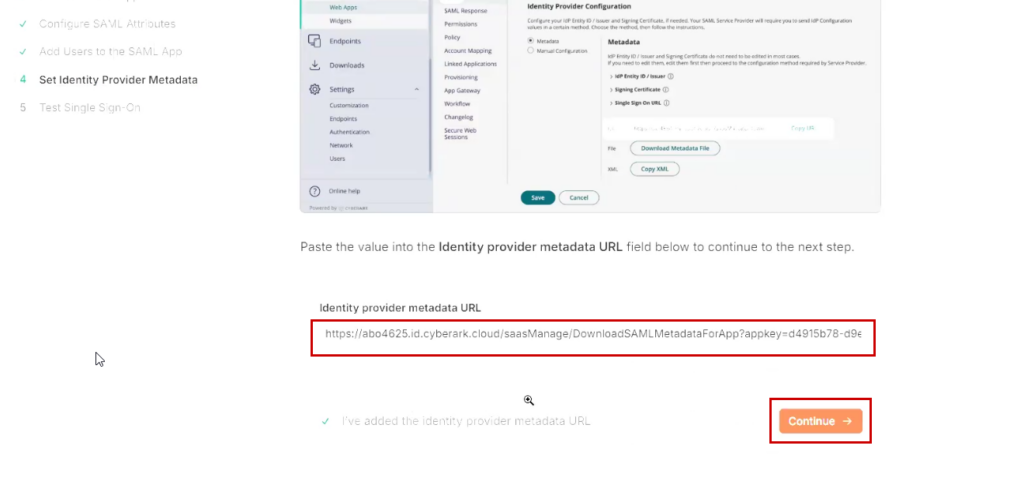
- In Step 4: Set Identity Provider Metadata, select Dynamic Configuration, then we follow the instructions provided on the page.
-
Go back to the Claude SSO application in the Practice Protect Admin Portal via Apps & Widgets > Web Apps > Claude SSO, then navigate to the Trust tab.
-
Under Identity Provider Configuration, select Metadata and click Copy URL. This is the Metadata URL required for the Claude SSO configuration.
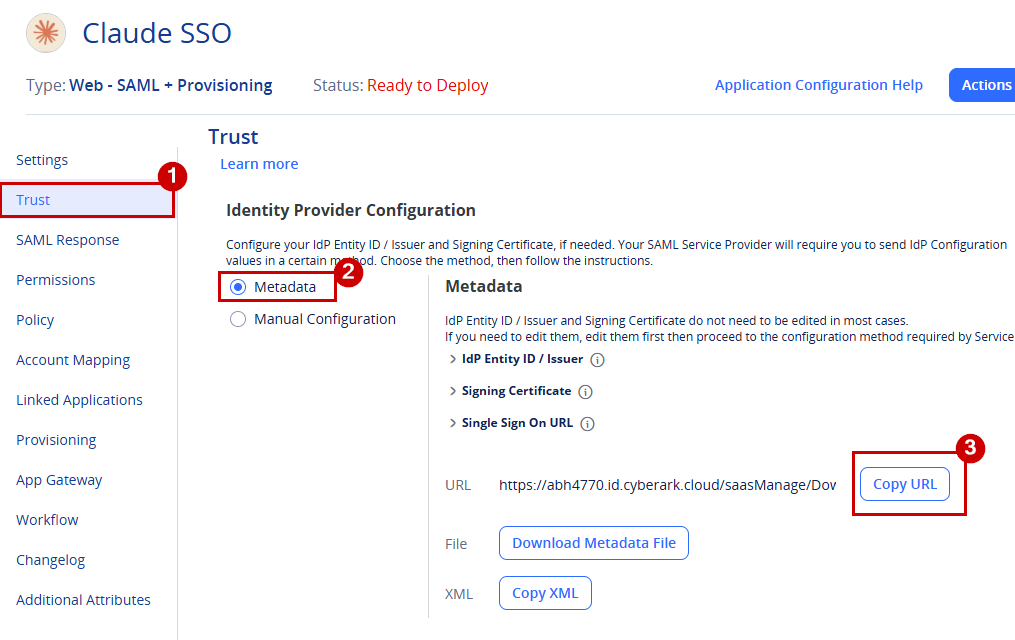
- Click Save, then return to the Claude SSO page in your browser under Step 4: Set Identity Provider Metadata.
- As instructed on the page, paste the copied Metadata URL into the Identity Provider Metadata URL field.
- Click Continue to proceed to the next step
- As part of the final step, Step 5: Test Single Sign-On, click Continue to sign-in to proceed with the sign-in test.
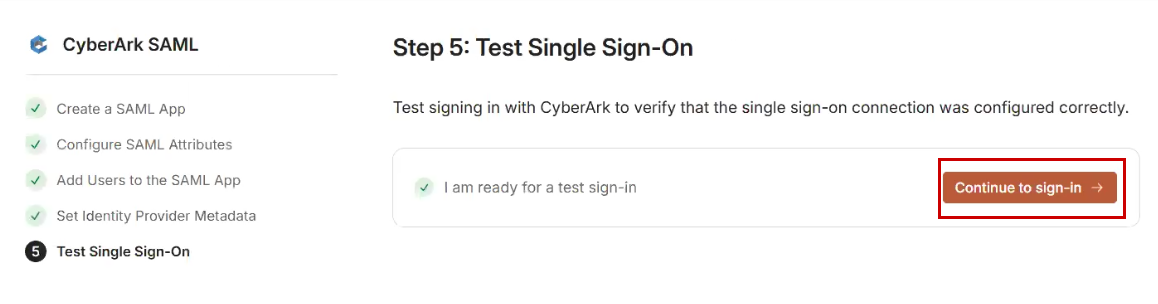
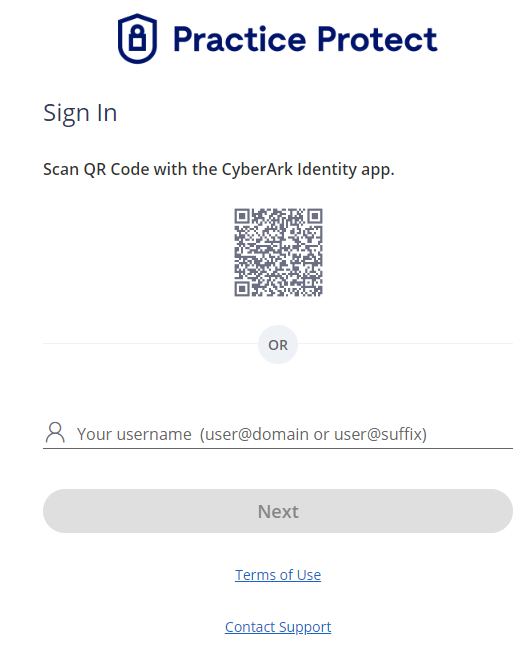
- This will redirect you to Practice Protect to sign in. The user must use their Practice Protect credentials to verify the connection and complete the testing. This is the final step required to complete the SSO setup.
-
Once successful, a message stating “Connection activated” will appear. You can now close the page.
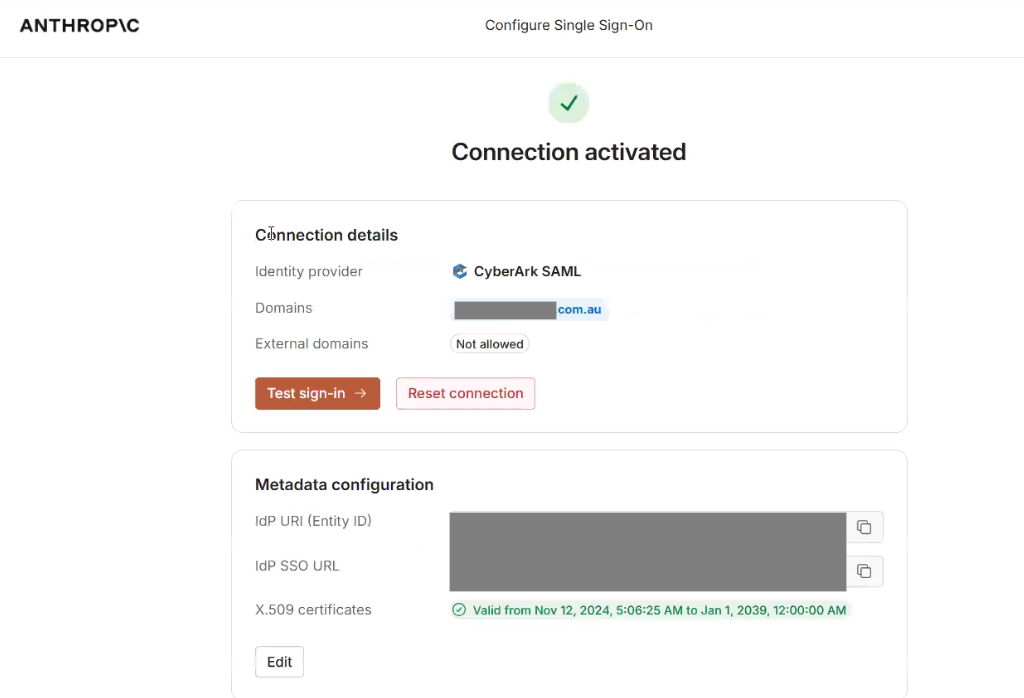
-
SSO is now enabled. Users can also access the Claude SSO app directly through the Practice Protect portal.
It is recommended to test SSO with the remaining users to ensure it is working correctly across all platforms, including browser, desktop, and mobile versions.

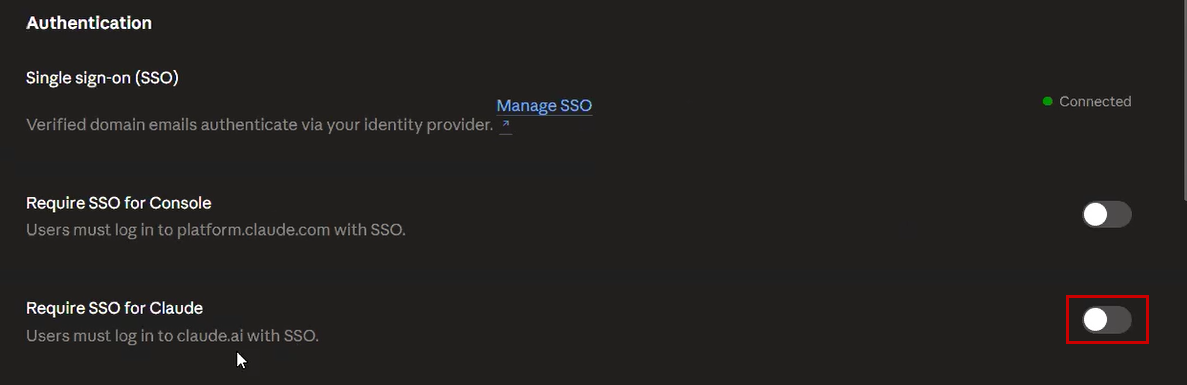
Take note that at this stage, users still have the option to either sign in using their regular credentials or via the SSO. -
To enforce SSO, navigate back to Claude Organization Settings > Authentication.
-
Switch on the option Require SSO for Claude. Once enabled, regular users will only be able to sign in to Claude through SSO.
-