
Purpose
Tribal Habits offers single sign-on via SAML integration with Practice Protect. This provides a seamless login experience to the Tribal Habits platform using IdP-initiated SSO.
Practice Protect will configure this on your behalf. Please send us an email at support@practiceprotect.com
Prerequisites
Instructions
- Sign in to your Practice Protect.
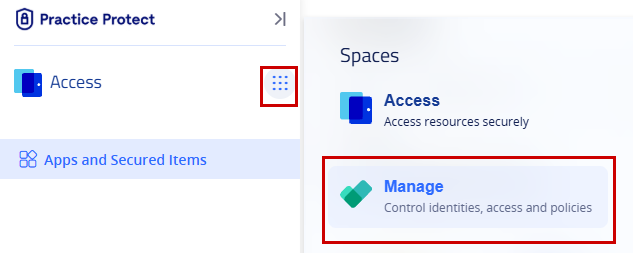
- From the Access space, click the 9-dot menu on the left-hand side of the screen, then select Manage.
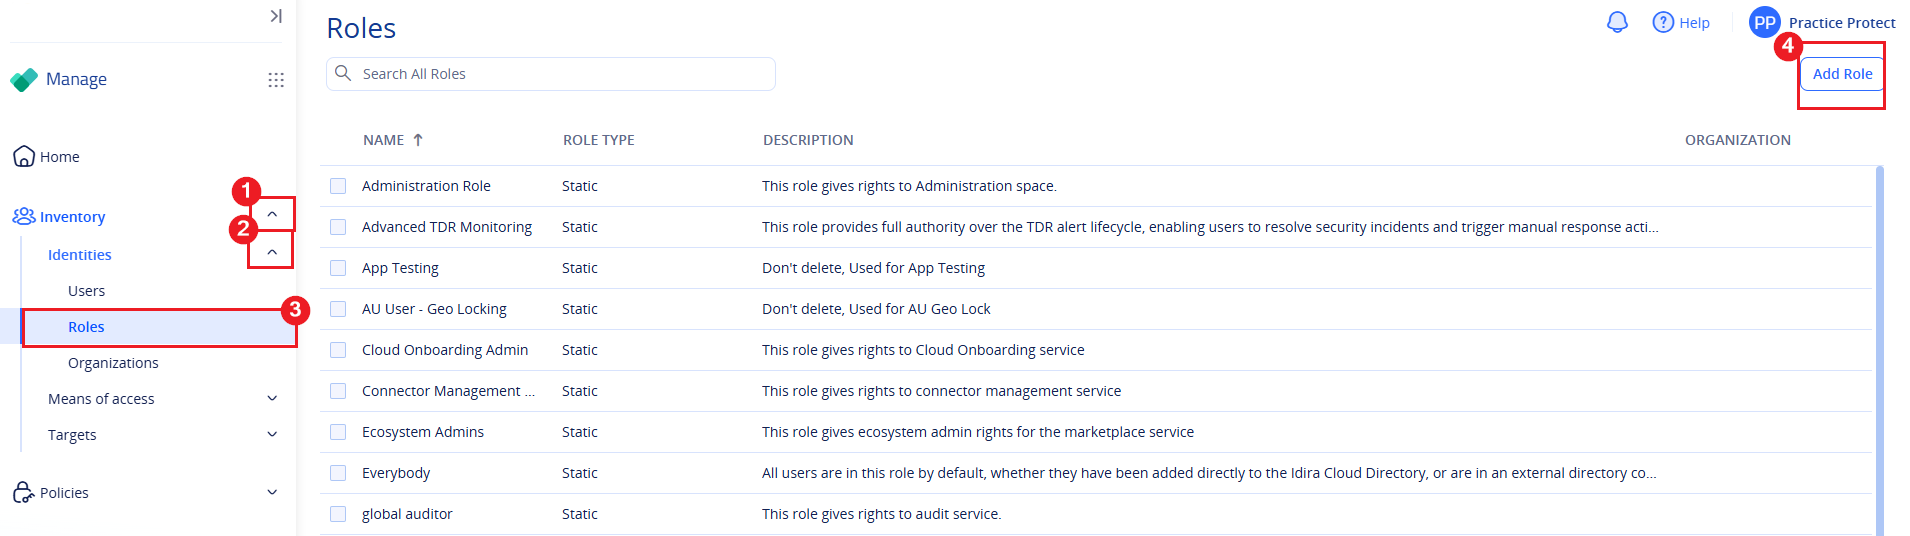
- From the left-hand menu, navigate to Inventory > Identities > Roles.
- Click Add Role.
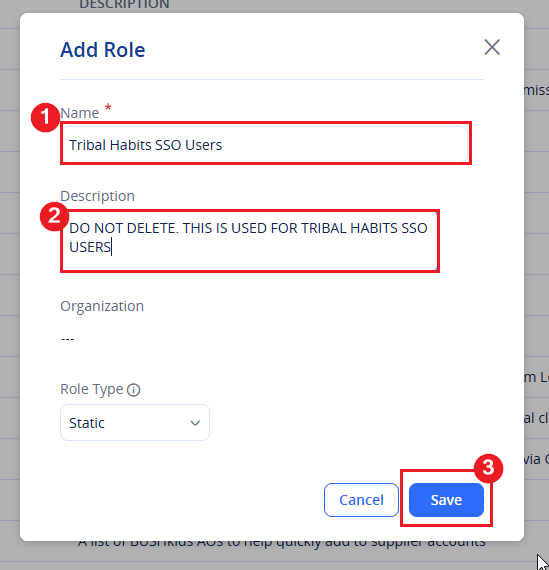
- Enter the following details to create the role:
- Name: Tribal Habits SSO Users
- Description: Do not delete. This role is used to manage members who require access to the Tribal Habits SSO app.
- Click Save.
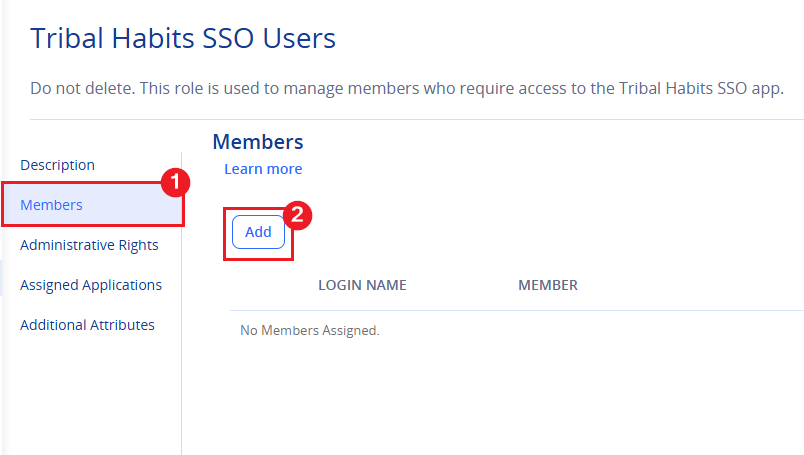
- After creating the role, you will be automatically redirected to the role details page. Click the Members tab.
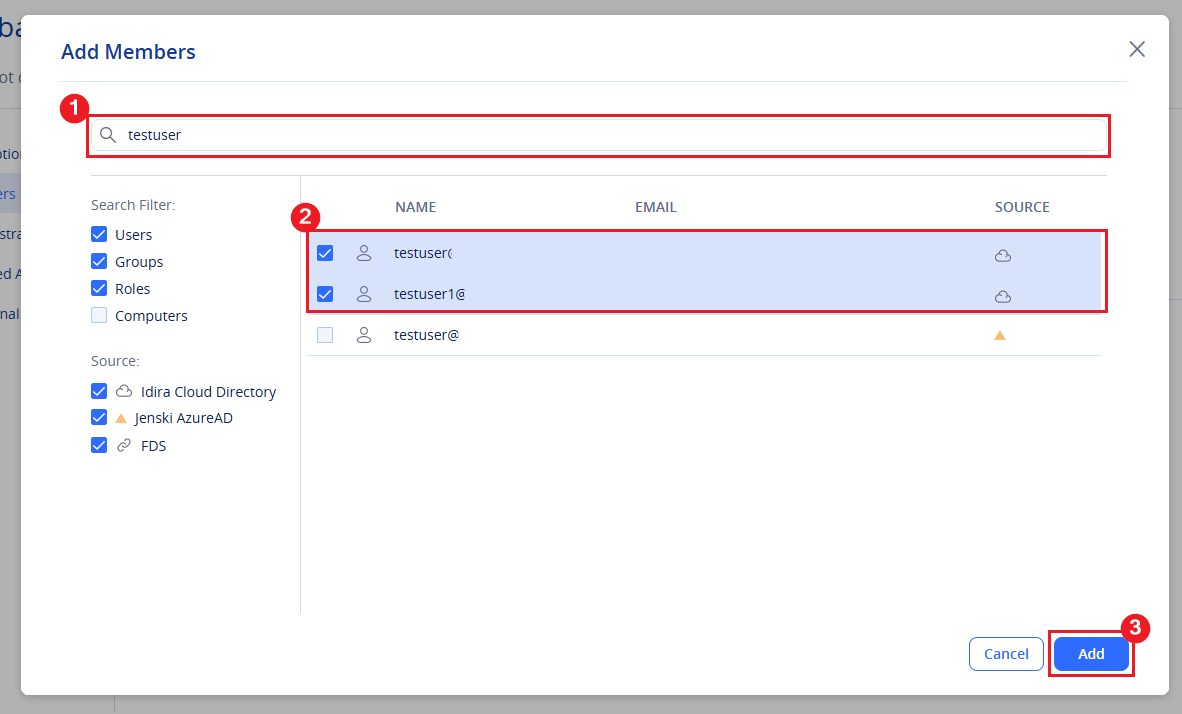
- Click Add.
- Select the Practice Protect users who have an existing Tribal Habits account, then click Add. Repeat as needed to add all remaining users.
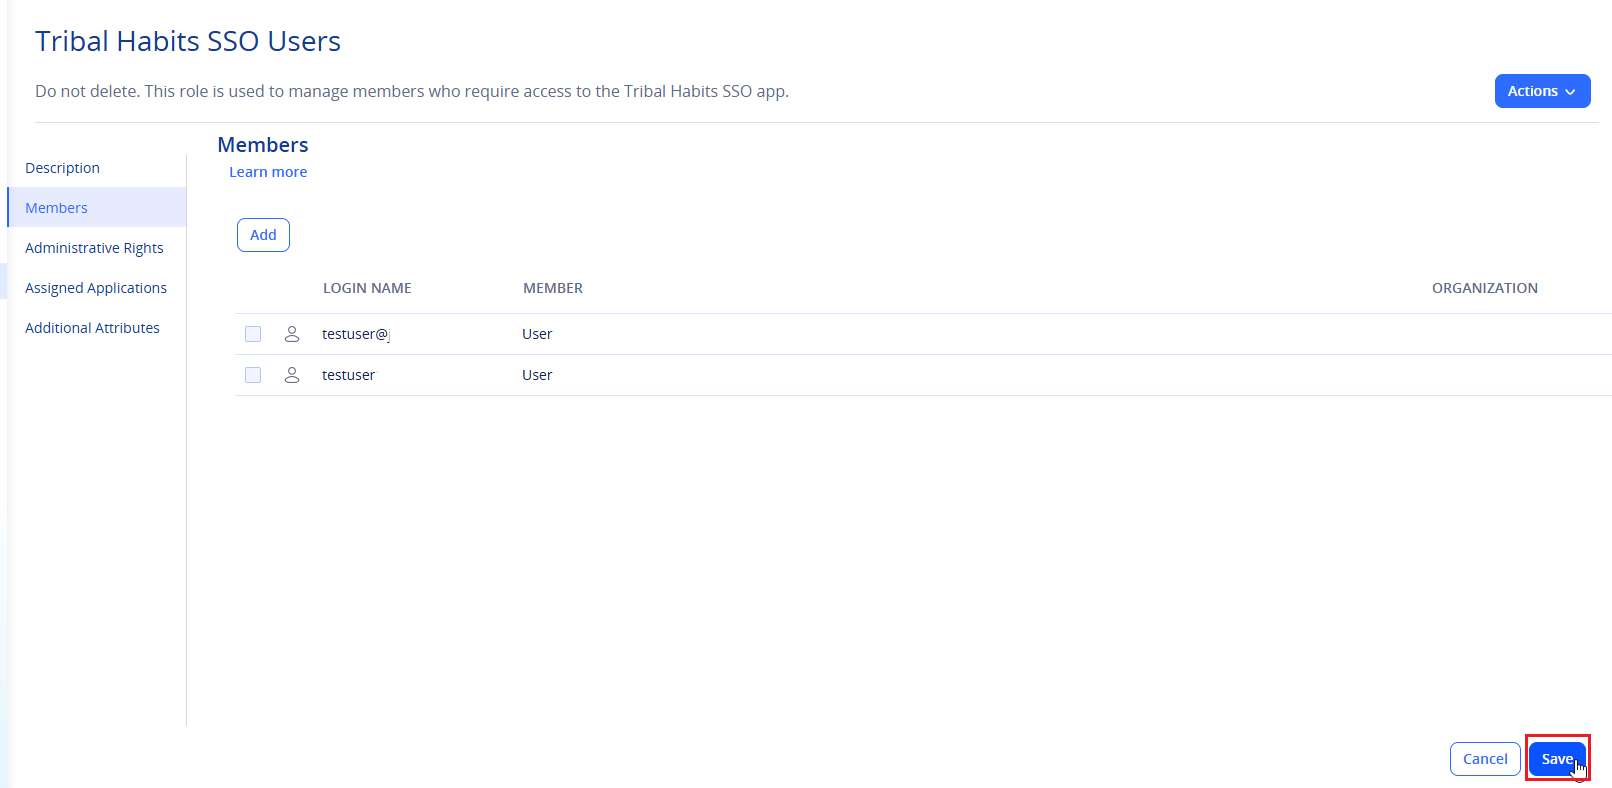
- Click Save to apply the changes and update the role.
-
Navigate to Targets > Applications.
-
In the Applications, Click Add application.

- Select the Custom tab, locate SAML, then click Add.

-
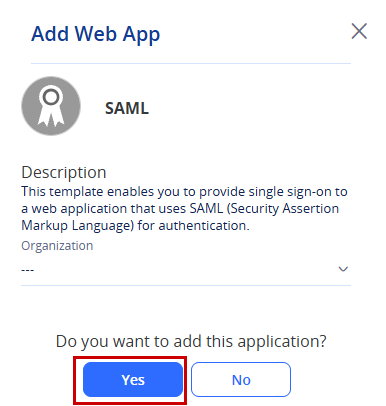
In the Add Web App confirmation prompt, click Yes.
-
The SAML application will be created, and you will be redirected to its settings page.
-
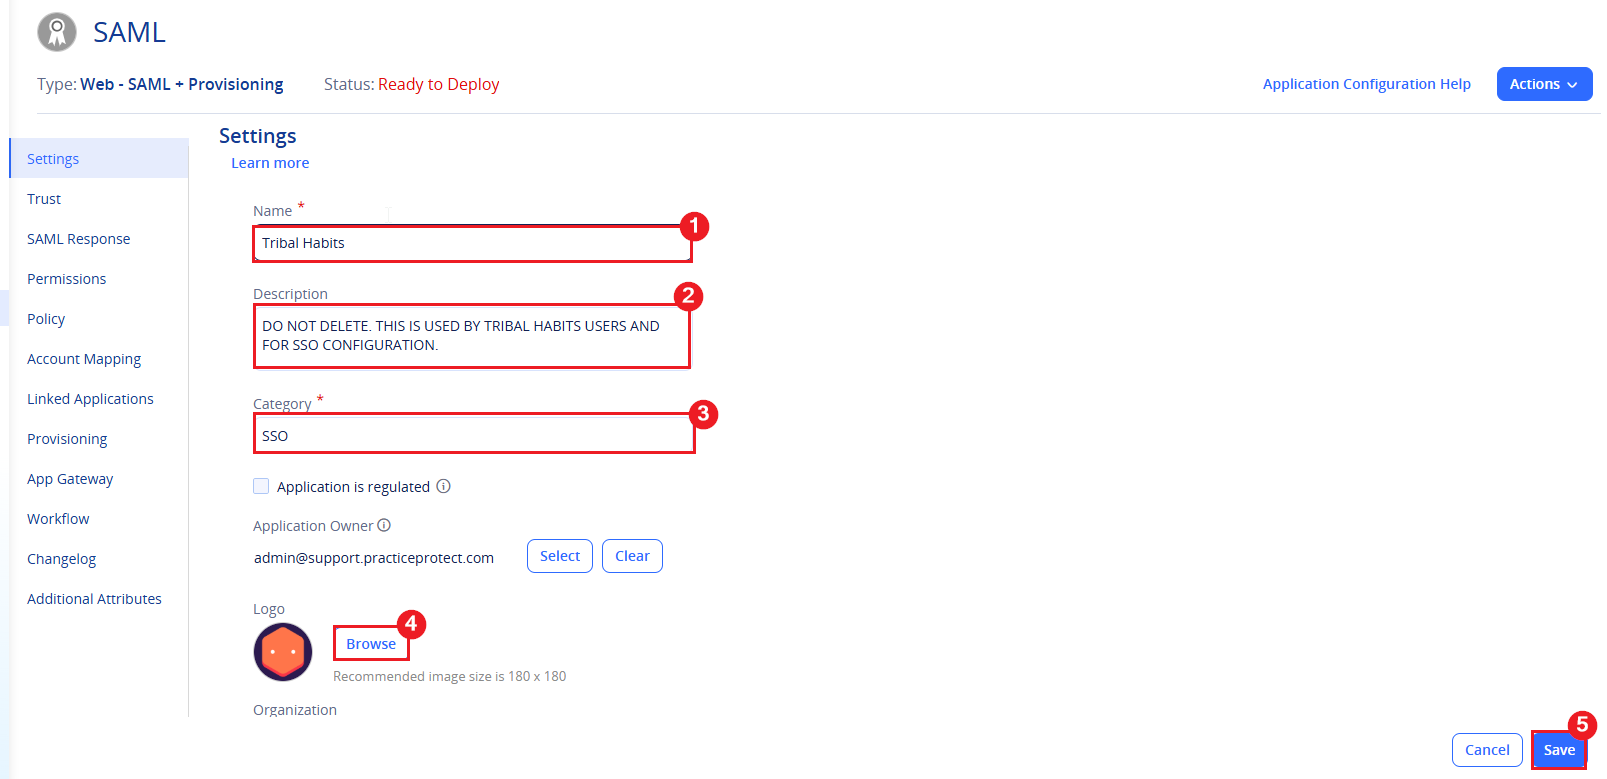
Enter the application details using the configuration below:
-
Name: Tribal Habits
-
Description: DO NOT DELETE. THIS IS USED BY TRIBAL HABITS USERS AND FOR SSO CONFIGURATION.
-
Category: Select SSO or your preferred category.
-
-
Under Logo, upload the Tribal Habits logo provided below:

- Click Save in the bottom-right corner to save the application details.
- Navigate to the Trust tab. Under Identity Provider Configuration, select Metadata.
- Expand IdP Entity ID / Issuer and copy the displayed value.
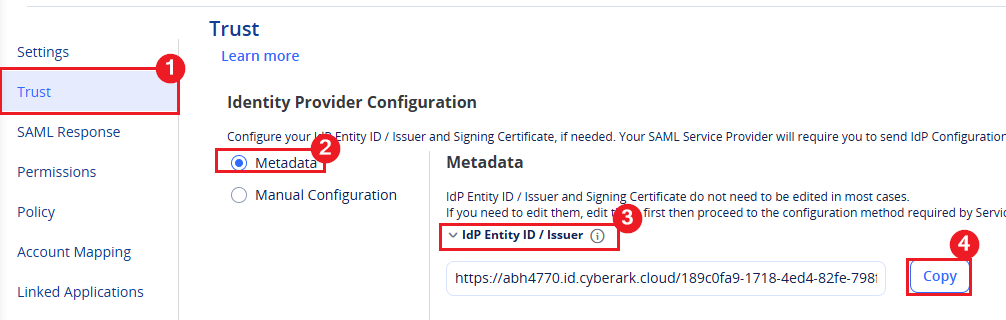
- Expand Signing Certificate and click Download. Keep the downloaded certificate file for the next steps.
- Expand Single Sign-On URL and copy the displayed value.
- Keep the copied values and downloaded certificate handy, as these will be required later when configuring SSO in Tribal Habits.
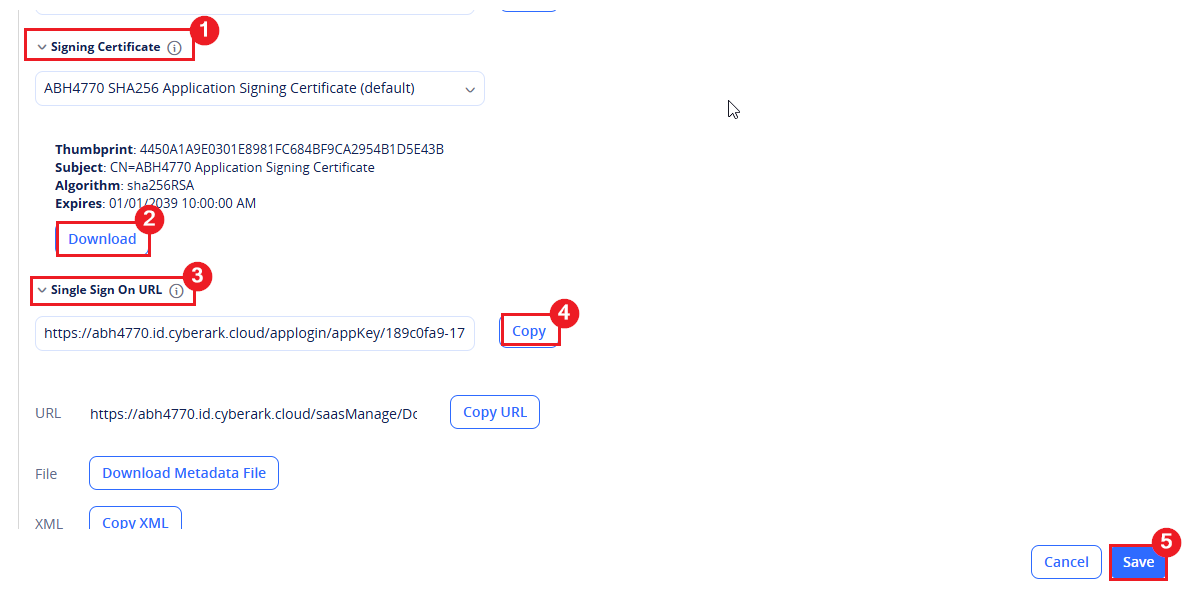
- Click Save to save the configuration.
- Leave the Trust page open, then open a new browser tab and sign in to Tribal Habits.
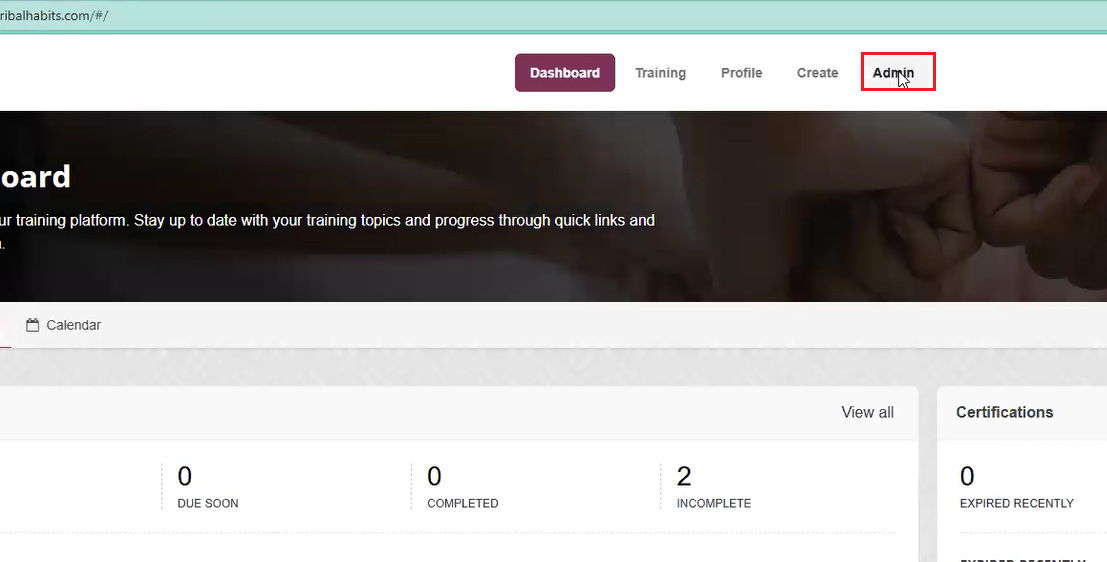
- In Tribal Habits, go to Admin.
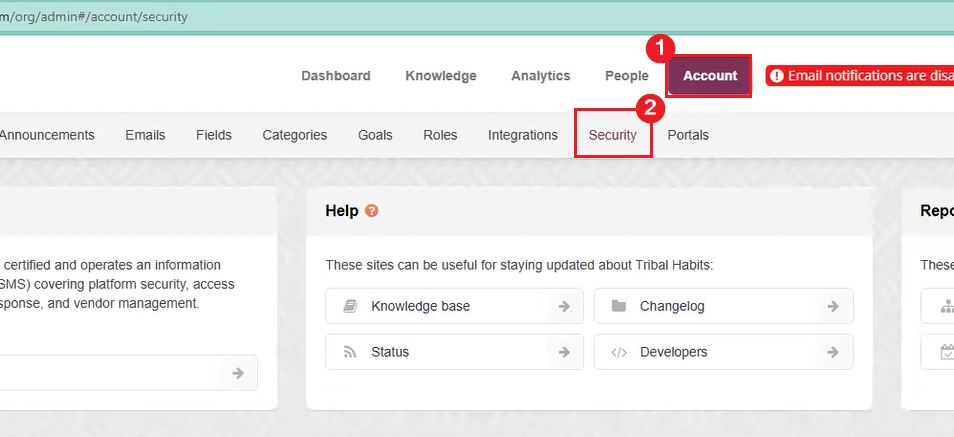
- Under Account, select the Security tab.
-
Scroll down to the Authentication section.
-
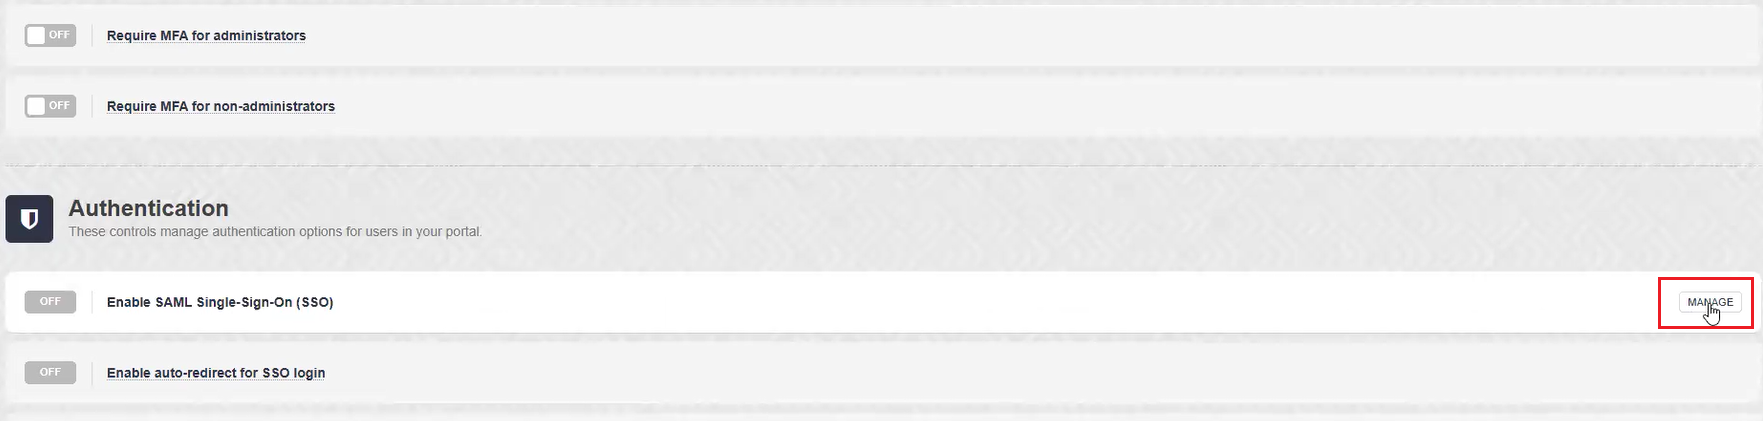
By default, Enable SAML Single Sign-On (SSO) is turned off. Click Manage to configure SAML SSO.
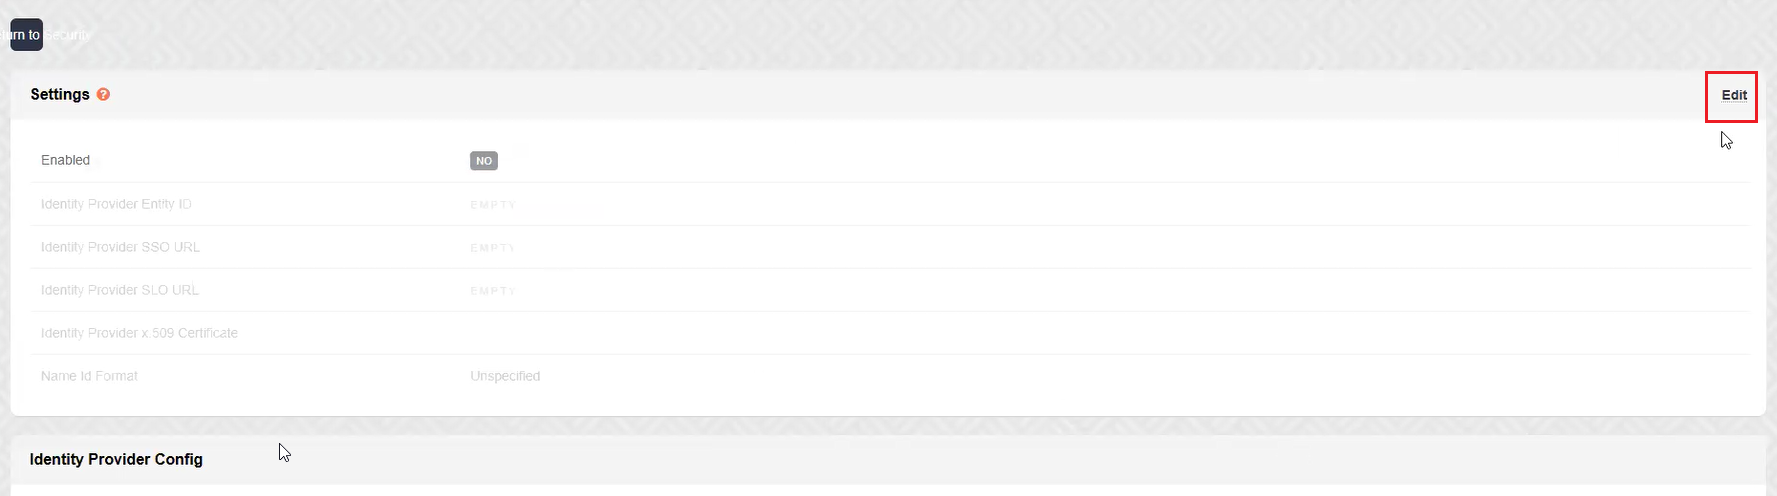
- On the SSO Settings page, click Edit to configure the SAML SSO settings.
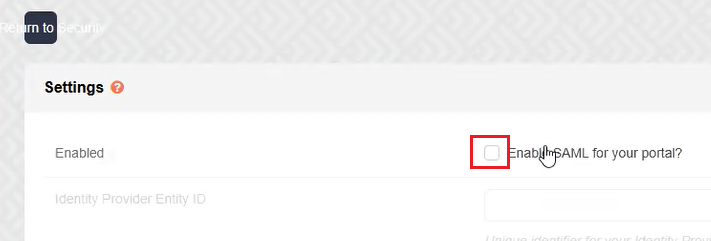
- Tick the Enable SAML for your portal checkbox to enable SAML SSO.
- Enter the following details in the required fields:
- Identity Provider Entity ID: Paste the IdP Entity ID / Issuer copied earlier from Practice Protect.
-
Identity Provider SSO URL: Paste the Single Sign-On URL copied earlier from Practice Protect.
-
Identity Provider SLO URL (Optional): You can leave this field blank. If you wish to configure a logout URL, return to the Tribal Habits SAML application in Practice Protect, navigate to Trust, and copy the Single Logout URL into this field.
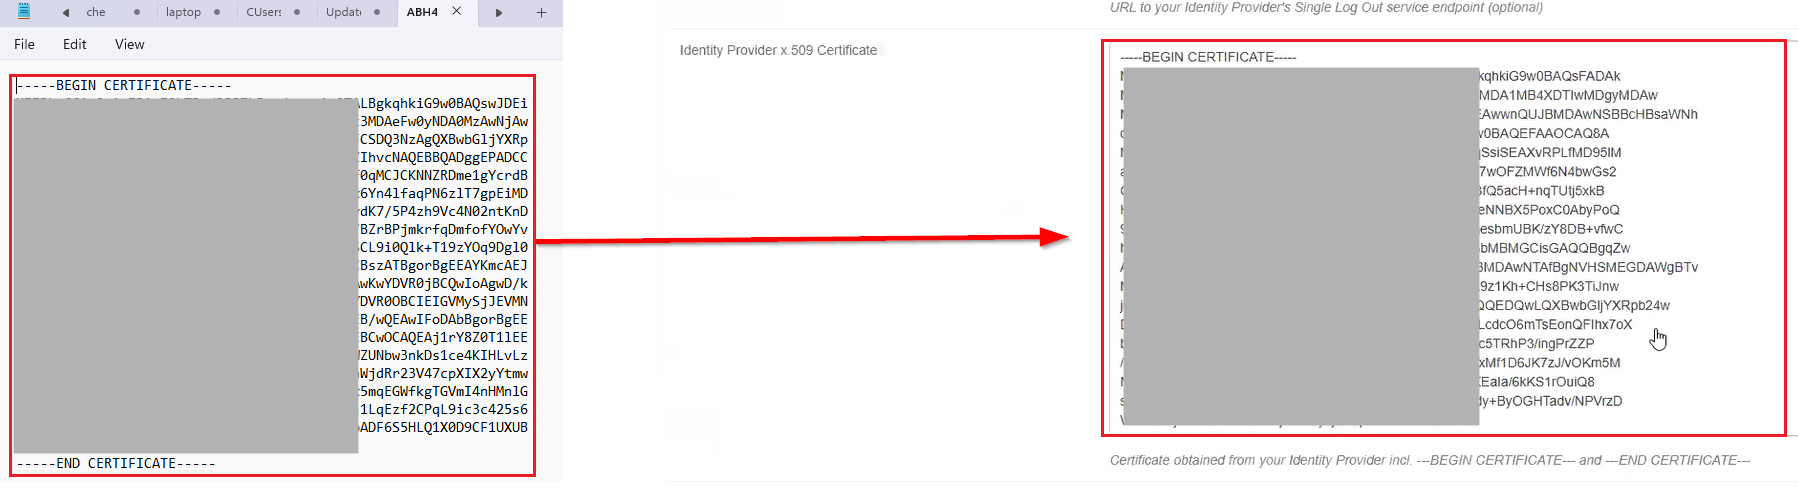
- In the Identity Provider X.509 Certificate: Open the certificate file downloaded earlier using Notepad. Copy the entire certificate contents, including the —–BEGIN CERTIFICATE—– and —–END CERTIFICATE—– lines, and paste them into the Identity Provider X.509 Certificate field.
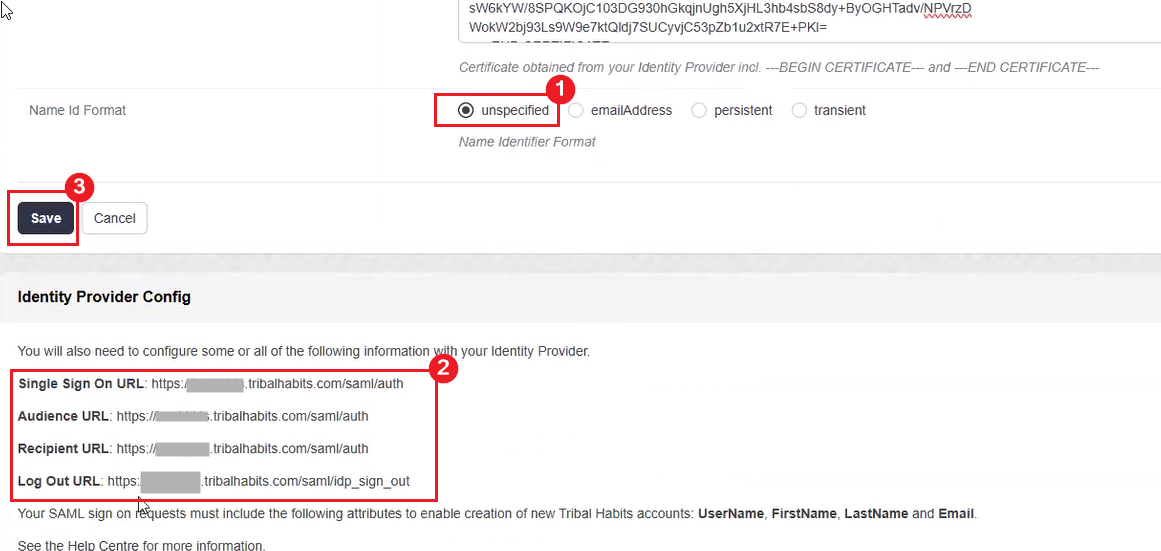
- Under Name Id Format, select unspecified.
- Before clicking Save, scroll down to the Identity Provider Config section.
- Copy and keep the following values provided by Tribal Habits. You will need to enter them into the SAML application in Practice Protect in the next steps:
- Single Sign-On URL
- Audience URL
- Recipient URL
- Log Out URL (Optional)
- Click Save.
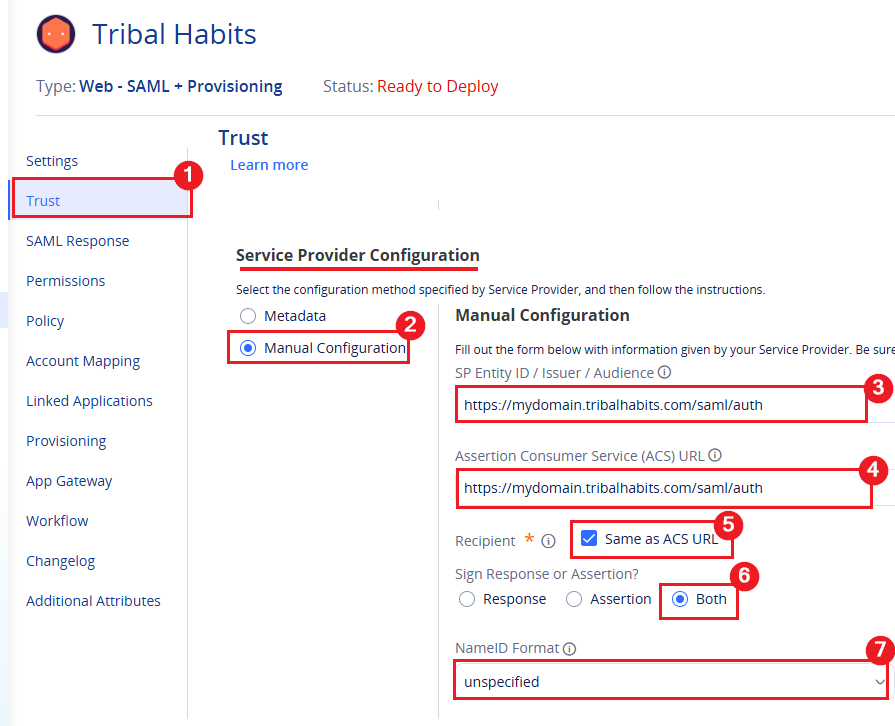
- Return to the Tribal Habits SAML application settings in Practice Protect. From the Manage space, navigate to the Trust tab.
- Scroll down to the Service Provider Configuration section and select Manual Configuration.
- Fill in the fields under Service Provider Configuration using the values copied from the Identity Provider Config section in Tribal Habits:
-
SP Entity ID / Issuer: Paste the Audience URL.
-
ACS URL: Paste the Recipient URL.
-
Same as ACS URL: Tick this checkbox since the Recipient URL is the same as the ACS URL.
-
Sign In Response or Assertion?: Select both
-
NameID Format: Select Unspecified, matching the configuration selected earlier in Tribal Habits.
-
-
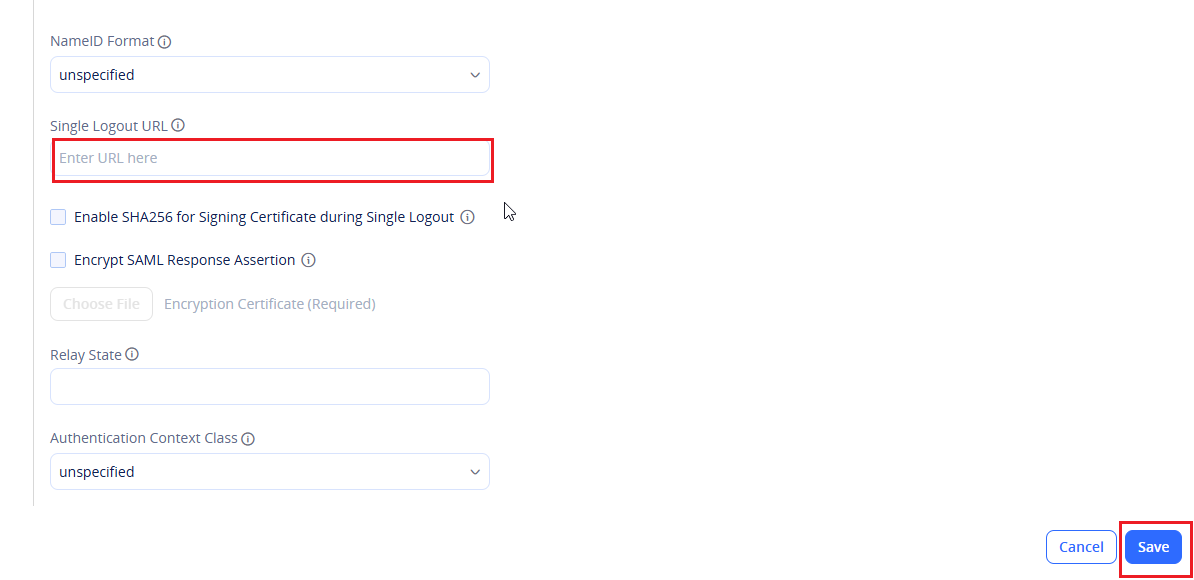
Single Logout URL (Optional): You can paste the Log Out URL copied earlier from Tribal Habits if you wish to configure single logout.
- Click Save.
-
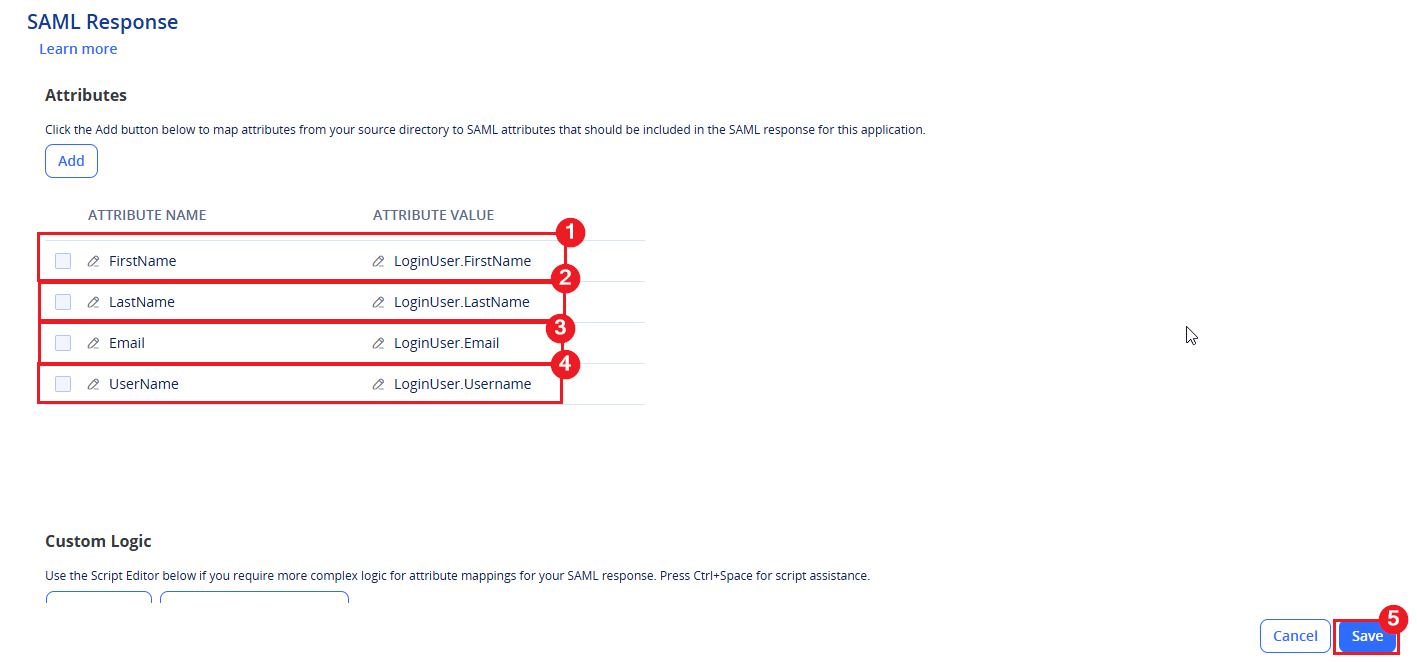
Navigate to the SAML Response tab. In the Attributes section, click Add.
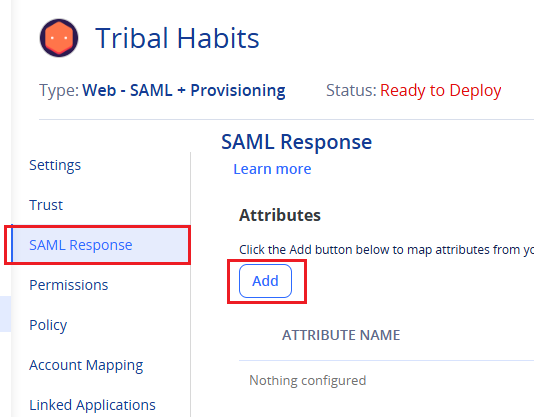
- Add each attribute by entering the Name along with its corresponding Attribute Value.
- FirstName– LoginUser.FirstName
- LastName – LoginUser.LastName
- Email – LoginUser.Email
- UserName – LoginUser.UserName
- Click Save.
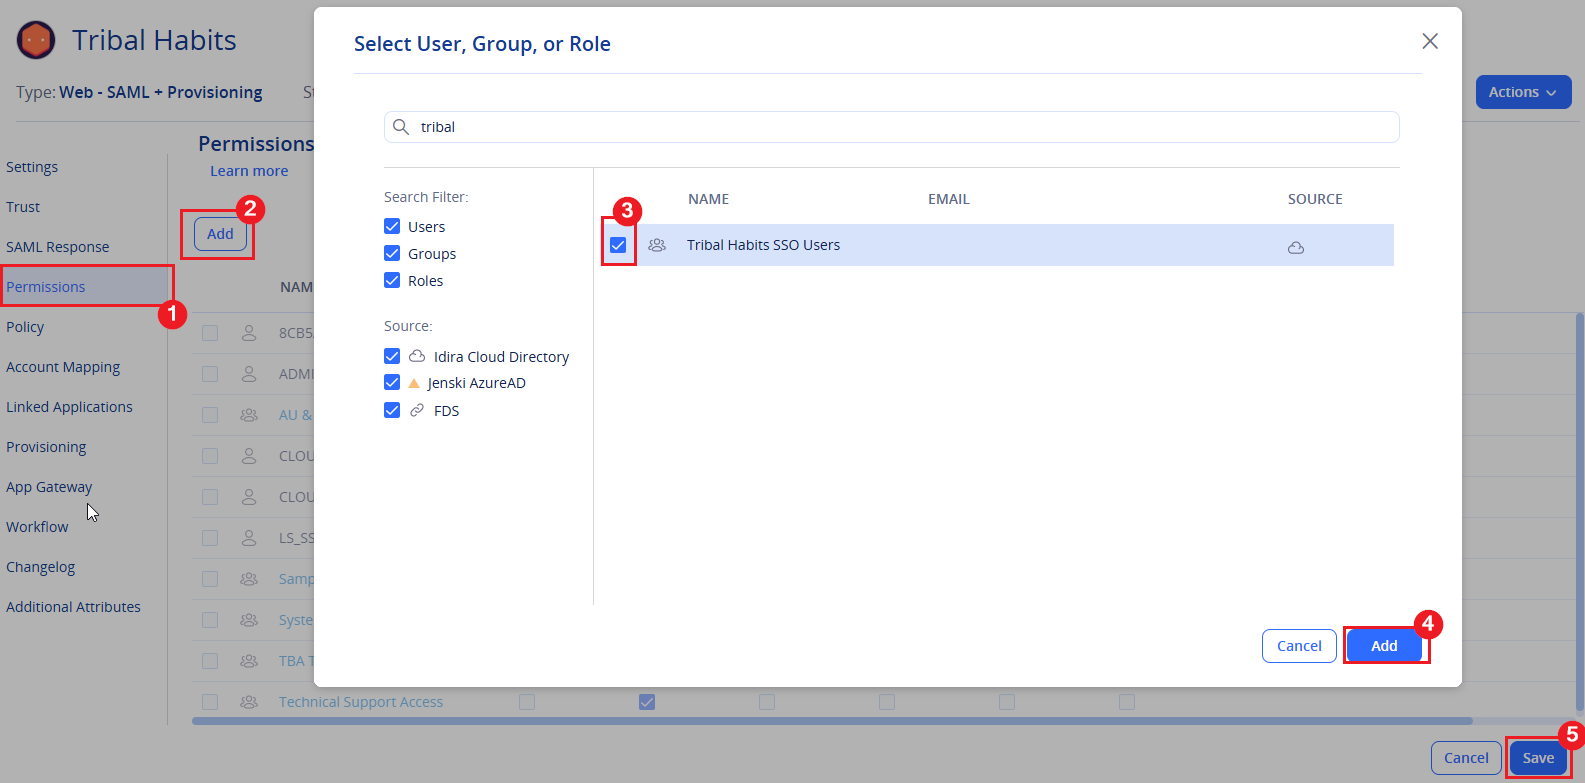
- Navigate to the Permissions tab and click Add.
- Select the role created earlier (e.g. Tribal Habits SSO Users), then click Add followed by Save to apply the changes.
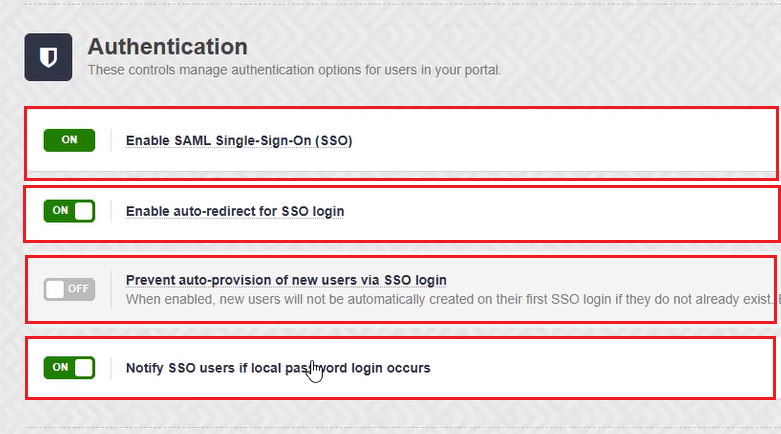
- Return to Tribal Habits > Admin > Account > Security > Authentication. You should now see that Enable SAML Single Sign-On (SSO) is turned on.
- Enable auto-redirect for SSO Login is now enabled by default.
Important!! Users without a matching account in Practice Protect will not be able to sign in to Tribal Habits because they will automatically be redirected to Practice Protect for authentication.
If some users do not yet have matching accounts in Practice Protect, you can temporarily turn this option off. Leaving it enabled enforces SSO login for everyone. - You can leave Prevent auto-provision of new users turned off.
- You may also enable Notify SSO user if local password login occurs to receive notifications when an SSO user signs in using their local password.
- Users can now access Tribal Habits through the Tribal Habits application tile in Practice Protect or by signing in directly using your organisation-specific Tribal Habits login URL.