
Purpose
BGL offers single sign-on via SAML integration with Practice Protect. This provides a seamless login experience to the BGL platform using IdP-initiated SAML.
Take note that BGL will charge the firm a one-time fee of $2,200.00 (including GST) to activate SAML. This is charged upon signing the BGL SAML agreement.
Practice Protect will configure this on your behalf. Please send us an email at support@practiceprotect.com
Pre-requisites
Before you configure the BGL web application for SSO, you need the following:
- All BGL Users including the Administrator Account have a matching Practice Protect account
- Access to the Practice Protect Admin portal
- Scheduled deployment with the Customer and BGL Support
Instructions
1. Login to your Practice Protect and switch to Admin portal (ex. mydomain.practiceprotect.app)
2. On Core Services, Click on Roles > Add Roles. Create a role and set the name field to “BGL SSO Users“. Then Save.
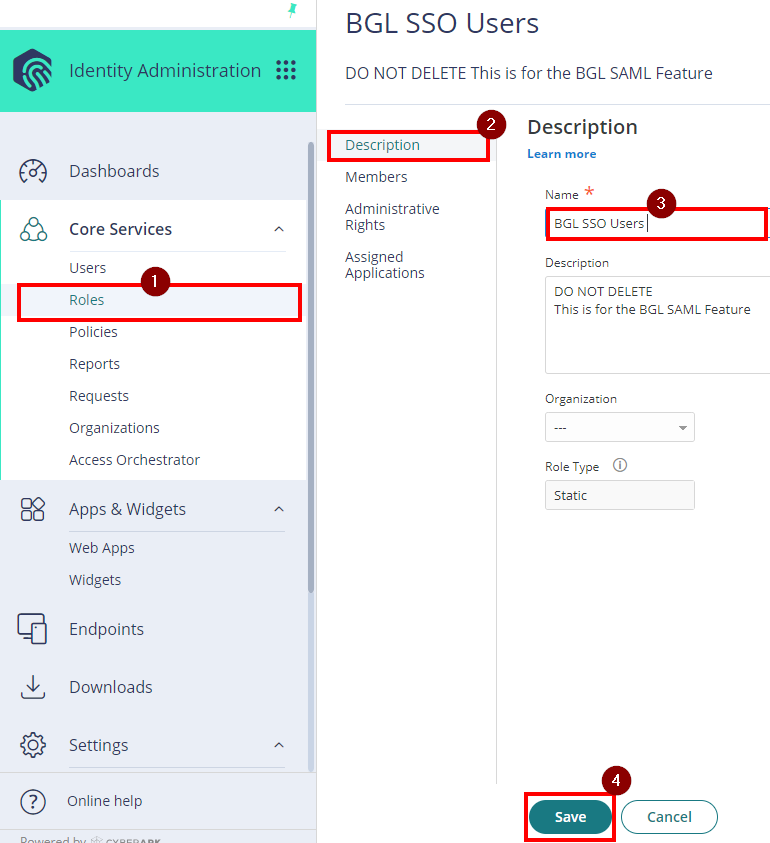
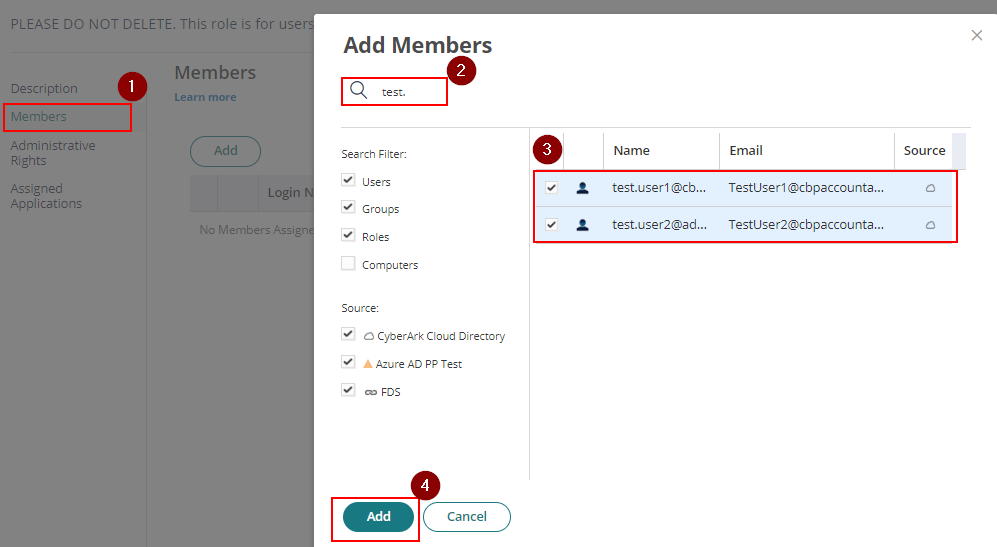
3. Within the new role, click on Members > Add. Add each user that will use BGL. Select Save.
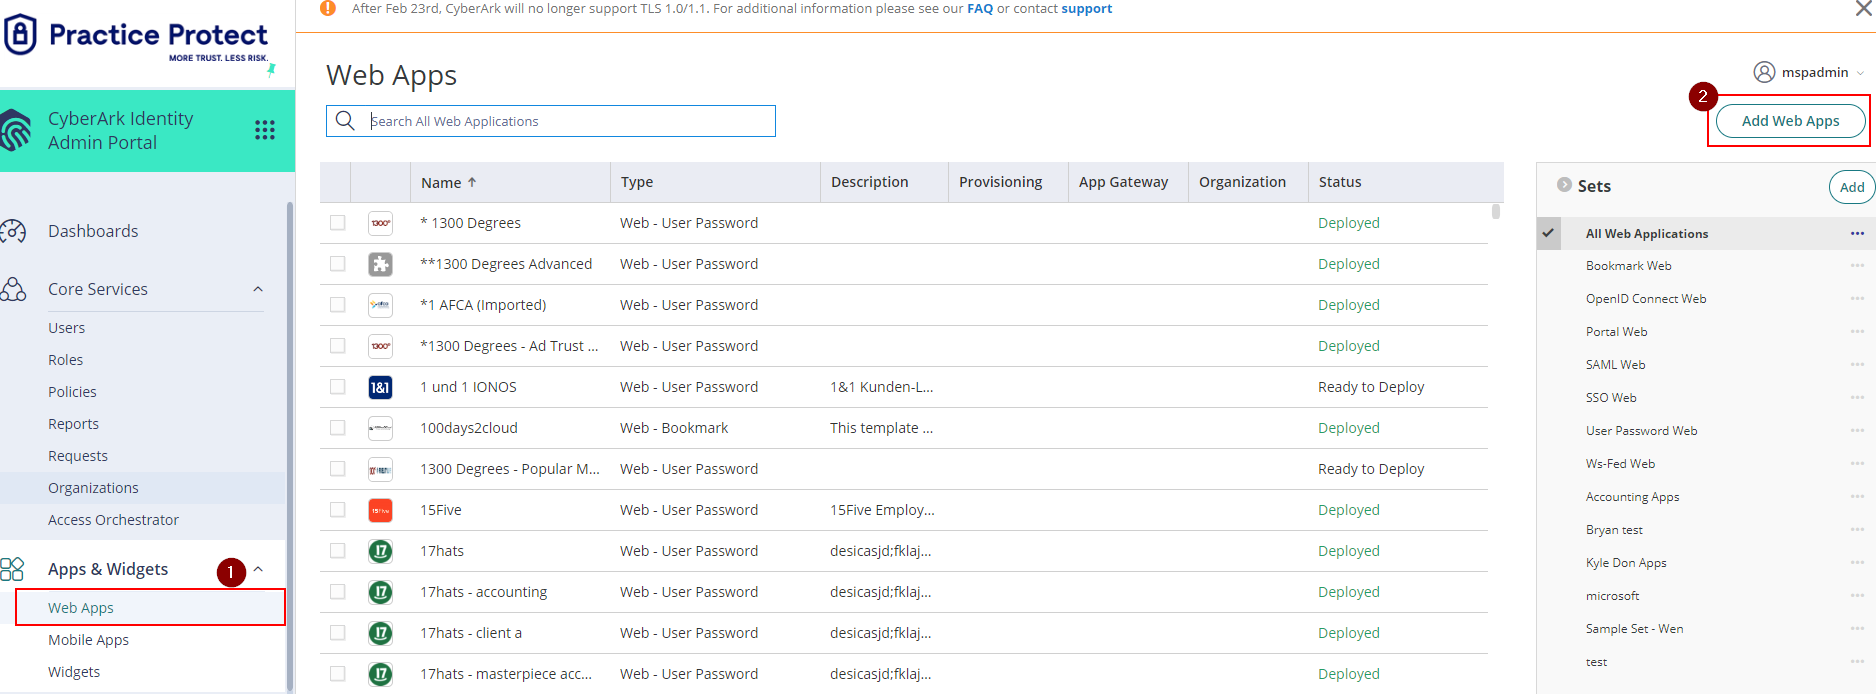
4. From the Apps & Widgets, go to Web Apps section. Then, choose Add Web Apps on the top right corner.
5. Go to the Custom Tab > Scroll down and add SAML. Confirm to add the application by choosing “Yes“.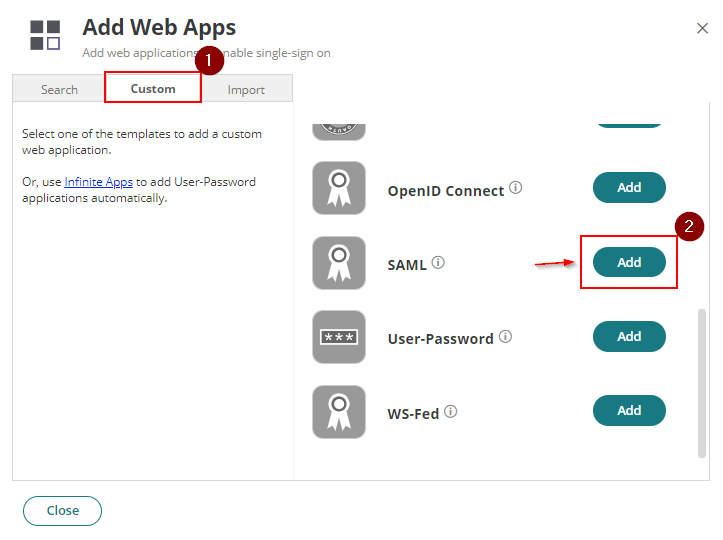
6. Rename the application to “BGL SAML Configuration”. Note: You can change the category, or logo based on your preference.

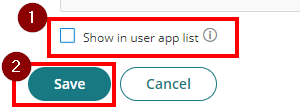
7. At the bottom part, untick the box for “Show in user app list” and hit Save.
8. Click Trust page to begin configuring the application. On Identity Provider Configuration, choose Metadata and click Download Metadata File.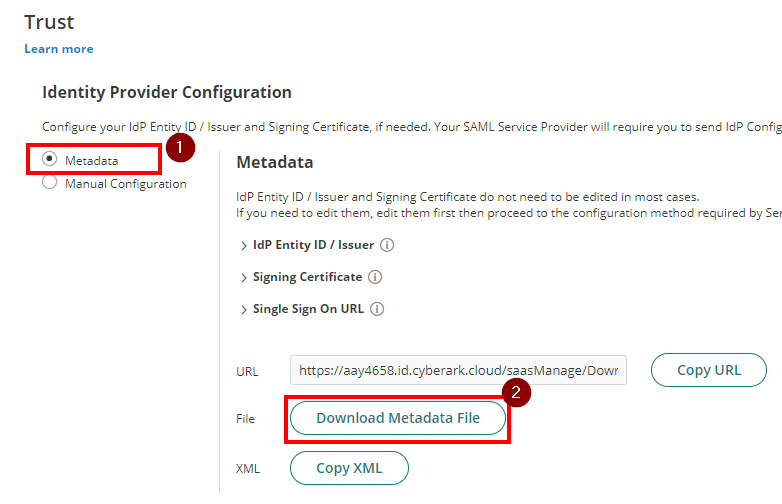
9. Scroll down to Service Provider Configuration and tick Manual Configuration.
10. Copy and fill out the details below:
SP Entity ID / Issuer / Audience – urn:amazon:cognito:sp:ap-southeast-2_zaFx0LO1i
Assertion Consumer Service (ACS) URL – https://bglcorp-production-external.auth.ap-southeast-2.amazoncognito.com/saml2/idpresponse
NameID Format: emailAddress
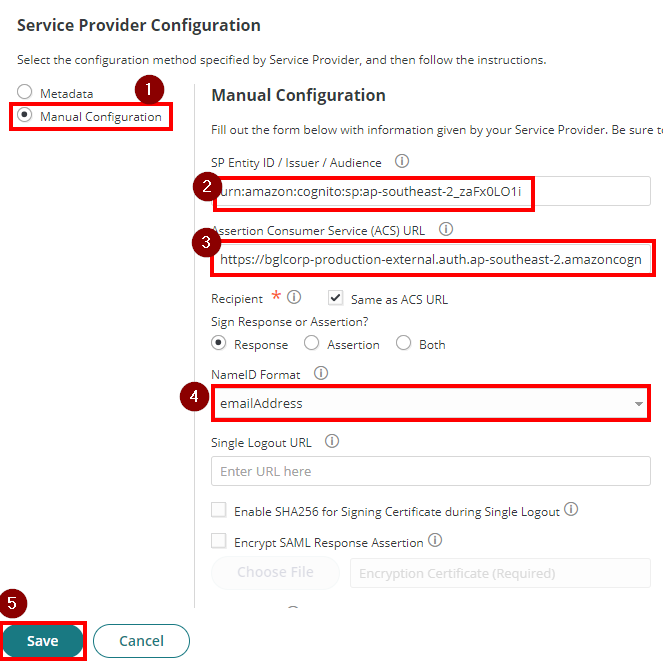
11. Hit Save to apply.
12. Proceed to the SAML Response option. On the Attributes section, click Add and set Attribute Name as “email” and Attribute Value as “LoginUser.Username”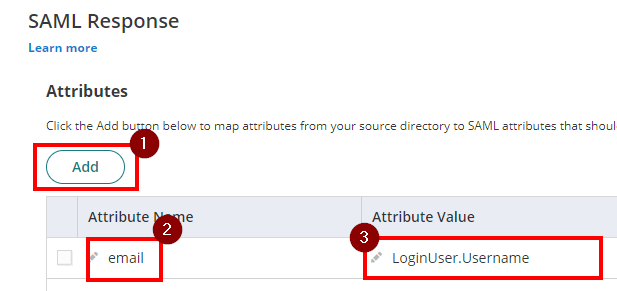
13. Hit Save.
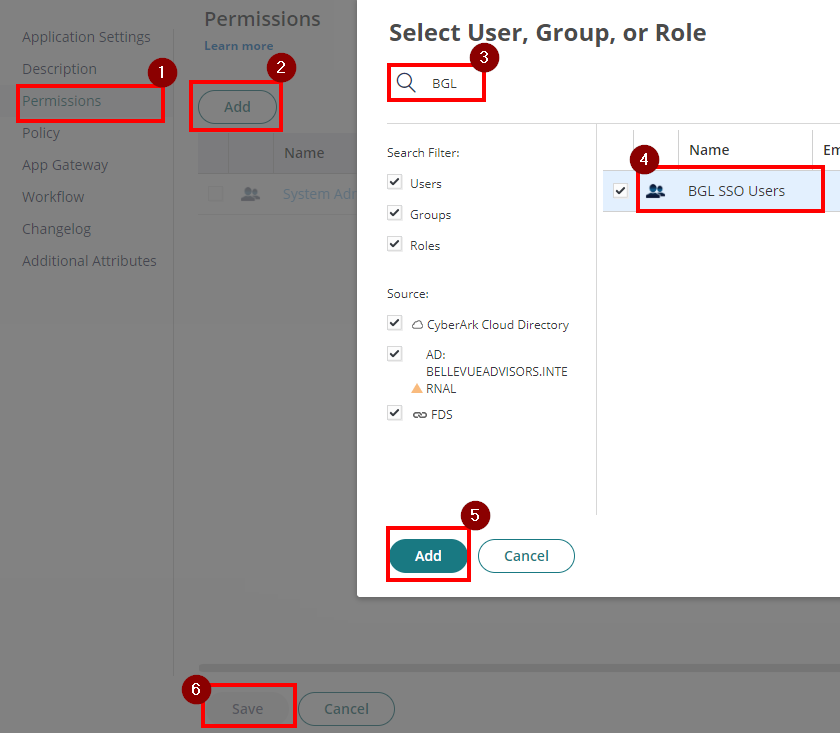
14. Click on Permissions, then click Add. Search for the BGL SSO Users role that you created previously. Click Add, then click Save.
15. Go back to the Web Apps section and click Add Web Apps on the top right corner.
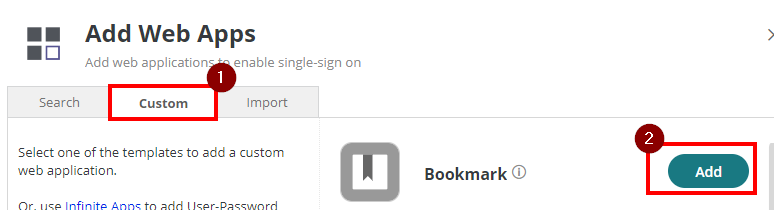
16. On the Custom Tab, select and add Bookmark. Confirm to add the application by choosing “Yes“.
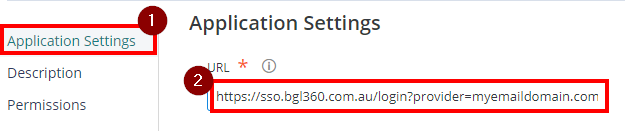
17. Add this https://sso.bgl360.com.au/login?provider=clientdomain.com on the Application Settings.
Note: clientdomain.com above needs to be replaced with the firm’s domain.
18. On the Description update the following:
Application Name: BGL 360
Logo: save this image and upload
19. Click Save

20. Click on Permissions, then click Add. Search for the BGL SSO Users Role created in step no. 2. Click Add, then click Save.
21. Send an email to BGL Support to enable SSO and attach the Practice Protect Metadata file downloaded from Step 8. You will also need to provide BGL support your domain name.
BGL Contact Information
Email: info@bglcorp.com.au
Phone: 1300 654 401
22. Once BGL has confirmed they’ve completed the steps on their side, test the the login & confirm it’s working as expected.