
Purpose
Nimbus offers single sign-on via SAML integration with Practice Protect. This provides a seamless login experience to the Nimbus platform using IdP-initiated SAML.
Practice Protect will configure this on your behalf. Please send us an email at support@practiceprotect.com
Prerequisites
- Administrator Access in Practice Protect
- Active Nimbus account with administrator rights for your organization (Note: this can be your account so you don’t have to pay and create for another license account)
- A signed certificate. You can either download one from Admin Portal or use your organization’s trusted certificate.
- Nimbus login should have exact login names in Practice Protect.
Instruction
1. Login to your Practice Protect and switch to Admin portal (ex. mydomain.practiceprotect.app)
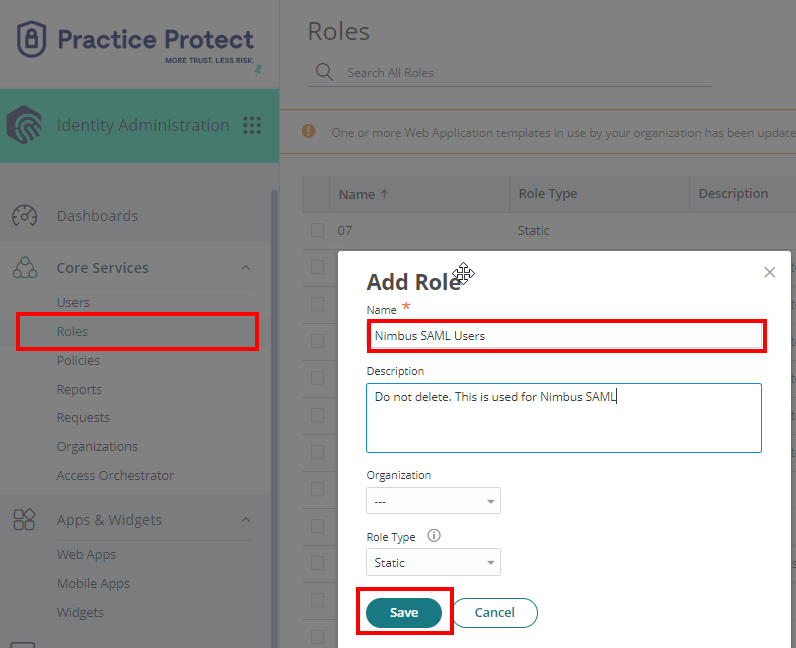
2.On Core Services, Click on Roles > Add Roles. Create a role and set the name field to “Nimbus SAML Users“. Then Save.
3. With the created role, click on Members > Add. Add each member/user that will be part of the SSO. Then Save.

4. From the Apps & Widgets, go to Web Apps section. Then, choose Add Web Apps on the top right corner.
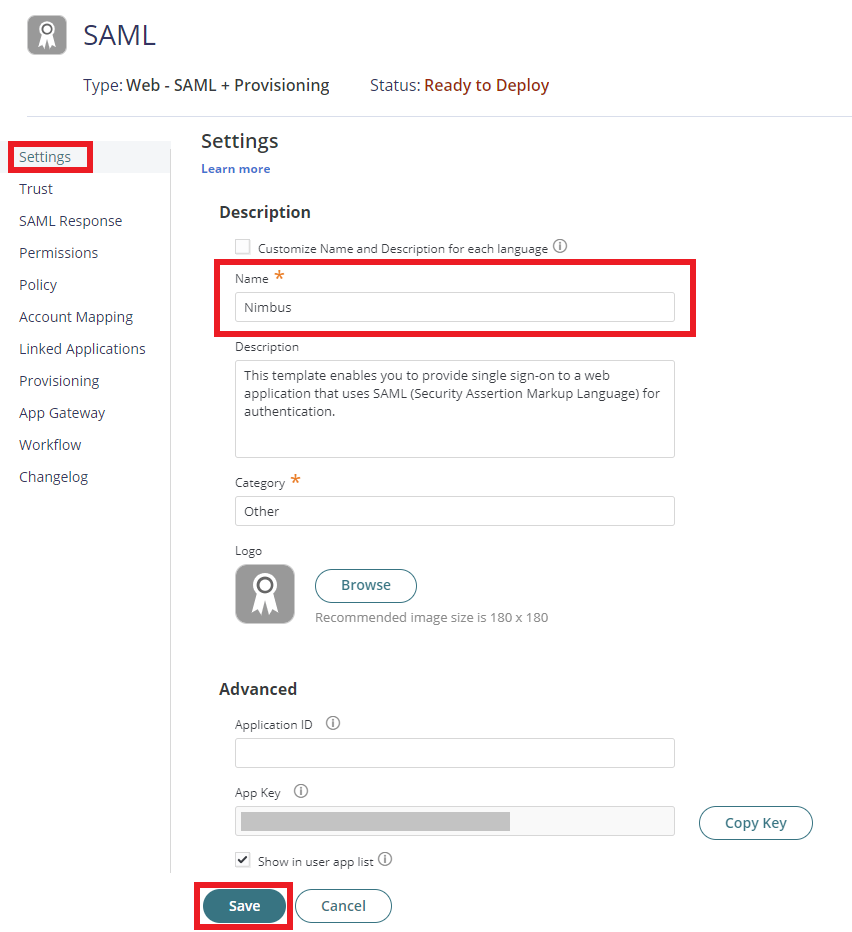
5. The application that you just added opens to the Settings page. Set Name to Nimbus then click Save. Note: You can change the name, description, category or logo based on your preference.
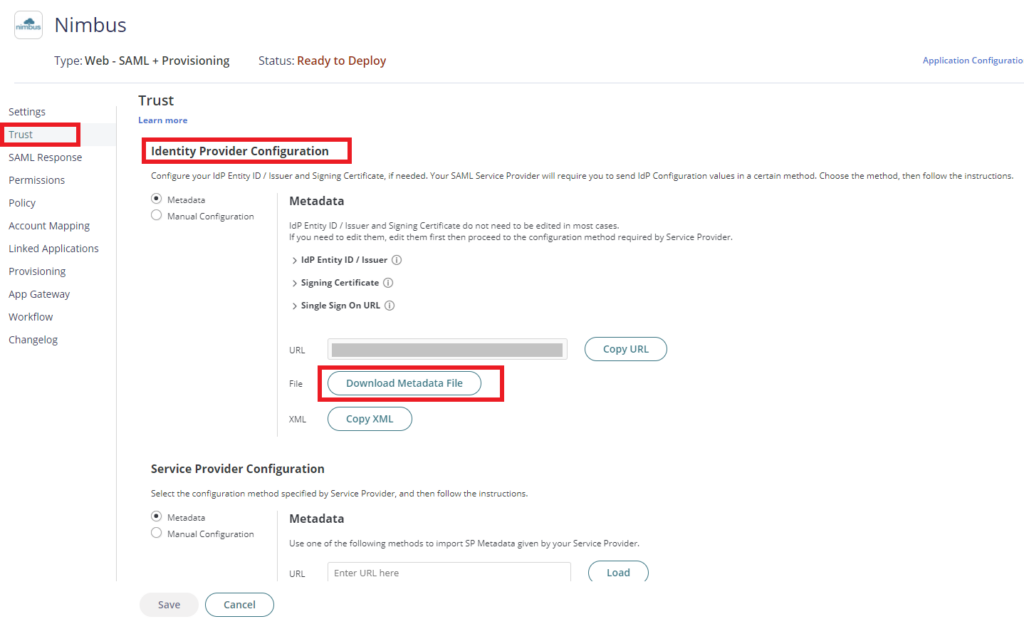
6. Click on Trust > On Identity Provider Configuration click Download Metadata File. This will download the Metadata file on your local PC which you will need on the succeeding instructions.
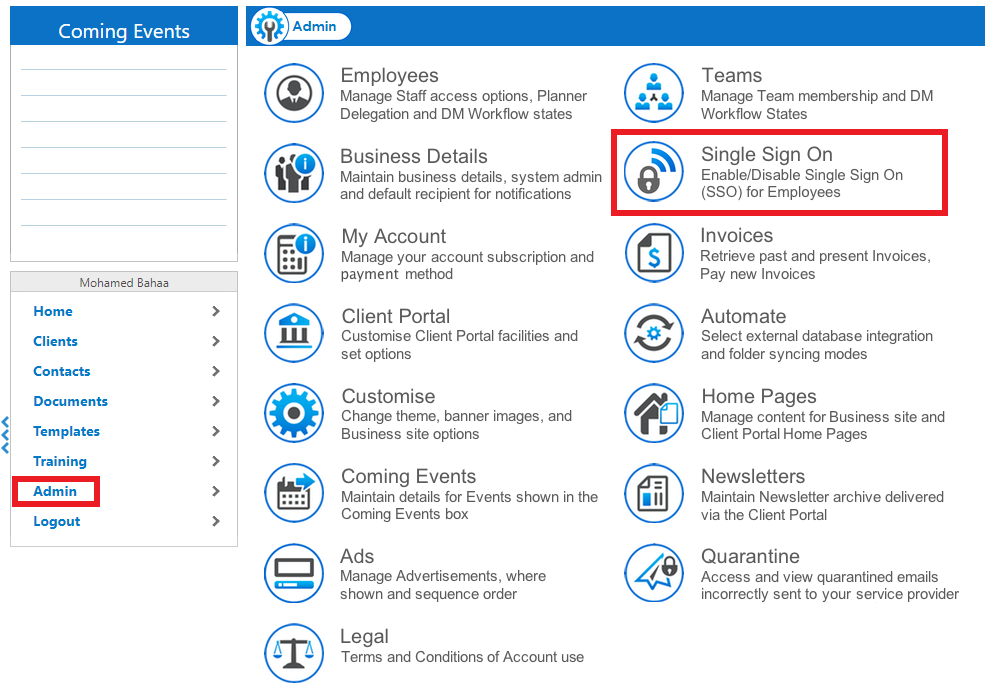
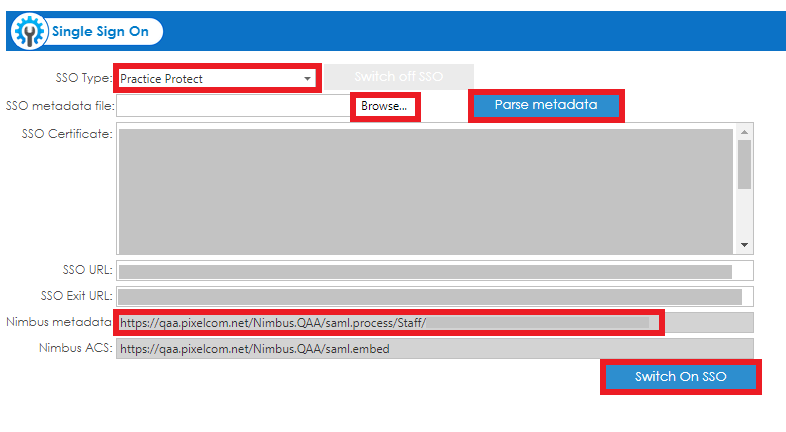
7. Go to Nimbus and login with the admin account, Go to Admin and click Single Sign On.
8. Select Practice Protect from SSO Type. under SSO Metadata file click Browse and select the Metadata file downloaded in step 6. Click Parse metadata, once file is loaded, it will fill all the required fields. Copy the URL under Nimbus metadata which you will need on the succeeding instructions. Click Switch On SSO
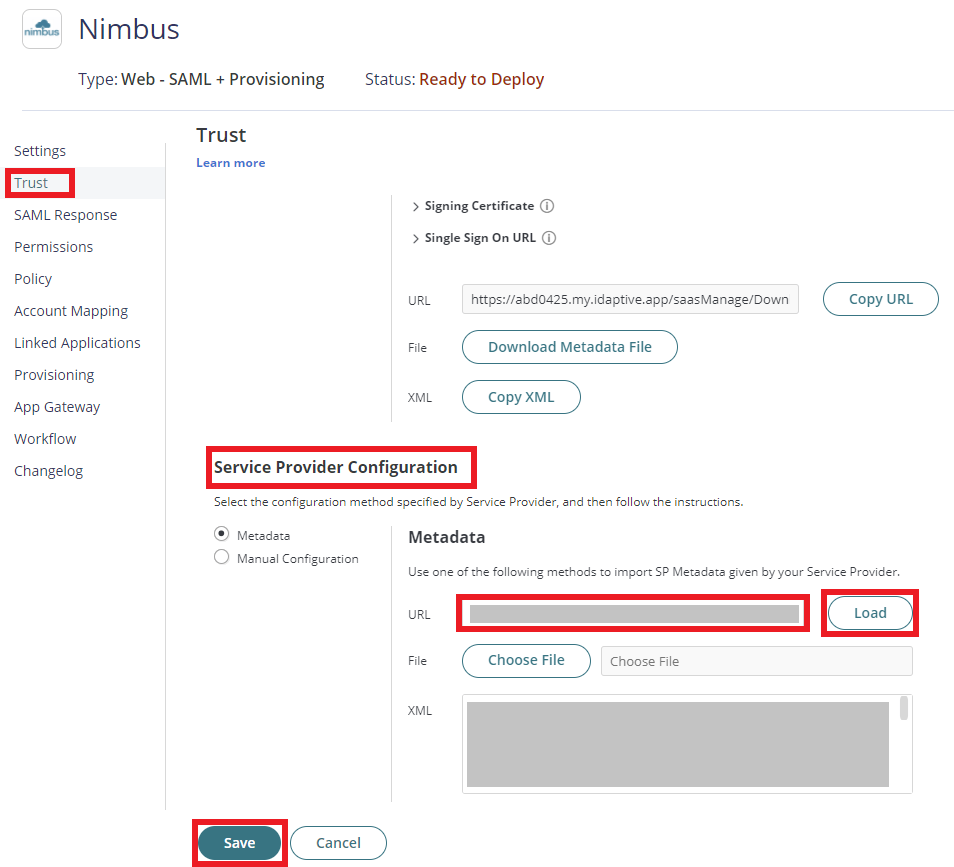
9. Go back to Practice Protect. Nimbus Application > Trust >Scroll down to Service Provider Configuration, add the URL you copied in step 8 in the URL field , then click Load and then click Save.
8. Click on Permissions > Click Add > Select the Role created on step 2 i.e. Nimbus SAML Users. Click Save.
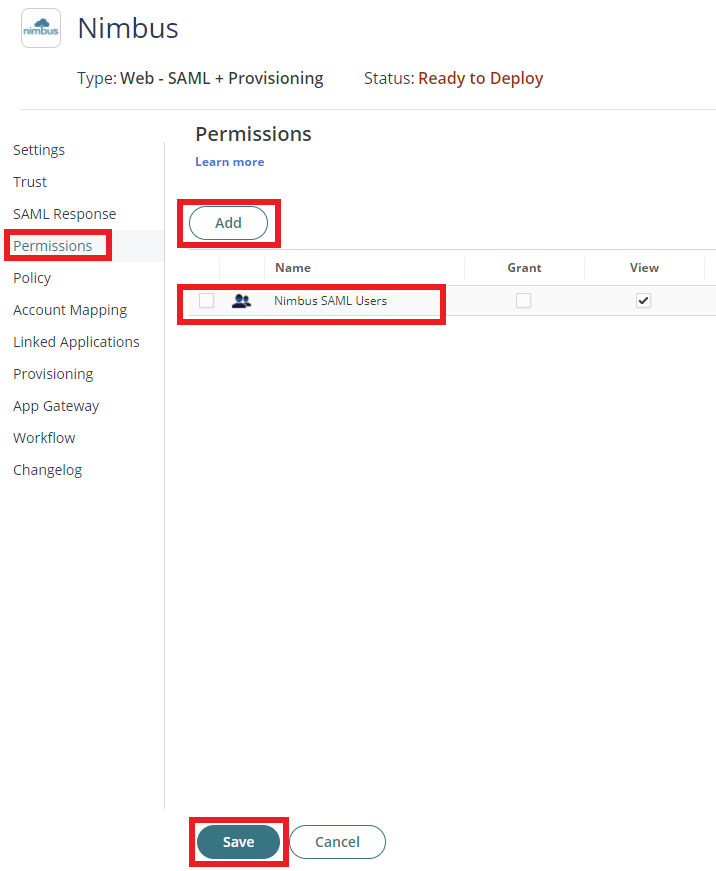
9. The status of the application will change from Ready to Deploy into Deployed. This means that the newly added app will now appear on the user portal for all users that are members of the role (i.e. Nimbus SAML Users)
10. Test if it is working by logging into a User account at Nimbus. Go to you Nimbus page, Click Sign on with SSO.
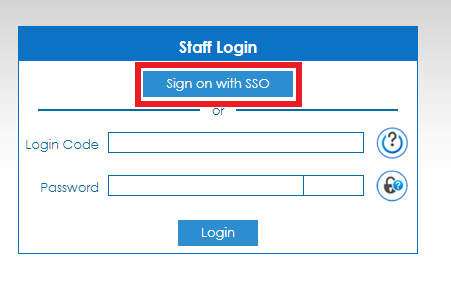
11. You will be redirected to the Practice Protect login page. Enter your Practice Protect credentials.
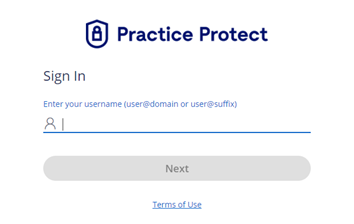
12. Once authentication is successful, you should be able to access your Nimbus application.
Handling Exceptions/Errors (different username)
When a team members uses a custom username (i.e. john.doe) instead of their email address, they won’t be able to login to the app after enabling SSO. Follow the steps below to rectify this problem:
- Return to Practice Protect Admin Portal
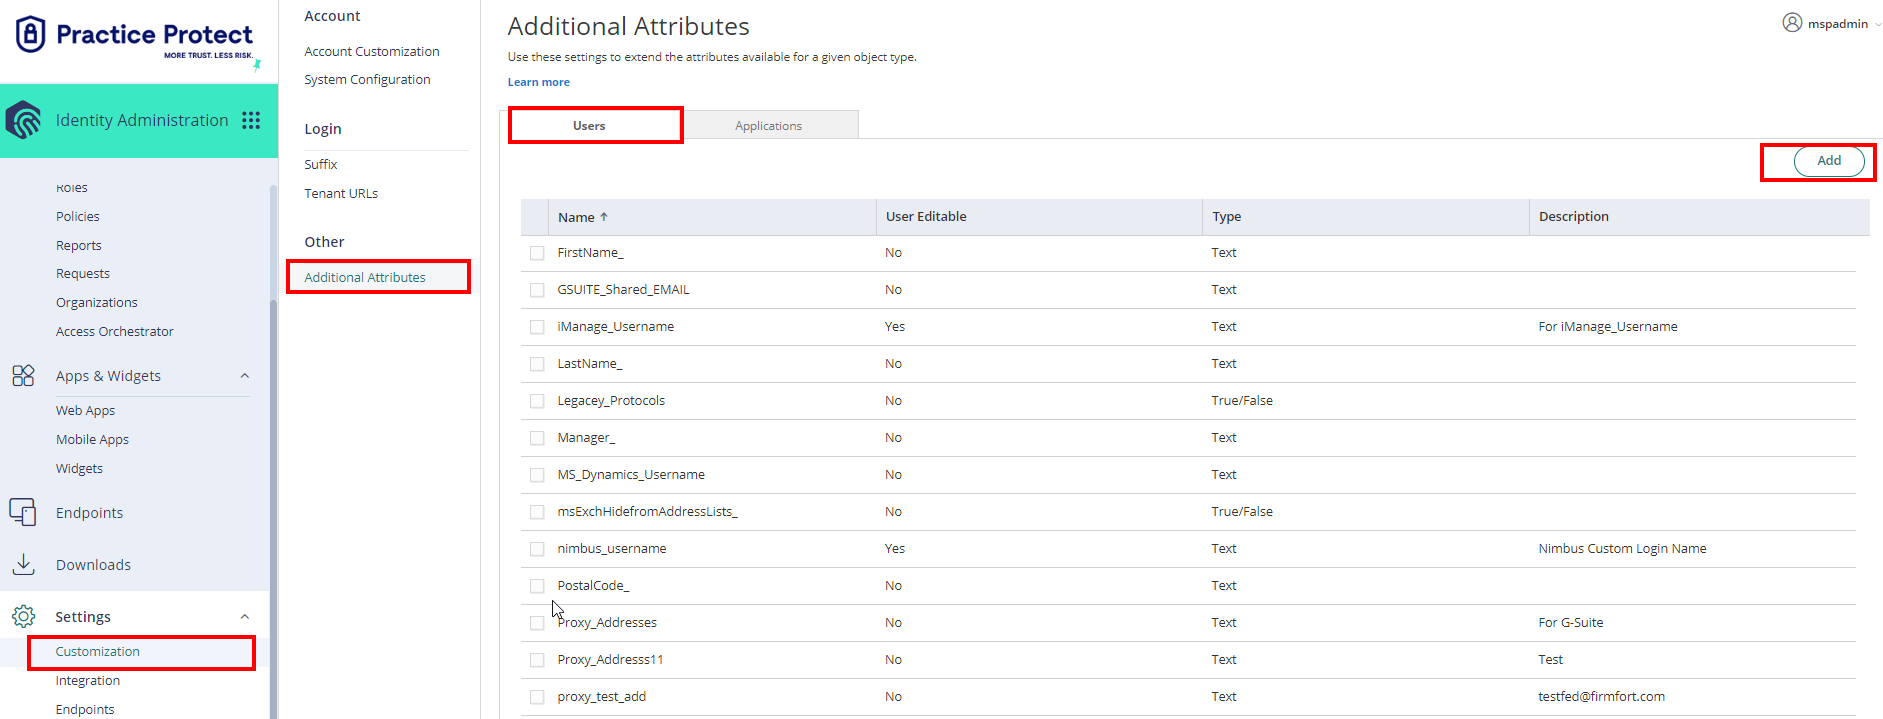
- Go to Settings > Customization > Other > Additional Attributes
- On Users, click Add.
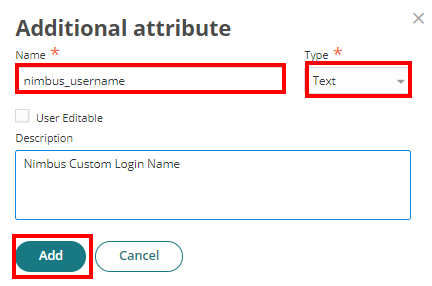
- Fill in the fields with the following details:
Name: nimbus_username
Type: Text
Description: Nimbus Custom Login Name - Click Add to apply
- From Core Services > Users > Select user with the custom username
- Select Additional Attributes and put the custom username on the “Value” field. under nimbus_username.
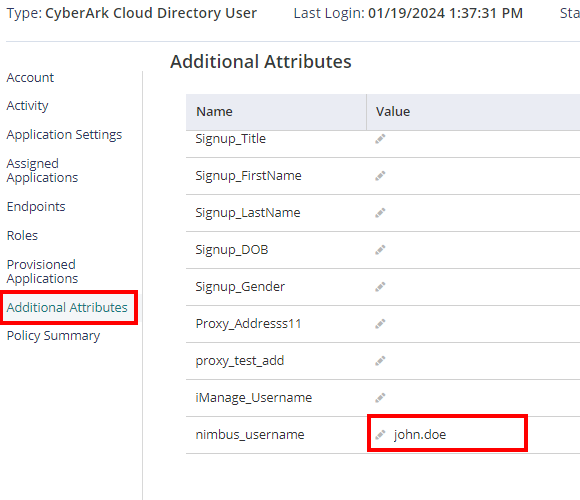
- Hit Save. Repeat the steps 6-8 for other users with custom username.
- Proceed to Apps & Widgets > Web Apps > Nimbus SSO app > SAML Response. On Custom Logic, remove any existing script and replace with below:
var Nimbus_Username = LoginUser.Get("nimbus_username");
if(Nimbus_Username != null && Nimbus_Username != "")
{LoginUser.Username = Nimbus_Username;}
else
{LoginUser.Username = LoginUser.Get("UserPrincipalName");}
- Then, Save.
- Test and login using the username.