
Purpose
ChatGPT offers single sign-on via a SAML integration with Practice Protect. This provides a seamless login experience to the ChatGPT platform including the mobile application.
Once SSO is enabled and enforced, users will no longer be able to sign in using other login methods (e.g., Google, Microsoft, Apple) for any account associated with the registered business domain in ChatGPT.
For users currently using non-business email addresses (e.g., personal Gmail accounts) or accounts not part of the ChatGPT Workspace, SSO will not apply to those accounts, and chat history will not carry over. In such cases, users must:
-
Create a new ChatGPT account using their business email that matches their Practice Protect login.
-
Manually migrate important chat history by exporting it from the old account and saving it for reference.
Prerequisites
-
Requires Business, Enterprise, or Edu ChatGPT Workspace. Please note that the Teams plan does not support SCIM provisioning.
- Practice Protect Account with Admin Access
- The username or email address of each associated ChatGPT account must match the login name used in Practice Protect to ensure successful SSO authentication.
Instructions
Verify Domain
To use the Single Sign On feature, your domain must be added and verified.
- Login to ChatGPT Workspace using an Admin Account.
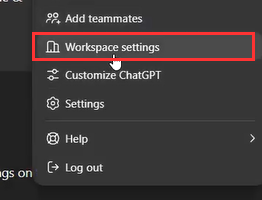
- Click on your Profile and choose Workspace Settings
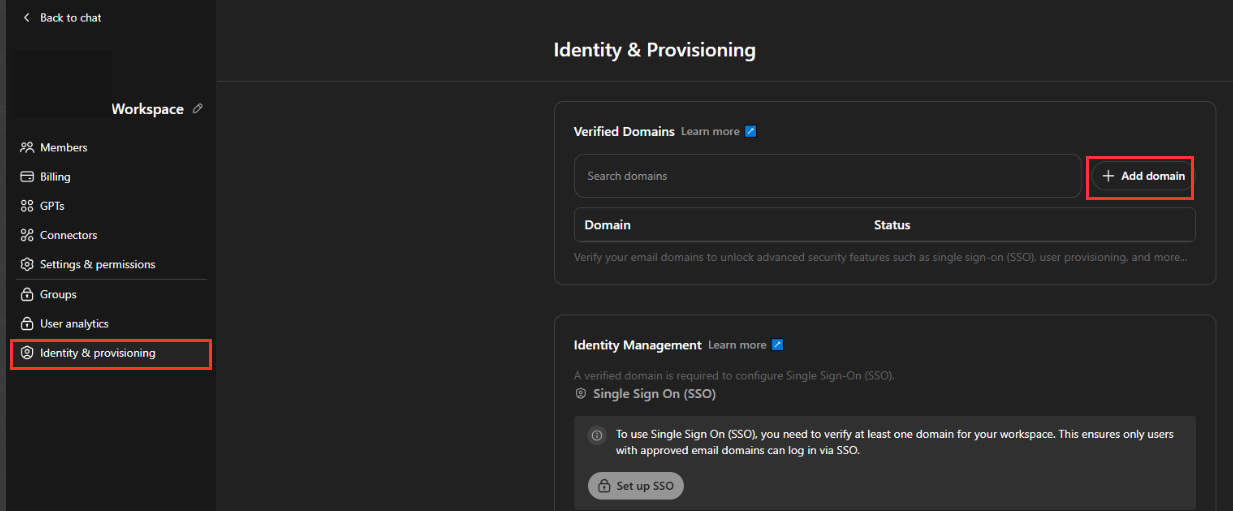
- In the left navigation menu, select Identity & Provisioning and click on + Add Domain button.
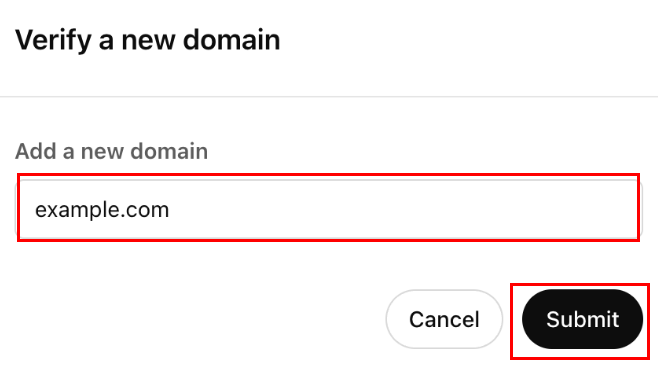
- Enter your domain and hit Submit.
- Once submitted, ChatGPT will provide a TXT record to verify ownership of your domain. Please contact the person (IT or Web Developer) who manages your DNS and have them add the provided TXT record.
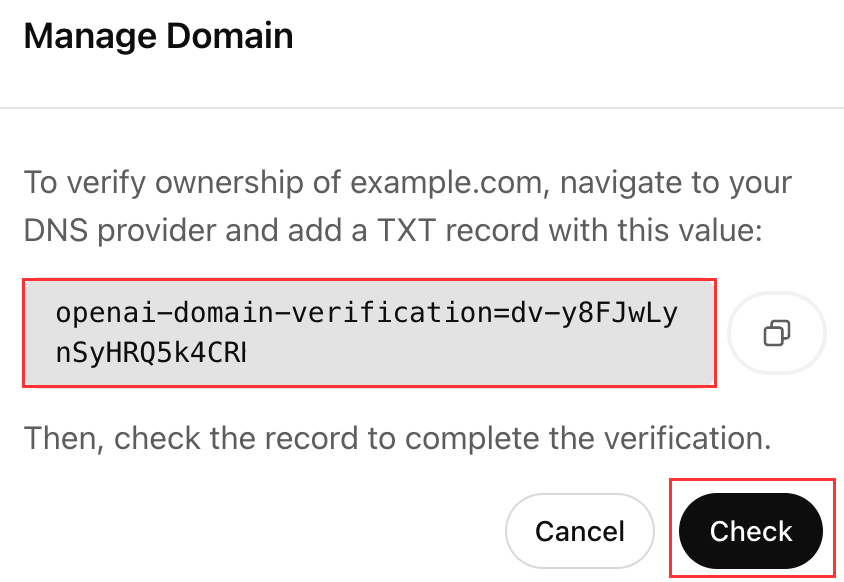
- After adding the TXT record in your DNS provider, return to the setup page and click the Check button. If your domain ownership is successfully validated, the status will update to Verified.
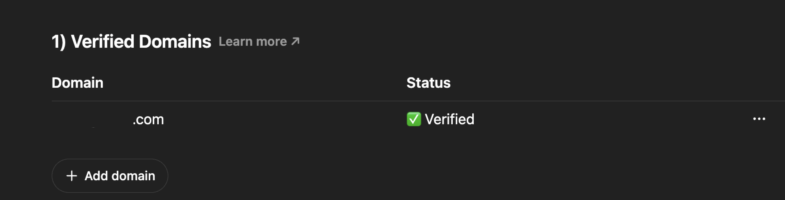
NOTE: You can add up to 99 verified domains per organization ID, and you have a 7-day period to complete the verification before the domain is marked as expired. Currently, each domain can only be verified on a single organization or workspace. If you encounter an error stating that the domain is already in use, please contact ChatGPT Support. - After your domain is successfully verified, you can continue the SSO setup by configuring the SAML app in Practice Protect.
Setup & Enable Single Sign-On
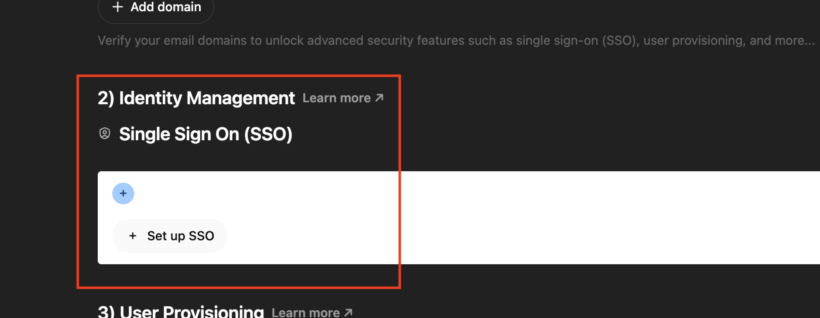
- To get started, go to Identity & Provisioning in ChatGPT and click the “+ Set up SSO” button.
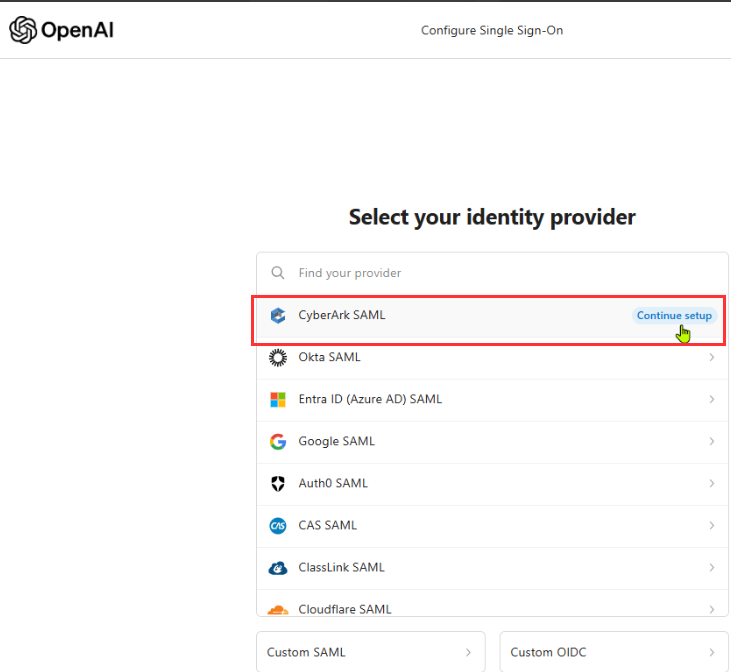
- Next, select CyberArk SAML as the Identity Provider on the selection page.
- Next step is sign in to Practice Protect and switch to the Admin Portal. It’s recommended to open a new tab for this while keeping the ChatGPT SSO configuration page open, so you can work through both setups simultaneously
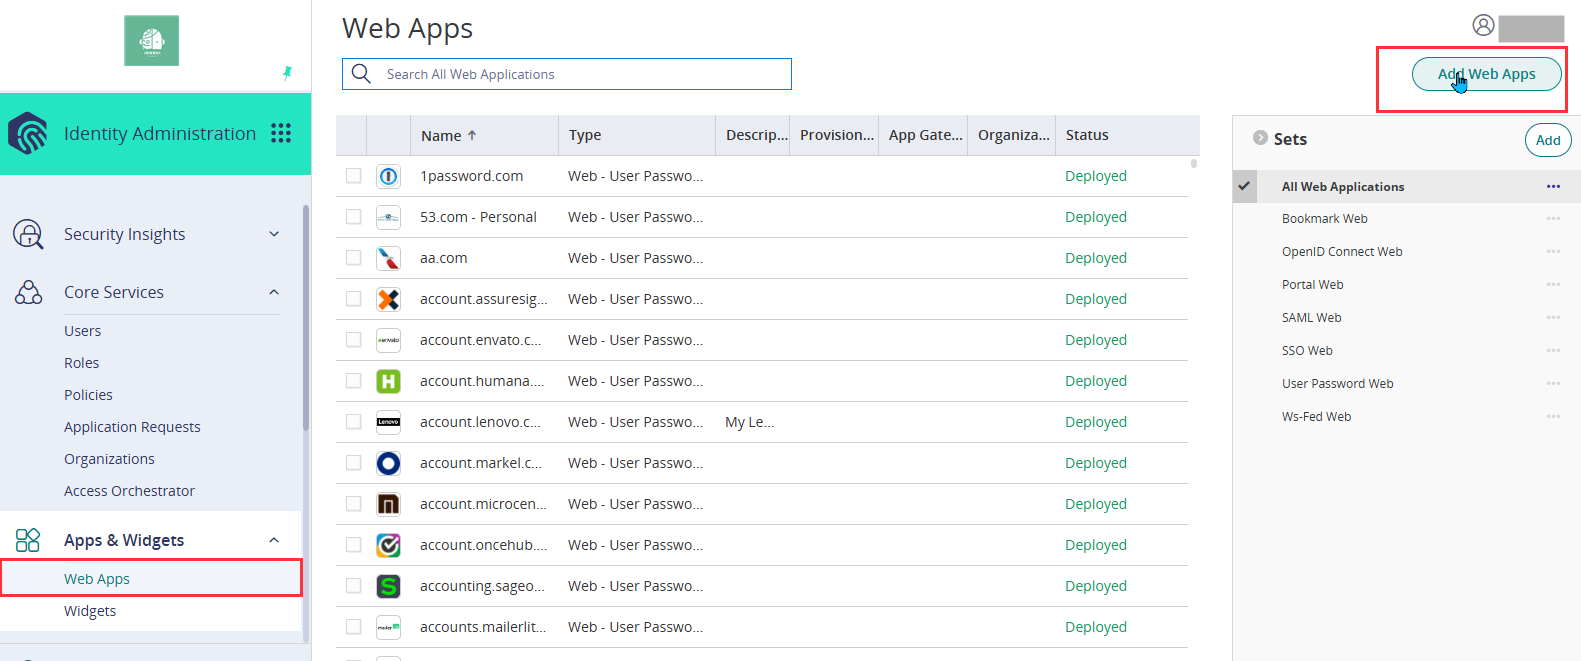
- Follow the instructions to navigate to Apps & Widgets > Web Apps, then click Add Web Apps.
-
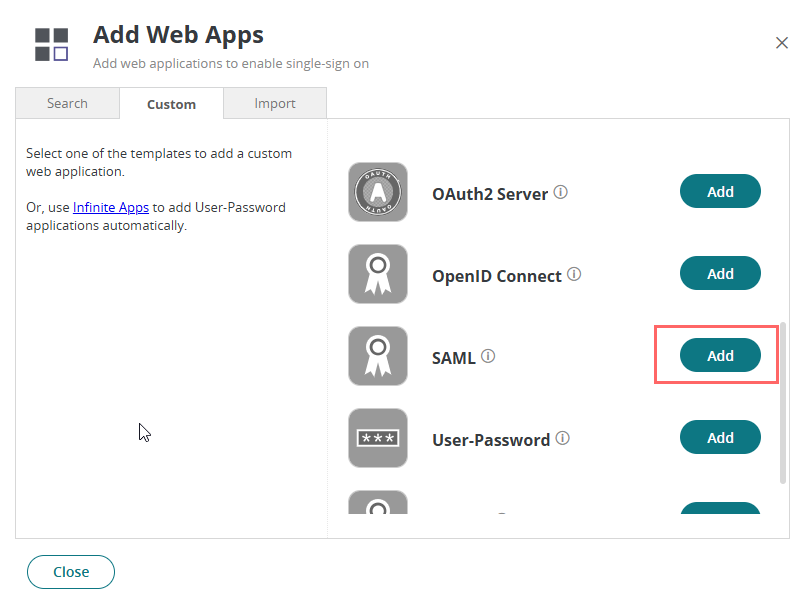
Select the Custom tab, then click Add next to SAML.
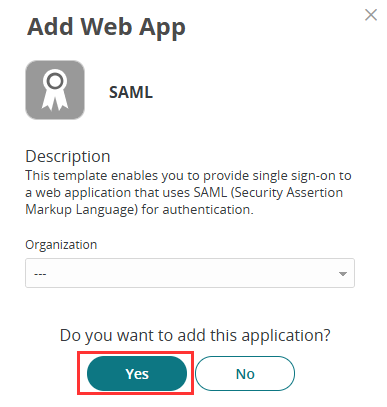
- Click Yes.
- Set the Name of the app to ChatGPT SSO and click Save.
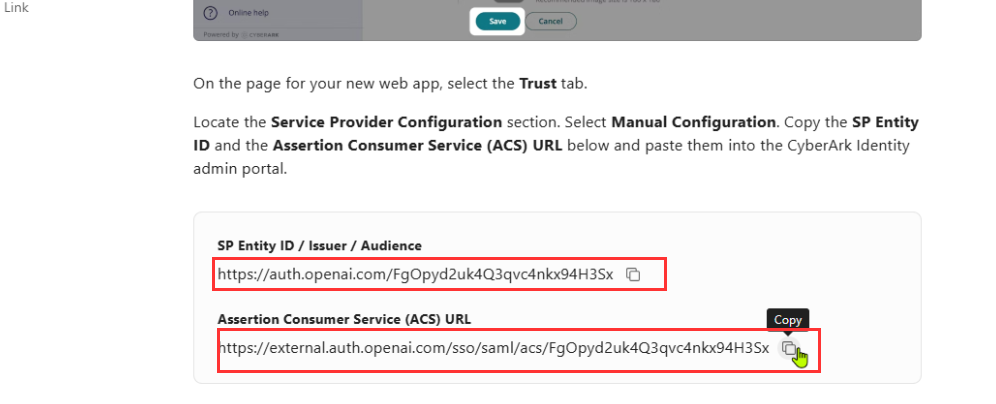
- Return to the ChatGPT SSO page and copy both the SP Entity ID and Assertion Consumer Service (ACS) values. These will be configured in Practice Protect.
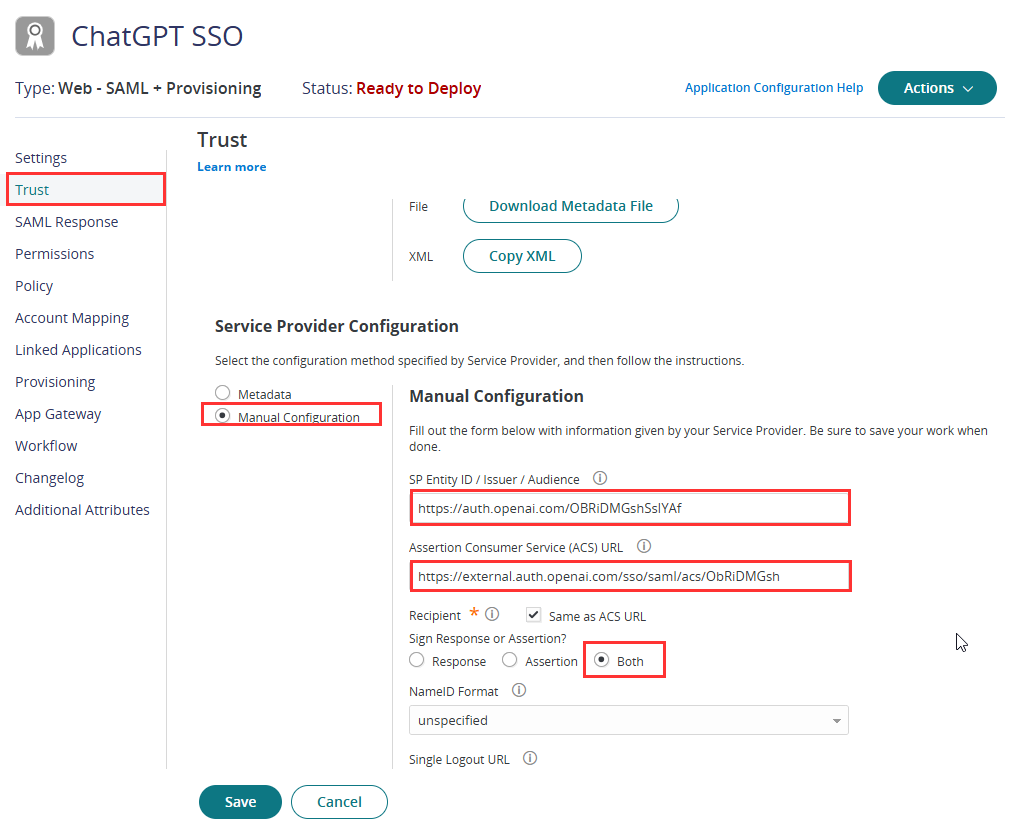
- Next, return to Practice Protect, navigate to the Trust tab, scroll down to the Service Provider Configuration section, and select Manual Configuration.
- Paste the copied SP Entity ID and ACS URL into the corresponding fields in the Service Provider Configuration.
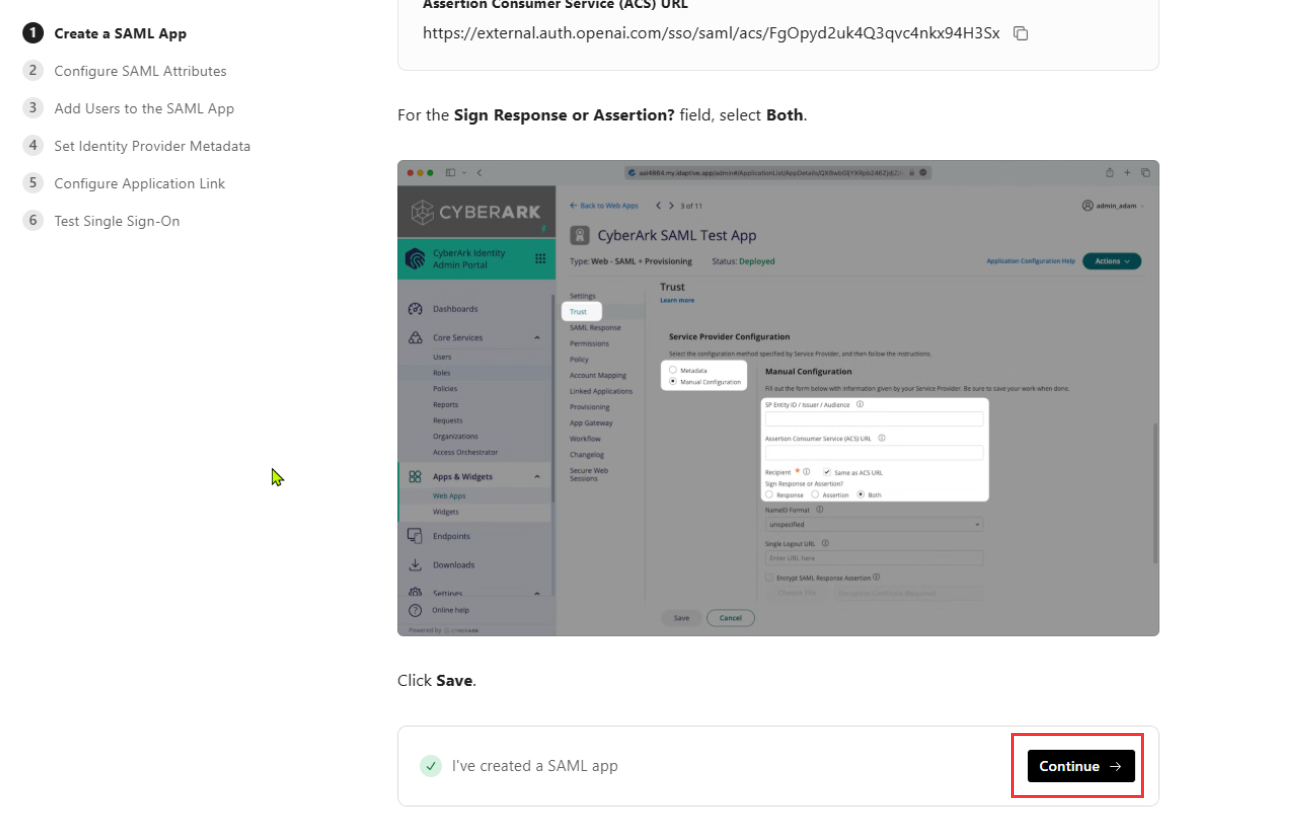
- For Sign Response or Assertion?, select Both.
- Click Save
-
Return to the ChatGPT Workspace SSO Settings page, scroll to the bottom, and click Continue. This completes the first step of the ChatGPT SSO setup – Create a SAML app. We will now proceed with Configure SAML Attributes.
-
Return to the ChatGPT SSO app in Practice Protect, then navigate to the SAML Response tab.
-
In the Attributes section, click Add.
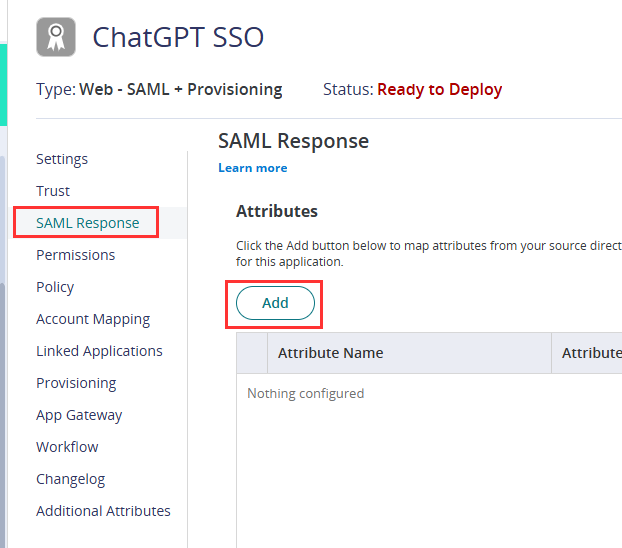
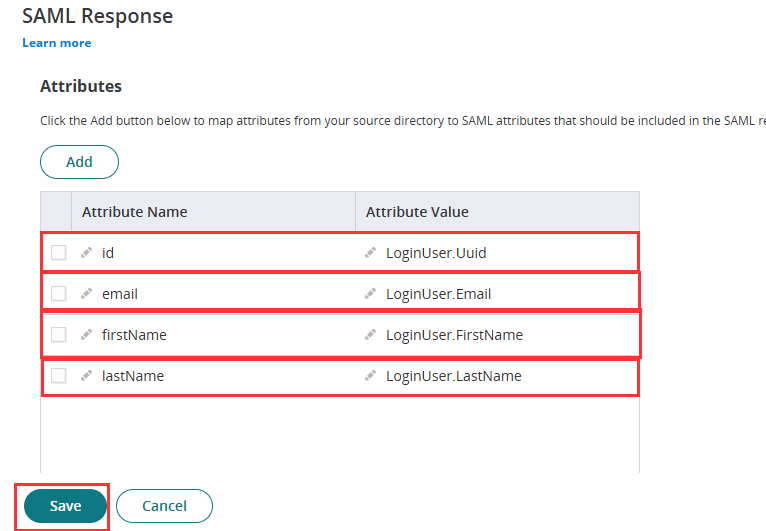
- Add each attribute by entering the Name along with its corresponding Attribute Value.
- id – LoginUser.Uuid
- email – LoginUser.Email
- firstName – LoginUser.FirstName
- lastName – LoginUser.LastName
- Click Save.
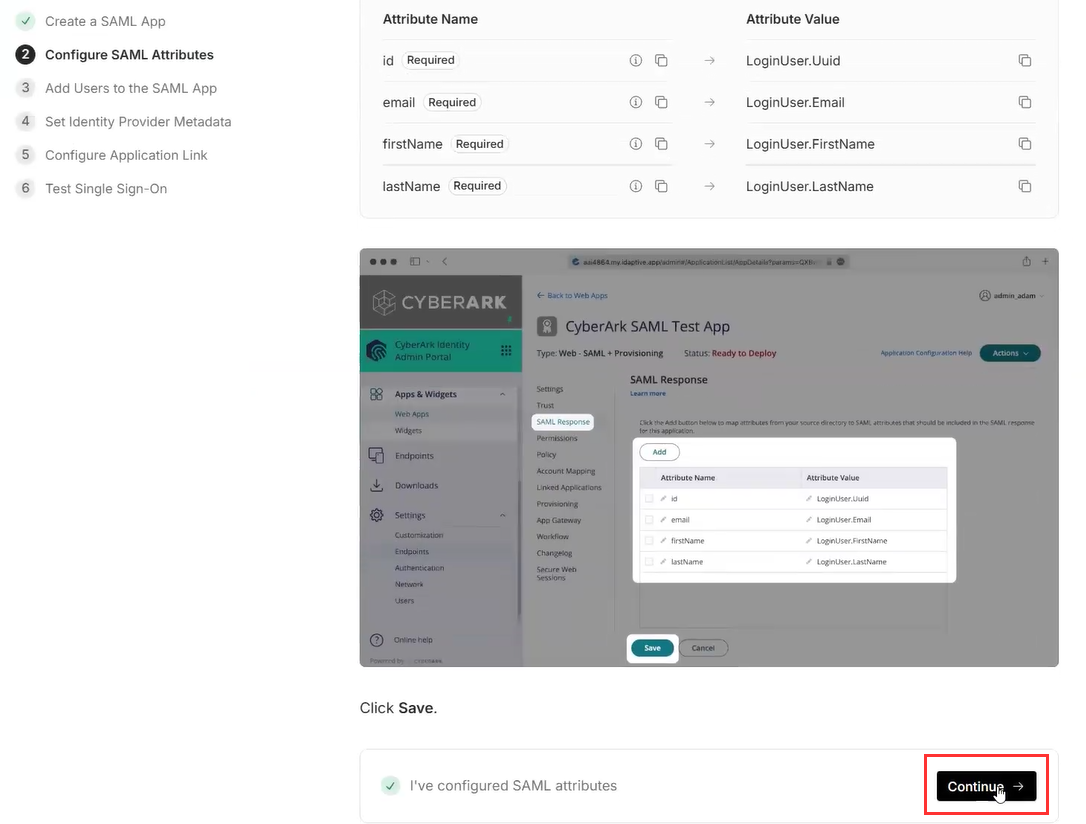
- Once saved, return to the ChatGPT Workspace SSO Settings (Configure SAML Attributes) page and click Continue. This completes the second step of the ChatGPT SSO setup. Next, Add Users to the SAML App.
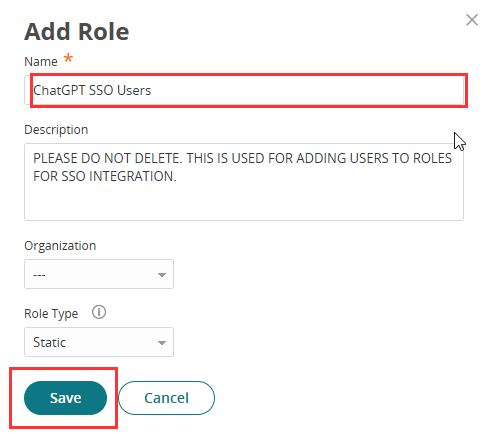
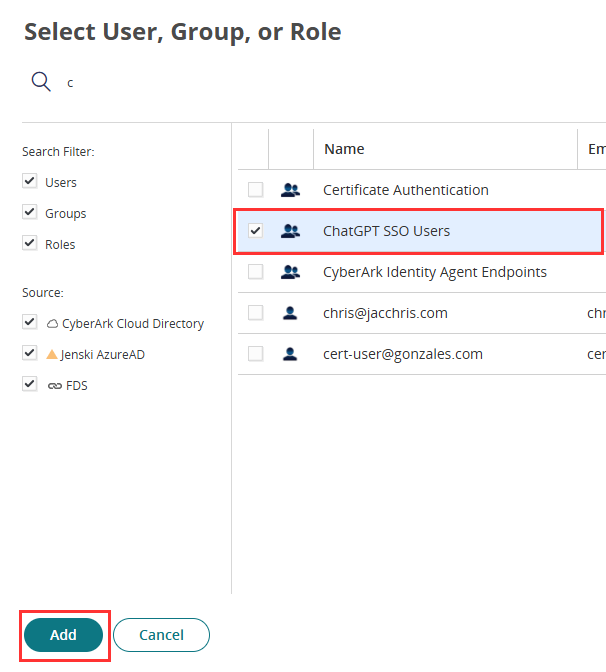
- In Practice Protect Admin Portal, go to Core Services, click Roles > Add Roles. Create a role and set the name field to ChatGPT SSO Users. Then Save.
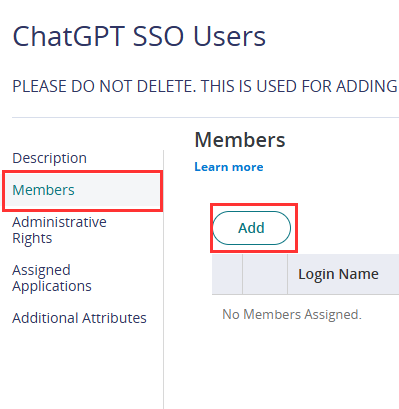
- Within the created role, click on Members > Add. Add each user that should have access to the ChatGPT Workspace application, then Save.
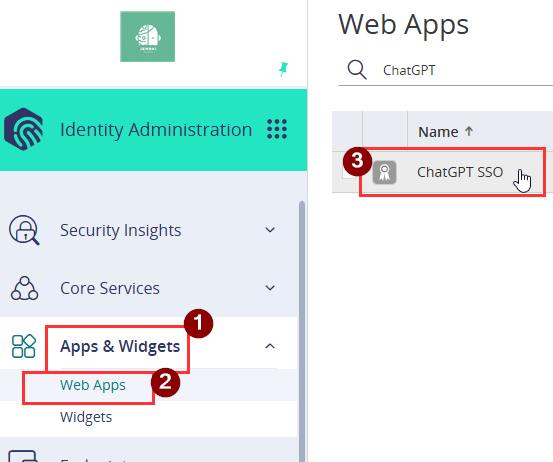
- Proceed to Apps & Widgets > Web Apps and open ChatGPT SSO app.
- Go to Permissions. Click Add.
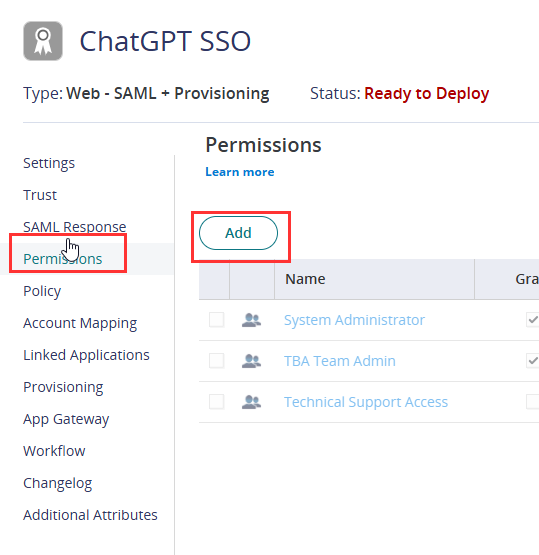
- Add the role you created earlier (e.g. ChatGPT SSO Users) and click Add then Save.
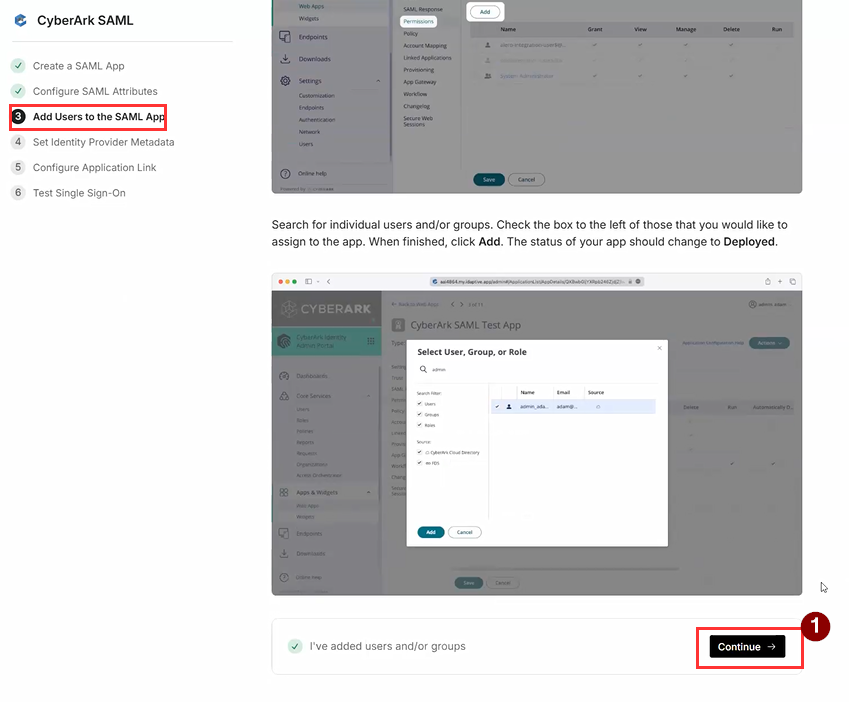
- Return to the ChatGPT Workspace SSO Settings (Add Users to the SAML App) page and click Continue. This completes the third step of the ChatGPT SSO setup. Next, Set Identity Provider Metadata.
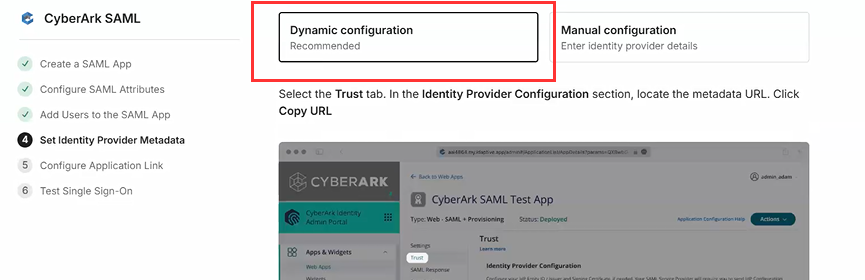
- On the same page, ensure it is set to Dynamic Configuration rather than Manual Configuration. By default, this is already set to Dynamic Configuration.
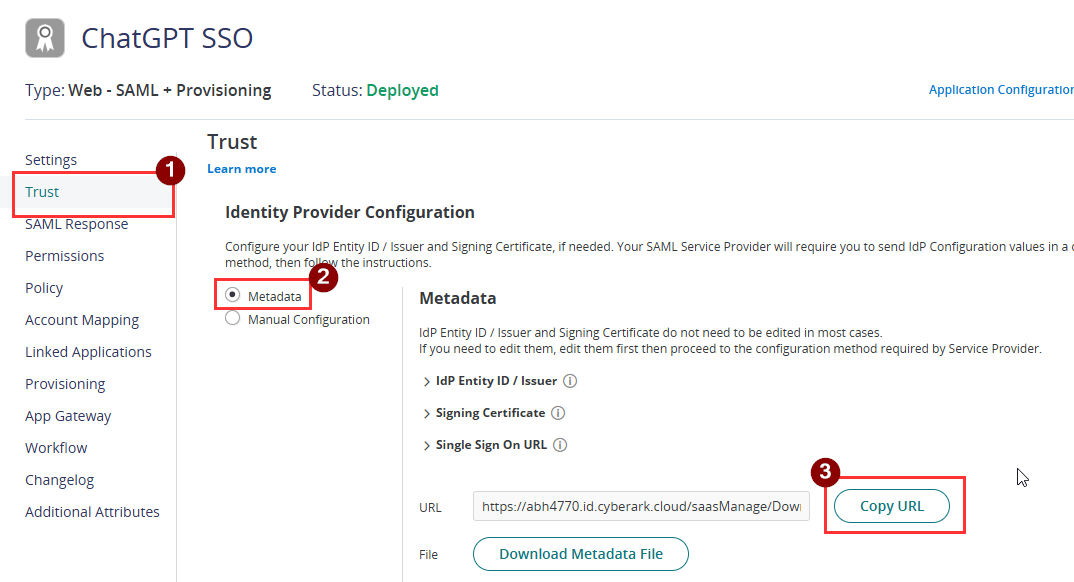
- Revisit the ChatGPT SSO app in Practice Protect and navigate to the Trust tab.
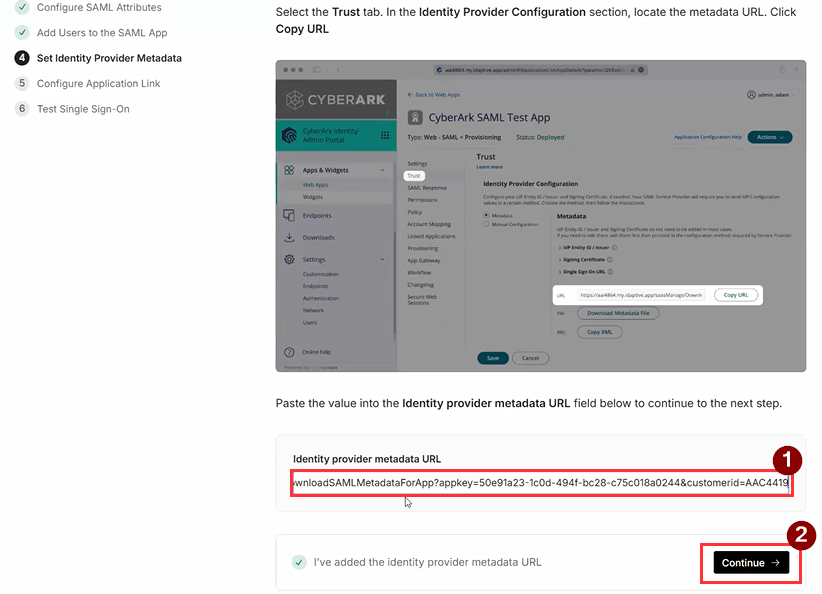
- In the Identity Provider Configuration section, select Metadata and copy the Metadata URL.
- Go back to the ChatGPT Workspace SSO setup (Set Identity Provider Metadata), and paste the URL you copied into the Identity Provider Metadata URL field.
- Click Continue. This completes the fourth step of the ChatGPT SSO setup. Next, Configure Application Link
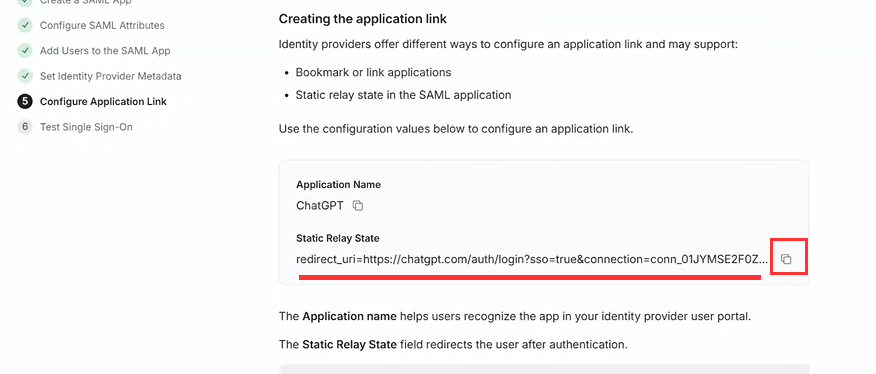
- When creating the application link, select Static Relay State and copy the provided Static Relay State URL.
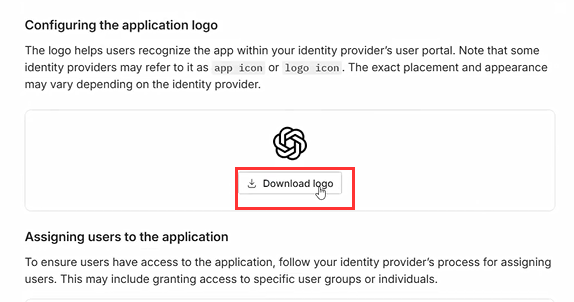
- Download the official ChatGPT logo. We will use this for the SSO app in Practice Protect.
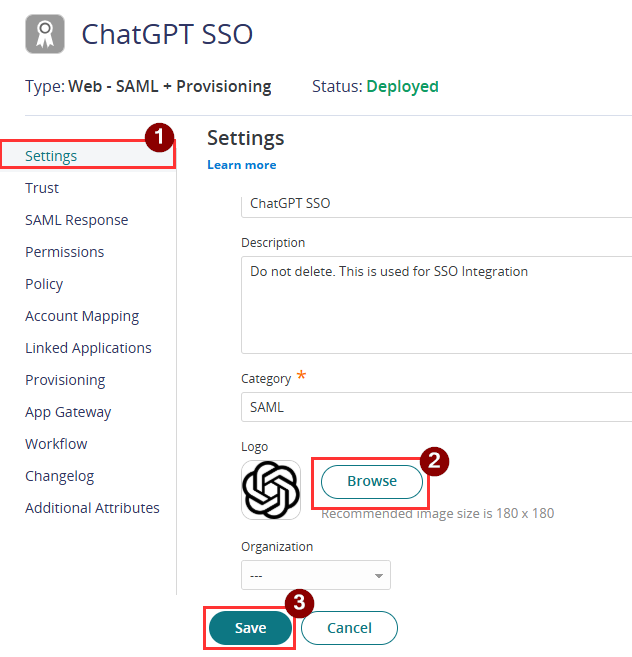
- Navigate back to the ChatGPT SSO app in Practice Protect and go to Settings.
- Click Browse to upload the logo you just downloaded, then click Save.
- Proceed to the Trust tab, scroll down, and go to Service Provider Configuration.
- Under Manual Configuration, paste the Static Relay State URL you copied from Step 30 into the Relay State field.
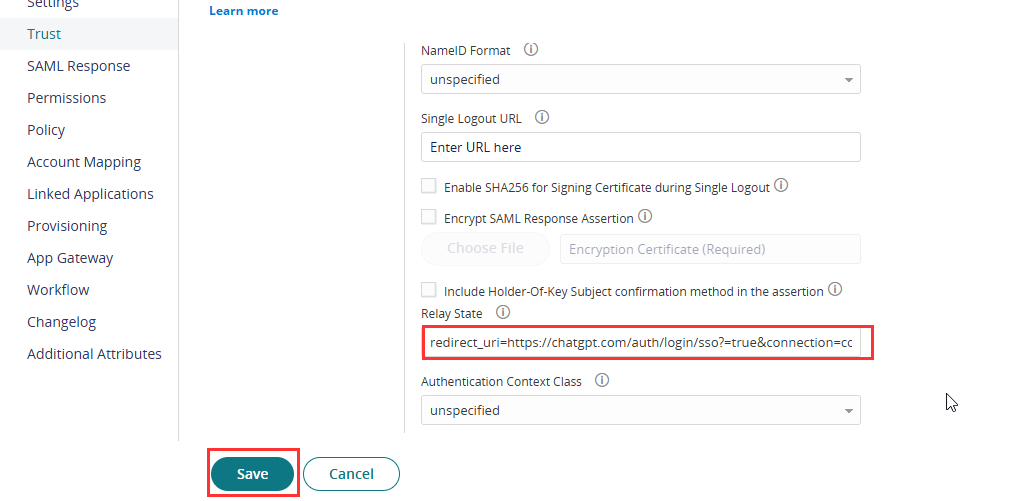
- Hit Save.
- Once done, revert to Configure Application Link in ChatGPT Workspace and click Continue. This completes the fifth step of the ChatGPT SSO setup. Next, Test Single Sign-On
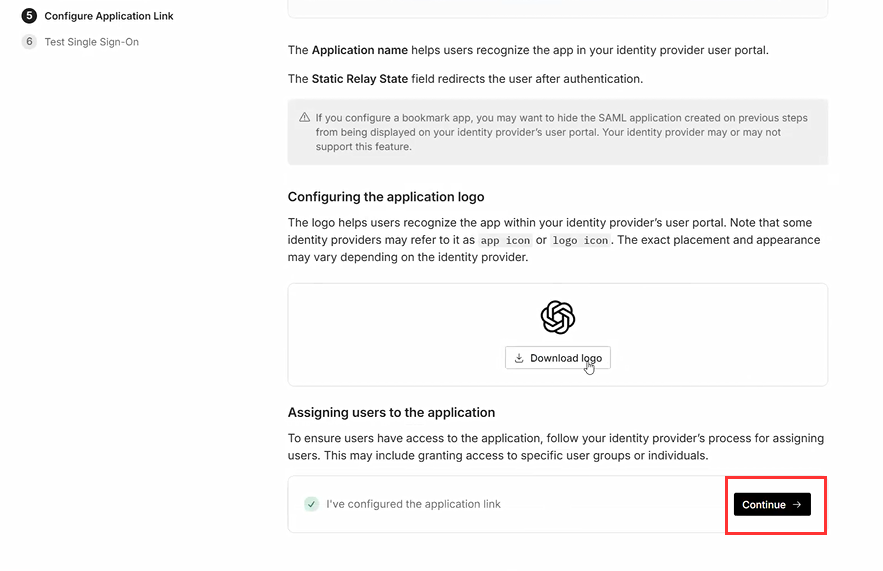
- Once all configurations are set, click Continue to sign in.
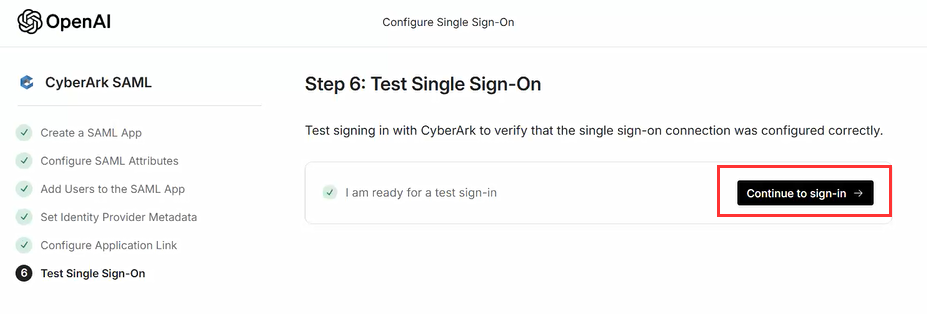
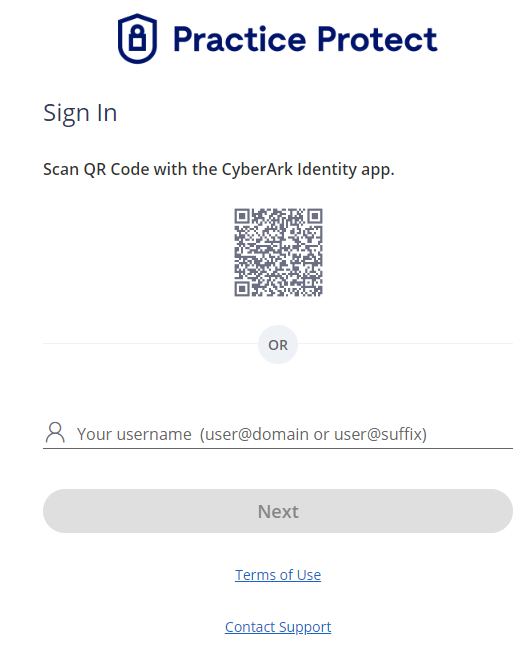
- This will redirect you to Practice Protect to sign in. The user must use their Practice Protect credentials to verify the connection and complete the testing. This is the final step required to complete the SSO setup.
- Once successful, a message stating “Test was successful” will appear. Close the page and navigate back to the SSO configuration in ChatGPT.
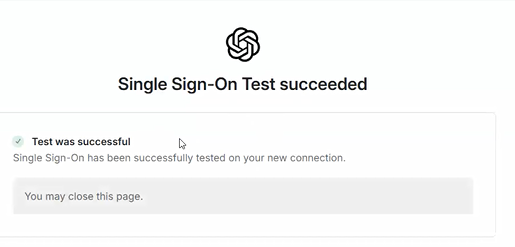
- SSO is now enabled. Users can still sign in using their regular credentials. To enforce SSO, proceed with the next steps.
- It is recommended to test SSO with the remaining users to ensure it works for them. They can also access the ChatGPT SSO app in Practice Protect.
- Switch on Enforce SSO Login. Note that this will prevent users from signing in through their social accounts.
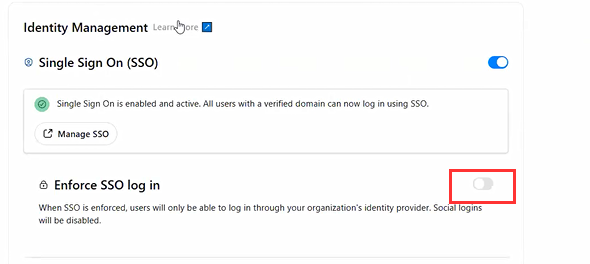
- SSO is now enabled and enforced.
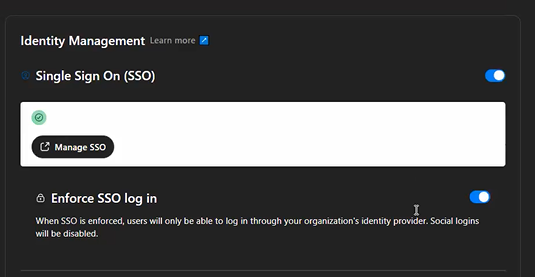
- This ends the SSO configuration