
Purpose
Zoho offers single sign-on via SAML integration with Practice Protect. This provides a seamless login experience to any Zoho products using IdP-initiated SSO.
Practice Protect will configure this on your behalf. Please send us an email at [email protected]
Prerequisites
- This feature is available only in the Premium and Enterprise plans of Zoho Subscriptions.
- Active Zoho account with the Organization Owner or Organization Admin role (Note: This can be your existing account, so you don’t need to create or pay for an additional license account.)
- Verified domain in Zoho. Refer to Zoho documentation: Add and Verify Domain
- Admin Access to Practice Protect
- Username/Email in Zoho should match the login username in Practice Protect.
Instructions
- Sign in to your Practice Protect.
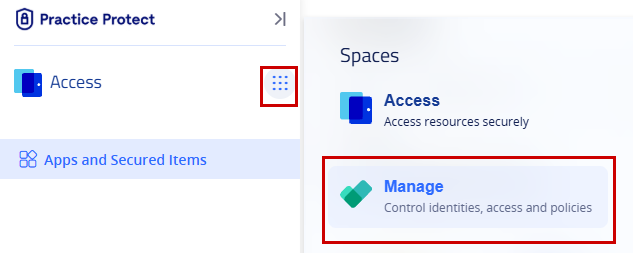
- From the Access space, click the 9-dot menu on the left-hand side of the screen, then select Manage.
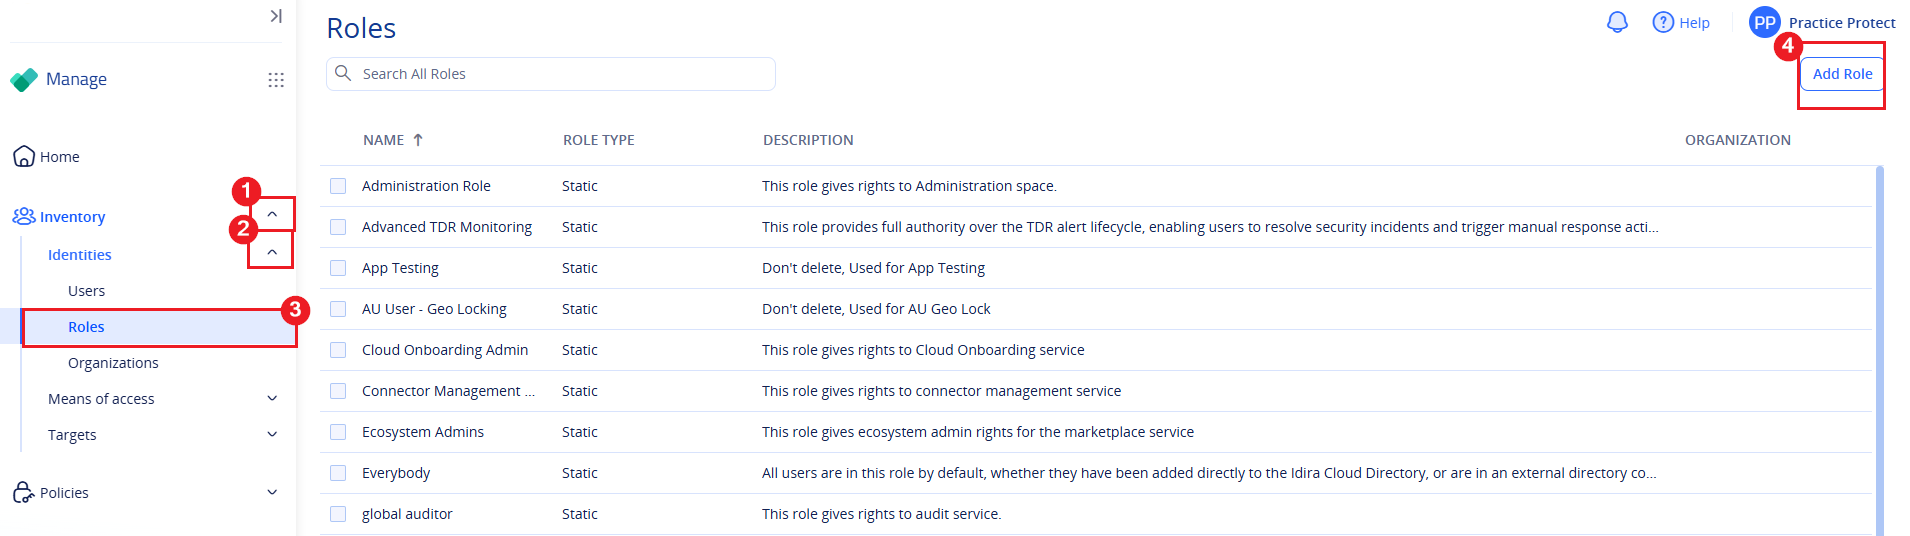
- From the left-hand menu, navigate to Inventory > Identities > Roles.
- Click Add Role.
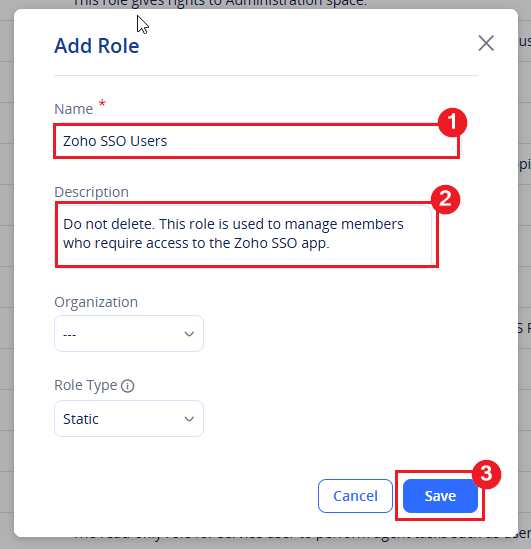
- Enter the following details to create the role:
- Name: Zoho SSO Users
- Description: Do not delete. This role is used to manage members who require access to the Zoho SSO app.
- Click Save.
- After creating the role, you will be automatically redirected to the role details page. Click the Members tab.
- Click Add.
- Select the Practice Protect users who have an existing Zoho account, then click Add. Repeat as needed to add all remaining users.
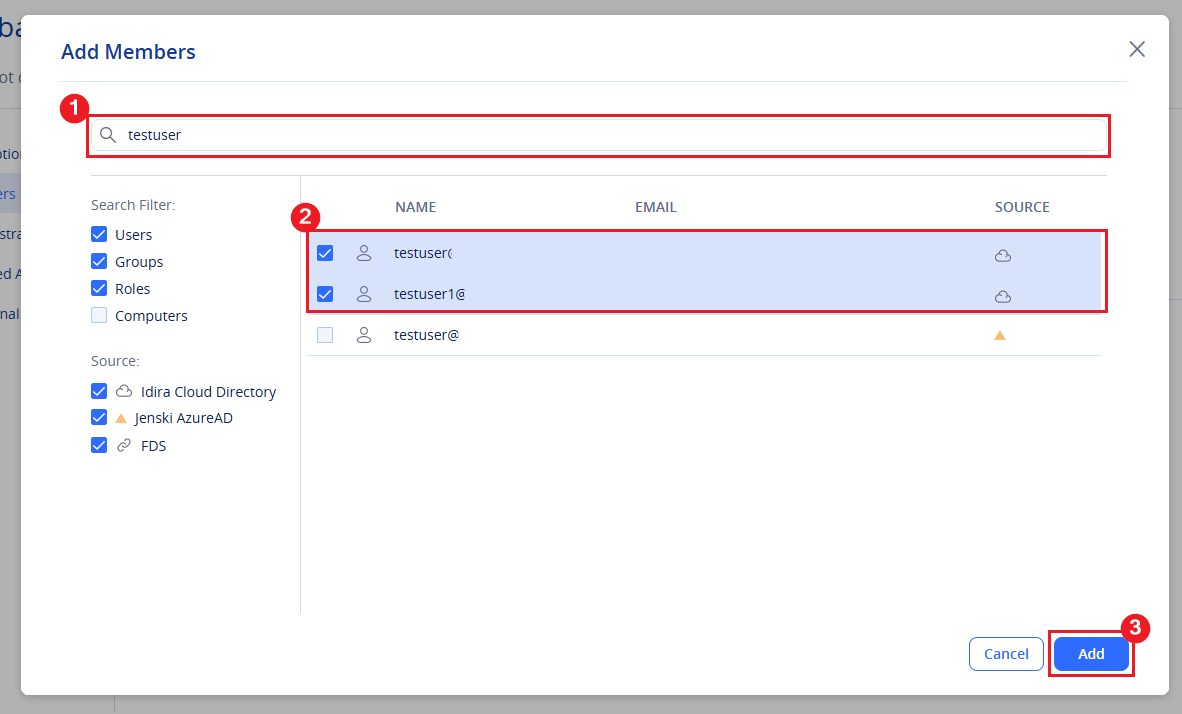
- Click Save to apply the changes and update the role.
-
Navigate to Targets > Applications.
-
In the Applications, Click Add application.

- Select the Custom tab, locate SAML, then click Add.

-
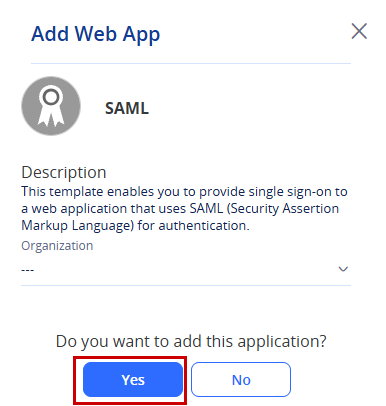
In the Add Web App confirmation prompt, click Yes.
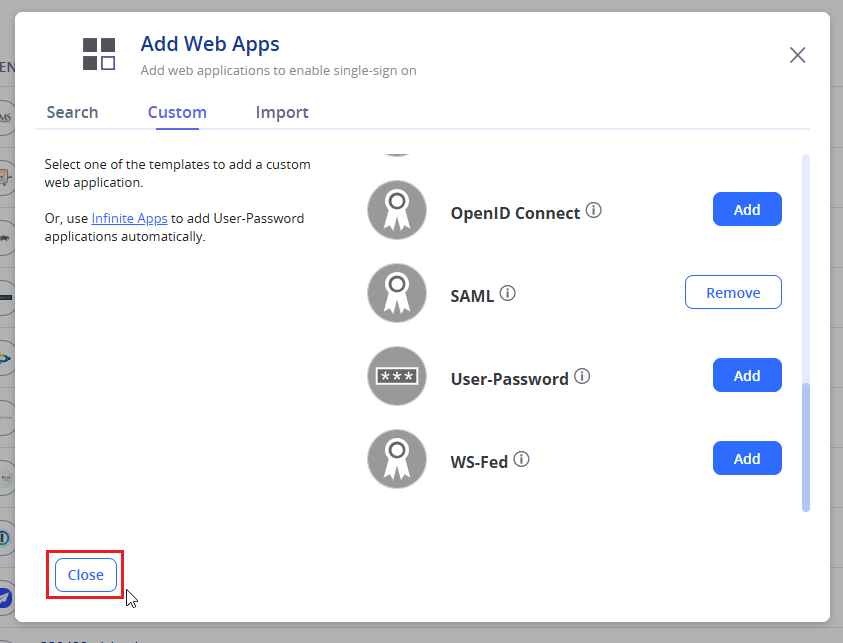
- The application will be created, and a confirmation notification will appear. Click Close to proceed to the application’s settings page.
-
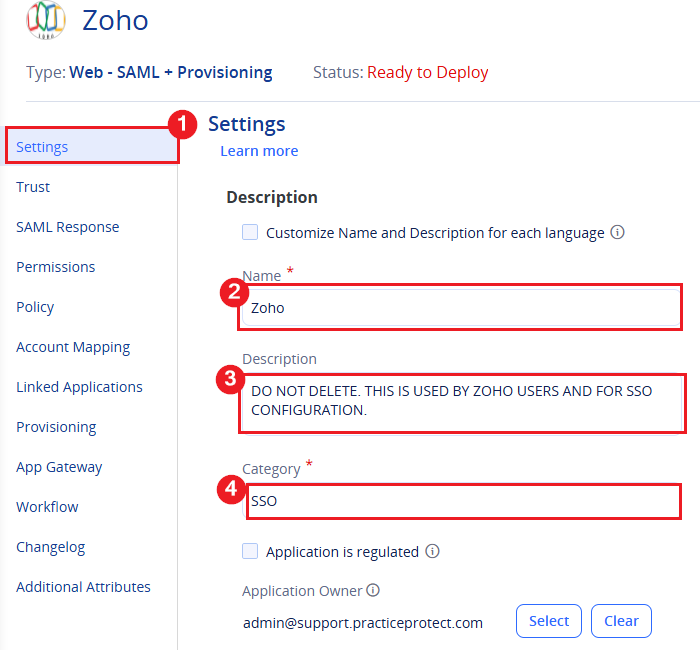
Enter the application details using the configuration below:
- Name: Zoho
- Description: DO NOT DELETE. THIS IS USED BY ZOHO USERS AND FOR SSO CONFIGURATION.
- Category: Set SSO or your preferred category name
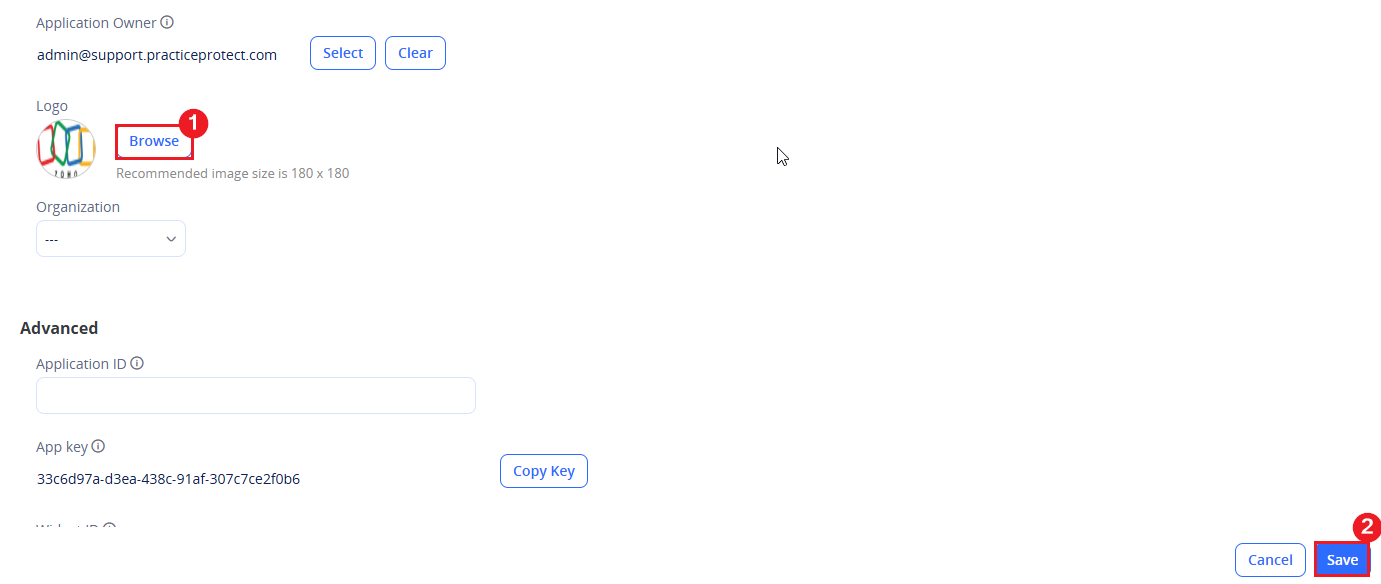
- You can use logo below as the icon for the app. Just right click and save image as. Then upload it

- Click Save in the bottom-right corner to save the application details.
-
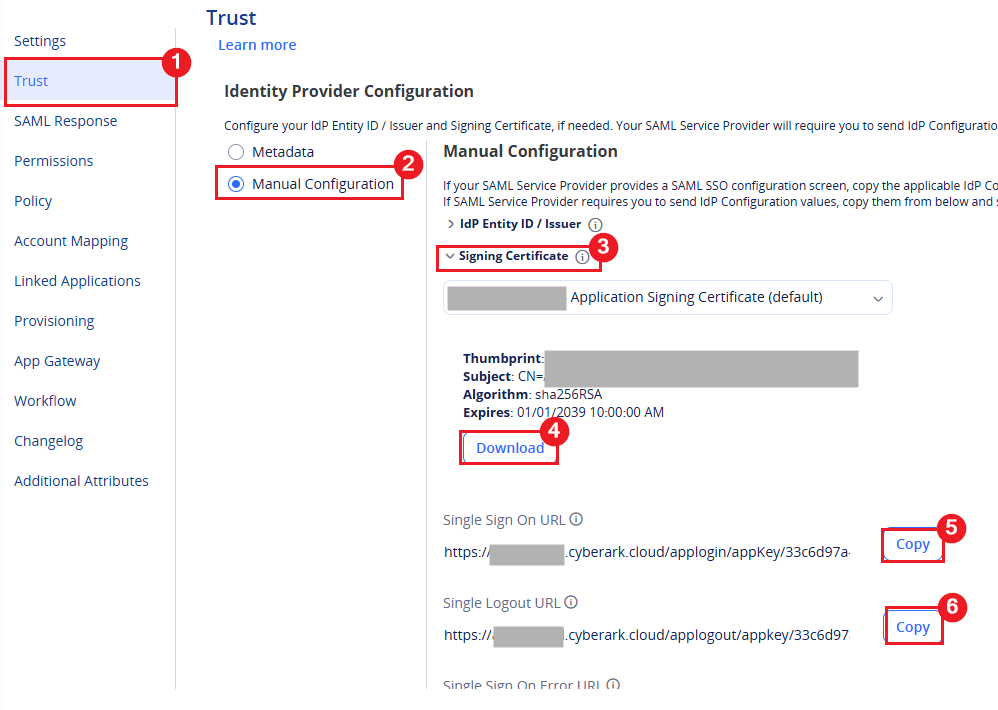
Navigate to Trust > Identity Provider Configuration and select Manual Configuration.
-
Under Signing Certificate, click the dropdown and select Download. Keep the downloaded certificate, as we will need it later.
-
Copy both the Single Sign-On URL and Single Logout URL, as we will also need them later.
-
Click Save.
- Open a new browser tab and keep Practice Protect open.
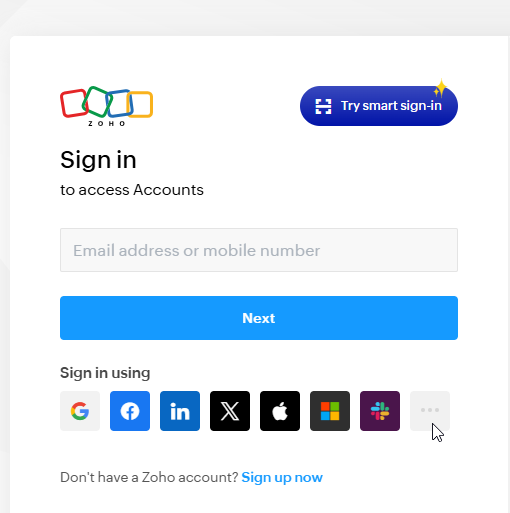
- Log in to Zoho Accounts using the following link: Zoho Accounts.
-
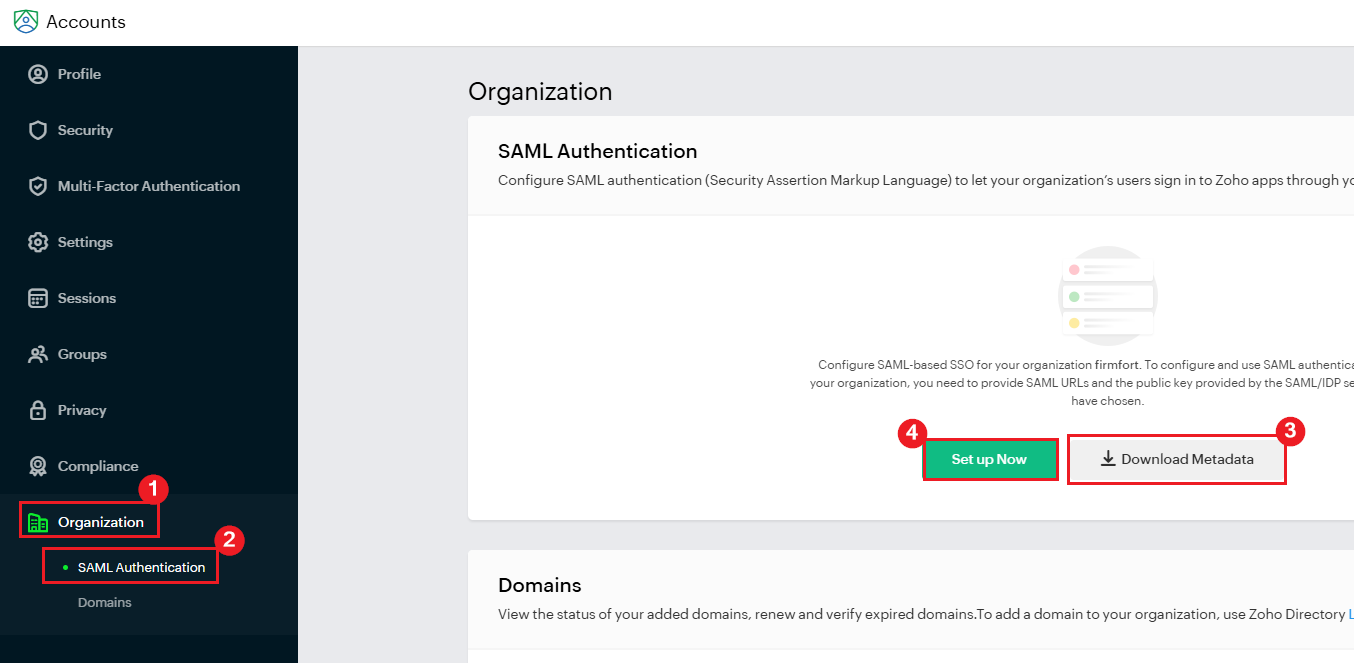
In the left-hand menu, navigate to Organization > SAML Authentication. If the organization is not displayed, it may mean that you don’t have the required permissions, haven’t been added to the organization, or the domain has not yet been verified.
-
Click Download Metadata and keep the downloaded file, as we will need it later.
-
Click Set up Now.
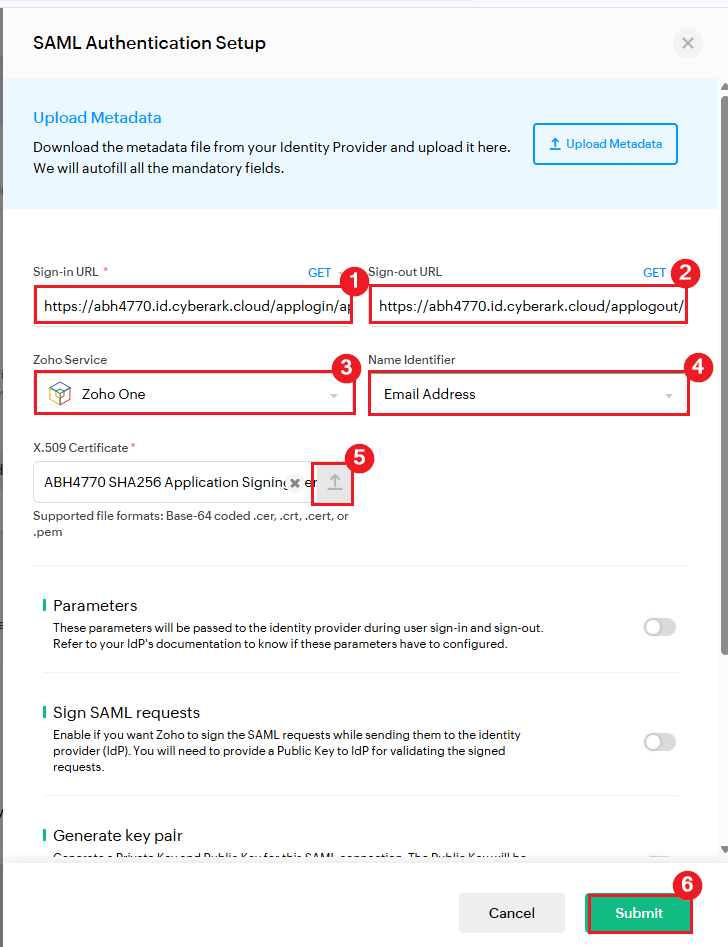
- In the Zoho SAML Authentication Setup form, setup the following
-
Sign-in URL: Paste the Single Sign-On URL copied from Practice Protect in Step 21.
-
Sign-out URL: Paste the Single Logout URL copied from Practice Protect in Step 21.
-
Zoho Service: Select the Zoho product you want to launch when users access the app from Practice Protect (e.g., Zoho One).
-
Name Identifier: Select Email Address. If you choose Unspecified, Zoho will also default to using the email address.
- X.509 Certificate: Upload the signing certificate downloaded from Practice Protect in Step 20.
-
-
You can leave the remaining settings at their default values, including Parameters, Sign SAML Requests, Generate Key Pair, and Just-In-Time Provisioning.
-
Click Submit to save the SAML configuration.
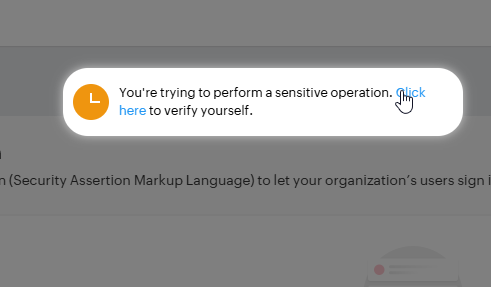
- You may be prompted to re-enter your Zoho login credentials, as Zoho considers this a sensitive operation. Click Click here to open the login page in a new tab, then sign in again using your Zoho credentials. Once your credentials are verified, you will automatically be redirected back to the SAML Authentication page.
-
Click Submit again to save the configuration.
-
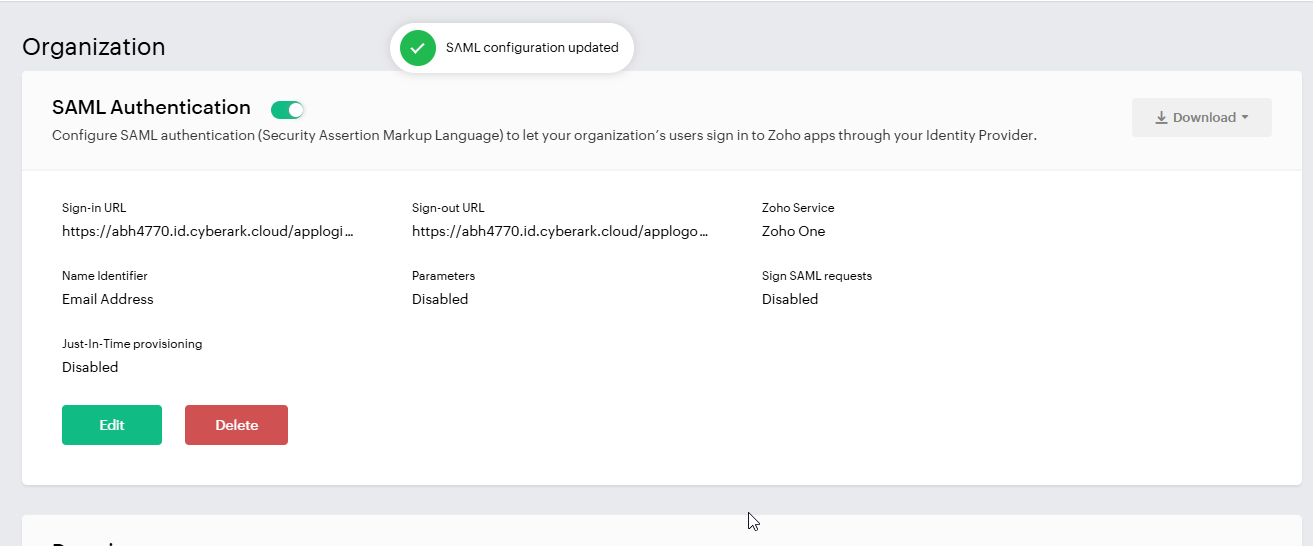
A notification stating SAML configuration updated confirms that the setup was successful. You should also see that SAML Authentication is now Enabled.
-
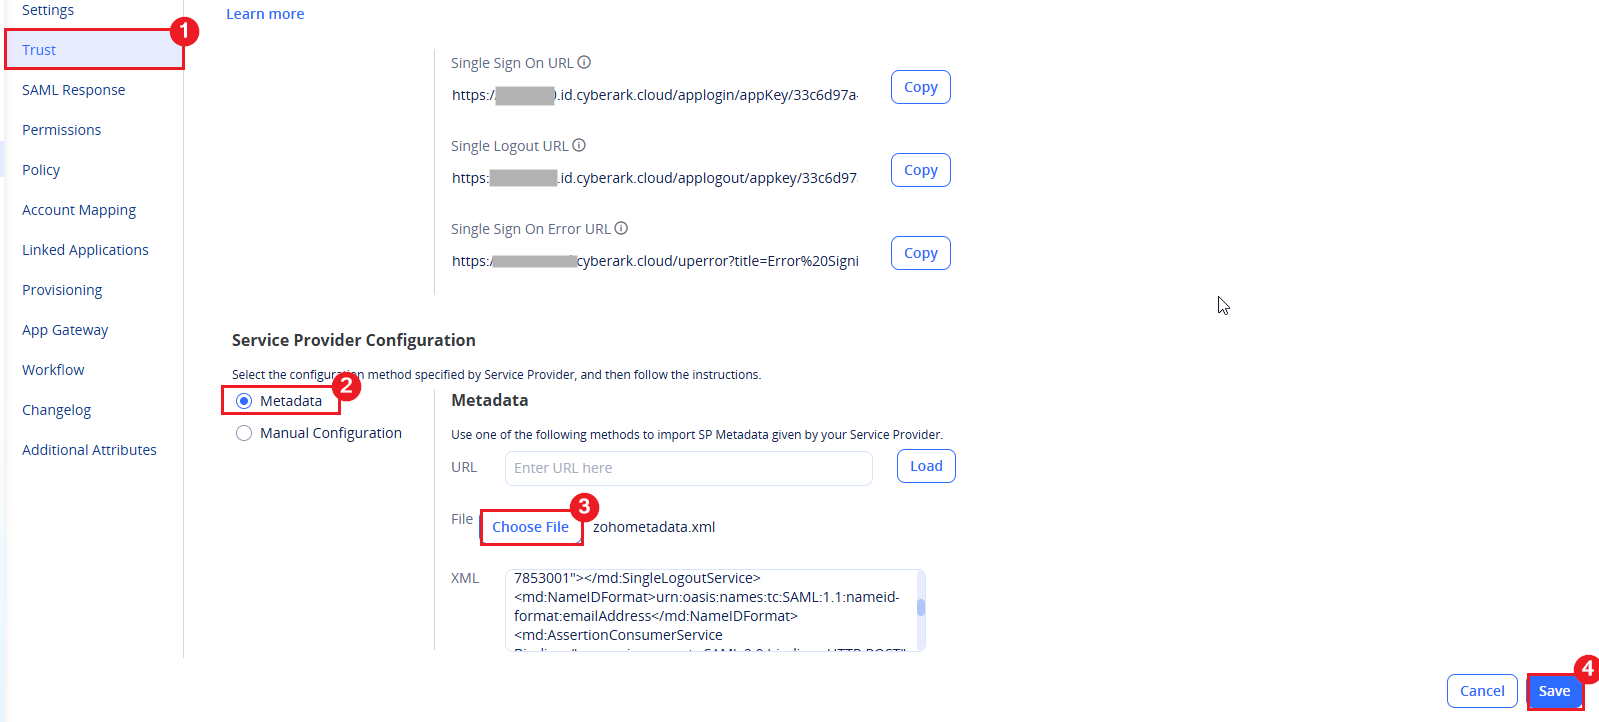
Return to the Zoho app in Practice Protect and navigate to Trust.
-
Scroll down to Service Provider Configuration. Under Metadata, click Choose File and upload the zohometadata.xml file downloaded from Zoho in Step 26.
- Click Save.
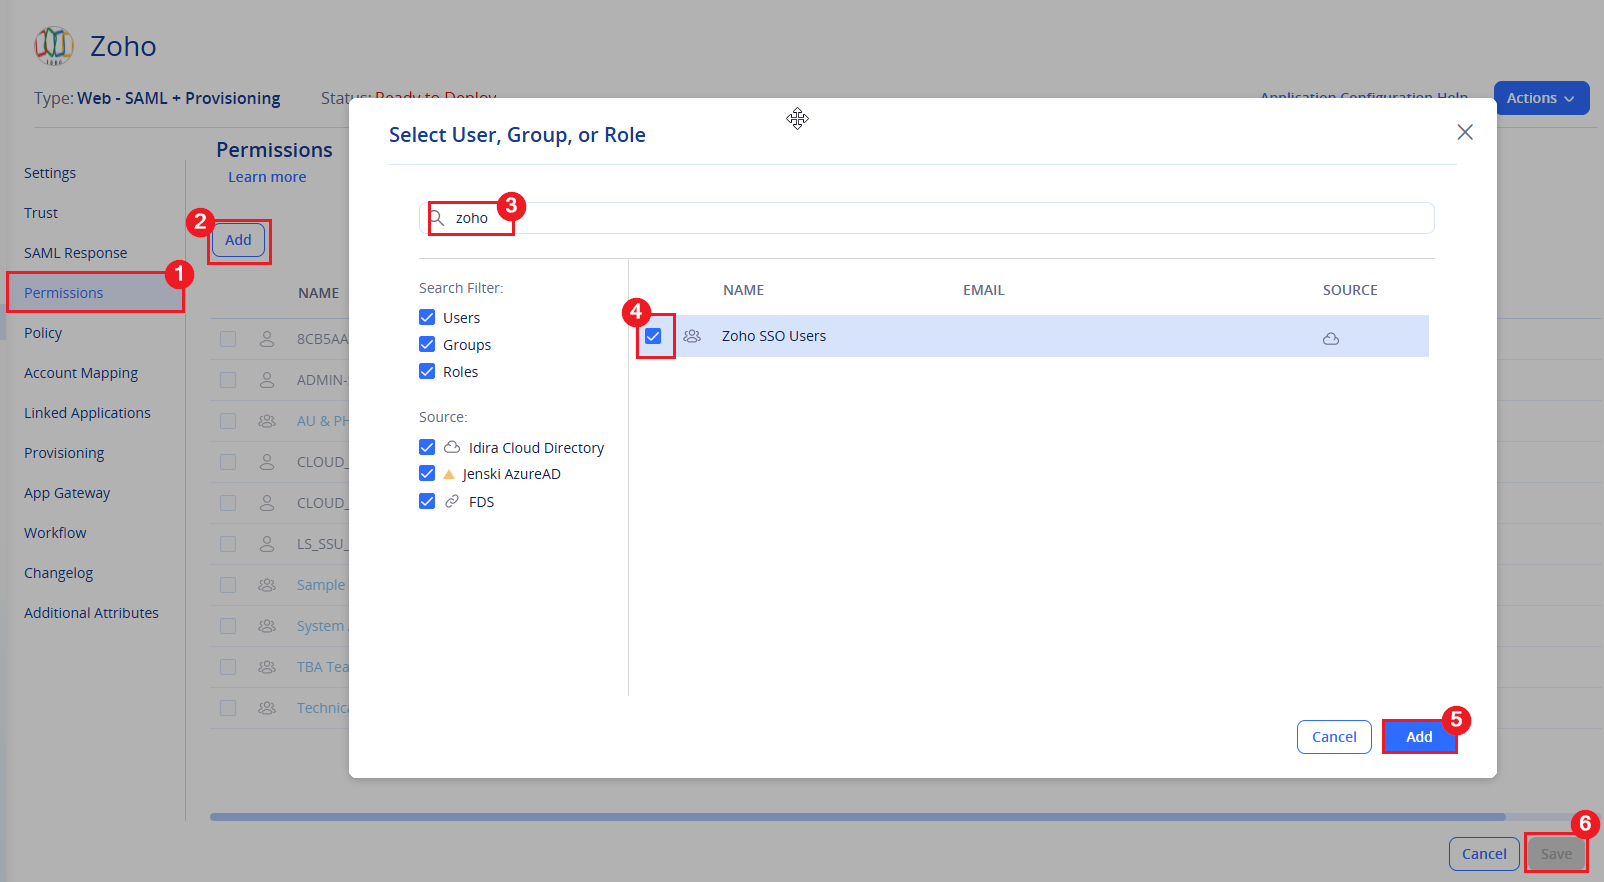
- Navigate to the Permissions tab and click Add.
- Select the role created earlier (e.g. Zoho SSO Users), then click Add followed by Save to apply the changes.
- Users assigned to this role can now access the Zoho service through the Zoho tile in their Practice Protect Access Space. Clicking the tile will automatically sign them in to Zoho.Note: If you already have an existing Zoho app in Practice Protect before configuring SSO, make sure to remove it or unassign it from users to avoid confusion or conflicts with the new SSO configuration.
- SSO integration is now complete. If you encounter any issues, please contact Practice Protect Support for assistance.