Purpose
This guide shows how to restrict logins to a specific browser (e.g. Google Chrome, Mozilla Firefox or Microsoft Edge) for the Practice Protect platform.
This can be done by either updating an existing Security Policy or creating a new one.
Pre-requisites
- Practice Protect Account with access to the Admin Portal
Instructions
Select from below:
Update Existing Policy
- Login to Practice Protect and switch to the Admin Portal.
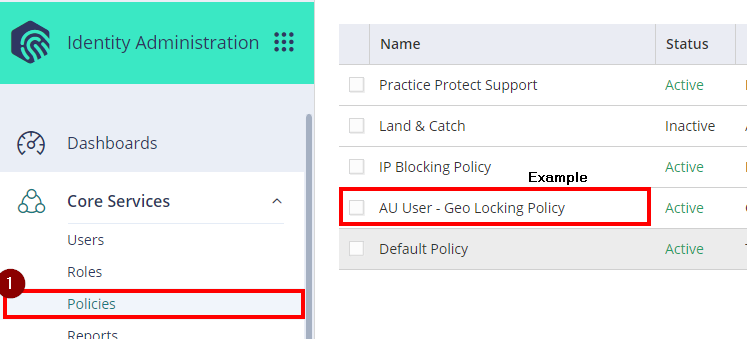
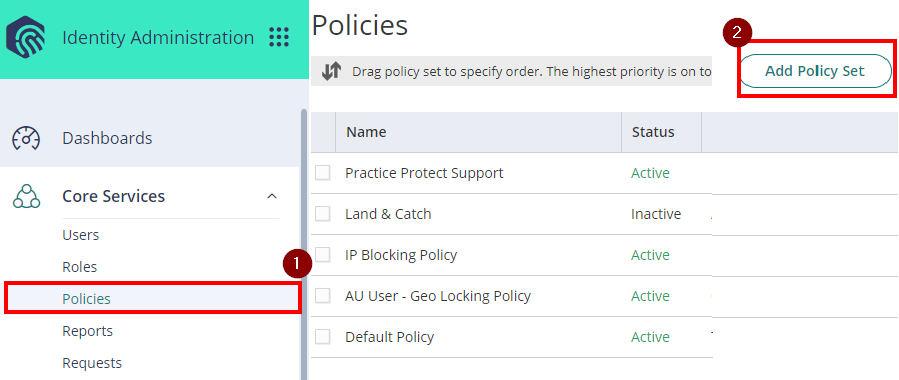
- In the Admin Portal select Core Services > Policies then select the existing policy you would like to apply the browser restriction to.
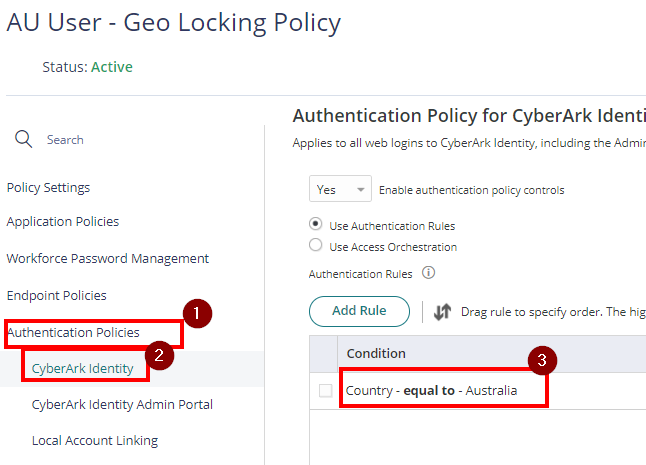
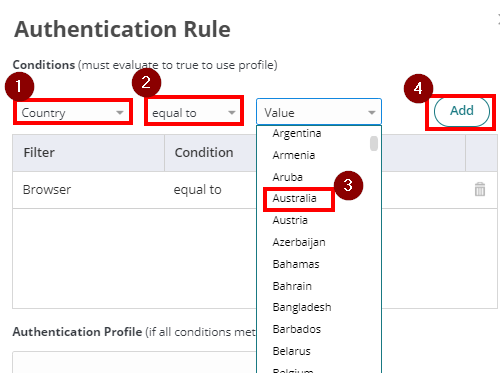
- Under Authentication Policies select CyberArk Identity. On the Authentication Rules, click on the existing condition (e.g. Country – equal to – Australia)
- Select Add Filter
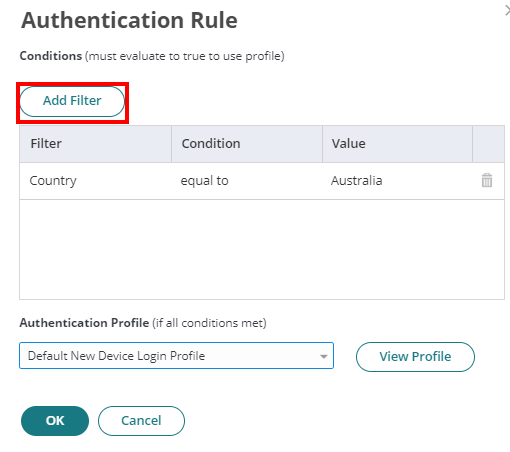
- Under Filter Options choose Browser, set the Condition as equal to and the value to the desired browser (e.g. Chrome). Then select Add.
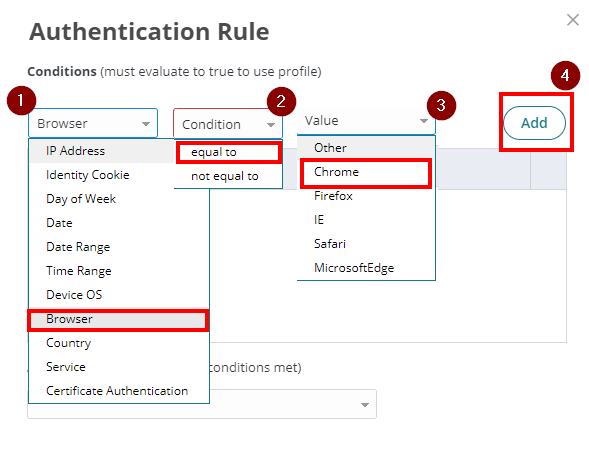
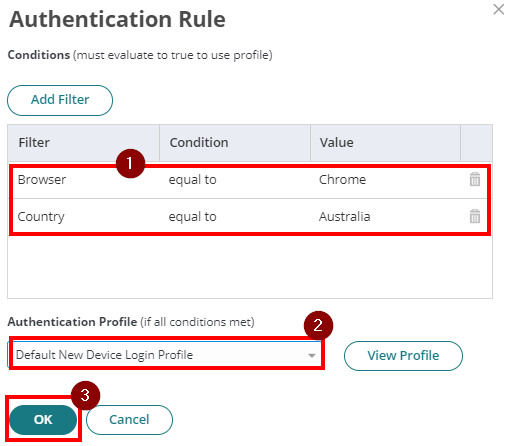
- Select OK.
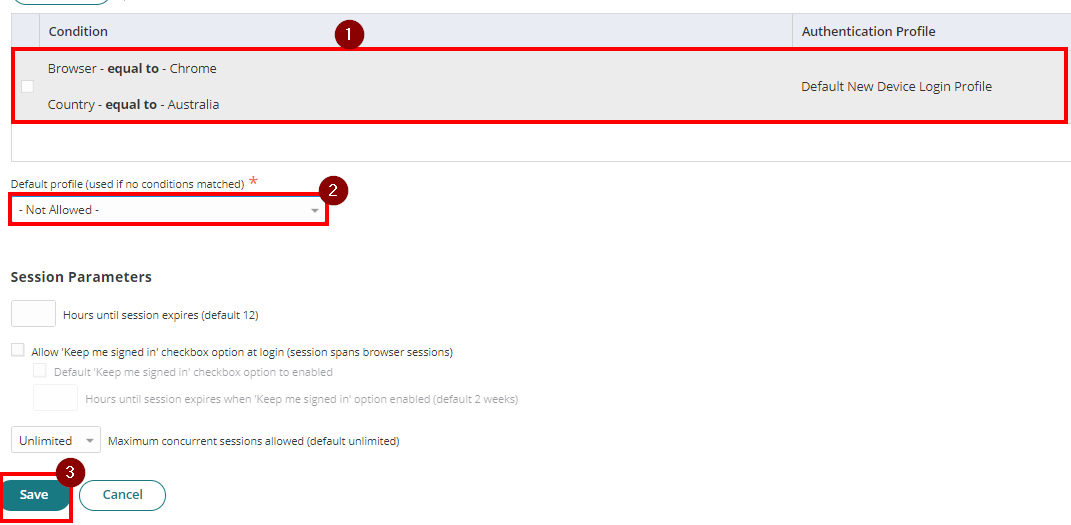
Note: Ensure the Authentication Profile is set as Default New Device Login Profile is the policy is a geo-locking policy or Default Other Login Profile if the policy is an IP restricted policy.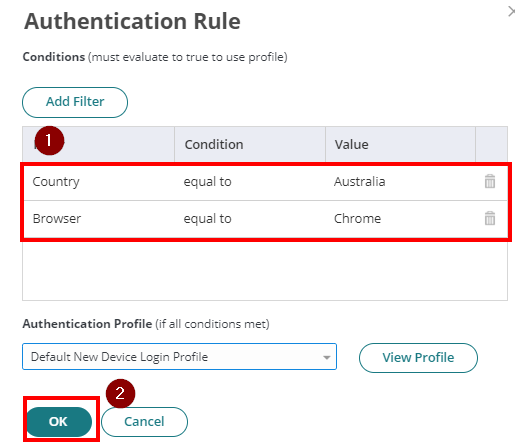
- Select the Save button.
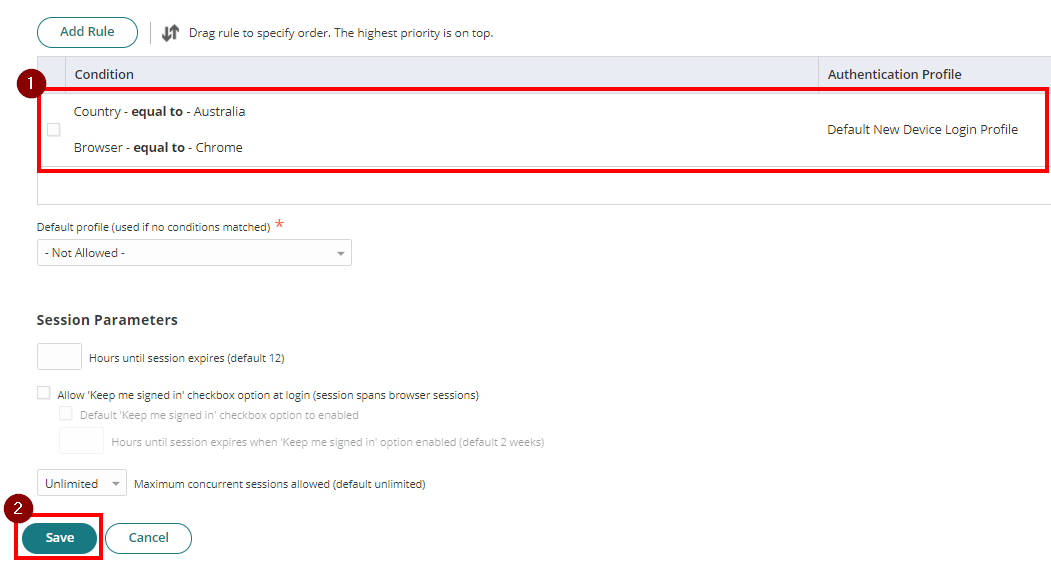
- This policy will now require the login to be originating from a specific browser to authenticate.
Create New Policy
- Login to Practice Protect and switch to the Admin Portal.
- In the Admin Portal select Core Services, then Policies and select Add Policy Set
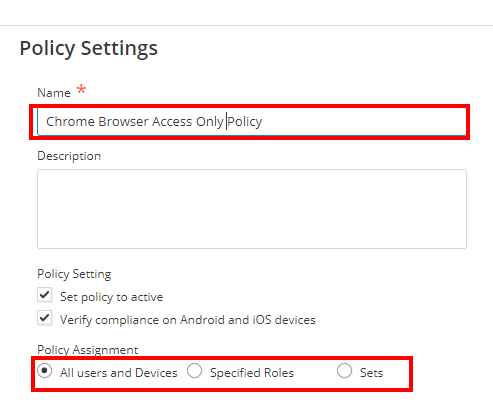
- Configure the Policy Name (eg. Chrome Browser with AU Geo-lock Policy).
- On Policy Assignment, set this as All users and devices if this will apply to everyone. Choose Specified Roles if you have created a custom role for applying the policy to a specific group of users.
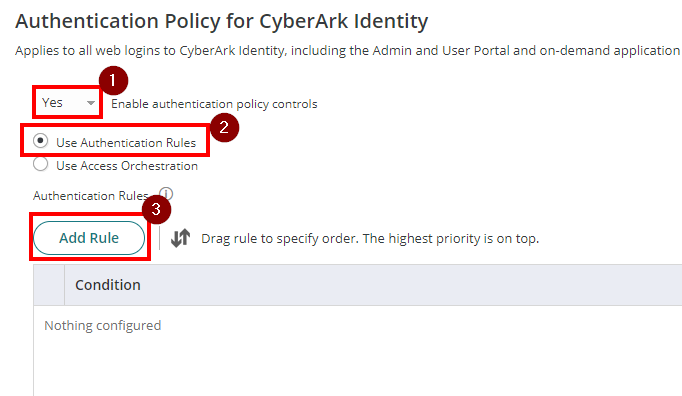
- Select Authentication Policies then CyberArk Identity.
- Enable Authentication Policy Control by setting the dropdown option as Yes.
- Choose Use Authentication Rules then Add Rule
- Select Add Filter and select the Filter dropdown

- Under Filter Options choose Browser, set the Condition as equal to and the value to the desired browser (e.g. Chrome). Then select Add.
- IMPORTANT: Add another filter to ensure your policy is limiting access to a specific country or IP address as well. We’ll use a Country filter in this example. For restricting users to a specific network, please select IP Address.
- Select OK.
Note: Ensure the Authentication Profile is set as Default New Device Login Profile is the policy is a geo-locking policy or Default Other Login Profile if the policy is an IP restricted policy.
- IMPORTANT: Configure the Default profile (used if no conditions matched) setting as Not Allowed. This ensures that logins that do not meet the previous requirements are rejected. Then select Save.