
Purpose
This guide explains how to create a user account in Practice Protect when Google Workspace provisioning is enabled.
When a new user is added in Practice Protect, the account is synchronized to Google Workspace through outbound provisioning, automatically creating the corresponding Google Workspace user account.
The following functions and attributes are managed and synchronized from Practice Protect to Google Workspace:
- Google Workspace Account Creation – New user accounts are created in Google Workspace through Practice Protect.
- Display Name – The display name configured in Practice Protect is synchronized to and reflected in Google Workspace.
- Primary Email Address / User Principal Name (UPN) – Changes made in Practice Protect will update the user’s primary email address in Google Workspace.
All other user attributes, licensing, organizational unit assignments, group memberships, mailbox settings, and Google Workspace-specific configurations are managed directly within Google Workspace.
Prerequisites
- Google Workspace SAML with Provisioning is enabled in Practice Protect
- You have a user account with System Administrator access to the Practice Protect
Instructions
-
Create a Cloud Directory user account through Practice Protect by following the steps outlined in this guide. If you’d prefer, our Practice Protect Support Team can create the account on your behalf. Simply reach out to us, and we’ll be happy to assist.
-
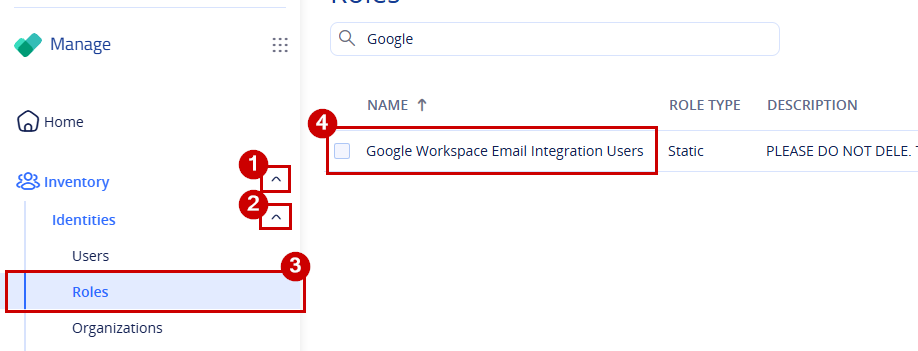
Once the user has been created, switch to Manage Space (if you are not already there), then navigate to Inventory > Identities > Roles.
- Click on Google Workspace Email Integration Users. Note that the role name may vary, for example, it could be Google Workspace SAML Users.
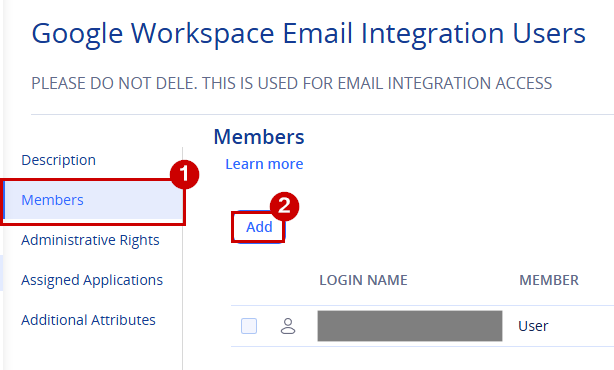
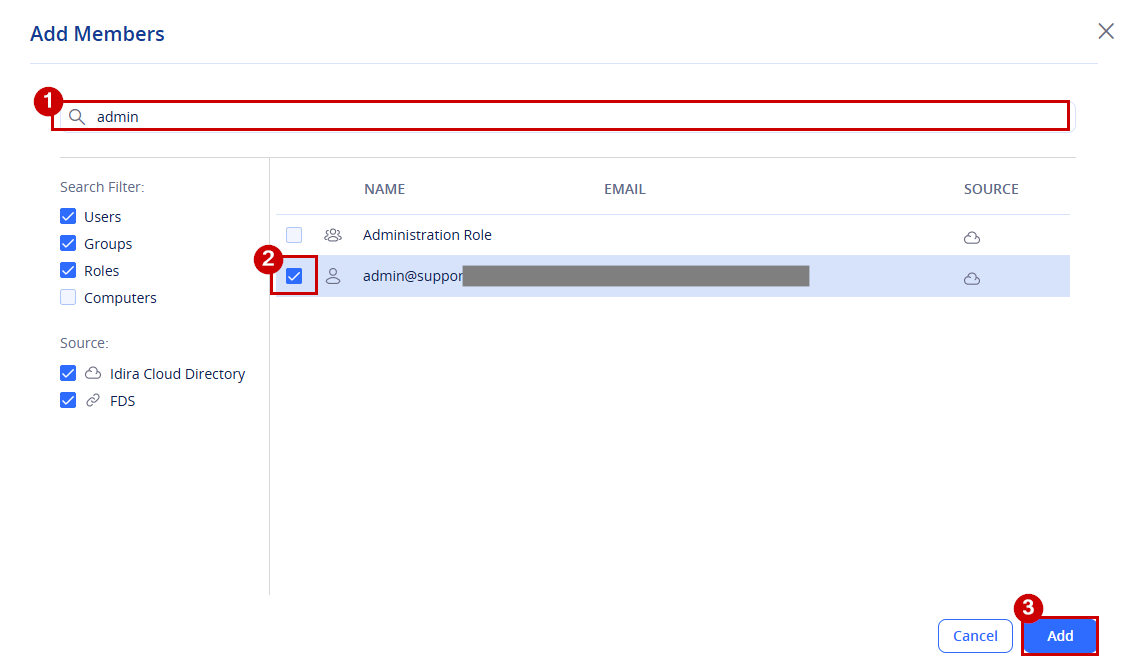
- Go to Members and click Add to include the newly created user.
-
-
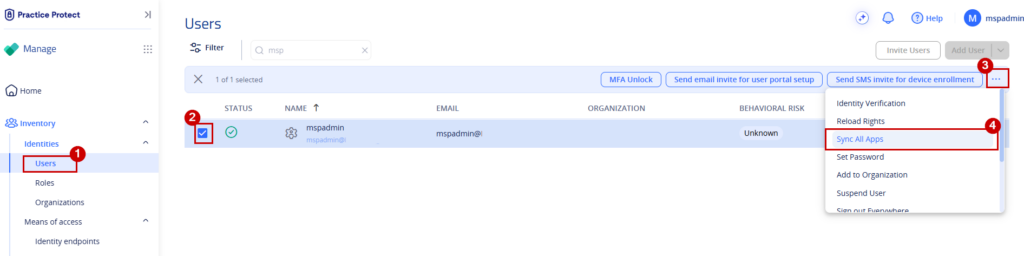
Next, navigate to Inventory > Identities > Users. Locate the newly created user and tick the checkbox next to their name. A menu will appear in the top-right corner of the page.
-
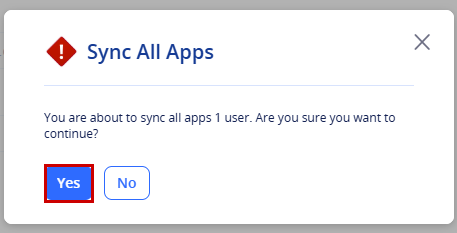
Click the three-dot (•••) menu, then select Sync All Apps from the available options.
- Click Yes to confirm and start the synchronization process.
-
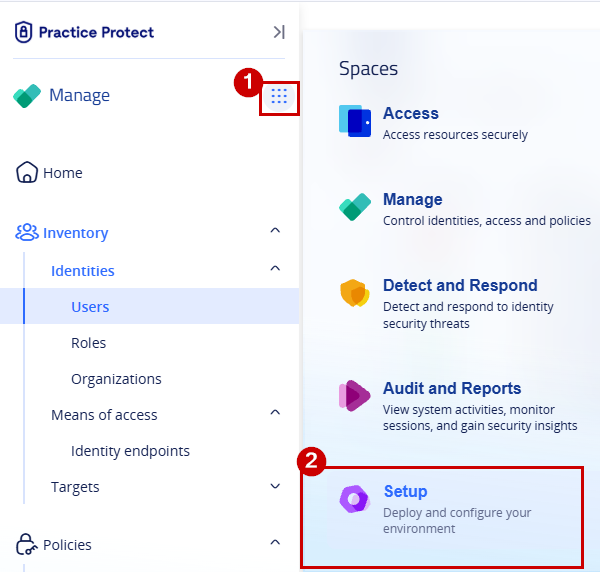
To check the synchronization status, click the menu next to Manage and select Setup.
-
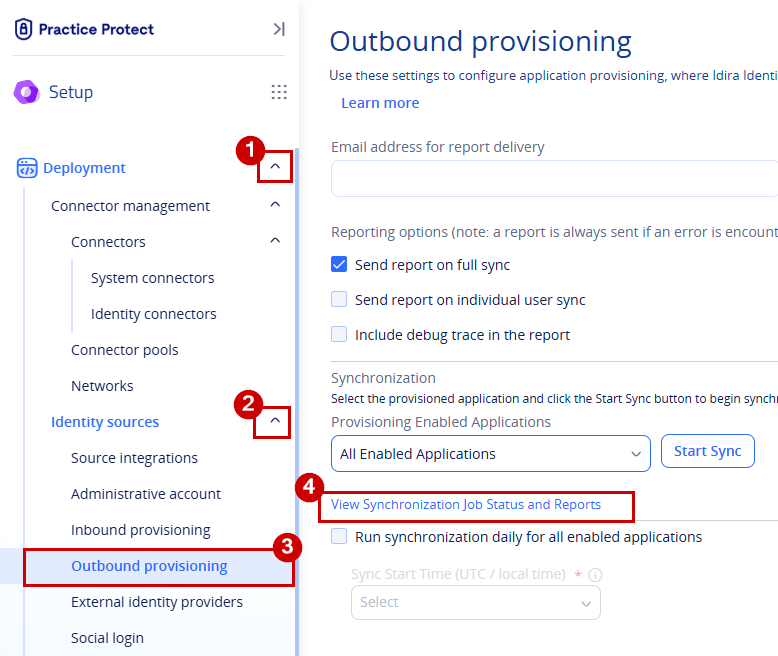
From the Setup space, expand Deployment, then open the Identity sources dropdown and select Outbound provisioning.
- Click View Synchronization Job Status and Reports.
-
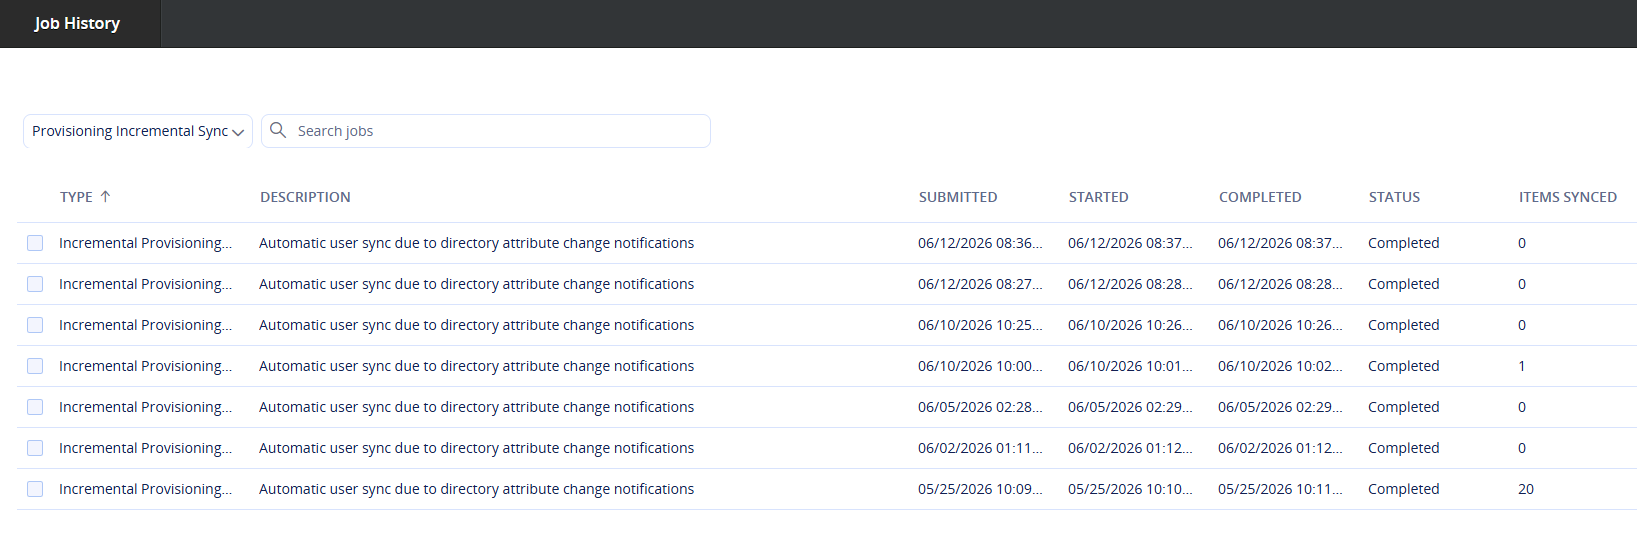
Verify that the user’s synchronization has completed successfully. If you have administrative access to Google Workspace, confirm that the user account appears in the Google Admin Console. If you do not have access, your IT provider or Google Workspace administrator can verify that the synchronization was successful.
-
Once the user account is visible in Google Workspace, the user provisioning process is complete. Note: In most Google Workspace environments, a license is automatically assigned when the user account is created. Any additional configuration, such as group memberships, organizational unit assignments, and other Google Workspace settings, should be managed by your IT provider or a Google Workspace administrator.