
Create New User Account
Creating new users in Practice Protect can involve different account types and Identity Sources, depending on your organization’s environment and how it is integrated with Practice Protect.
It is important to create new user accounts using the correct method to ensure users can access the platform and related services without issue. Please refer to the instructions below for the appropriate account type or Identity Source.
Account Types
- Cloud Directory Account (Default) – See steps below
- Users are created and managed directly within Practice Protect. These accounts are independent of external identity sources and are not synchronised with Microsoft 365, Google Workspace, or Active Directory.
- Microsoft 365 Cloud Email Integrated Account (Click Here)
- The accounts are created in Practice Protect and linked to their corresponding accounts in Microsoft 365. They are federated with Practice Protect, and certain attributes in Microsoft 365 are managed exclusively through the Practice Protect account.
- Google Workspace Email Integrated Account (Click Here)
- The accounts are created in Practice Protect and linked to their corresponding accounts in Google Workspace via SAML. Certain attributes in Google Workspace are managed exclusively through the Practice Protect account.
-
Microsoft Entra Accounts
Accounts can be created and managed through Microsoft 365 / Entra ID. User details, such as passwords, are set in Microsoft 365, and any conditional access policies or multi-factor authentication (MFA) enforced in Microsoft 365 will also apply.There are two types of Entra accounts in Practice Protect:
-
Legacy Accounts (Microsoft Entra ID as Source): These accounts do not support automatic provisioning. Users must be manually pulled from Microsoft 365 into Practice Protect to create their corresponding accounts.
-
SAML Accounts: These accounts are added via an external identity provider using SAML. Adding the account in Microsoft 365 will automatically create the corresponding account in Practice Protect after running provisioning through the Microsoft SAML app.
For detailed instructions on creating and managing both account types, see the Microsoft Entra Account Guide.
-
- Active Directory Linked Account (Click Here)
- The accounts are managed by your organization’s on-premises Active Directory (Local AD Accounts), which can also be integrated with Microsoft 365 Federation
Instructions – Create a Cloud Directory Account
In this procedure, you will learn how to create an Cloud Directory Only user account in Practice Protect. This account type is similar to the default account type and is managed directly within the Practice Protect platform.
Note: To create new users, you must be assigned either the User Management or System Administrator role.
- Sign in to your Practice Protect.
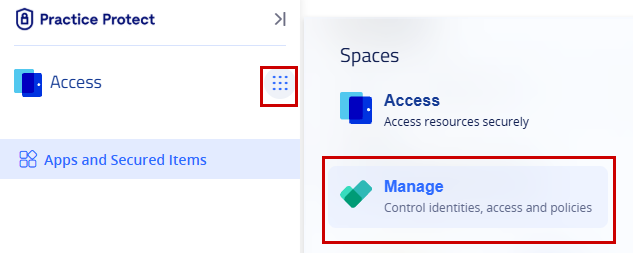
- From the Access space, click the navigation menu on the left-hand side of the screen, then select Manage.
-
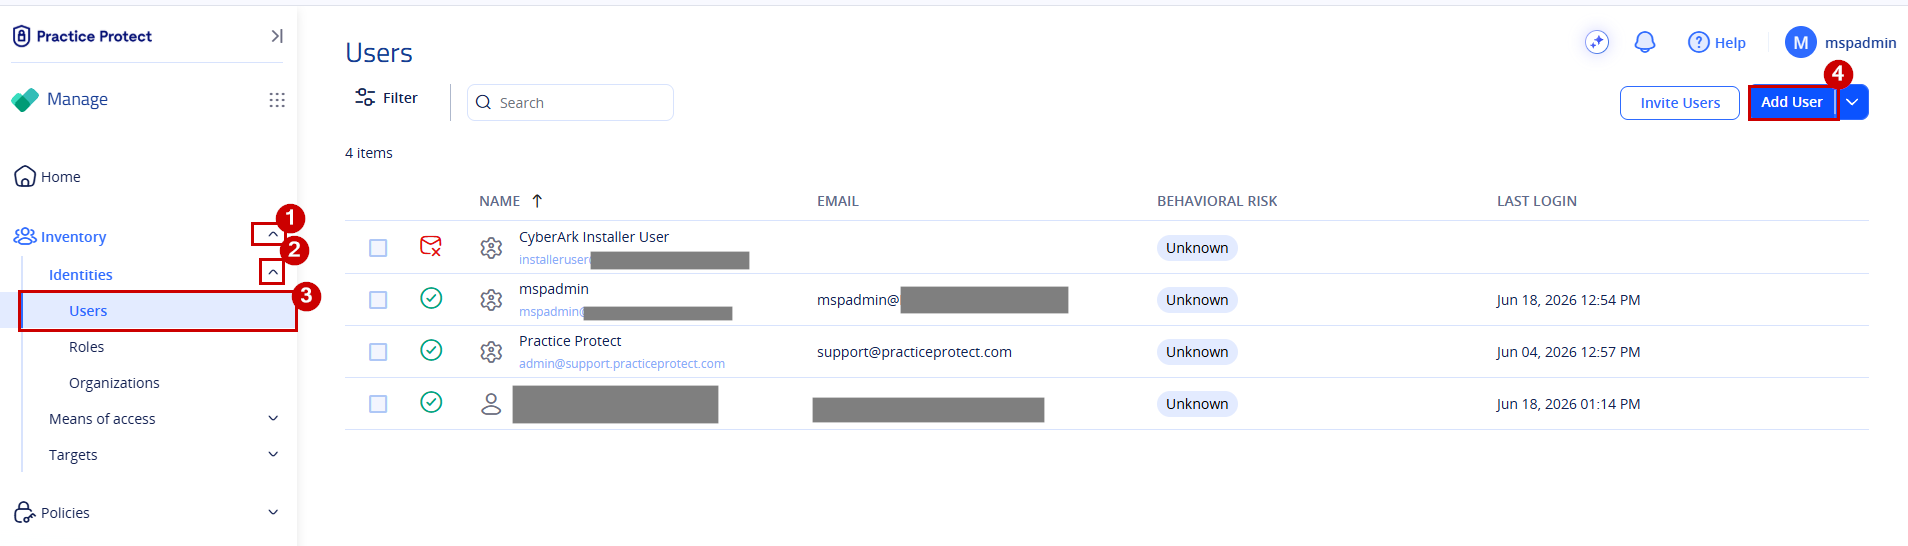
In the left-hand navigation menu, click Inventory to expand the available options, then select Identity > Users. On the Users page, click Add User.
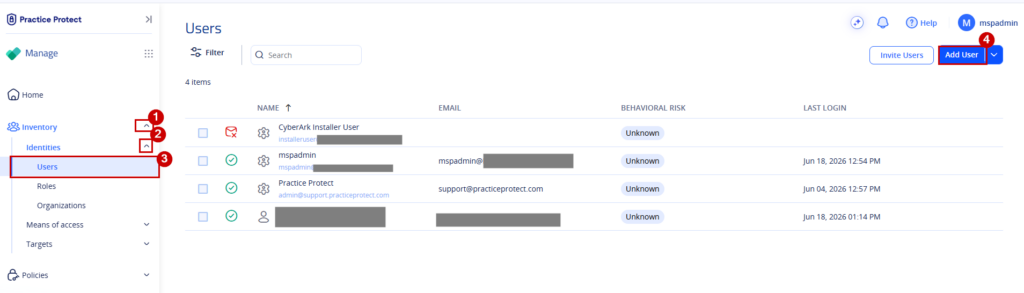
Note: If you need to create multiple users at once, click the dropdown arrow next to Add User and select Bulk User Import. - You will be redirected to the Account Creation page. Complete the required account details and review the information before creating the account.
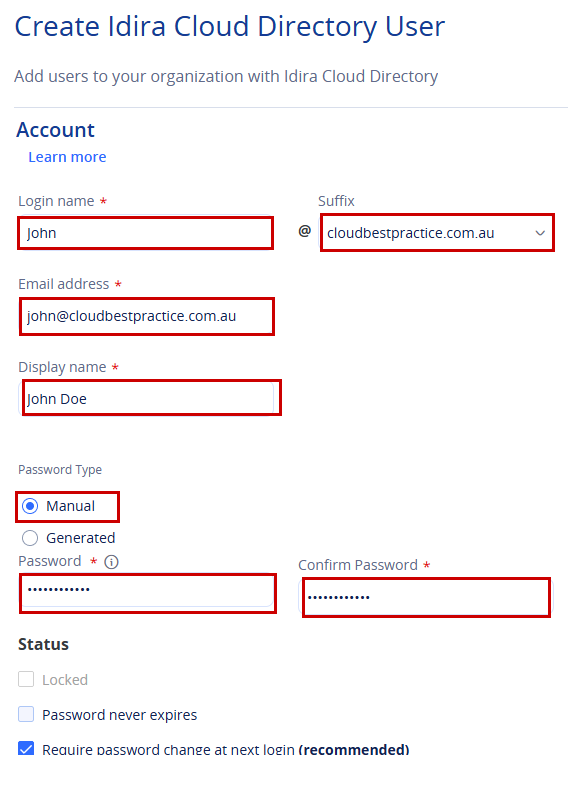
- Login Name – The username the user will use to sign in to the Practice Protect portal. Depending on your organisation’s configuration, one or more domain suffixes may be available and applied to the login name (for example, johndoe).
- Email Address – The user’s email address. Practice Protect uses this address to send notifications, user portal invitations, password-related communications, and integration-related updates.
- Display Name – The name displayed throughout the platform and within the user’s profile.
- Password – Specify how the user’s password will be assigned:
- Manual Assignment – Enter a password that will be provided to the user.
- Generated Assignment – Practice Protect generates a temporary password and includes it in the user’s invitation email.
Password Requirements
- Must be between 8 and 64 characters in length.
- Must contain at least one numeric character (0–9).
- Must contain at least one uppercase letter (A–Z).
- Must contain at least one lowercase letter (a–z).
-
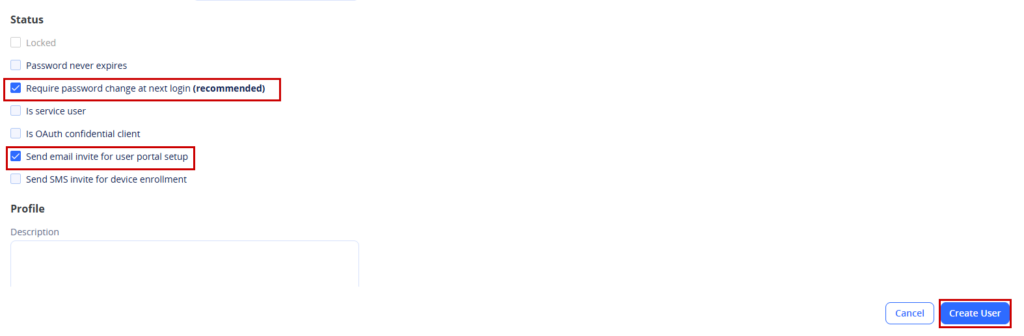
In the Status section, you can configure the following options:
- Require Password Change at Next Login – Select this option if you want the user to create a new password the first time they sign in.
- Send User Portal Invite – Select this option to automatically send a User Portal invitation email to the user.
Note: If you only want to create the account without sending an invitation email, leave Send User Portal Invite unchecked. The account will still be created, but the user will not receive an invitation to set up their User Portal access.
-
Once all required fields are completed, click Create User.
-
The user account has now been created and will appear in the Users list.
-
After creating the account, assign the appropriate roles and policies to the user. This ensures the user has the correct permissions and that your organisation’s security controls are applied. Additional restrictions, such as country-based or IP-based access policies, can also be configured as required.

Assigning Policy
A policy must be assigned to each user account to enable access and enforce security controls. Policies can include restrictions such as GeoLock (country-based access) and IP Lock (IP address-based access).
Policies consist of one or more conditions that control user access based on criteria defined by your organisation.
-
From the Manage space, expand Inventory > Identities, then select Roles.
-
On the Roles page, select the role you want to assign to the user (for example, AU User – Geo Locking).
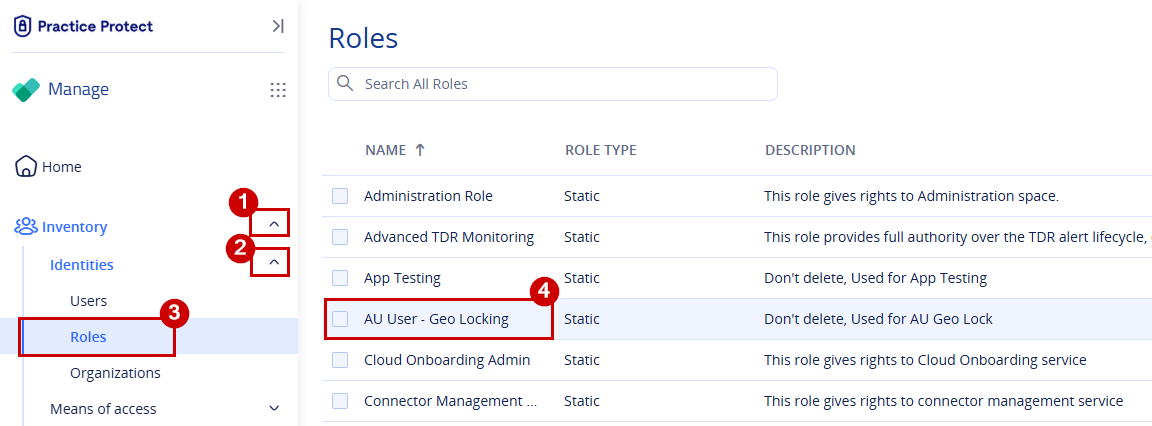
Note: Roles such as Geolocking, WFH, and Travel are linked to policies that enforce country-based access restrictions. The Restricted Users role is intended for users who require IP-based access restrictions. - Once inside the role, go to Members, then click Add.

-
Find the user, select the account and click Add.
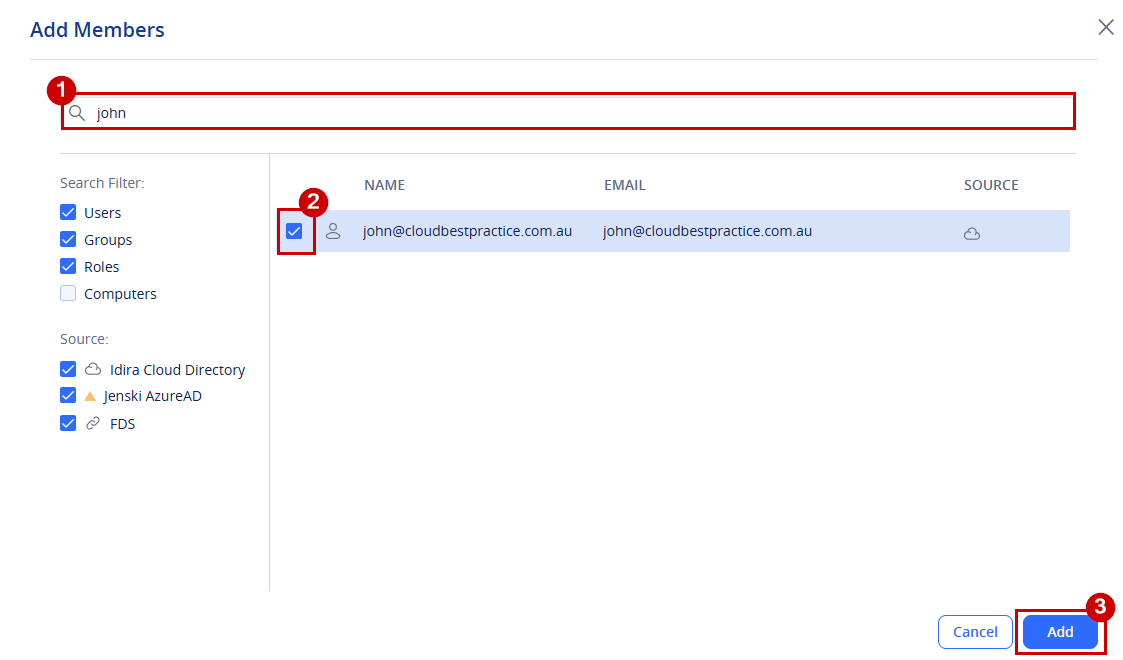
- Click Save in the bottom-right corner to complete the assignment.
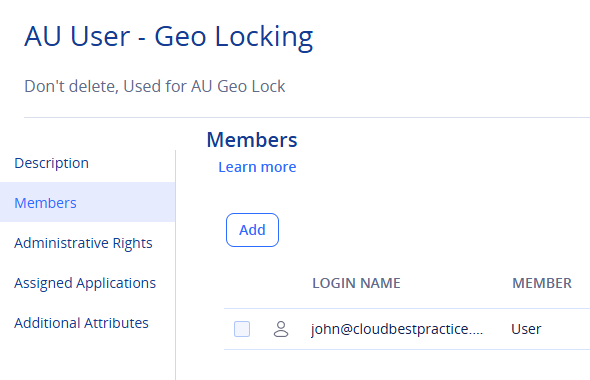
-
The user has now been successfully assigned to the selected role. In this example, the user was assigned the AU User – Geolocking role, which is linked to a policy that restricts access based on location. As a result, the user will only be able to access Practice Protect when signing in from within Australia.
Need help? If you require assistance assigning roles, configuring policies, or applying access restrictions, please contact the Practice Protect Support team.