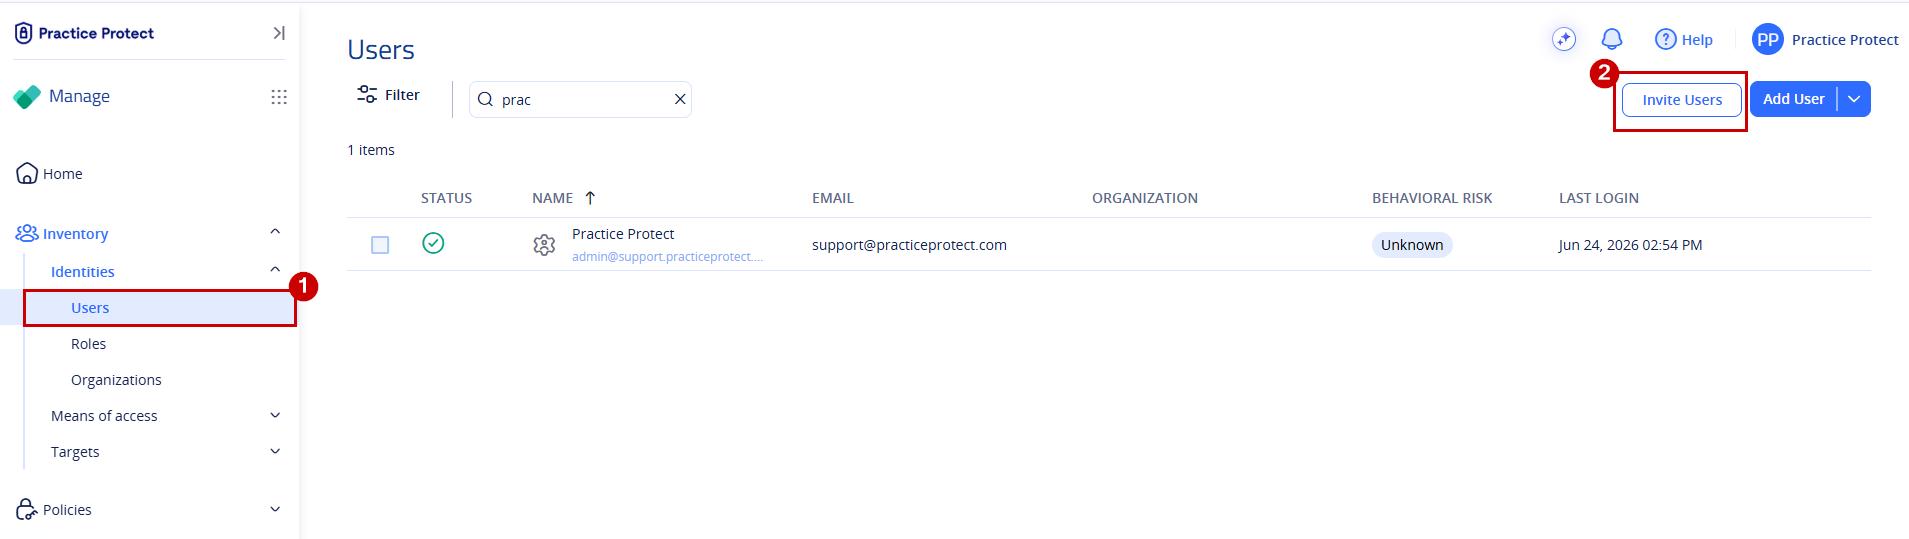
This guide explains how to send invitations to newly added team members for User Portal setup in Practice Protect, based on the identity source configured in your environment.
Important: Ensure the user’s email address is active before sending the invitation. Sending an invite to an inactive or non-existent mailbox may prevent future invitation emails from being delivered, requiring support assistance and a new invitation to be sent. Also, ensure the user is assigned to a role (e.g., AU User – Geo Locking) in Practice Protect that is linked to a policy, as users without a policy assignment may not receive the invitation email.
For Cloud Directory Users Only
These instructions apply to organizations using the Cloud Directory as their identity source, including those configured with Microsoft 365 Federation, Google SAML, or Entra ID SAML.
- Log in to Practice Protect using an account with Administrator access.
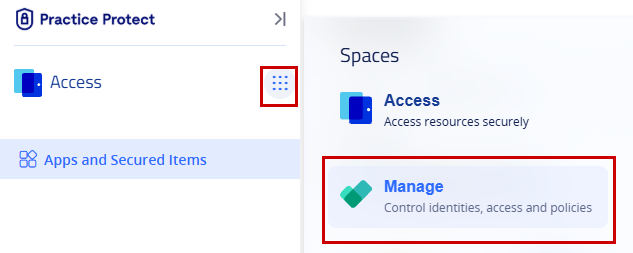
- In the top-left corner, click the 9-dot menu (App Launcher). Select Manage Space from the menu.
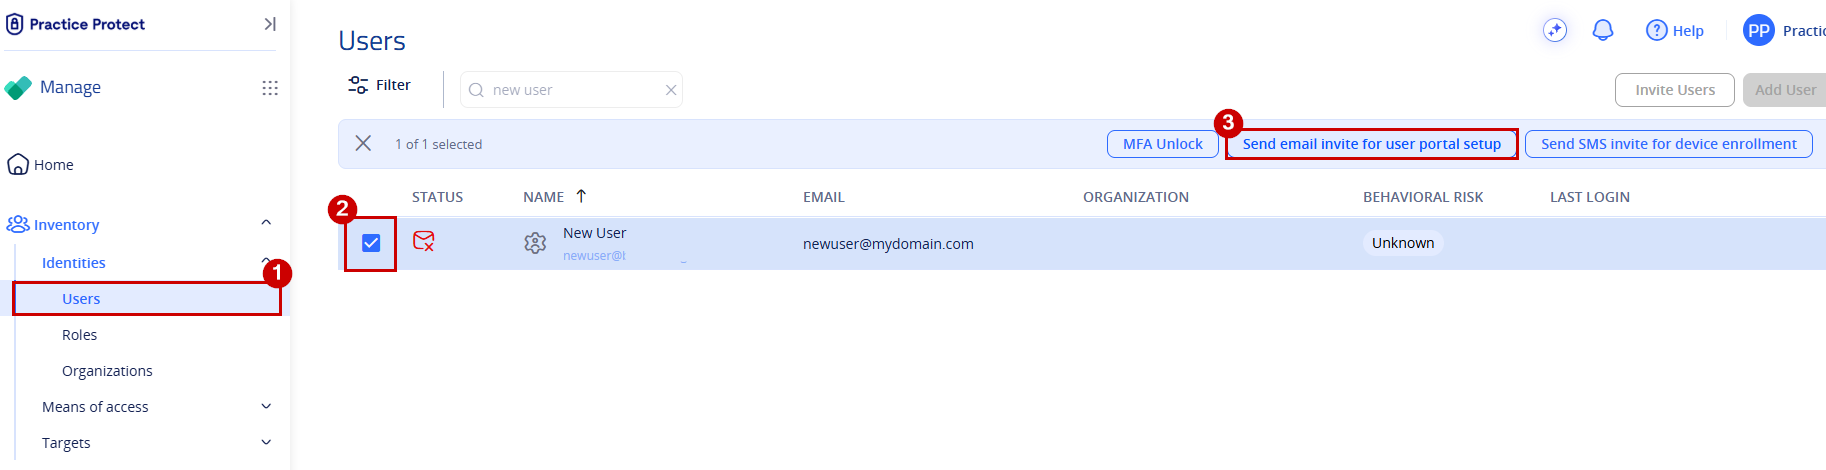
- From the left-hand menu, navigate to Inventory > Identities > Users.
- Tick the checkbox next to the user’s username. Additional actions will then become available in the top-right corner of the page. You can also select multiple users to send invitations in bulk.
- Click Send Email Invite for User Portal Setup.
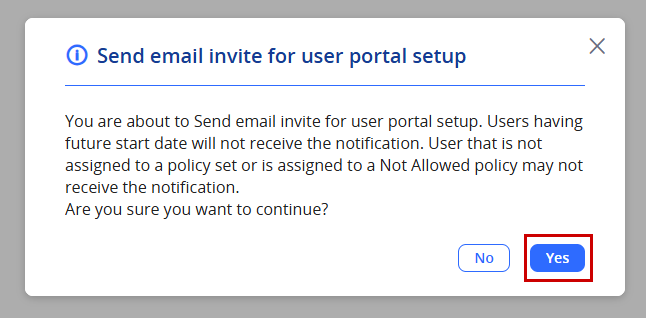
Important: Ensure the user’s email address is active before sending the invitation. Sending an invite to an inactive or non-existent mailbox may prevent future invitation emails from being delivered, requiring support assistance and a new invitation to be sent. - In the confirmation prompt, click Yes.
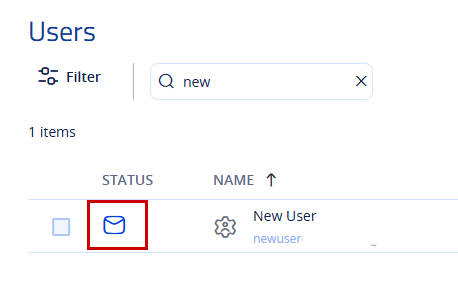
- Once the invitation has been sent successfully, the user’s status will change to Invited.
For Local AD-Synced Users / Entra ID as the Identity Source (Legacy Method)
- Log in to Practice Protect using an account with Administrator access.
- In the top-left corner, click the 9-dot menu (App Launcher). Select Manage Space from the menu.
- From the left-hand menu, navigate to Inventory > Identities > Users.
- Click Invite Users
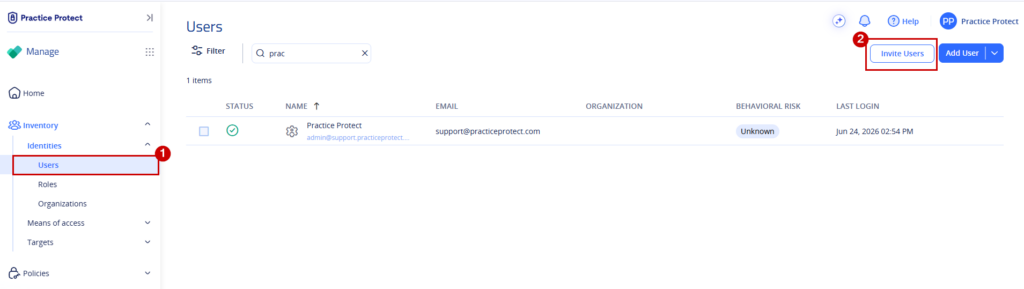
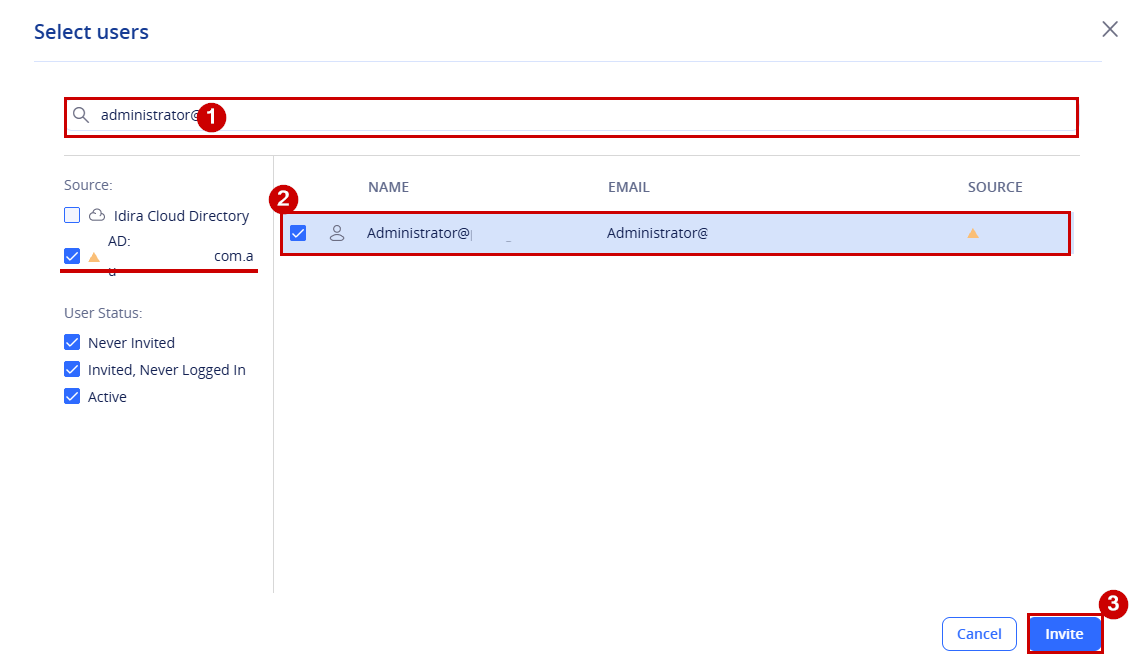
- Then, search for the user’s email address that was created in your AD Server or Microsoft Entra ID. Select the matching user from the search results, then click Invite.
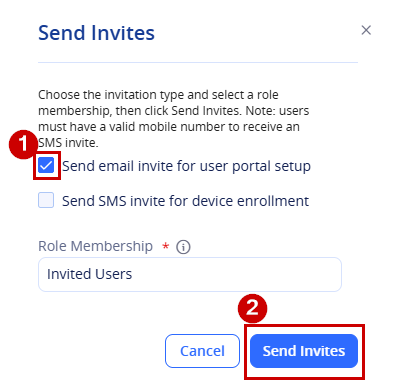
- A new pop-up window will appear. Ensure that Send email invite for User Portal setup is selected, then click Send Invites.
- Once the invitation has been sent successfully, the user’s status will change to Invited.