
Purpose
This document guides your IT on how to change the Primary Domain for G Suite SAML enabled Tenant in Practice Protect. The steps should be done by an IT expert who has Global Admin privilege in G Suite, knowledge in adding records in Domain Registrar and has admin access to the Practice Protect Tenant.
Prerequisites
- Account with Global Admin privilege in G Suite
- New Domain should be verified and added in G Suite
- Read and understand the impact before changing the primary domain.
Instruction
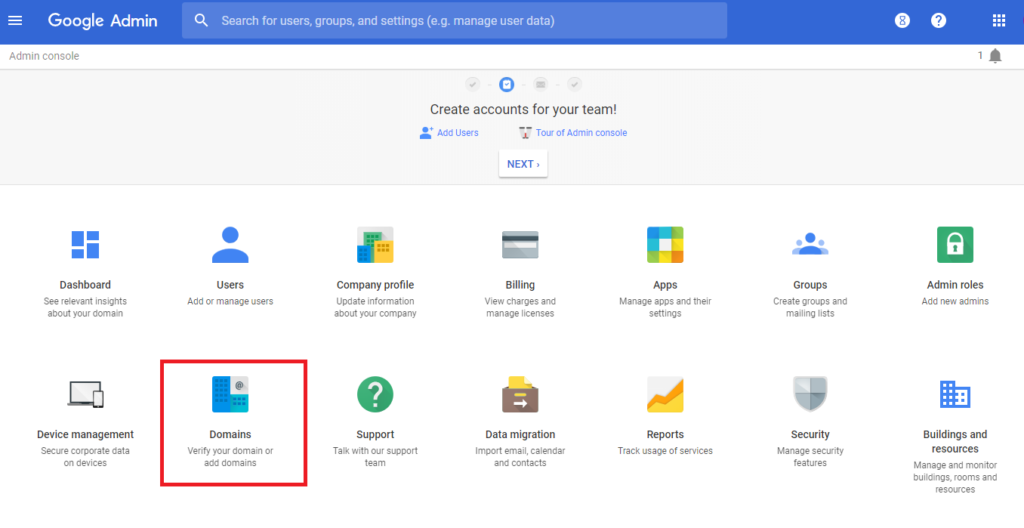
1. Login to admin.google.com. Click on Domains.
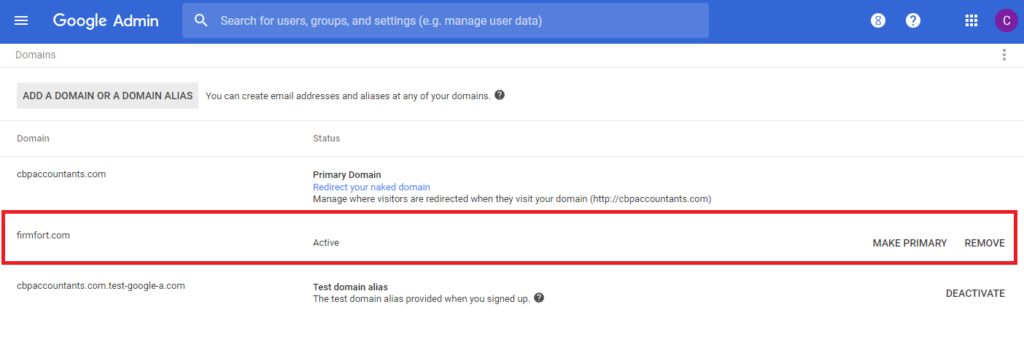
2. Click on Add/remove domains.
3. On Domains page, ensure that the New Domain is already added and verified (i.e firmfort.com). This should show Active Status once Verified.
4. If you need to add another domain, Click on ADD A DOMAIN OR A DOMAIN ALIAS.
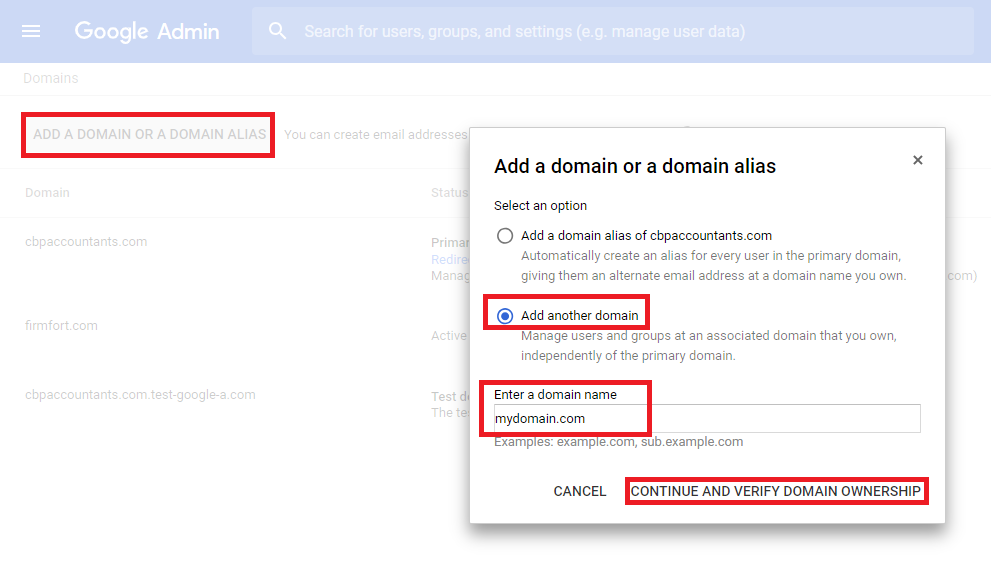
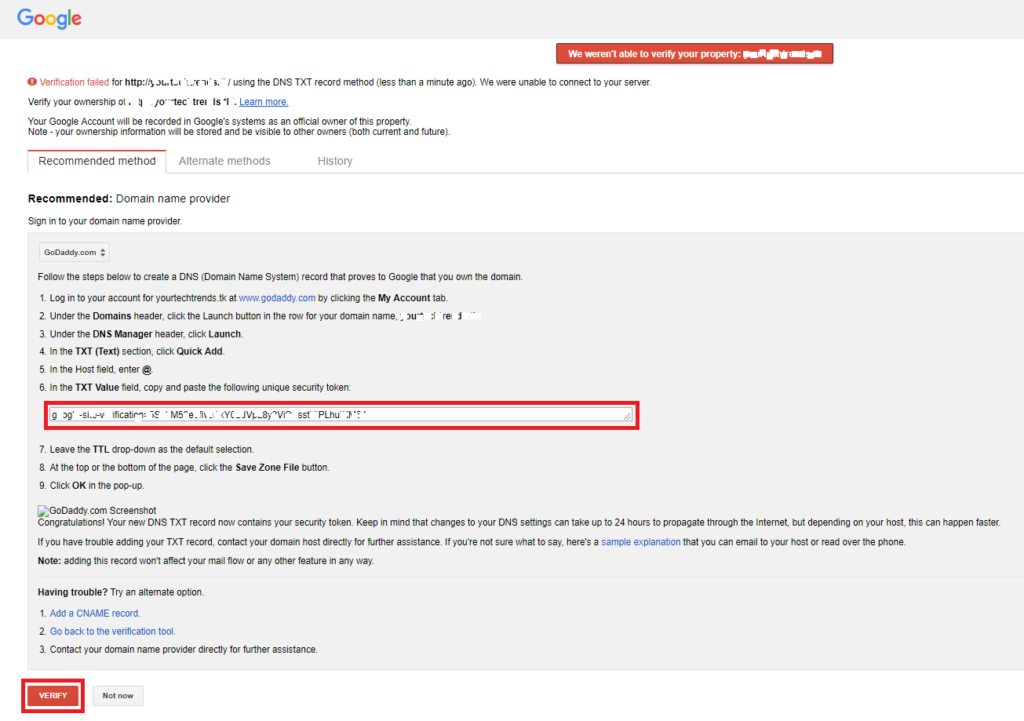
5. Follow the prompt to verify the domain. Select the domain registrar or provider. Select TXT record to verify. Open another tab in your browser and login to your domain registrar (i.e GoGaddy). Go back to the page below and Copy the TXT Value similar to the below screenshot. Go back to your domain registrar and add a TXT record (paste the TXT Value). This would take a couple of hour or minutes to propagate. Go back to the page below then Click VERIFY. Make sure to add the MX record of the newly added domain. To Set up G Suite MX records, follow this guide.
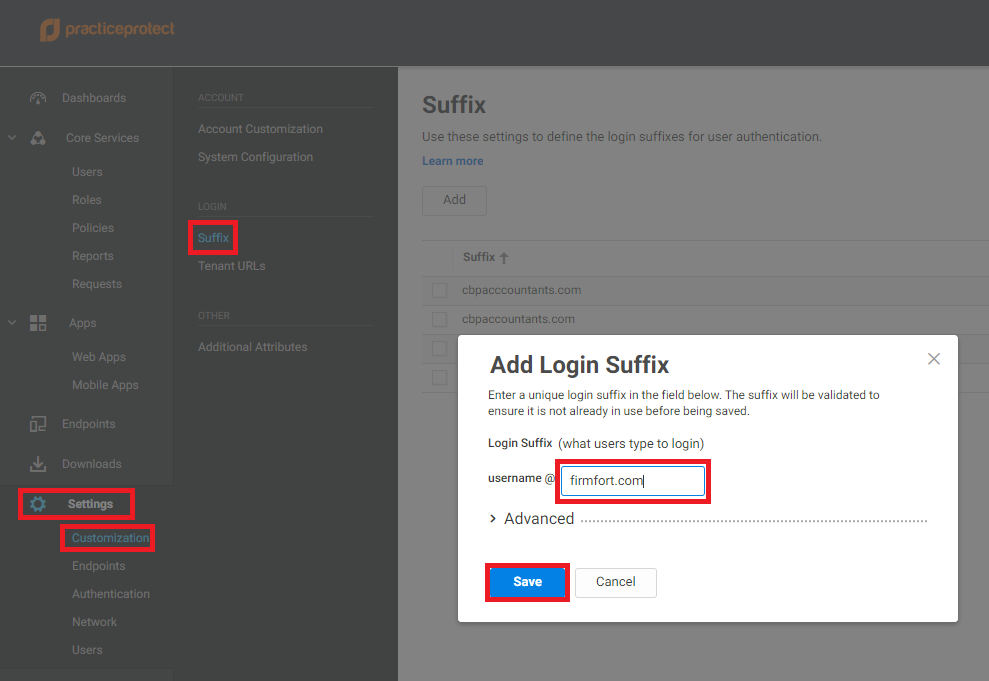
6. Login to Practice Protect Admin portal. Go to Settings > Customization > Suffix > Click Add. Enter the New Suffix on the field i.e. firmfort.com then Click Save.
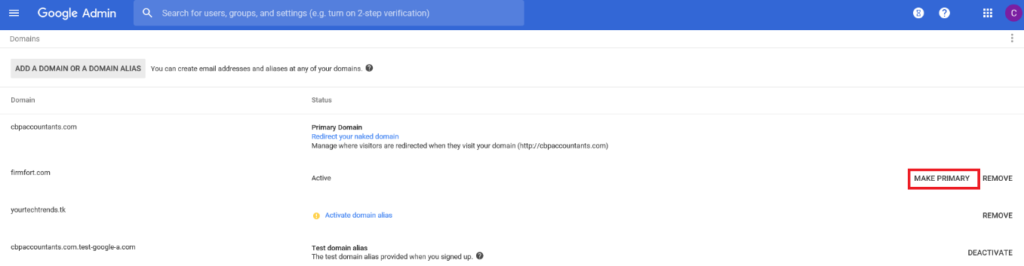
7. Go back to the admin.google.com and go to Domains.
8. Select the domain that you want to become a primary domain and Click on MAKE PRIMARY.
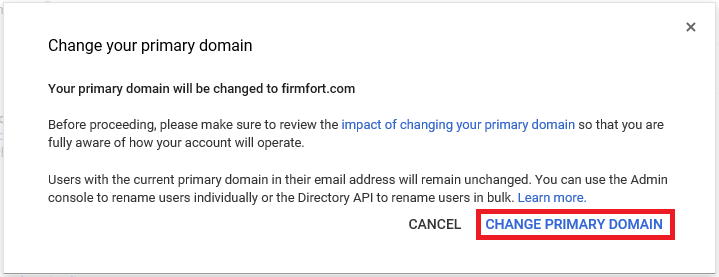
9. Please make sure to review and understand the impact of changing the primary domain. Click on CHANGE PRIMARY DOMAIN.
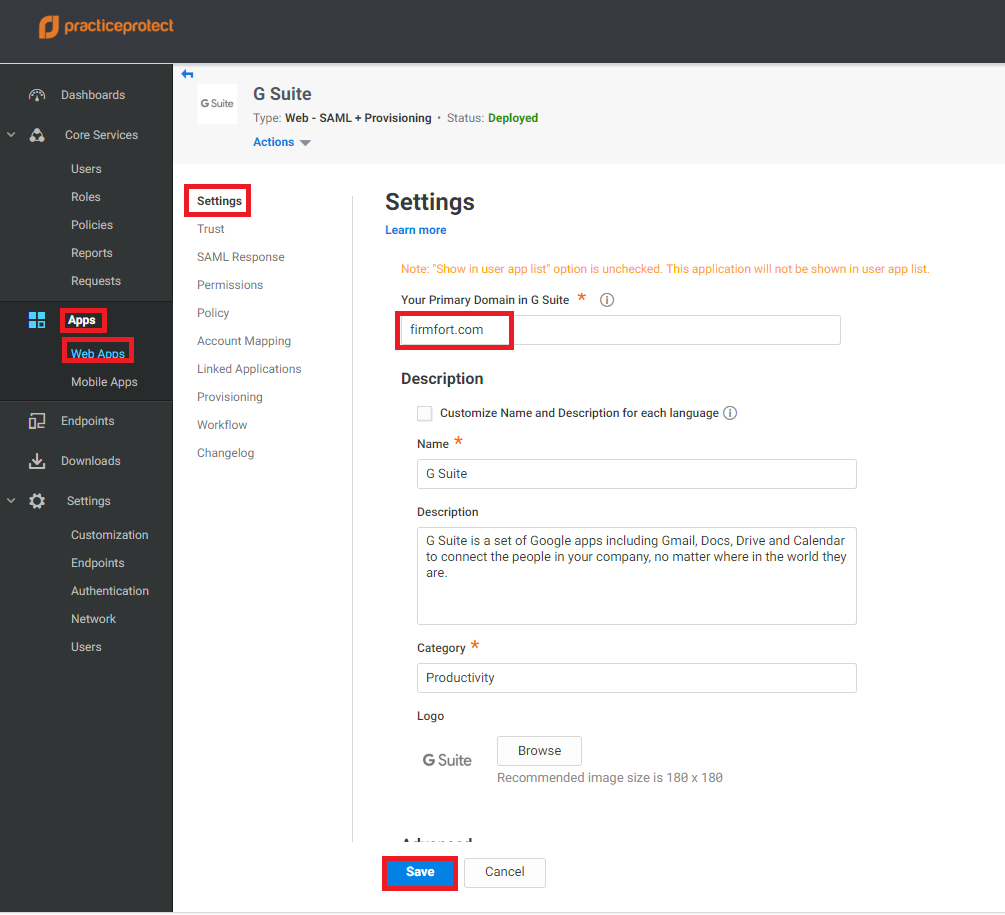
10. On you Practice Protect Admin portal, go to Apps > Web Apps > Click on G Suite > Settings. On Your Primary Domain in G Suite, update the domain to the new one i.e. Firmfort.com. Click Save.
11. Next step is to change the users login name so it would match to the new domain.
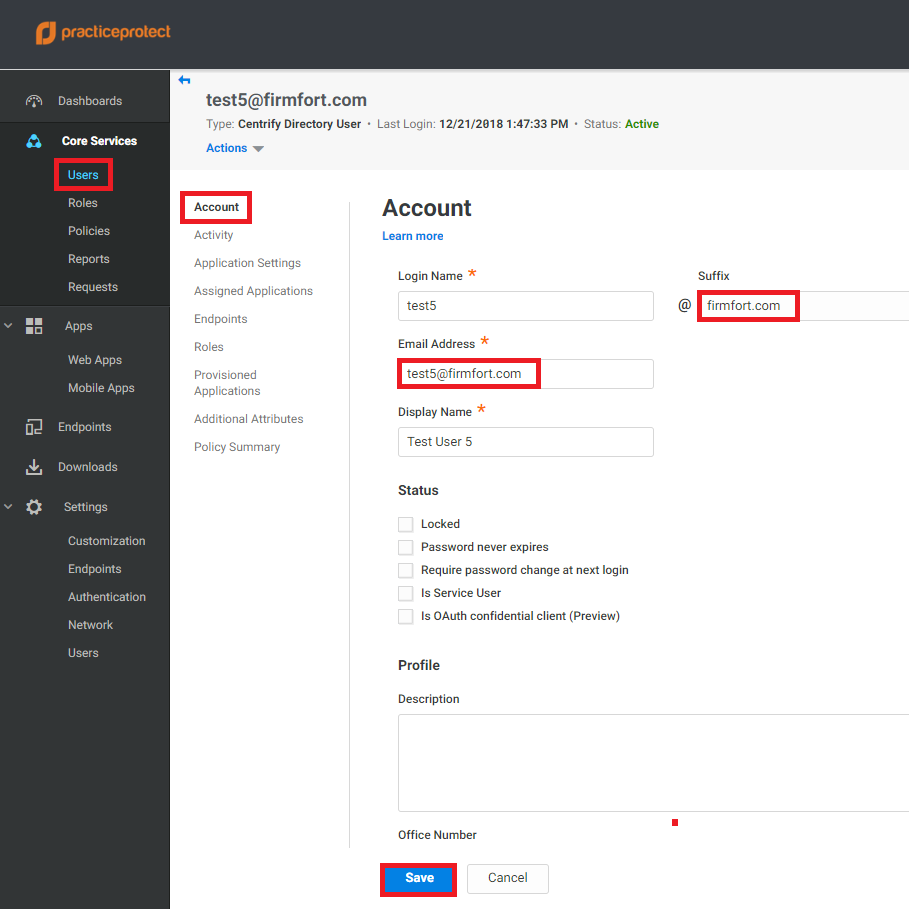
12. Go to Users, select the user that you want to change. Under Account tab, change the Suffix to the new domain (i.e firmfort.com). Update the Email Address field with the new domain (i.e test5@firmfort.com) then Click Save.
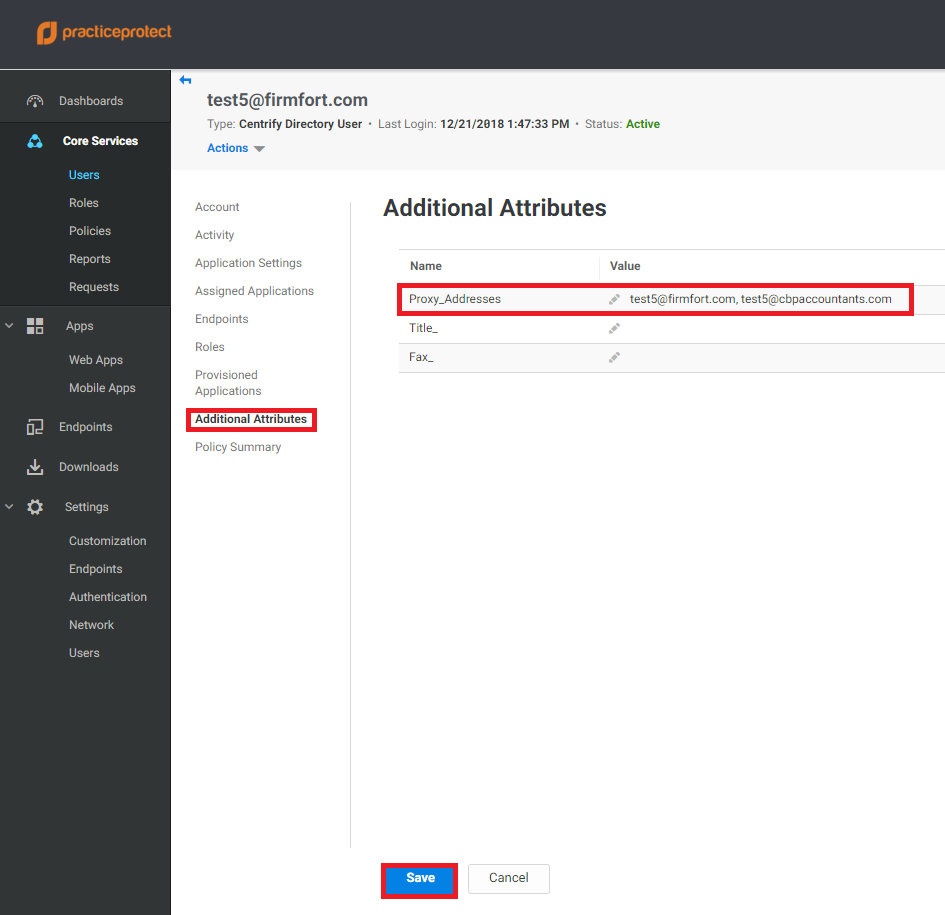
13. If you want to receive email from the old email address you need to add it as an email alias. Click on Additional Attributes, then click Proxy_Addresses. Enter the old email address (i.e. test5@cbpaccountanlts.com). Click Save.
**email aliases should be separated by a comma (,) i.e.<test5@firmfort.com, test5@cbpaccountants.com>
14. Repeat step 12 for the rest of the users accordingly.
15. Once you have changed their login names suffixes, you are now ready to sync the changes from PPO to GSuite.
16. Go to Settings > Users > Outbound Provisioning > On Provisioning Enabled Applications, select G Suite then click on Start Sync.
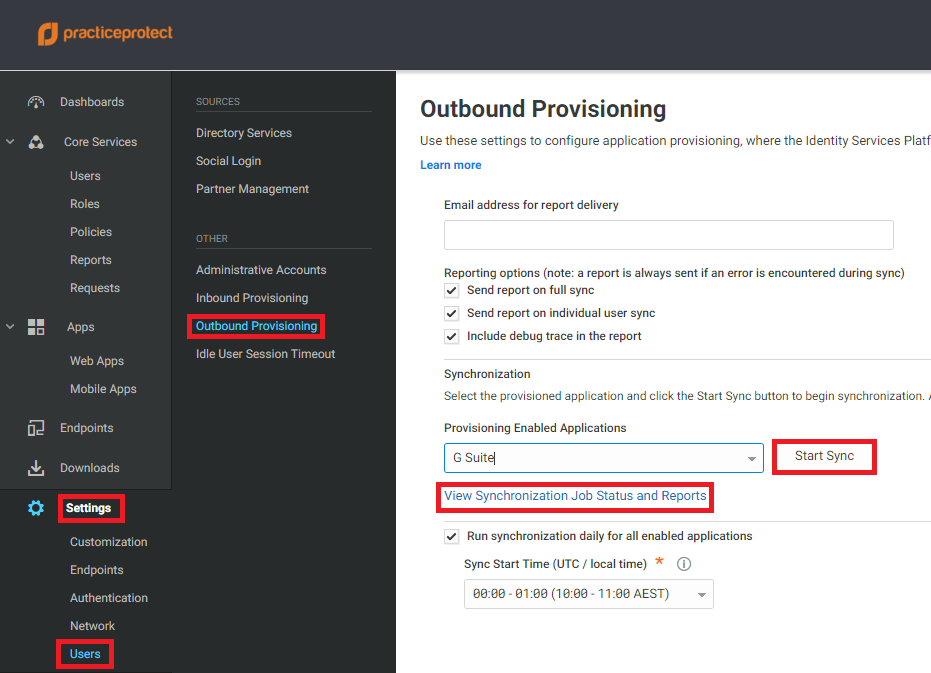
17. This runs a synchronization from PPO to G Suite. Click on View Sychronization Job Status and Reports to see that status
18. Go back to admin.google.com and confirm that the login has changed and alias has been added.
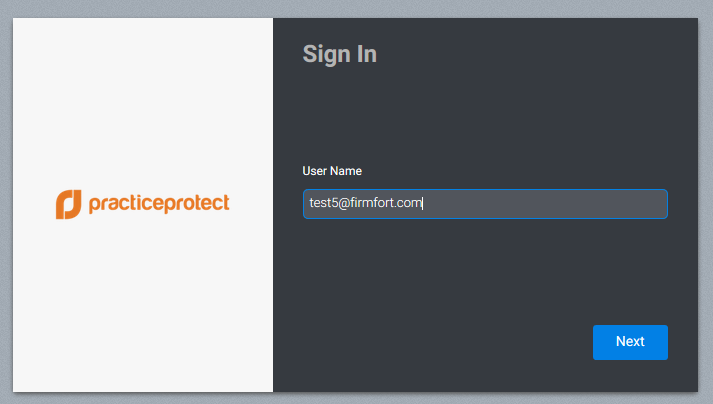
19. Once confirmed, login to any G Suite Apps (G mail, google drive etc.) and test if you can login using the new domain.
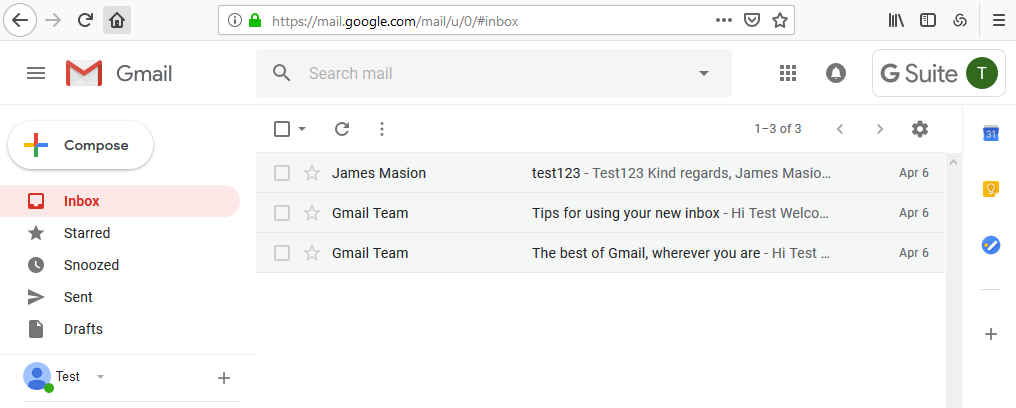
20. Send a test email to both old and new domains. Make sure you can send and receive emails to both domains.