
Purpose
Automatic email forwarding is useful for delegating tasks, ensuring continuity during absences, centralizing communication for teams, and creating backups to avoid missing important emails or messages.
Prerequisites
- Super Admin Access for enabling Automatic Forwarding to end user
- Google Workspace Regular User Access to setup automatic forwarding to another user account
Instruction
Enable Automatic Forwarding (Google Admin)
- Login to Google Admin Console using the Super Admin account.
- On the left navigation menu, click Apps > Google Workspace > Gmail > End User Access
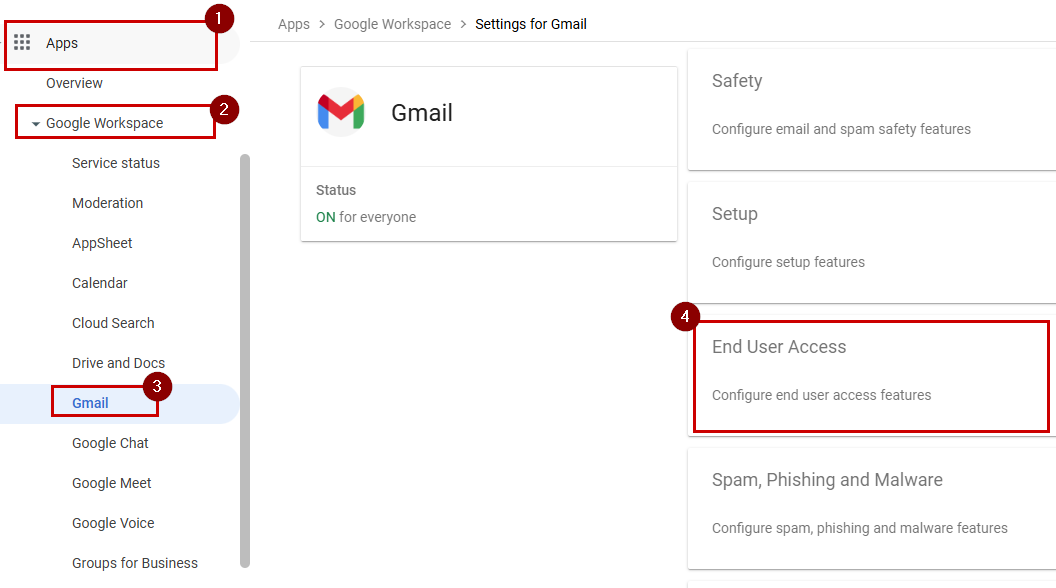
- Click on the pencil icon to edit Automatic Forwarding settings

- Tick the box to allow users for automatic forwarding of emails and click SAVE

- Automatic Forwarding feature is now enabled.

- Proceed with the below steps to setup email forwarding to the user.
Setup Email Forwarding (End User)
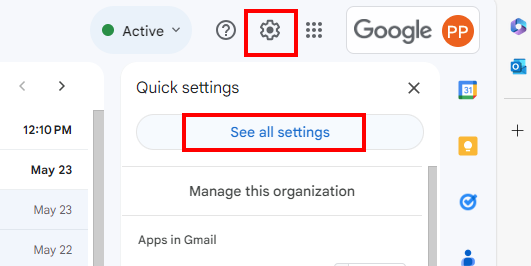
- Access Google Mail (Gmail) using the account that we will setup auto forwarding (ex. user1@domain.com)
- On the top right corner, click the Gear Settings icon and choose See all settings.
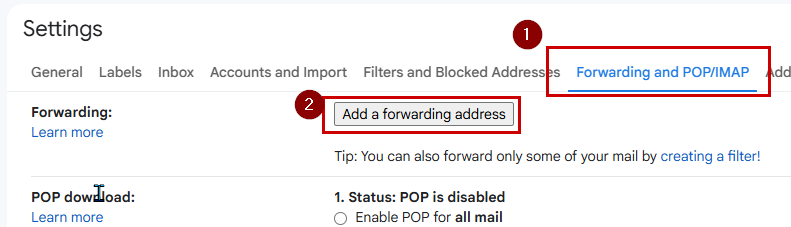
- Click on Forwarding and POP/IMAP tab then click Add a forwarding address.
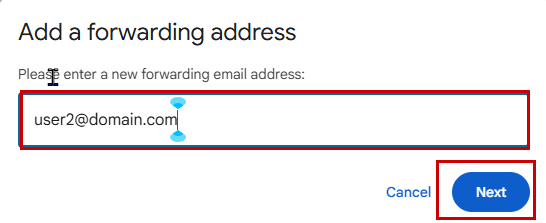
- Enter the email address of the user who will receive forwarded emails (ex user2@domain.com) and click Next
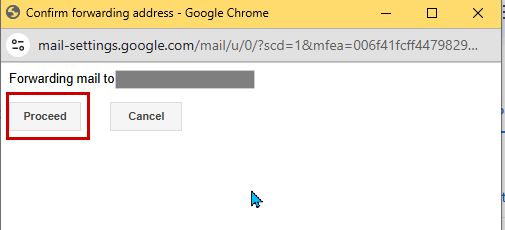
- On the window prompt confirmation, click Proceed.
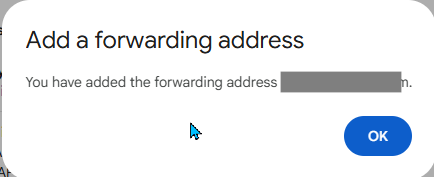
- A notification will show that the forwarding address is now added.
- Enable forwarding by selecting Forward a copy of incoming email to added forwarding address

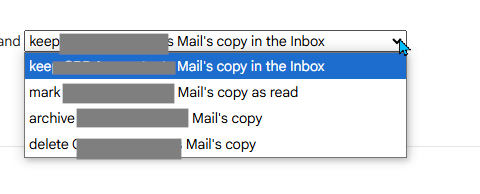
- By default, it will also keep a copy to the original user’s mailbox. If you wish to change it, select the dropdown and choose whether you want to mark as read, archive or delete the copy.
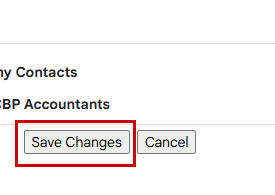
- Scroll to the bottom and click Save Changes
- After you add a forwarding email address, it will send a verification link to the address. Once verified, you should now be able to forward messages to that email address.