
Purpose
This guide explains how to securely share items with external users using External Share Links. External sharing allows item owners to generate encrypted, one-time access links for people outside the organization, such as vendors, contractors, or third-party service providers, without requiring them to have an account.
External share links can be used to provide temporary access to supported secured items while maintaining control over sensitive information.
Supported Items
External share links can be created for the following item types:
- Personally added applications (imported, Land & Catch, and custom user-password applications)
- Secured passwords
- Secured notes
Depending on the item type, the external share link can include details such as the item name, URL, description, username, password, TOTP code, custom fields, and attachments.
Please Read! External sharing is disabled by default for all accounts. Refer to the Enable External Sharing guide below for instructions on enabling external sharing and configuring related settings, such as link expiration periods.
Prerequisites
- A Practice Protect administrator is only required to enable external sharing of items.
- You must be the owner of the item to share it with external users.
Instructions
-
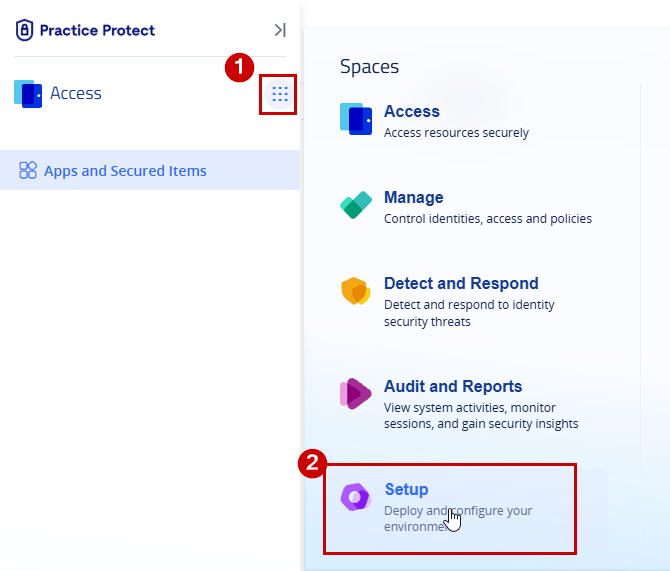
From the Access Space, open the menu and navigate to Setup space.
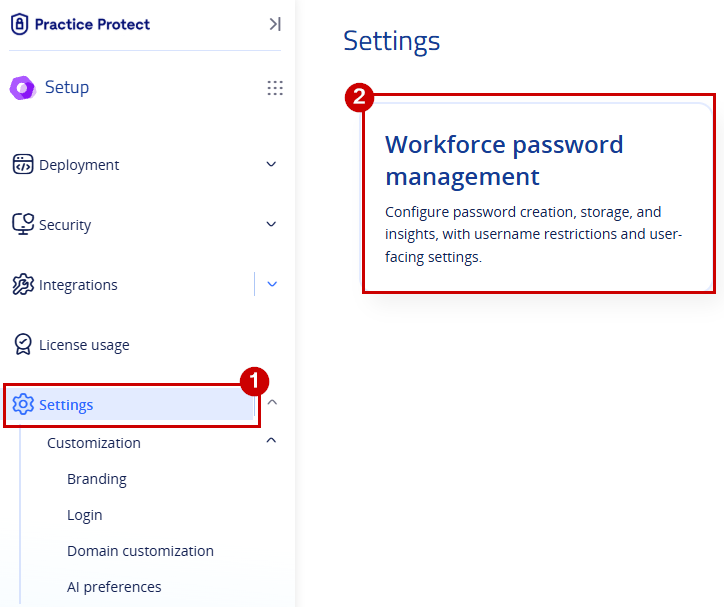
- From the left-hand menu, navigate to Settings, then select Workforce Password Management.
-
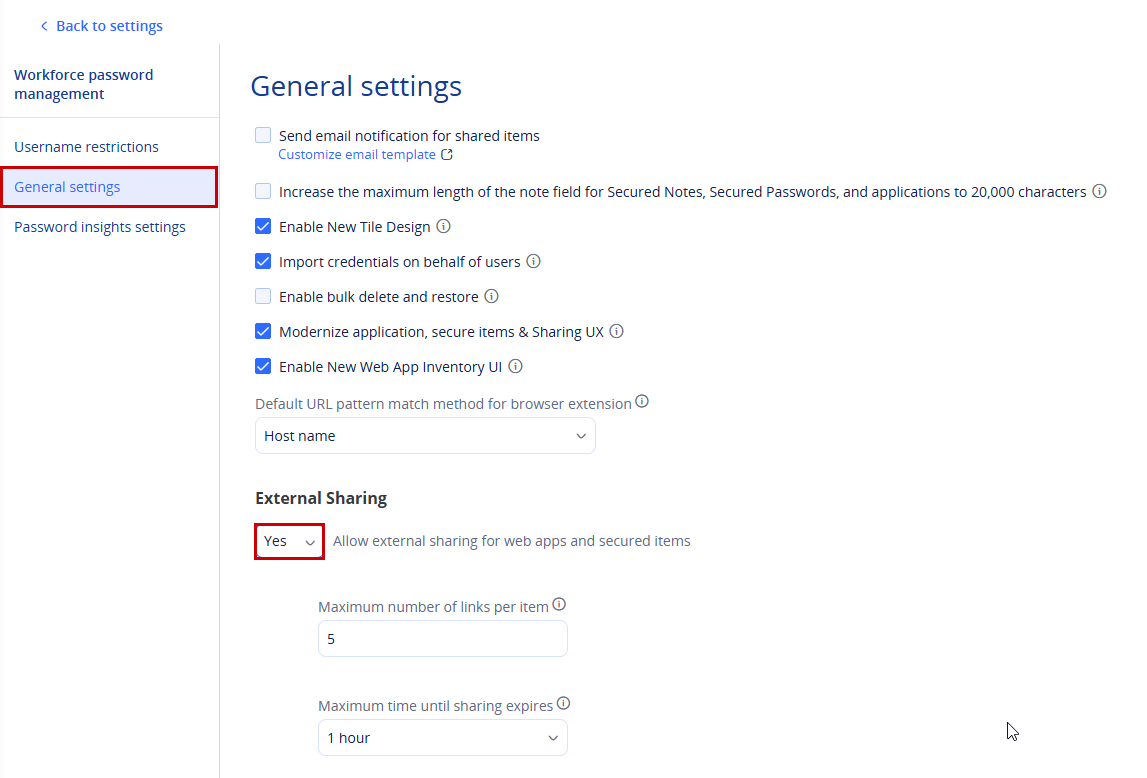
Navigate to General Settings under Workforce Password Management.
- In the External Sharing section, set “Allow external sharing for web apps and secured items” to Yes.
-
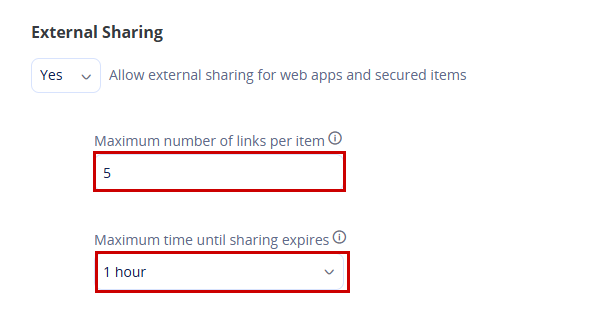
Optional: Configure the Maximum number of links per item according to your requirements. The allowed range is 1 to 10 links, with a default value of 5.
-
Optional: Configure the Maximum time until sharing expires by selecting one of the available options: 1 hour, 1 day, 7 days, or 14 days. The default expiration period is 1 hour.
- In the bottom-right corner of the page, click Save to apply the changes.
- Users can now share items with external users. Follow the steps below to create an external sharing link.
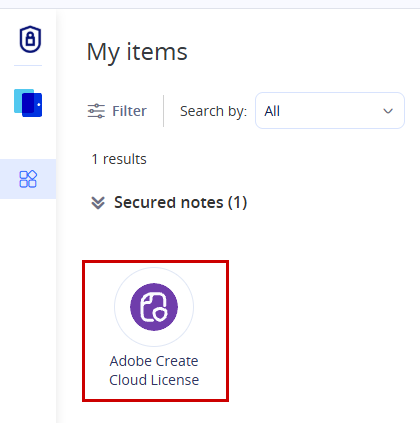
- In the Access Space, select the item you want to share. A side panel will open, displaying the available actions and options for the item.
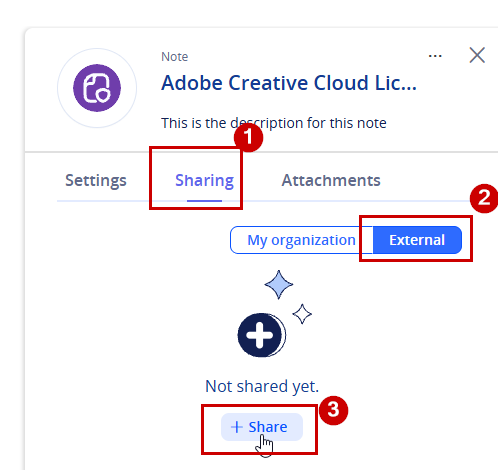
- Navigate to the Sharing tab, then select the External.
- Click +Share
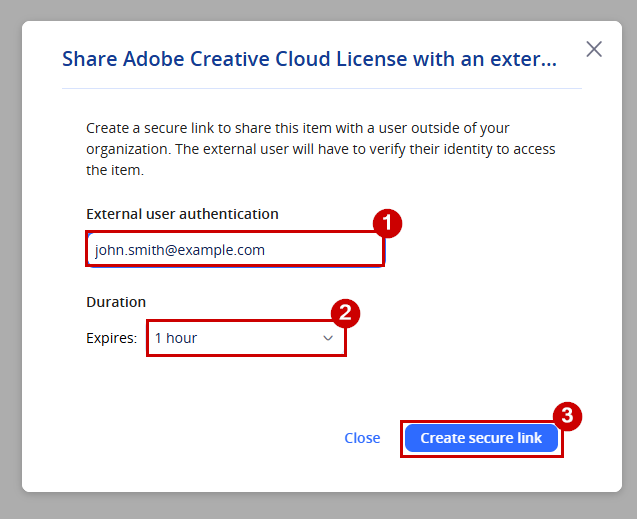
- In the pop-up window, enter the email address of the external user. The recipient must have access to this email address, as they will be required to validate their identity using a One-Time Passcode (OTP) sent via email before accessing the shared item.
-
Select the duration before the secure sharing link expires. By default, the link is set to expire after 1 hour. If a longer expiration period is required, an administrator must adjust the external sharing settings
-
Once selected, a new window will appear confirming that the secure link has been created. This window also displays the expiration details of the secured link.
- There are two ways to share the secure link:
- Link tab: Copy the generated link and send it to the intended recipient. Ensure this is the same email address provided during the sharing process.
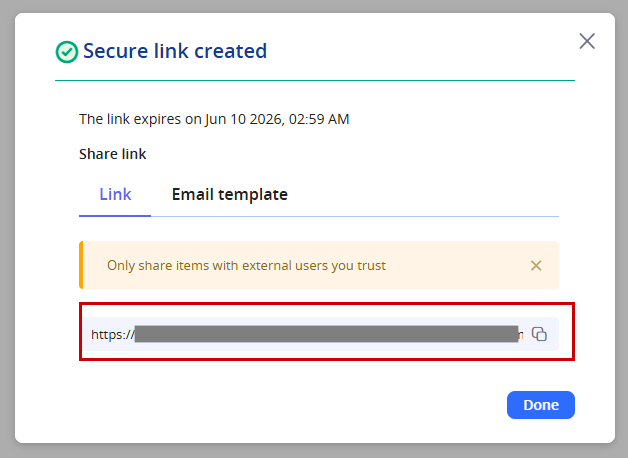
- Email Template tab: Use the pre-generated email template, which includes the secure link. You can copy the email content and send it directly to the recipient.
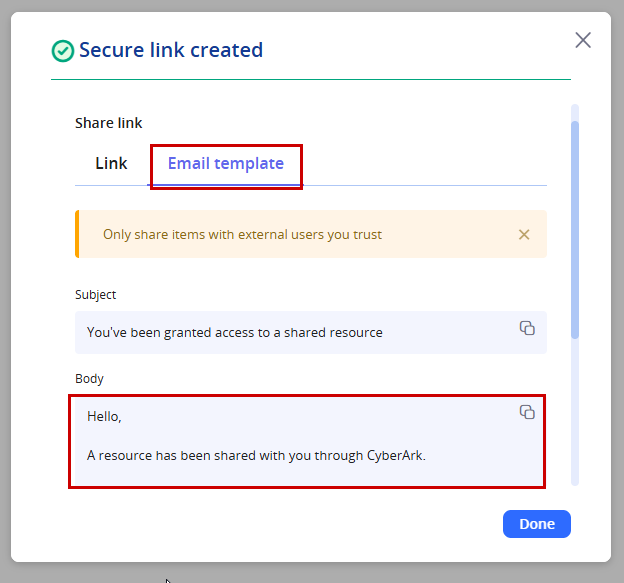
- Link tab: Copy the generated link and send it to the intended recipient. Ensure this is the same email address provided during the sharing process.
- Click Done. Note: If you forget to copy the link, you can return to the Sharing tab, select External, locate the user the item was shared with, click the three-dot menu and choose Copy Link.
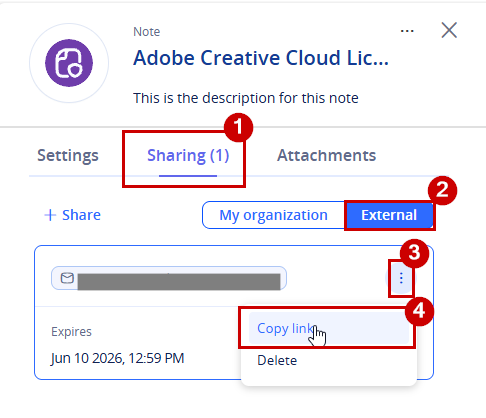
-
This is how you share a secure link. The recipient can access the link directly in their browser. Please refer to the next guide for further information.
Important! Always be vigilant when sending secure sharing links. Verify the recipient’s email address and confirm that the item is being shared with the correct individual before proceeding.
-
Once you receive the secure link, open a web browser and paste the link into the address bar. This will take you to the verification page, where you will be prompted to enter a One-Time Passcode (OTP).
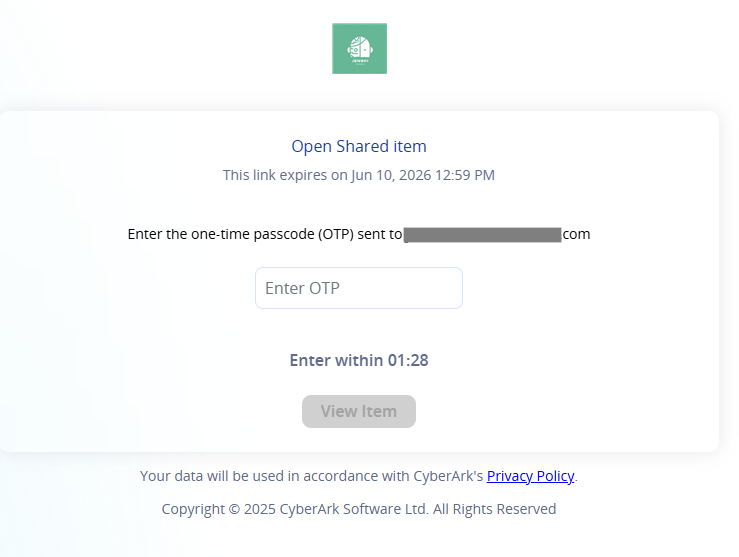
- Retrieve the One-Time Passcode (OTP) sent to your email address. If you do not receive the OTP, verify with the sender that the correct email address was used when the secure link was created.
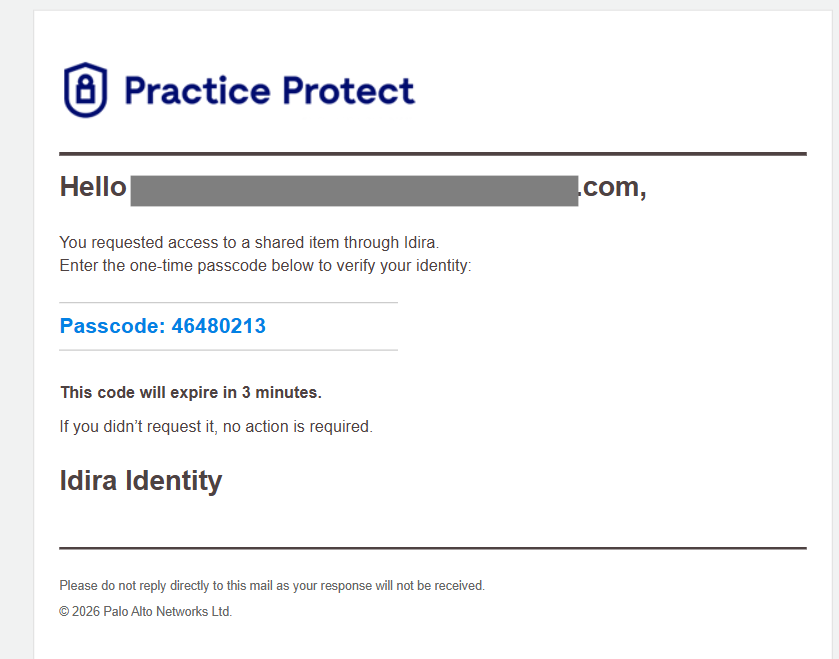
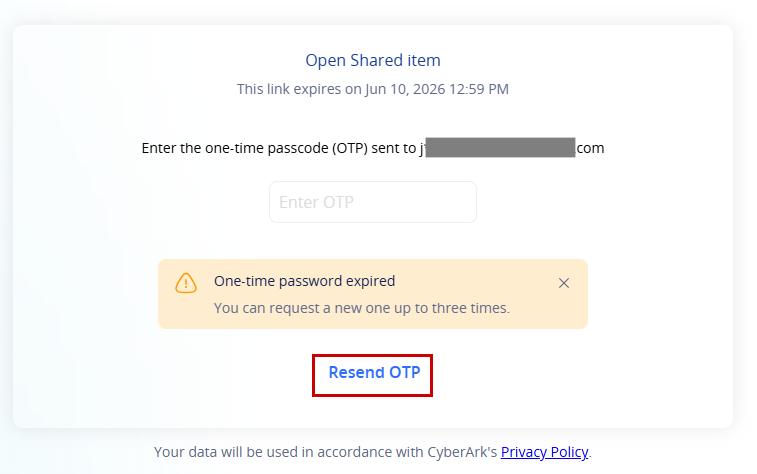
NOTE: If the One-Time Passcode (OTP) has expired, you can click Resend OTP to request a new one. You may request a new OTP up to three times.
-
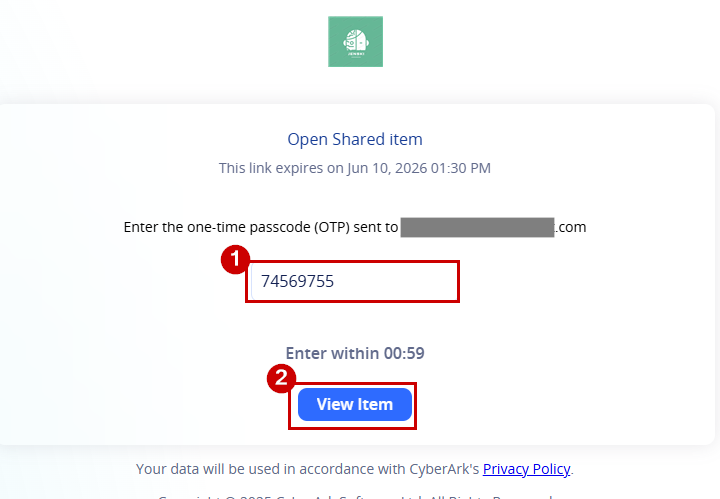
Enter the One-Time Passcode (OTP) and click View Item. If the OTP is correct, you will be able to view the shared item.
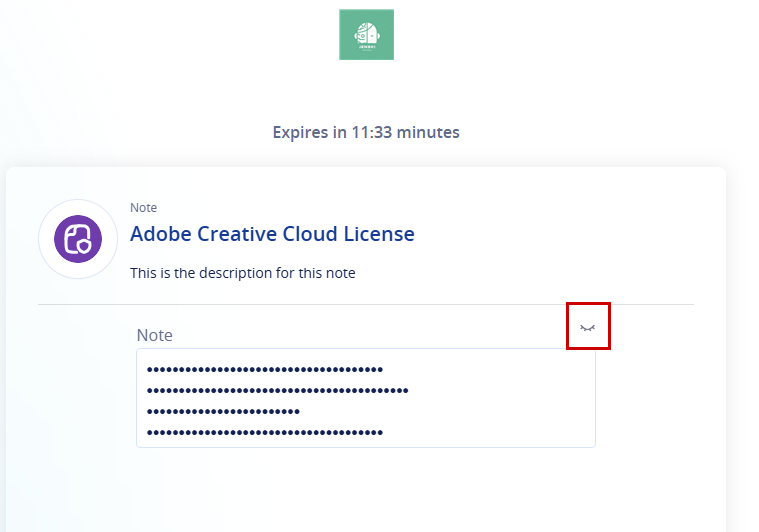
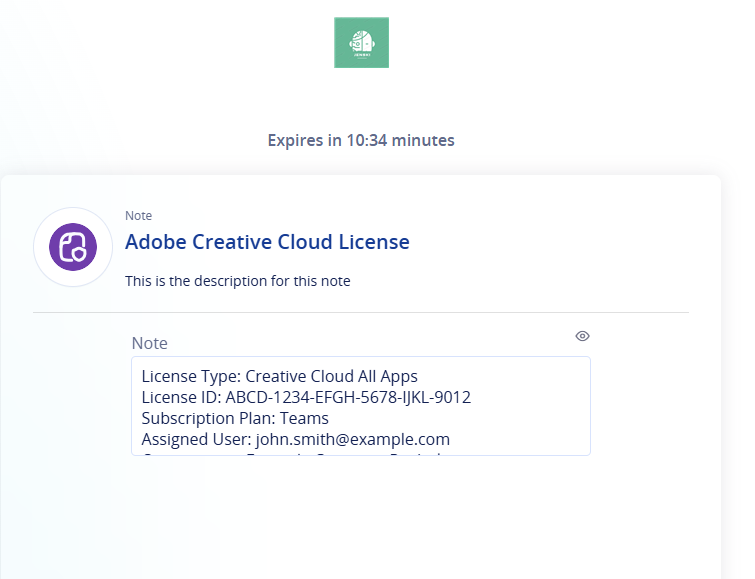
- Once you are on the item view page, the session is valid for 15 minutes before it expires. If the item details are hidden, click the eye (Show/Hide) icon to reveal the information.
-
From the Access Space, open the menu and navigate to Setup space.
- From the left-hand menu, navigate to Settings, then select Workforce Password Management.
-
Navigate to General Settings under Workforce Password Management.
-
In the External Sharing section:
- Set the Maximum number of links per item (allowed range: from 1 to 10, Default is 5), depending on your requirement.
- Configure the Maximum time until sharing expires by selecting one of the available options: 1 hour, 1 day, 7 days, or 14 days. The default value is 1 hour.
-
Once you have made your changes, click Save in the bottom-right corner of the page.