Purpose
This guide explains how to sign in to your Practice Protect Access Space for the first time. It applies to firms that have implemented Email Integration, such as Microsoft 365 Federation or Google Workspace SAML.
If your firm has not implemented Email Integration, team members signing in for the first time should follow the First-Time Sign-In guide instead.
Your Password Administrator will normally provide your Practice Protect username and password after your account has been created. Once you have received your login details, follow the instructions below to sign in.
Instructions
- Open your preferred web browser, such as Google Chrome.
-
Enter your firm’s Practice Protect tenant URL in the address bar. For example: https://tenantdomain.cyberark.cloud/
Alternatively, if you have access to the email address associated with your Practice Protect account, check your inbox for an email invitation from Practice Protect. The invitation may contain a link to access and set up your Practice Protect account.
-
Enter your Username and click Next.
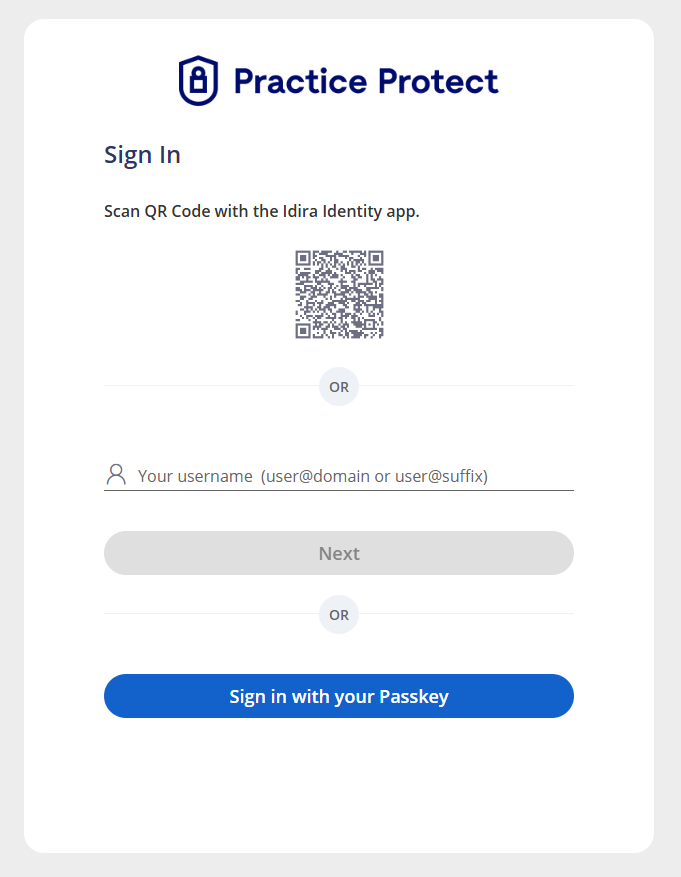
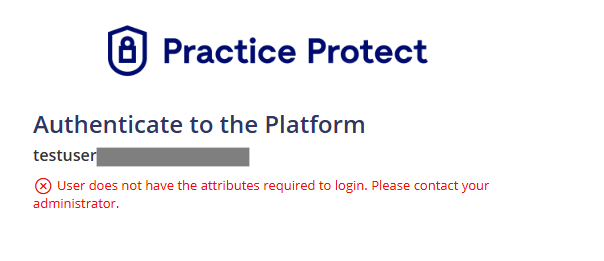
Note: If you receive the error message “User does not have the attributes required to login”, it usually means that your account either does not exist or has not yet been granted access from your current location.
If this step does not appear during the sign-in process, it means no additional action is required. Proceed to the next step. If you believe this is incorrect, please contact your Password Administrator or Support Team for assistance.
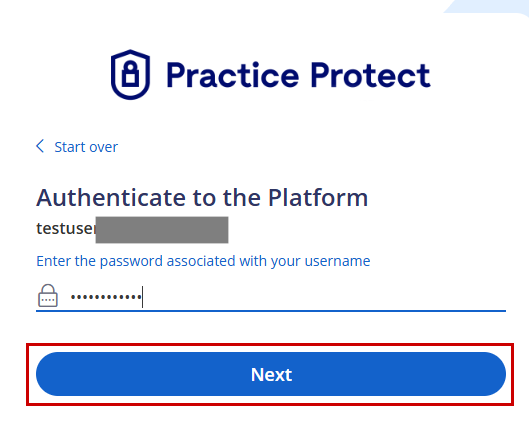
- Enter the temporary password provided to you, then click Next.
-
If you receive the message shown below, your Password Administrator will need to temporarily unlock MFA by following the instructions in the guide linked here.
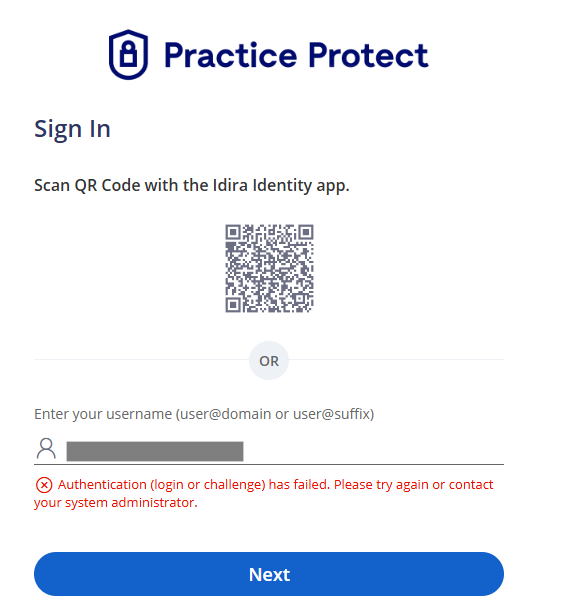
If you do not receive the message above, skip this step and proceed to Step 6.
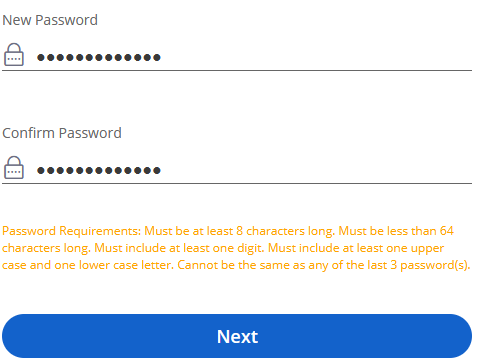
- Set a new password, then click Next.
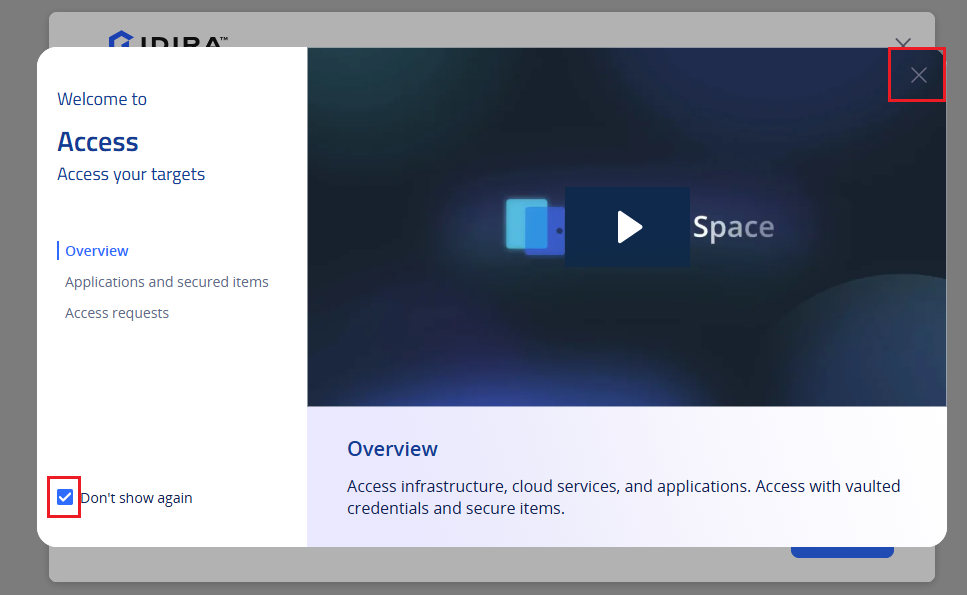
- You will be taken to the Access Space Welcome overview screen. If you do not need to review the guide, select Don’t show again, then click the X in the top-right corner to close the guide and continue.
-
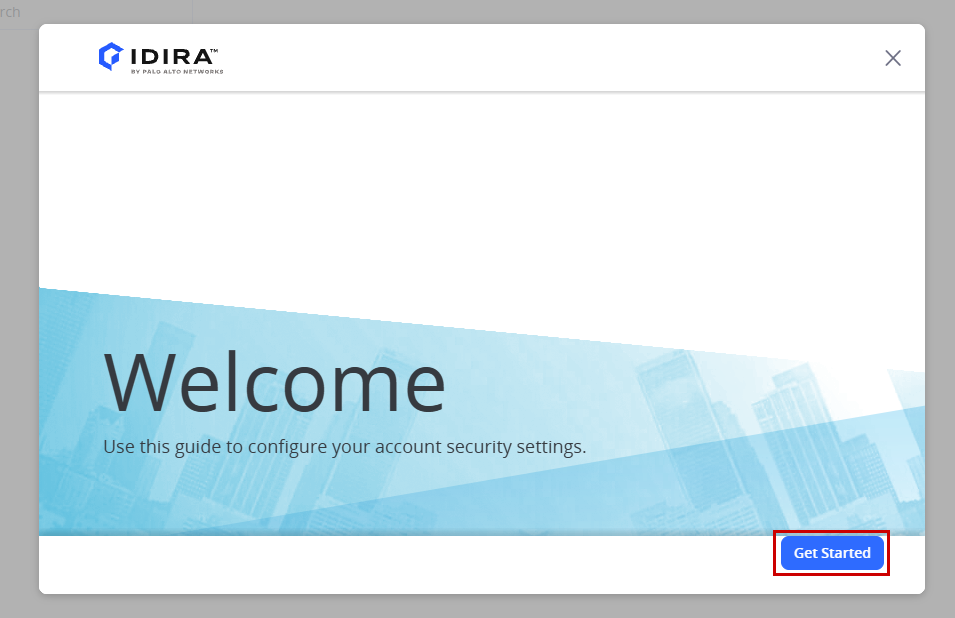
On the next Welcome screen, click Get Started. You will then be prompted to set up your Multi-Factor Authentication (MFA).
The MFA setup options available to you may vary depending on your firm’s Practice Protect configuration. Select the instructions below that match the MFA method displayed on your screen.
 Setup Passkey as MFA
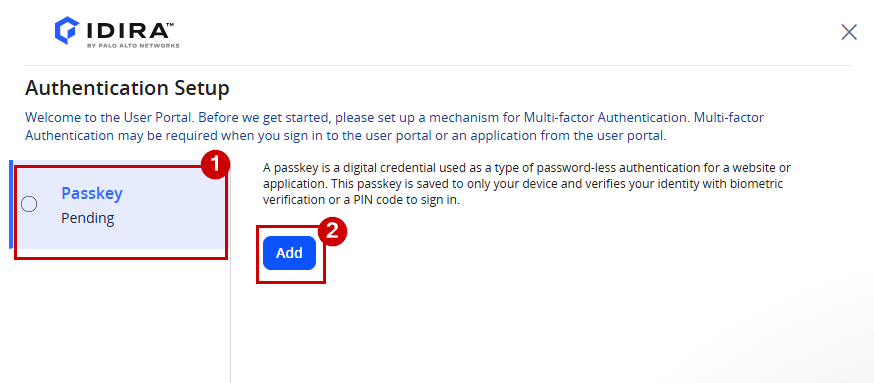
- Click Passkey, then click Add. You will be redirected to the Passkey setup page.
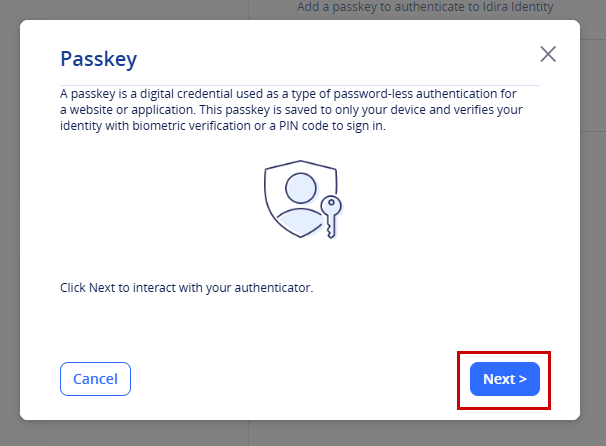
- Once redirected to the Passkey window, click Next.
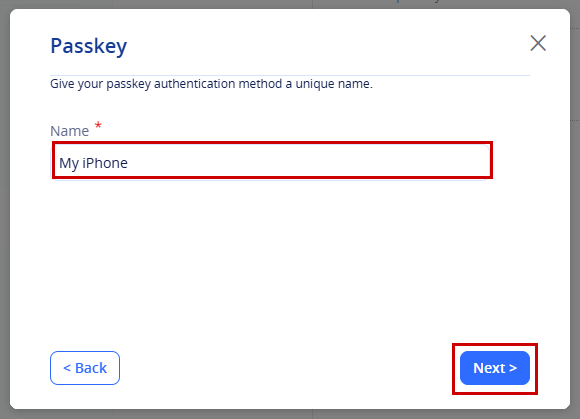
- Enter a name for the passkey. We recommend using a name that identifies the device where the passkey is stored. For example, if you are using your iPhone, enter My iPhone. Click Next.
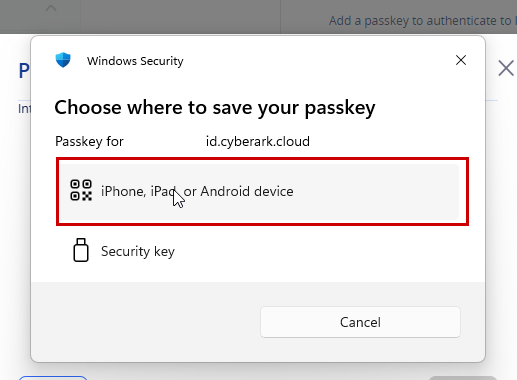
- When prompted to set up your Passkey, select iPhone, iPad, or Android device.
- A QR code will be displayed. On your mobile device, open the Camera and scan the QR code.
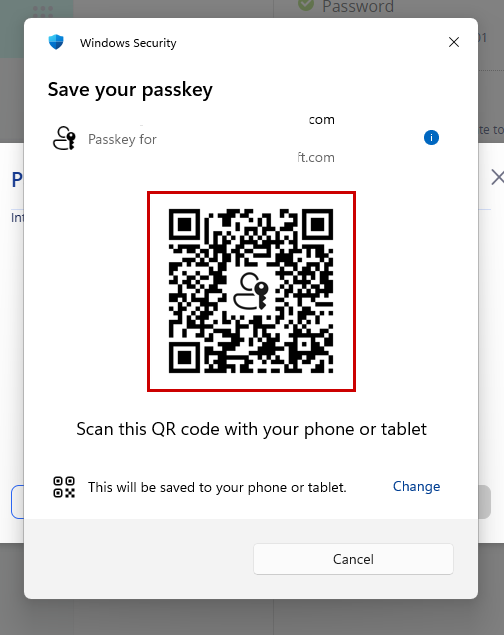
- Follow the prompts on your device to complete the setup. Depending on your device, you may be asked to verify your identity using Face ID, fingerprint, PIN, or screen lock.
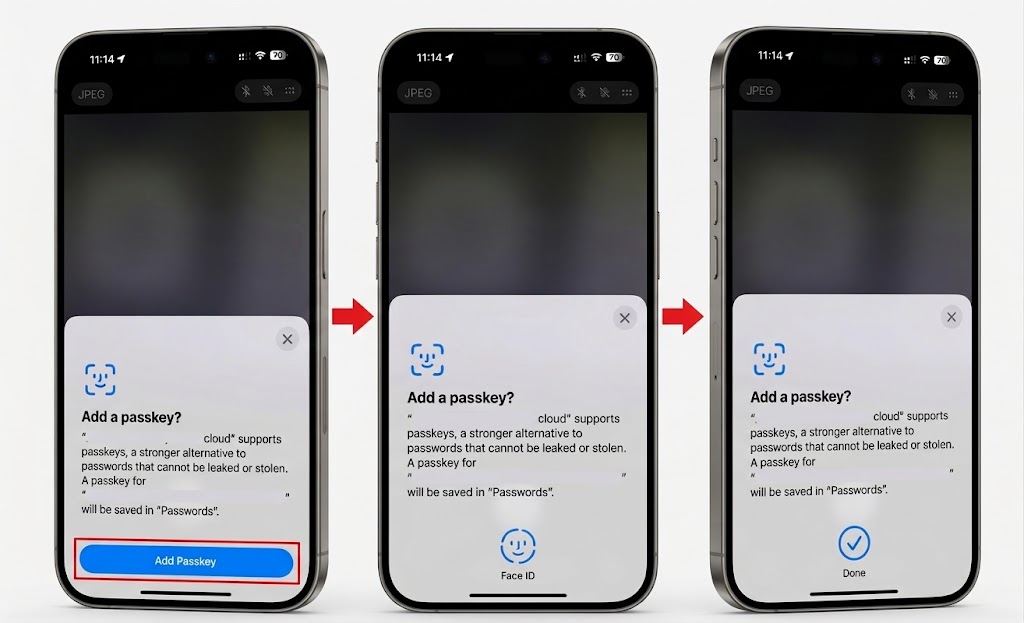 For more information about Passkeys, see the Sign In with a Passkey guide.
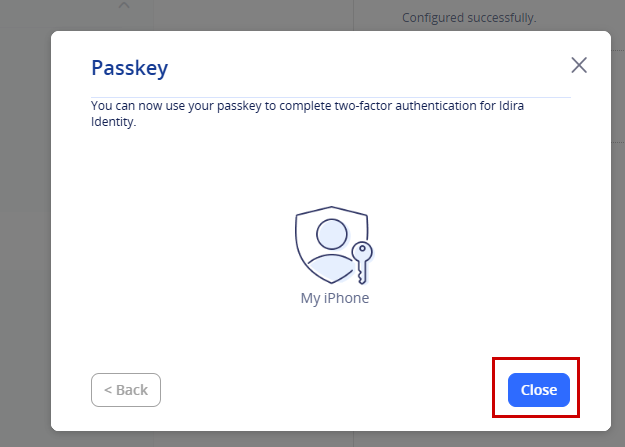
 - Once the passkey has been successfully registered, Practice Protect will display a confirmation message. Click Close.
Setup SMS and OATH OTP as MFA-
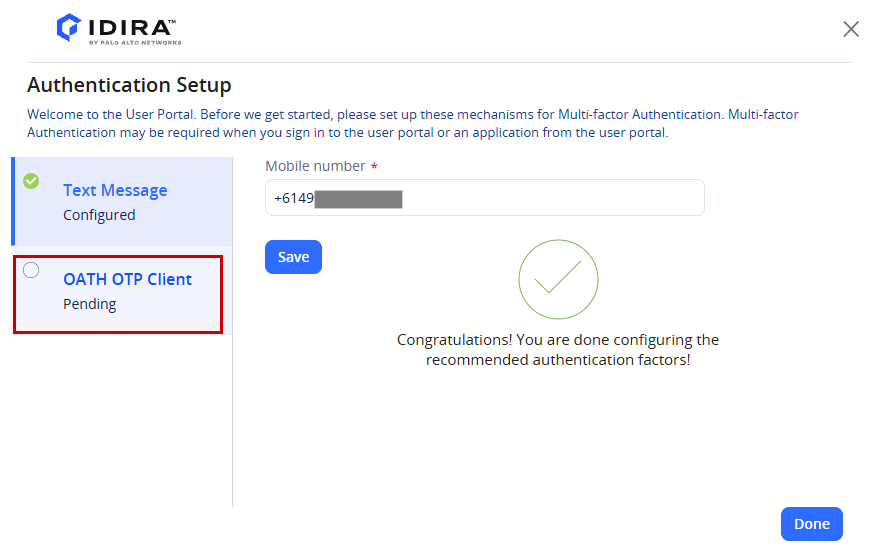
Setup your mobile phone number, then click Save.
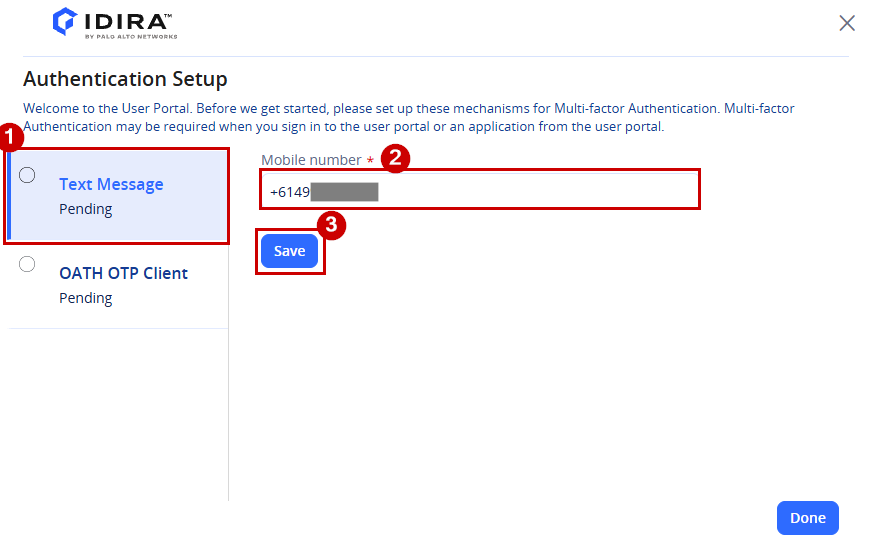
Important: Enter your phone number in full international format (for example, +614XXXXXXXX). This number will be saved to your account and can be used to receive SMS verification codes when signing in to Practice Protect Access Space. - Once complete, you will see the message, “Congratulations! You are done configuring the recommended authentication factors!” Click OATH OTP Client to continue.
-
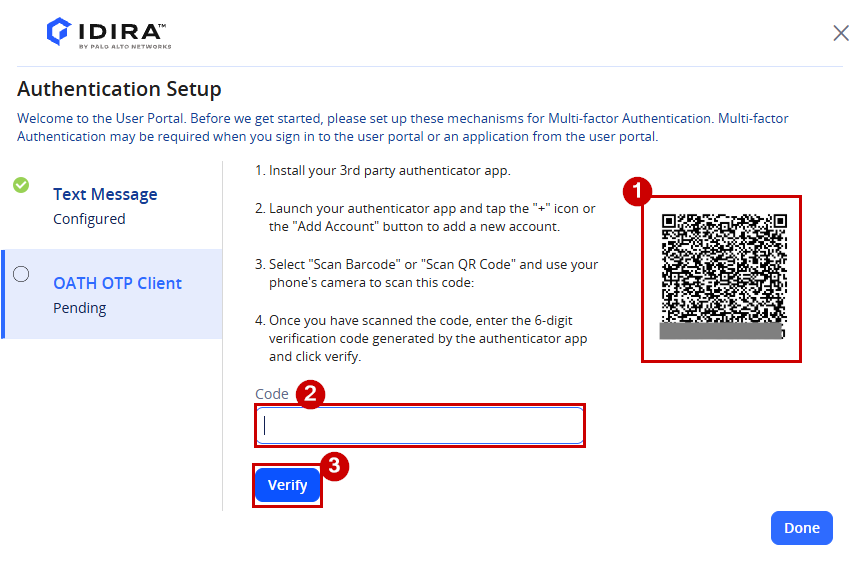
On the next screen, set up your OATH OTP by scanning the displayed QR code with your preferred authenticator app (for example, Google Authenticator). Once scanned, enter the generated verification code in the field provided, then click Verify.
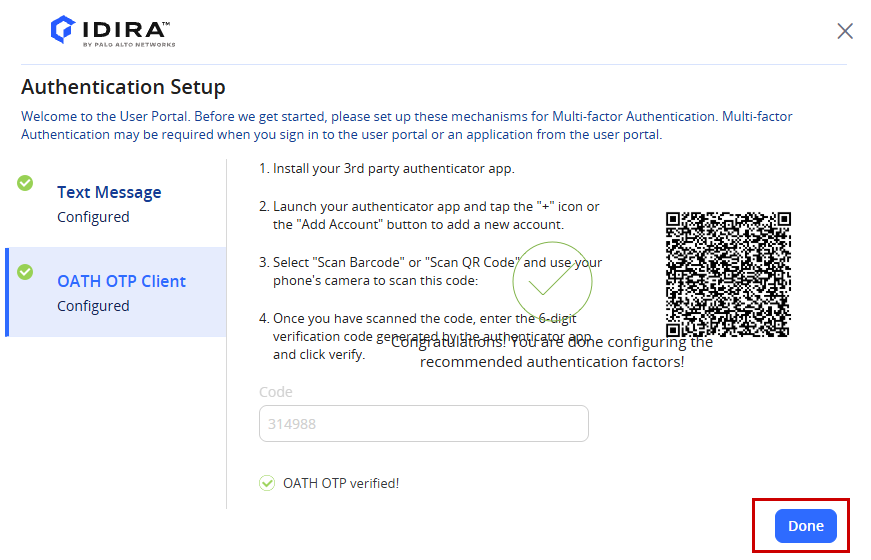
- Once your OATH OTP setup is successful, click Done to continue.
- Click Passkey, then click Add. You will be redirected to the Passkey setup page.
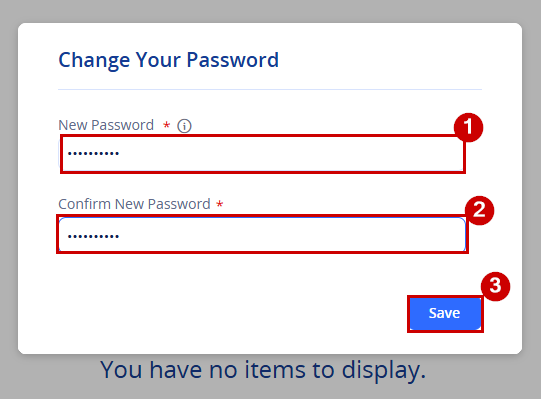
- Next, you will be prompted to create a new password. Enter your new password and click Save.
 |
| - The next step is to install the Practice Protect browser extension. Open the appropriate link below for your preferred browser.
-
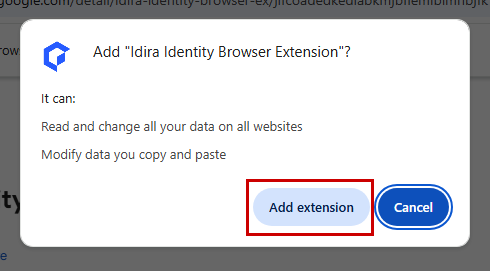
In this example, we’ll use Google Chrome. Click Add to Chrome to install the extension.
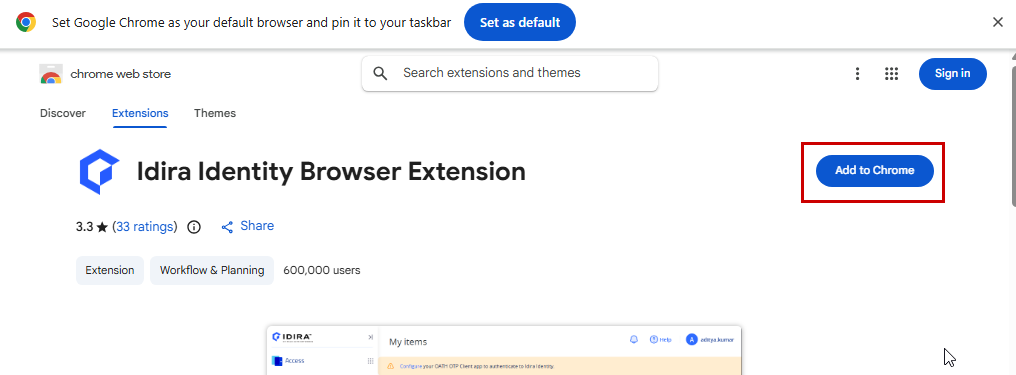
Note: If the Add to Chrome button is greyed out, your browser is managed by your organization’s IT administrator. Please contact your IT team for assistance with installing the extension.
-
- A notification will appear confirming that the browser extension has been successfully added. You do not need to sign in to Google Chrome to complete the installation.
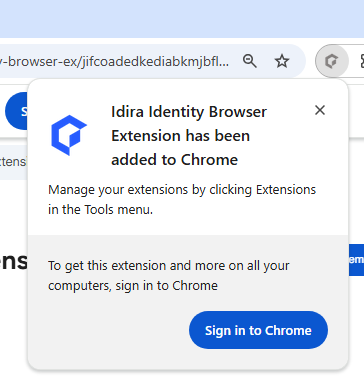
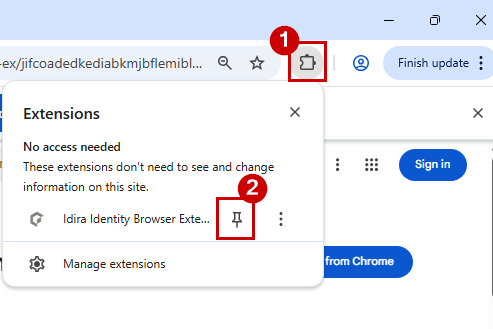
- Click the Extensions (puzzle piece) icon in the top-right corner of your browser, then click the Pin icon next to the Practice Protect extension to keep it visible in the browser toolbar.
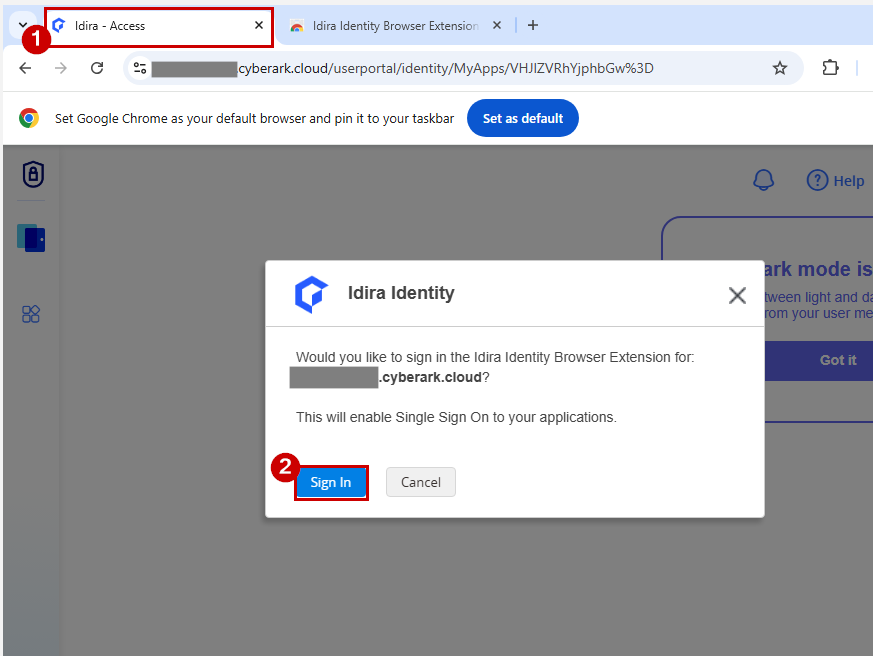
- Return to the browser tab where your Practice Protect Access Space is open and refresh the page.
- If prompted with “Would you like to sign in to the Idira Identity Extension?”, click Sign In. This will sync the browser extension with your Practice Protect account.
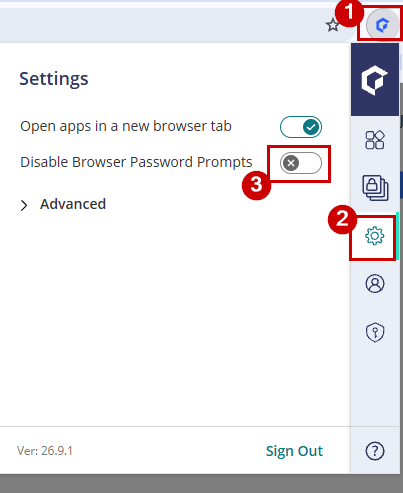
- Next, disable the browser password prompts. Click the extension icon that you pinned earlier, click the Settings (gear) icon, then turn on Disable browser password prompts.
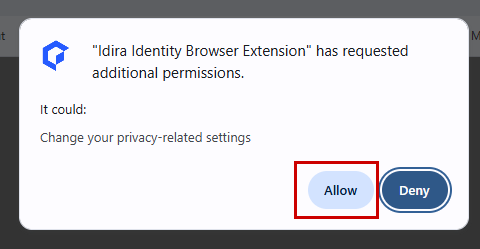
- If you are prompted to grant additional permissions to the Browser Extension, click Allow.
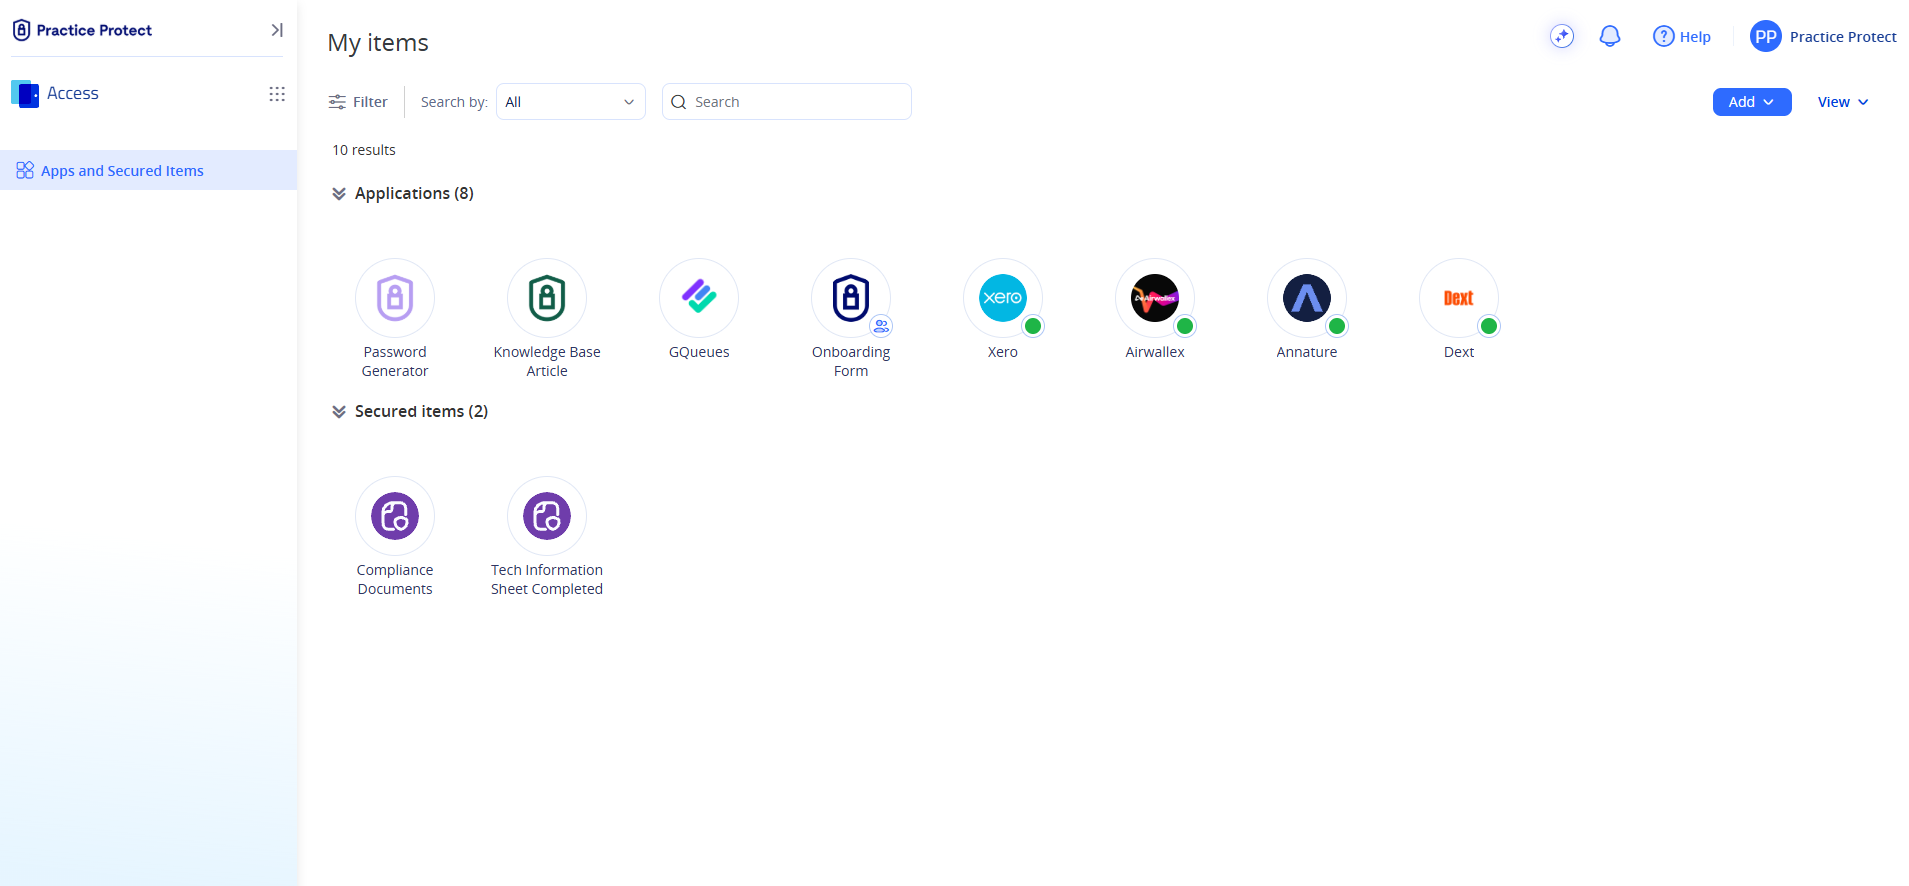
- You’re now ready to use Practice Protect Access Space. To test your setup, click an application tile to launch it. If credentials have already been configured, Practice Protect will automatically populates your username and password and sign you in. If no credentials have been saved for the application, you’ll be prompted to set them up before launching it.
- Bookmark the Practice Protect Access Space page in your browser so you can easily access it the next time you need to sign in. If you experience any issues with your applications or signing in to Access Space, please contact the Practice Protect Support team through our Support page.