
Purpose
When a user account is removed from Practice Protect, any personally captured apps or Secured Items that have not been shared with another team member will be permanently deleted. Shared items can be transferred to another staff member within the firm (recommended: System Admin).
Important: Before deleting any user account, ensure that all required shared applications and Secured Items have been transferred to another user. This step is necessary to retain access and prevent disruption. Deleting the user before completing the transfer may result in applications becoming unusable or Secure Items being permanently lost.
This guide outlines two methods for transferring ownership of shared applications and Secured Items prior to user deletion.
- Option 1: Configure a policy to automatically transfer shared items to a designated staff member when the original owner is removed.
- Option 2: Manually transfer ownership of shared applications, Secured Items, and folders to the specified user or manager.
If you are unsure how to configure this policy before sharing a secured item, please reach out to us here to complete this for you.
For a guide on how to share Secured Items you can click here.
For a guide on how to share Land & Catch applications you can click here.
Instructions
Configure Policy Settings to transfer ownership of secured items.
- In the Admin Portal, go to Policies under Core Services. You can either create a dedicated policy for transfer of ownership purposes or use an existing policy (e.g. Default Policy)
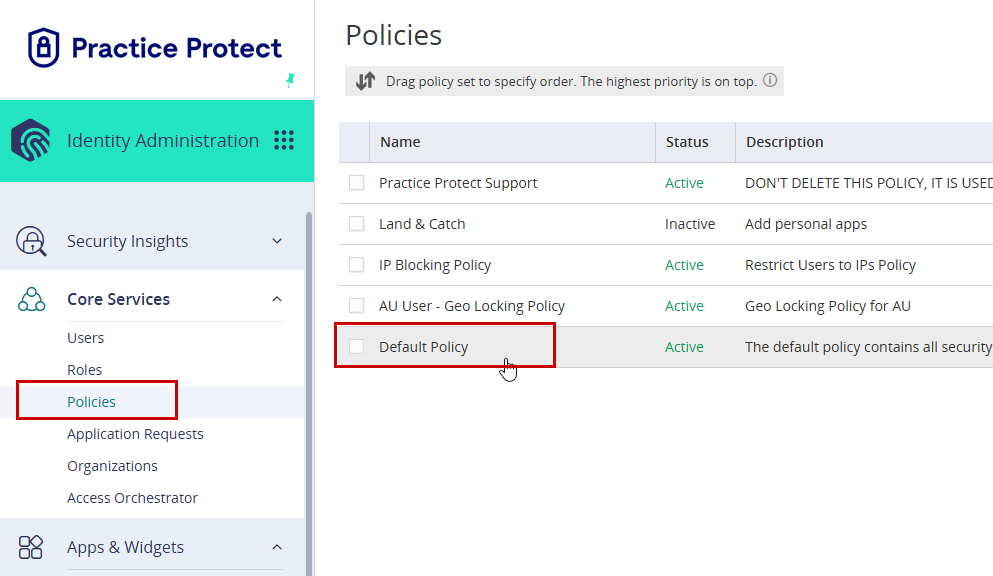
Note: Applying the setting to the Default policy will usually cover all users. - Open the selected policy, then navigate to User Security Policies > User Account Settings. Scroll down until you find User Shared Apps.
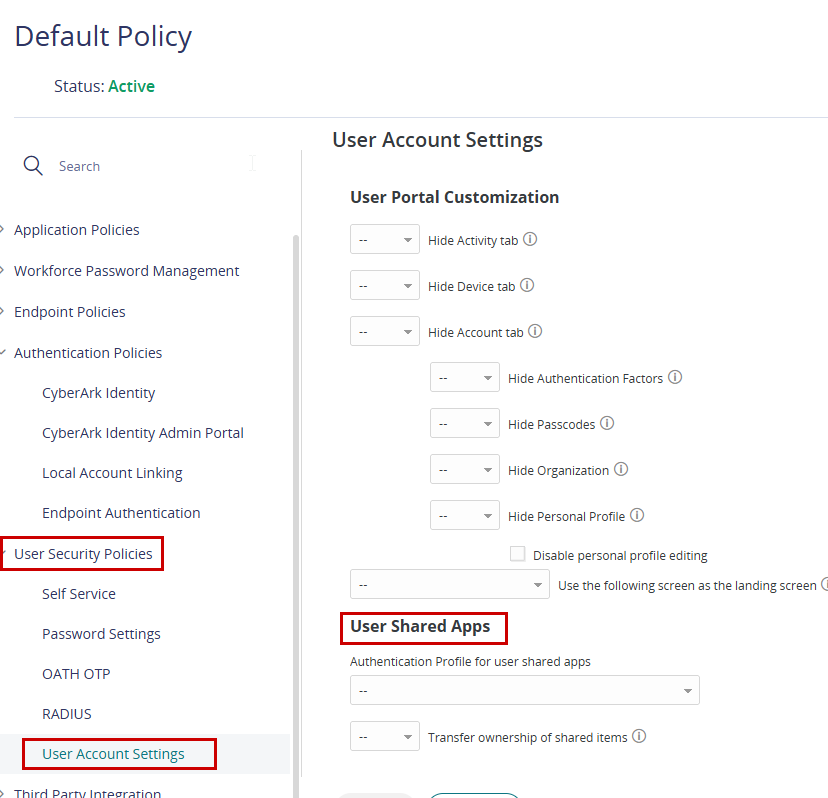
- Set the dropdown option for Transfer ownership of shared item to Yes.
- Click Add to display additional options.
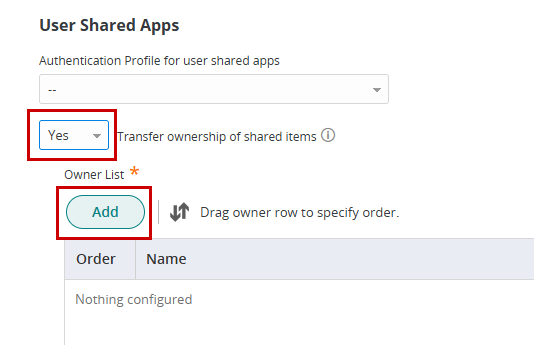
- Select the preferred Owner Type.
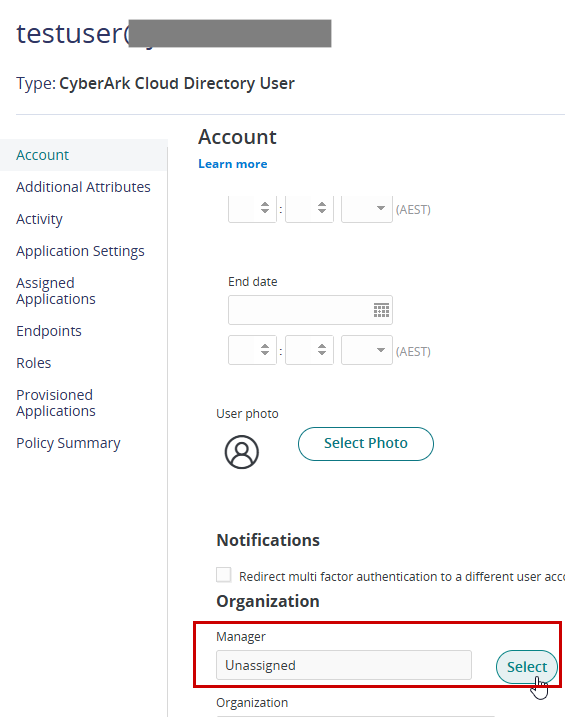
- If you select Manager, ensure the user’s practice protect profile has a manager assigned; otherwise, the transfer will not apply.
- Selecting Specified User is usually the easier option.
- If you select Manager, ensure the user’s practice protect profile has a manager assigned; otherwise, the transfer will not apply.
- In this example, we will select Specified User as the Owner Type.
- Click Add, then search for and select the user you want to assign.

- In this example, testuser was added as the user who will receive the shared
items once ownership is transferred.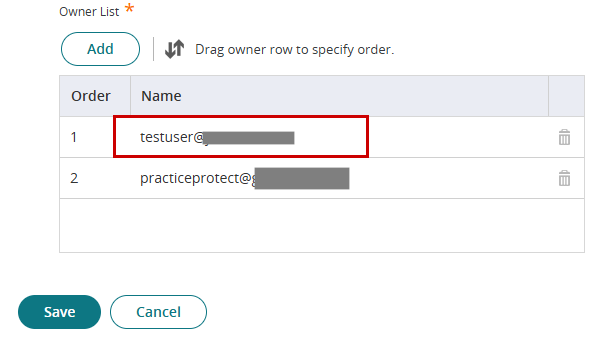
Note: You can add multiple users to the Owner List, but the list follows a priority order. The shared items will first be transferred to the user at the top of the list. It will only move to the next user if the first user has been removed or is no longer active.
- Click Save to apply configuration.
-
When the owner of a shared item is deleted, ownership of the shared item will automatically be transferred to the user you specified.
Current Owner – The user who needs to share the item with another user.
-
The owner of the items must ensure that the items are shared within the Portal. To do this, go to the User Portal
-
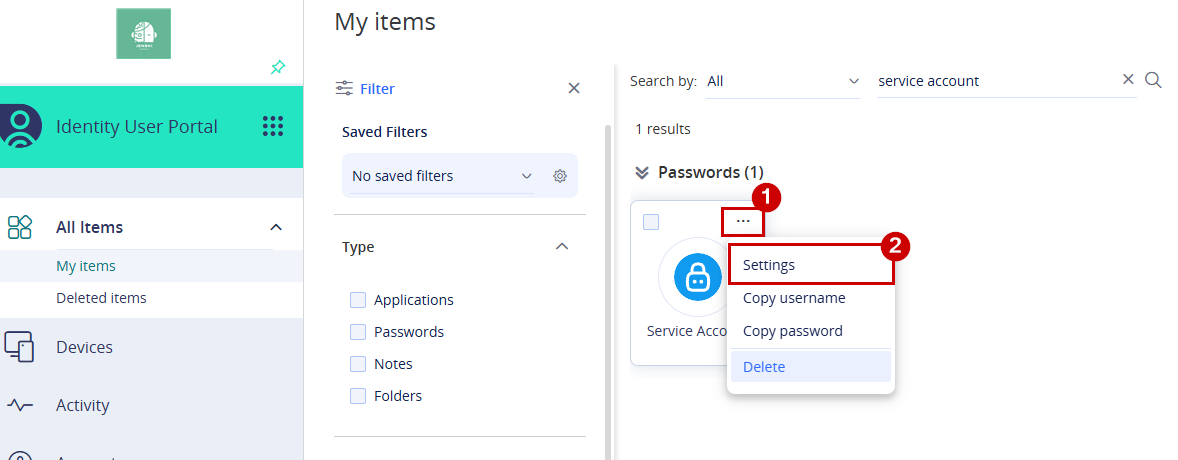
Select an item in your portal, either a personally captured app or a Secured Note / Secured Password.
- Click the three-dot menu (…) and select Settings. This will open the item configuration settings.
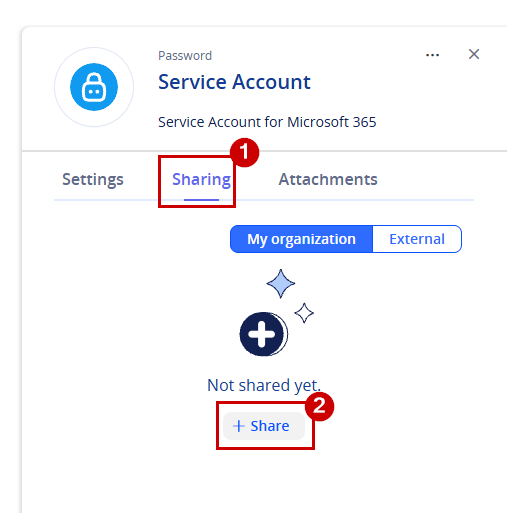
- Go to Sharing tab and click + Share
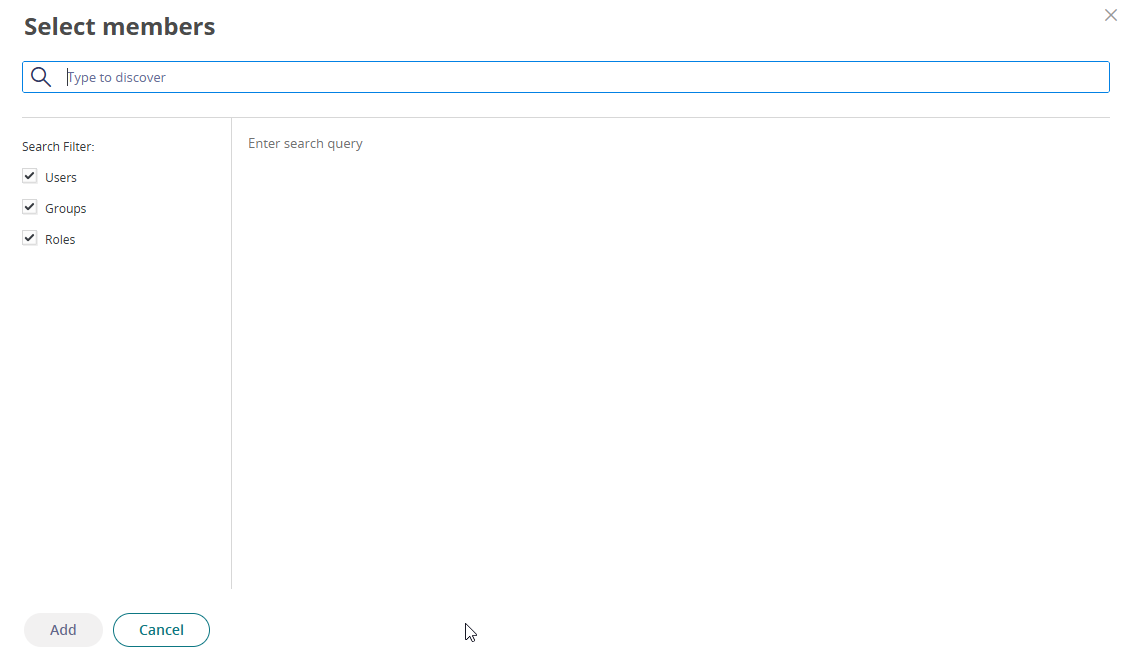
- Search for the destination user, select them, then click Add.
- Change the permission from View (default selected option) to Owner. Ideally, the user assigned as the owner should also be the same user selected as the transfer ownership recipient.
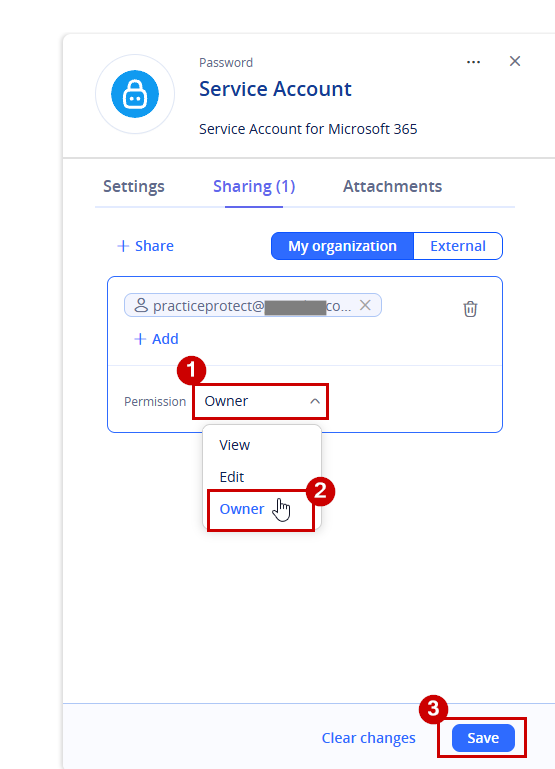
- Click Save.
-
Have the new owner confirm they can access the Secure Items or Personally Captured apps and manage the sharing settings. Once confirmed, complete the ownership migration before removing the old account.
Admin Side – The admin account who will transfer ownership of the shared item to another selected user.
-
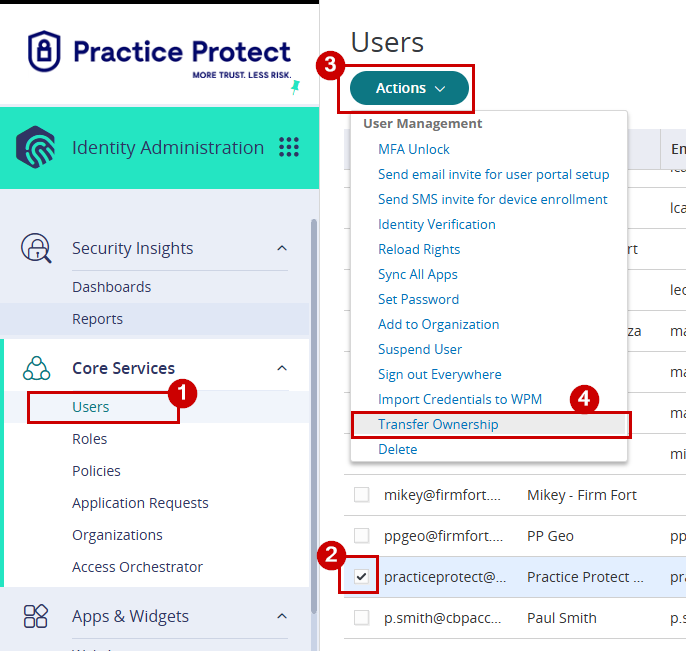
In the Admin Portal, go to Core Services > Users, then select the user who will become the new owner or receive the transferred item ownership.
-
With the user selected, click the Actions dropdown button at the top left, then select Transfer Ownership.
-
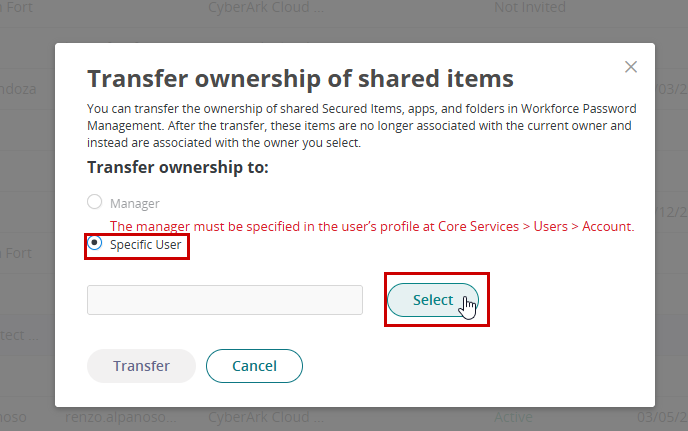
- Select the user and then click Add
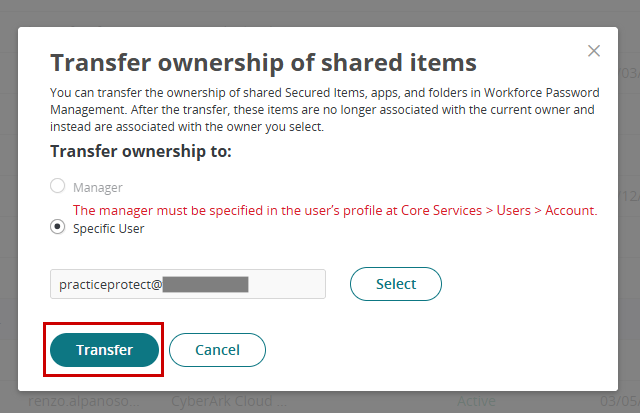
- Click Transfer.
-
A notification will appear indicating that ownership is being transferred to the selected user. The transfer will complete within a few minutes, depending on the number of items being transferred.
Important: Always verify that the items have been successfully transferred and are visible to the new owner before deleting the original account. This ensures access is retained and helps prevent accidental loss or applications becoming unusable.