
Purpose
Federating your identity with Practice Protect provides the best overall end-user SSO experience for environments where Microsoft is synced with your Local Active Directory (AD). This deployment offers unique security options not available in standard setups.
Once federation is configured, all users are redirected to Practice Protect to sign in to Microsoft services. Users continue to authenticate with their Local AD credentials, but the login process is governed by the security policies enforced by Practice Protect.
Similar to pass-through authentication, user logon attempts are validated against your custom policies on the Practice Protect farm. Microsoft Applications like Outlook use modern authentication to communicate directly with Practice Protect. Web browser access are redirected to Practice Protect to complete authentication. This enables SmartLinks technology, allowing users to access SharePoint and other Microsoft 365 apps without repeatedly entering usernames or passwords.
Important Notes:
-
This guide applies only to environments running Active Directory Sync to Microsoft 365 and Practice Protect.
-
Applies to domain-level changes; user provisioning is disabled in this scenario since accounts are managed through the Local AD server.
-
Future Cloud Considerations: If you plan to move to a fully cloud-based identity solution (e.g., Microsoft Entra) in the near future, this on-premises deployment is not recommended. In such cases, it is suggested to implement Practice Protect with Microsoft Entra SAML instead, which provides a smoother path to cloud identity and future scalability.
Prerequisites
- Administrator access to your Microsoft 365 Tenant. You can create a service account for Practice Protect by following this guide: Create Practice Protect Service Account.
-
Register Microsoft Entra ID application (Token-Authentication)
- Practice Protect Active Directory Connector is installed and connected to the local AD server, ensuring Practice Protect accounts are existing and synchronized from the local Active Directory
- The Practice Protect login must match the user’s Microsoft 365 User Principal Name (UPN).
Instructions
-
- Sign in to Practice Protect and switch to Admin Portal
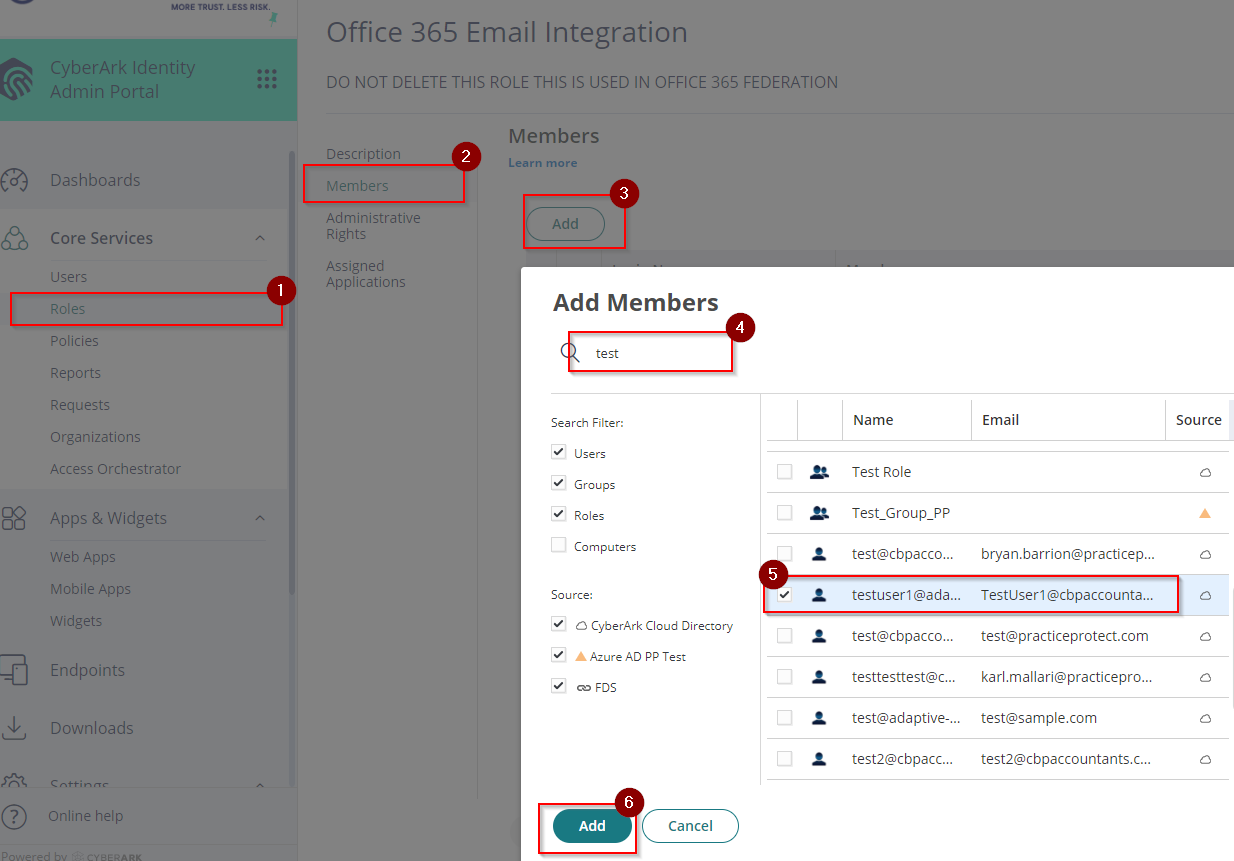
- Under Core Services > Roles > Click Add Role > Type Microsoft 365 Email Integration Users in the Name field.

- Click Save
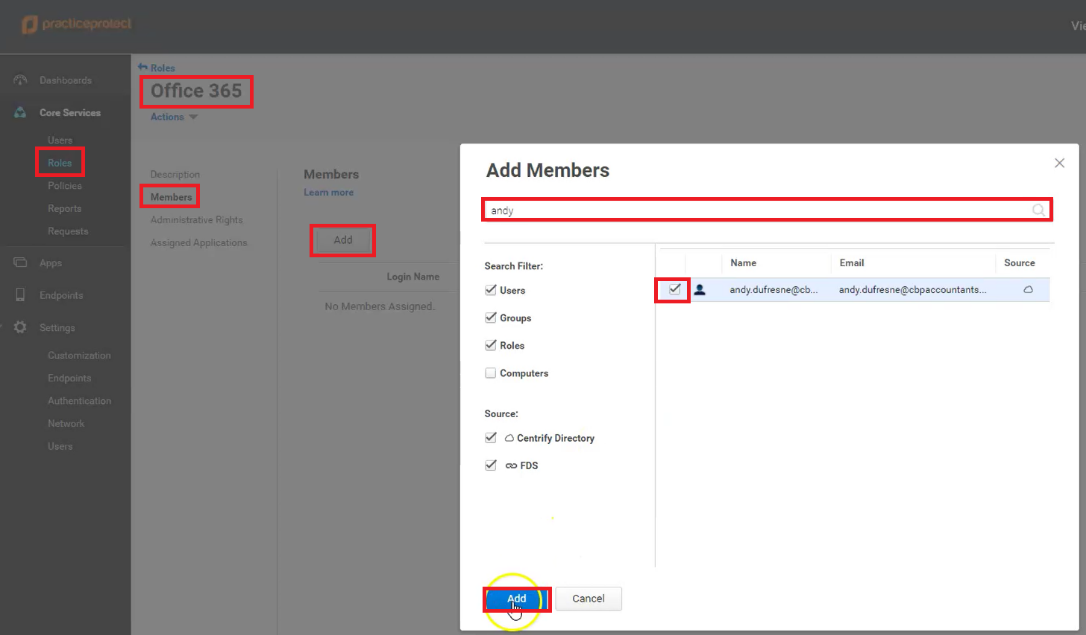
- Go to the role you created, then click Members > Add. Find and select all users who will be part of the email integration. Click Add and Save.
- Log in to the Microsoft Admin Center with your admin account. If you have not set up the Service Account follow this guide.
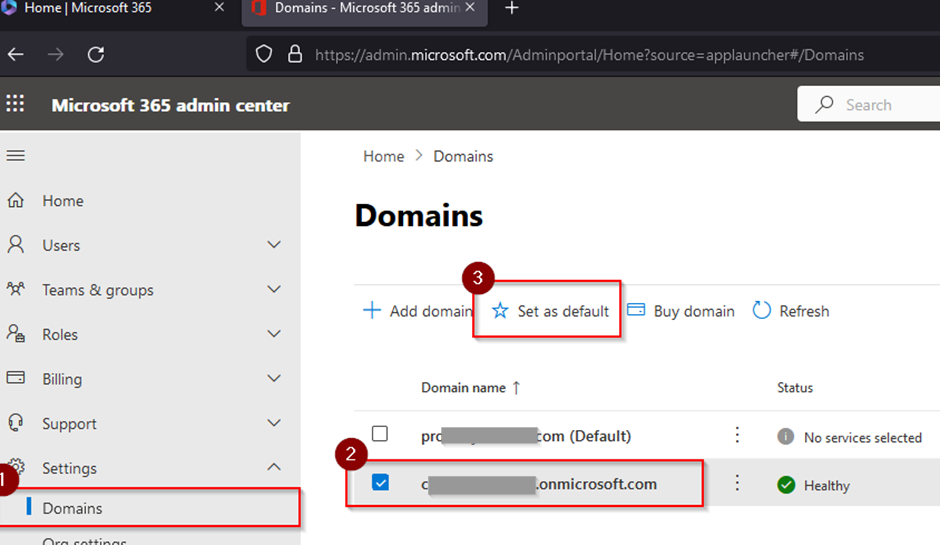
- In the Microsoft 365 Admin Center, go to Setup > Domains > Select the domain ending in .onmicrosoft.com > Click Set as default.
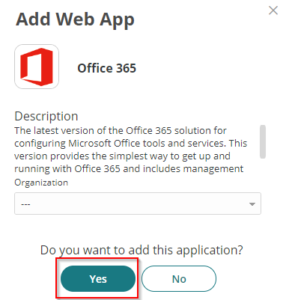
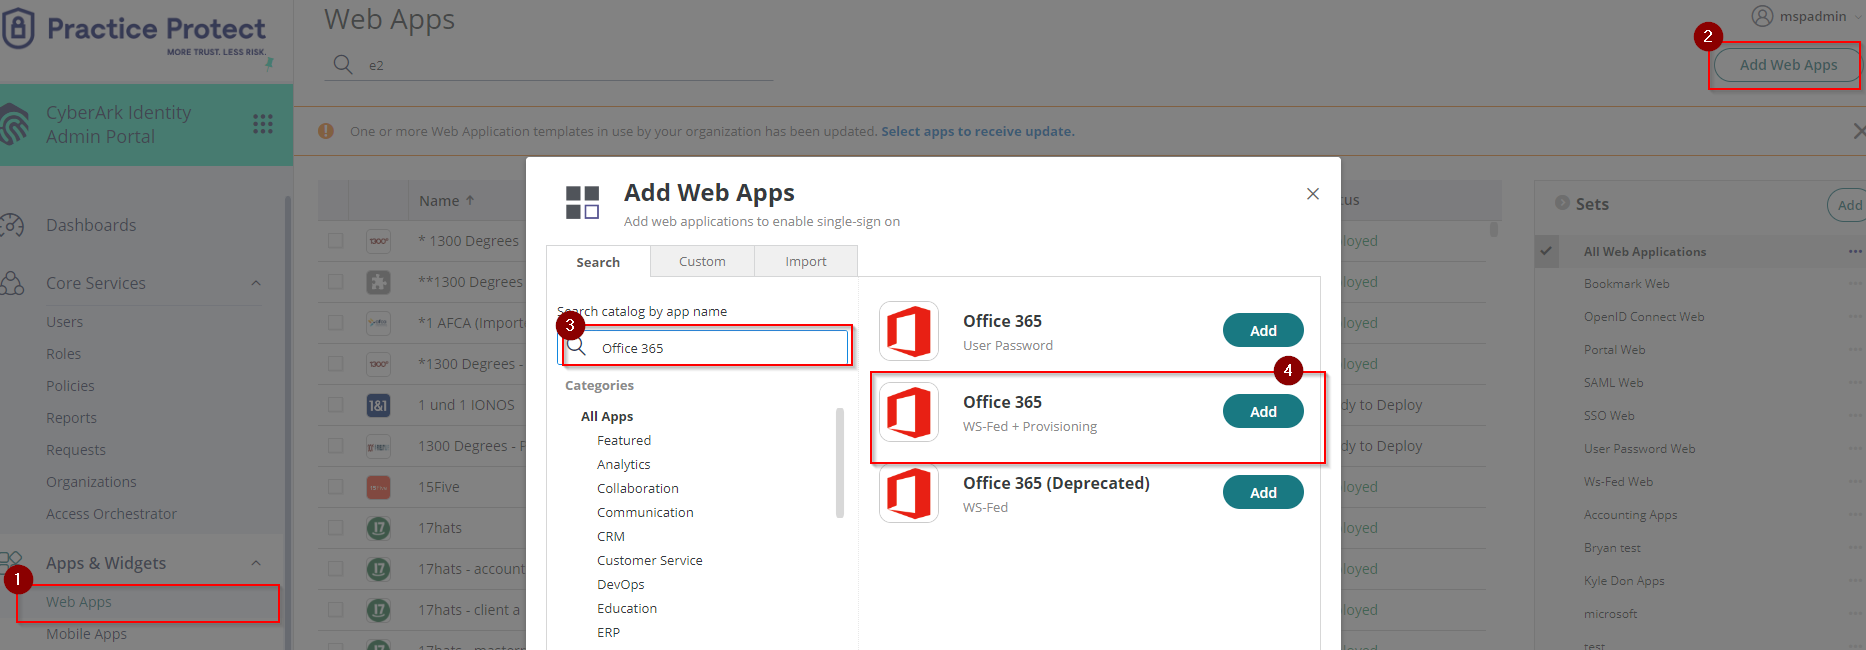
- Return to the Practice Protect Admin Portal, go to Apps & Widgets > Web Apps > Click Add Web Apps, search for Office 365, select Office 365 (WS-Fed + Provisioning), and click Add.

- On Add Web App page, click Yes.
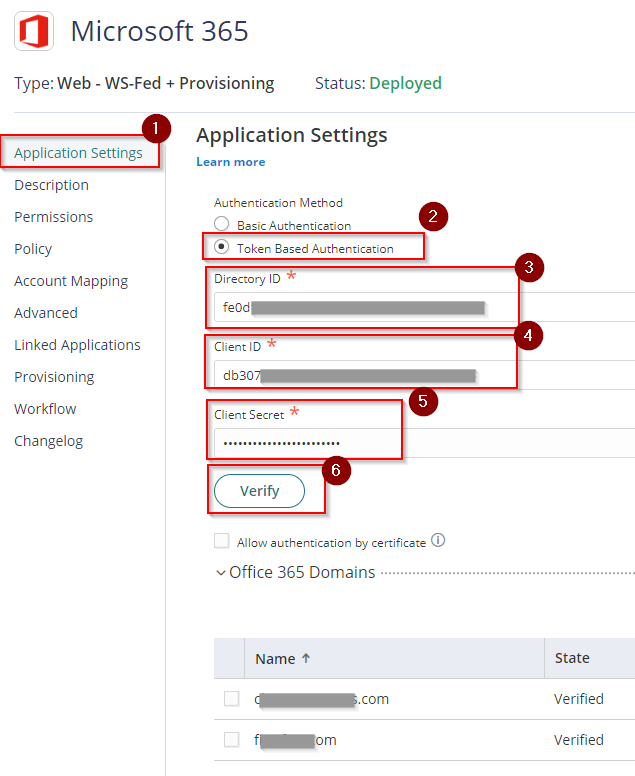
- In Application Settings, select Token-Based Authentication. Then, enter the Directory ID, Client ID, and Client Secret.
Note: If you do not have these details, refer this guide on how to register an application in Microsoft Entra ID to obtain them.
- Click Verify. Ensure the domain you want to federate appears in the domain list. Note: it will not appear if the default domain in Microsoft 365 is not set to .onmicrosoft.com.
- In the Description, change the app name to Microsoft 365 and click Save.
- Under the Advanced settings, paste the script below after line 76. Then Save.
setCustomAttribute('authnmethodsreferences','http://schemas.microsoft.com/claims','http://schemas.microsoft.com/claims/multipleauthn'); var UserMail = LoginUser.Get('userprincipalname'); var URN = UserMail.split("@")[1]; setAttribute('IssuerName', 'URN:' + URN);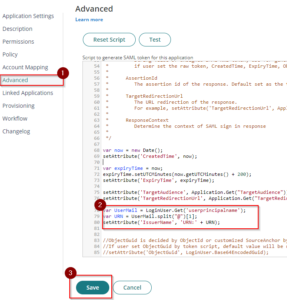 This configuration sets the following :
- Issuer URI/URN for the SAML token response and identifies the domain that the token is associated with.
- A custom attribute passes an MFA claim from the Practice Protect platform to Entra ID.
- This completes the integration configuration. Provisioning can be skipped, as Microsoft 365 accounts are already synchronized with the local AD


Enabling Office365 Email Integration/Federation
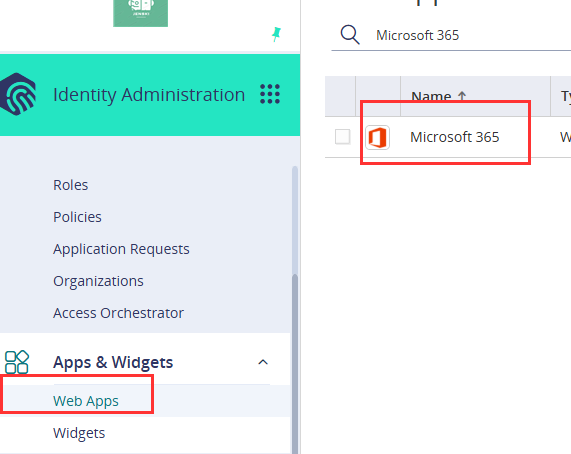
- Return to the Microsoft 365 tile in the Admin Portal > Apps & Widgets > Web Apps > Microsoft 365.
- On Permissions, Add the role that contains the user for email integration (i.e. Microsoft 365 Email Integration Users) and click Save to apply. This should display the app on their user portal and can be used once federated.

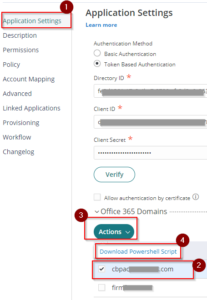
- Go to Application Settings, then in the Microsoft 365 Domains section, check the box next to the domain name(s) (e.g., youremaildomain.com). Click Actions, select Download PowerShell Script, and save the file – it will be used in the next steps to complete federation.
- Right-click the file downloaded in Step 3 and select Run with PowerShell. Log in with your Microsoft 365 Admin account when prompted.

- After signing in to Microsoft 365 and completing MFA, you will be prompted to grant the necessary permissions to federate.
- With the prompt “What Action Would You Like To Do?” press F. The script will run and federate your domain.

- Once the script is completed, Go back to Microsoft 365 web app settings in Practice Protect. On the Office 365 Domains section check the Type of the domain (i.e. cbpaccountant.com), It should now be Federated. (Optional) Refresh the page to show the latest state and type.

- (Optional) Repeat steps 3 to 6 to complete the federation for the other active domains.
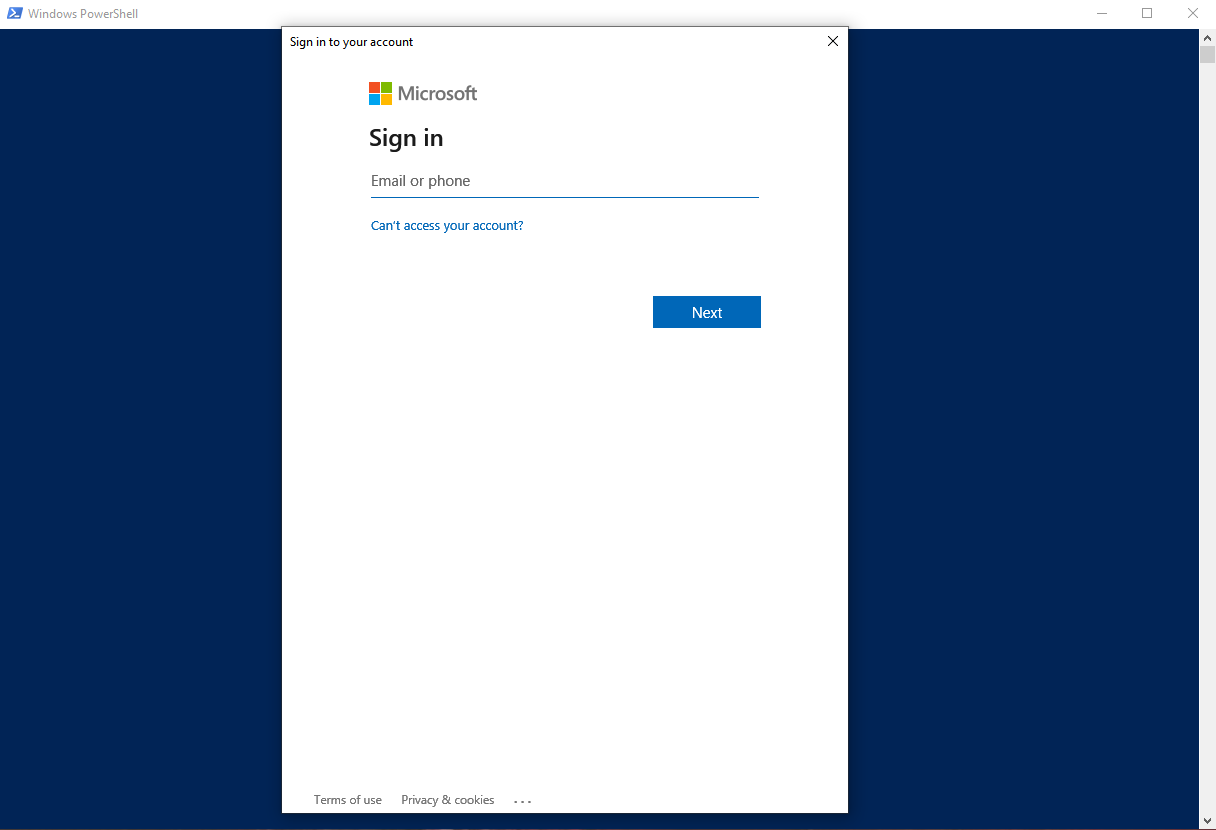
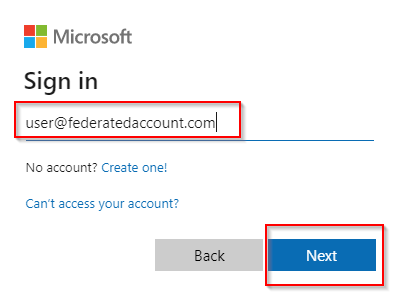
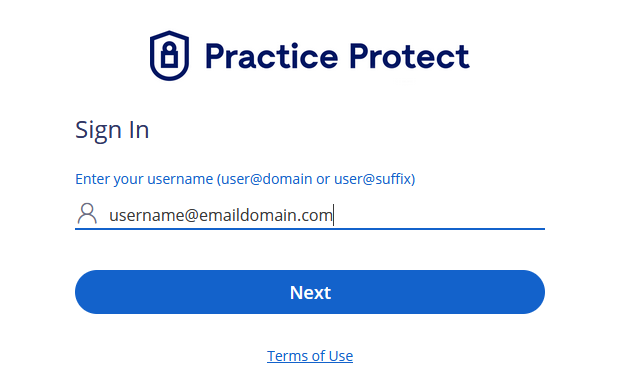
- Test federation if it is working by signing in to a user account in Microsoft 365 Once you type the user name/email address the page will redirect to Practice Protect.

- To authenticate and access, log in using active Practice Protect account credentials.

- If your Microsoft 365 email is configured in Outlook (desktop or mobile), you may be prompted to log in with your Practice Protect account for re-authentication if your accounts are not yet synchronized.
- After federation, Practice Protect recommends disabling legacy protocols and basic authentication (e.g., POP, IMAP, AUTH SMTP) in Microsoft 365. Please refer to this guide for instructions.
